Sunday, February 13, 2011

Fabulous 50's fun!

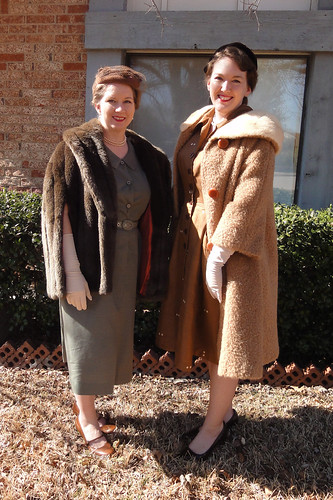
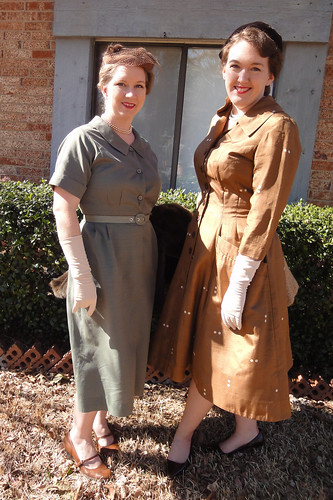
Yesterday, I got together with two of my costuming friends and we went to a "Fabulous 50's" fashion show at a local antique mall/tea room.  It was even better because Christy and I used it as an excuse to dress up in our new vintage 50's outfits. Girly outings are always more fun when you are wearing gloves, pearls, and fur!

DSC01580

DSC01584

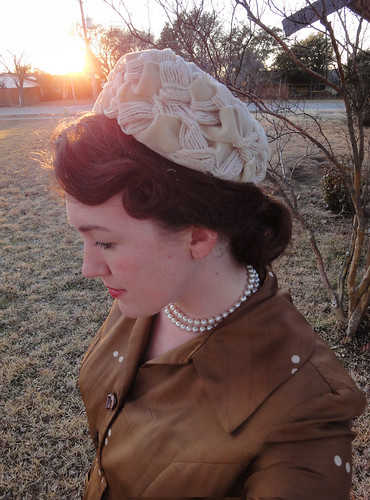
I tried to pincurl my hair, but the back refused to cooperate, so into a chignon it went. *bah* I also didn't have a hat that I really liked for this outfit, but that problem was solved beautifully when I picked up this little $7 beauty at the antique mall after the fashion show.

DSC01704

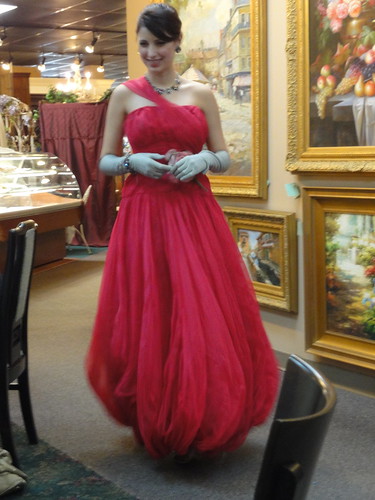
The fashion show itself was fun too, but I was surprised by how "normal" a lot of the dresses looked without 50's hair, makeup, and undergarments. It's amazing how much those finishing touches matter when capturing the look of a period. My favorite part of the fashion show was the evening wear. Most of the gowns were so timeless that they looked more like something from this year's Academy Awards red carpet vs. something your grandma once wore!

DSC01655

I got pictures of nearly every gown in the show, and you can see them all in my Flickr album. There will also be a repeat of this show, plus even more 50's fashions, at the Antique Elegance Show next Saturday at 9:00.

Wednesday, February 9, 2011

State of the Union

So even though I've been pretty quiet this winter, I have been staying busy behind the scenes - so busy that I haven't had much time for blogging.  But we have another snow day today, so it seemed like a good time to play catch-up and give you a little "state of the union... er... of jen" address!

1.  I've been working on getting all the DFWCG event graphics made and posted to our website.  We have some really cool things planned for this year, and if you are in the area, I hope you'll join us for some costumed shenanigans in 2011!
2.  I added some more vintage patterns to my flickr archive.
3.  My 16-year old cheap-o beginner sewing machine finally bit the dust, so I bought a shiny new Janome Magnolia this week!   I am totally in love with this thing!

4. I am working on two new costume projects right now that my son and I will wear in the Chestnut Square fashion show next month.

My dress is inspired by this 1918 dress from the New Idea Quarterly magazine that was given to me by my grandmother, and it is being cobbled together using a variety of patterns from my own collection and from CoPA.

My son is getting a suit made with one of my new old patterns from 1919.  I'm really excited about both of these, and I'll definitely be posting more about them soon!

Wednesday, February 2, 2011

winter recap

It seems like it has been forever since my last blog post... although you really haven't been missing much. Mostly I'e been working on 2011 planning with the DFW Costumers' Guild, and taking a much-needed break from tight-deadline, stress-inducing costume projects.


The one thing that I did mean to write about back in December was the Victorian Christmas ball that I went to with my husband. I've always dreamed of attendig a real live ball (*squee!*), but we ended up not knowing anybody there, and I'm afraid that we were quite the timid wallflowers. But it was still fun to get all dressed up and go somewhere, and I was pretty happy with the way the dress turned out.

I had just enough scraps remaining to make a new bodice to go with my 1868 silk daydress. I had to piece the bejeezus out of it to make it work, but it was fun to give this older dress a new life. For the pattern, I used the 1870-71 ballgown bodice from Patterns of Fashion. It went together well, but I wish I could have done some more tweaking on the bertha before I wore it. As usual though, I was sewing up until it was time to get in the car and go to the event, so I was pretty happy to just have it wearable.

I also re-boned my elliptical hoop skirt that I made with the Laughing Moon pattern. The first time I just used wire rope (bought from Home Depot), which wasn't strong enough to hold out the bottom hoops in back under the weight of a heavy skirt. But I went back and reinforced it with piano wire (from a Hobby shop), which did the trick nicely. I love the shape of this hoop - it is small, but gives the skirt such a pretty flare.

Unfortunately, I didn't get many pictures that night, and the ones that I did get were dark and blurry, but maybe this is better than nothing. You can see more on my website.

Sunday, November 14, 2010

2nd annual Georgian Picnic


DSCF3920

We had our 2nd annual Georgian Picnic for the DFWCG yesterday, and just like the first one, it was a delightful event, and one of the highlights of my year.  Thank-you to everybody who came out for it!  I had a blast catching up with old friends and making new ones as well.  I am one happy little costumer now.  :)

DSCF4046

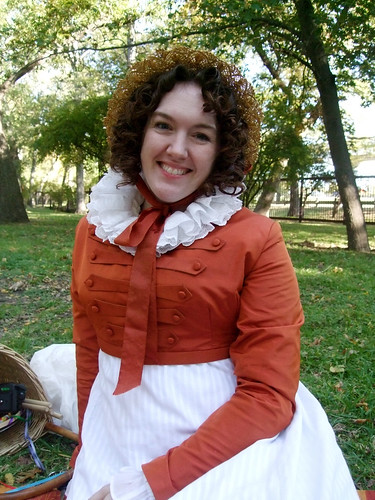
Even though I had a year to plan for this event, I procrastinated until the week before the party to make my costume, so I decided to dig out my Regency 2.0 dress (a.k.a. the Cremesicle gown) that I started last summer and finish that one.  I don't think this is the most flattering dress on me (the phrase "trussed up like a Christmas turkey" kept coming to mind), but it sure is fun to wear.  I've always liked the look of Regency military-style spencer jackets combined with uber-girly ruffs and bonnets (two good examples in this blog), so I decided to go all out with it and tell my modern "less is more" sensibilities to take a hike.   I recently watched Bright Star too, which is probably why I was more willing to go with the Regency foofy madness - my dress reminded me a lot of the one Fanny wears at the beginning of that move.  But with that being said, I might take it down a notch or two when I wear this outfit again in the future.  I think it would be a lot more attractive with a different hat and hair, and maybe leaving off the the ruff (although I do love a good ruff!)

Anyhoo, I'm especially happy with the way the spencer jacket turned out.  I made with with some gorgeous bright orange and burgundy shot silk taffeta, which was a nightmare to work with due to wrinkles, water spots, and grain issues... but it sure is purdy to look at.  ;)  I  used the pelisse pattern from Patterns of Fashion for the bodice, and I just improvised on the little peplum and decorative tabs.  I think I'm most proud of the collar though, which I carefully tailored using hair canvas and pad stitching, thanks to the fabulous tutorial on Gertie's New Blog for Better Sewing (thanks Gertie!).  It made a world of difference in the way it looked, and was surprisingly fun to do.  I'm looking forward to doing more tailored pieces in the future, and I think I'm going to shoot for an 18th c. redingote with a huge collar for next year's picnic.

I ran out of time and didn't get a chance to finish the bodice of the white underdress, but a friend of mine on LiveJournal pointed out this cool example of a spencer worn with a skirt instead of a full dress, so that made me feel a little bit better about it.  The fabric is vintage sheer striped cotton that I bought at an estate sale last year, and I am looking forward to finishing it so I can wear the dress alone some too.

I won't spam you too much with pictures here, but you can see my whole set on Flickr.

Sunday, October 31, 2010

Halloween fun!


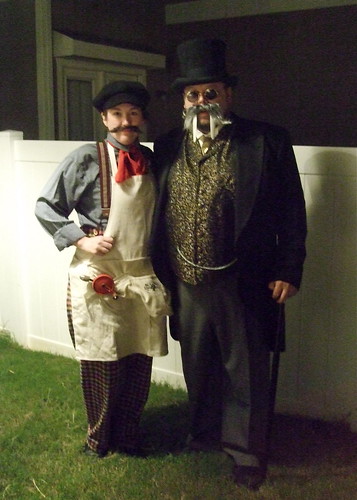
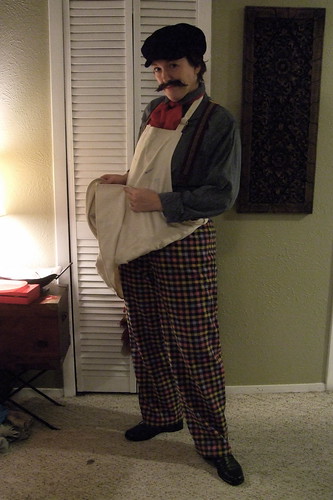
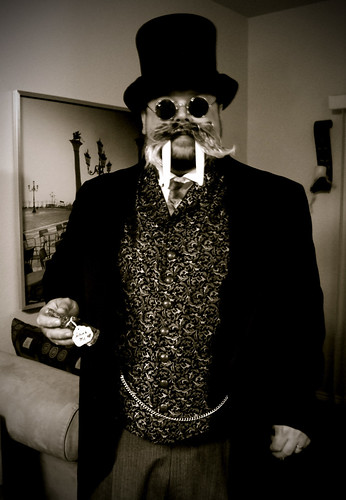
Mike and I were invited to an Alice in Wonderland party for Halloween this year, so we decided to go as the semi-obscure characters of the Walrus and the Carpenter.  I don't think anybody at the party had a clue who we were supposed to be, but we had a lot of fun anyway!

the Walrus and the Carpenter

I made my pants from some super-fab estate sale plaid wool, and I used one of the Martha McCain civil war era pants patterns (Simplicity 5023).  I loved that pattern and I had a blast making them! It was such a nice change of pace from complicated girl stuff. The rest of my costume was all scavenged from things around the house or from Dallas Vintage.  I actually made a square paper hat like the one in the original illustrations too, but I decided that we were going to confuse people enough as is without throwing another bizarre costume element into the mix!

DSCF3632

Mike just wore his old Victorian costume with the addition of whiskers that I made by cutting pieces off a $5 old man wig, and the tusks are plastic window blinds that I cut into the right shape. He thought the little round John Lennon glasses would add a funny finishing touch (goo goo g'joob!)

DSCF3601

I didn't take a ton of pictures, but you can see the rest here if you want. We had a lot of fun dressing up this year, and thanks again to Kaycee for inviting us! :)

Sunday, September 26, 2010

another site update


I wanted to tell you all that I just posted a new page for my Regency jumper that I made earlier this summer.  I think a lot of people have already seen these pictures elsewhere, but maybe not everybody.  It feels good to finally get these costumes webbed.  Now if I could just find the time to take pictures of all my new undies sometime.

Thursday, September 23, 2010

site update for Edwardian


For the past two weekends, I've attended events where I was able to wear my 1911 day dress that I made for the Suffragette Picnic earlier this summer.  I never was completely happy with the pics from the first event (mostly because I was wearing a modern bra that time, which ruins the silhouette of the bust), so I was thrilled to get anther shot a getting photos of this outfit.  You can now find a few of my favorite pictures on the gallery section of my website.

Thursday, July 15, 2010

finds

My "look what I found at the estate sale!!!!" posts are probably boring as all get out for you guys to read, but I love playing show and tell, and it helps me remember what I bought and when and how much it cost.  So anyhoo... after a bit of a dry spell, I've had some really good luck estate shopping these past two weeks.  Wanna see what I got?

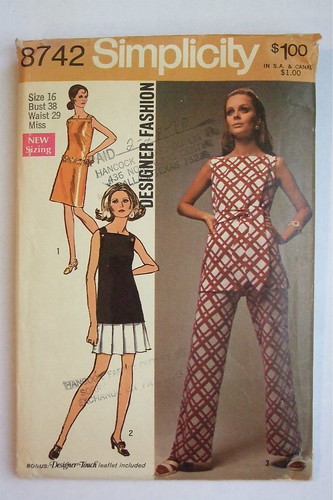
First of all, I picked up 17 new old patterns from the late 60's through the 70's.  This isn't my favorite era of retro fashions, but I have to admit, they are starting to grow on me - mostly because I can see great possibilities for garments that could work in my everyday wardrobe. For example, I love the clean lines in these 2 patterns from 1970.  With the right fabrics, they would look so chic and modern!

1970 - Simplicity 8742

1970 - McCall's 2468

All the patterns were $.50, which made them cheap enough that I could buy a few just to marvel at how hideous 70's fashions could be!

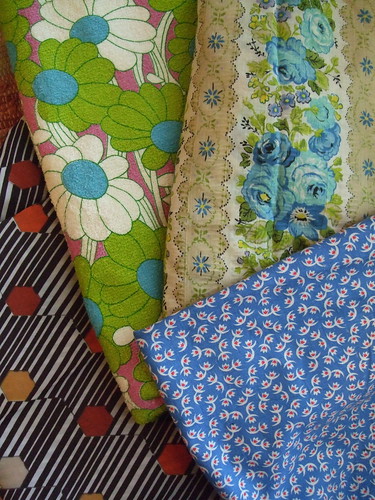
I also picked up some fabric yardage for $.50 a cut.  In addition to a few basics, I found these fabulous prints that I can't wait to use with my vintage patterns.  My favorite is the green and white daisies on terrycloth.  I have no idea what I'll ever do with it, but it is so over the top crazy that I'm determined to make something fabulous someday!  I also love the small scale print on blue, and although there isn't a lot of it, I think it would make a sweet little 40's blouse, or maybe trim on a dress.

DSCF0810

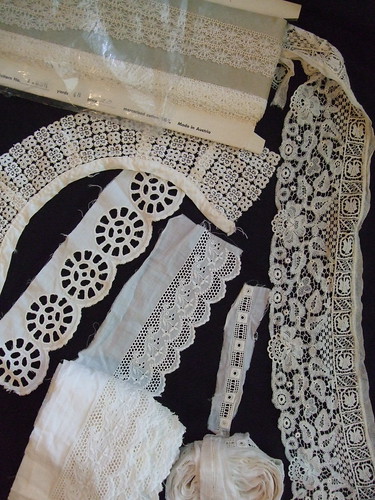
At another sale, I picked up some great lace and collars for $1 apiece.  There is 10 yards of the wide eyelet trim, so I am already daydreaming about pretty Victorian or Edwardian undies.

DSCF0811

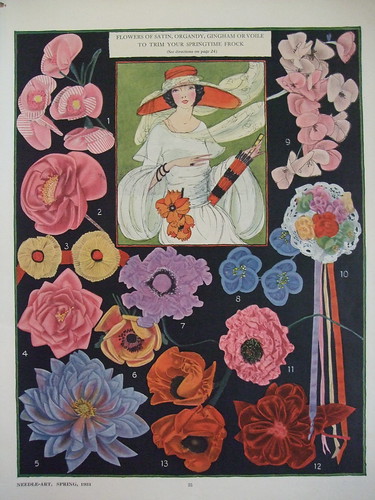
Next, I got a few women's magazines dating from 1900 - 1924.  They have some nice fashion plates, but the articles and embroidery diagrams are the best part.  My favorite article teaches you how to make fabric flowers.  I plan on scanning and posting the instructions for anybody who wants to give them a try (as soon as I can unearth my scanner). 

DSCF0808

And saving the best for last, here is my super-fab $2 coat.  I lovelovelove this coat, and it has a real fur collar and is in perfect condition!  I love it so much, I've been wearing it around the house on this 100 degree summer day!


I've been having a blast searching for estate sale treasures lately, and I am going to be SO sad when I have to go back to work again and miss out on all the early sales!  If any of you in the DFW area are interested in estate sale shopping, you might want to join the 24/7 Estate Sale mailing list.  Just be sure that you leave some of the good stuff for me!  ;)
  

Monday, July 12, 2010

building a straw braid bonnet


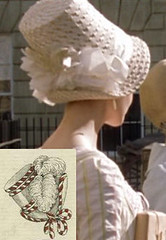
Last year, I bought 10 yards of beautiful 1 1/2 wide straw braid at an estate sale, and I've been dying to do something with it.  Since I've been working on Regency costumes lately, I decided to try my hand at making a stovepipe bonnet with a small brim, like these examples that I found in period illustrations and in the movie, Northanger Abbey.  It seemed like a good starter project since the shapes are quite simple, and it wouldn't take as much braid as one of the wider brimmed hats.

To begin, I made a mockup out of paper.  I traced around a slightly flared plastic pot for the crown, and I made a cone with a flare that I liked for the brim, then measured out from the middle point to draw the inside and outside edges of the brim.  I also cut out a circle for the top of the crown, but I didn't even need it in the end.


Next, I took the paper brim template, wet the braid, and then started pinning it directly to the paper.  I made each row of the braid overlap the top half of the previous row, and I used the zig-zag designs in the braid to keep it somewhat even.  I think most people start with the top of braid hats and work their way down instead of working up, but I wasn't sure how far my braid would go, so I figured it would be better to make the hat shorter if I needed to vs. not having enough for the brim.  


After the entire brim section was pinned plus a little extra starting up the crown, I started hand-sewing the rows together using strong, golden-yellow thread that is used for jeans.  I used basic basting stitches in the middle of the braid, and I would remove one pin at a time from the paper and move the template out of the way for the part I was working on so I could sew the braid without catching the paper.  


After the brim was all basted together, I put the crown template into the opening, and started pinning the braid to that section.  


Once the sides of the crown were all basted together, I removed the paper template, and then started folding the top row to the inside to make the flat section at the top of the hat.


To make the braid lay flat while working in toward the center, I had to pinch little tucks in the inside part of the braid and then sew these tucks down.  On the right of the picture above, you can see what it looks like with the tucks, and on the left side you can see how the braid tends to poke up without them.


When the hat was basted together, I re-wet it, then turned the entire thing inside out.  I sewed the flat edge of the rows to the layer beneath with tighter whipstitches to hold it all together better.  In the picture above, I have the top of the crown and the top few rows sewn down.  I think you can see how it looks tighter and more solid than the bottom parts.


When I was done, I flipped the hat right-side-out, and it looked like this.  It was still wet at this point, so I pinned the back of the brim up and let it dry upside down so the brim could flare out more naturally in the front (you can see that it gets very flat when sitting on the table).


When it was dry, I removed the pins from the back, and it held its shape with no problem.  Then I sewed on a simple ribbon band with a few loops on each side of the head.  I also went back and tacked down the scalloped edge of the braid around the top of the crown to soften the edge and keep the pointy bits from sticking out so much.


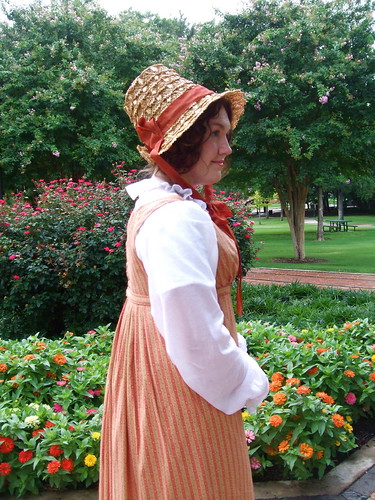
And here you can see the finished product with my new Regency dress!  

I considered sewing the braid to a buckram and wired base, but I liked how light and open and airy the braid looked on its own.  The hat is pretty flexible still, but it holds its shape wonderfully and is very cool and comfortable to wear.   And just FYI, I ended up using about 9 yards of braid when I was done.  

Of course, finding vintage straw braid like this was a HUGE stroke of luck, and I doubt that I'll ever find anything quite like it again.  I looked around online a little to see if anybody sold wide, decorative straw braid, but I didn't come up with much.  It is possible that you could take apart another hat though and reuse the braid if you like the "rustic" look of this type of open braid.  About halfway down this page, you can see a natural open weave hat that might give you a somewhat similar look, or you could always use the more common solid braids too.

All in all, it was a very fun and surprisingly easy project.  I hope this little tutorial will inspire others to give straw braid millinery a try!
Sunday, July 4, 2010

40's blouse for 4th of July


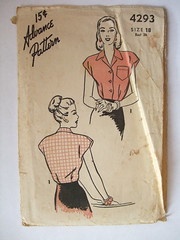
I recently found this wonderful vintage fabric in a local antique shop, so I decided that I needed a red, white, and blue blouse for Mike's family's 4th of July party.  Don't you think the leaves look a bit like fireworks?  I made it with an Advance pattern from 1947.  It went together great with no alterations necessary - I just left the pocket off since it seemed fairly pointless.  I also used a cool new trick that I learned from Gertie's New Blog for Better Sewing (which I adore, BTW!).  Since the fabric was semi-sheer, I used a flesh-colored silk organza for the interfacing, which kept the faced areas from having pattern bleed-through or being brighter white than the rest of the shirt.  I'll definitely be using that technique for now on!