Sunday, June 12, 2011

Retro Ice Cream Fun!

ice cream

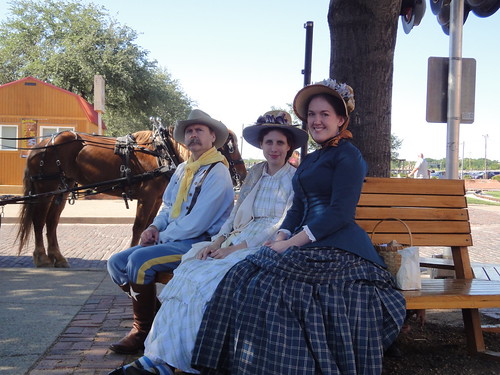
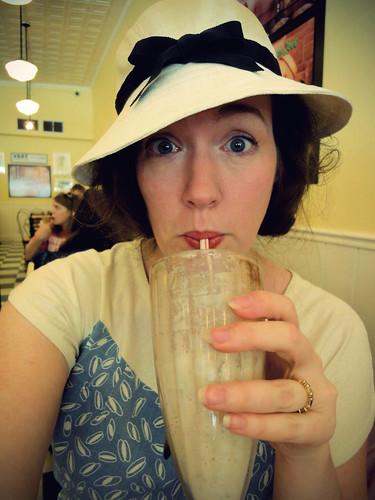
Yesterday was the DFW Costumers' Guild 20th c. Vintage Ice Cream Social.  I'm starting to sound like a broken record after every event, but once again, I had a blast!!!  We had a really great group of people come out for some sweets, shopping, and socializing, and everybody looked fabulous in their retro outfits.  You can find all of my photos from the afternoon on flickr.

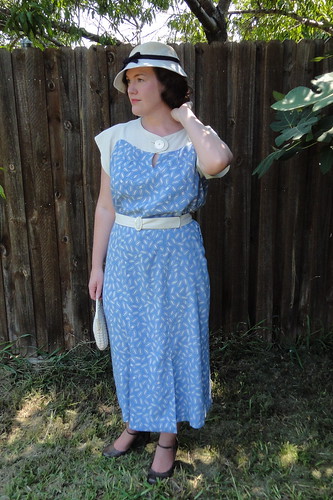
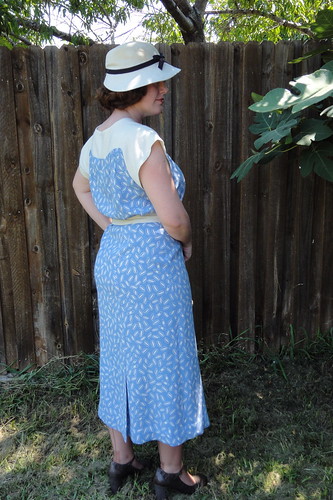
For my costume, I decided to make my first foray into 1930's fashions.  I used one of my recent lucky pattern finds - a mid-30's Anne Adams day dress.  I used some vintage rayon that I had in my stash for the dress, and I bought some silk noil for the contrasting sections.  The button and buckle are vintage mother-of-pearl.  This dress was a dream to put together, and I didn't even have to do any alterations other than lengthening the bodice by an inch.

And I am happy to report that my second version of the hat tuned out much better than my first.  It is made out of heavy linen and I used the brim pattern from the first hat and the crown pattern from the second hat in these directions.  I interlined the brim with heavy interfacing, and I wet the whole hat and let it dry while stretched over a hat block to make it nice and smooth.  I'm so glad I stuck with it - I think the hat is my favorite part of this outfit!

So after my first time wearing 1930's fashions, I must say that I'm hooked! It was such a fun dress to wear, and I felt both glamorous and relaxed at the same time. I'll definitely be making more outfits from this era in the future!


DSC04231


DSC04152

DSC04160

Sunday, June 5, 2011

reality bites

The costume guild has a 20th c. retro ice cream social coming up next weekend, and I decided to make a mid-30's outfit to wear to it.  The dress is coming along nicely, but finding a suitable hat has been a challenge.  I have a number late 30's hats already, but hat styles change drastically at this time, so nothing I have is really "right" for a dress from earlier in the decade.  Plus, I'm picky, and I really want something white, which makes the hunt even harder.

So brilliant me - I decide to make a hat!  I found this fun pattern on one of my favorite sewing blogs, Sewing Vintage.  It only took 2 hours to make, but sadly... reality is not nearly as charming as the picture.  *sigh*


Of course, this happens a lot when working from vintage patterns.  The reality of what the pattern looks like when made up is never as perfect as the idealized illustration.  I could try to shorten the crown so it isn't so puffy, but I doubt the little slit parts will ever stay neatly closed like you see in the original picture.  Maybe I just made the cuts come up too high or made the selvage too big thanks to the vague instructions.  If anything, I'll probably switch out the slit crown for the solid one in the second view from this pattern... or maybe I'll ditch it and try something else entirely.

It was still fun to try though, and I LOVE experimenting with hats, so it was a fun little project even if it wasn't a complete success.

Monday, May 23, 2011

next on the agenda

I don't think I've mentioned this publicly yet, but I'm going to Costume College this summer! Woohoo! Mostly, I'll be wearing costumes that are already in my closet, but I do want to make a few new retro outfits to wear to the classes, and I want something new and fun and over-the-top for the gala. I'll probably be working on all of these things simultaneously over the summer so I don't get burned out on one thing, so forgive me if I jump around a lot over the next 2 months.

The project that I am the most excited about at the moment is my gala dress. After changing my mind a million times, I finally decided to go for something totally random and different. I'm going to make a Victorian fancy dress costume inspired by the telegraph! Is it genius? Madness? Only time will tell! LOL!

Anyway, my plan is to make a pretty close copy of this 1884 illustration from the de Gracieuse archive (it was also found in Harper's Bazar). The only thing that I'm going to change is to omit the silly glass insulator headdress and make a tiara out of tiny telegraph poles instead. I think it'll be a ton of fun to make, and I'm hoping that I can wear it again at future steampunk events as well. It will probably be a few weeks before I get started on this dress in ernest, but I'm having a ball doing all the research and getting the materials right now.

And just for the heck of it, I saved all the fancy dress pictures that I found from de Gracieuse and put them in a flickr set. I hope to continue adding more examples to this set as I find them.

Saturday, May 21, 2011

the anticlimactic ta-da!

DSC03724

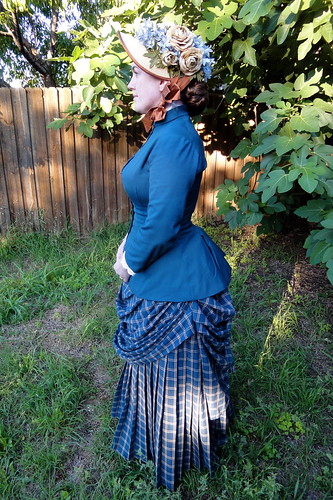
So I finished my 1883 dress last weekend and had a great time at the train event.  Unfortunately, I was so insanely exhausted from it all that I didn't have the energy to do a blog post about finishing my dress right away, and then a week slipped by before I knew it, and now I'm already knee deep into my next costume plans. Whoops. So this seems pretty anticlimactic at this point, but I just wanted to post a quick note to say that I finished the dress and I'm quite happy with the way it all turned out. I've been wanting an "everyday" Victorian bustle dress for years now, and I am thrilled that this one fits the bill so well. It will be great for wearing to living history events.

I'm out of space on my website, so I'll have to go in and do some housecleaning before I can post an official page about it. But until then, you can see more pictures of my dress and the event on flickr.

DSC03711

Tuesday, May 10, 2011

sleevils-1/jen-0

I think I have discovered the tragic flaw of this system of pattern enlarging - the shoulders of the bodice are WAY too wide when scaled up as much as I have it.   But once I started thinking about it, that makes sense.  I have a 40" bust, so the pattern has to be scaled up quite a bit to fit my torso, but the measurement from my neck to the edge of my shoulder wouldn't change significantly even if I was 50 lbs. lighter.  That measurement deals with bone structure vs. "fluff", so it doesn't increase proportionally at the same rate as the bust/waist/hip measurements.  Probably if I had read the entire book it would have told me how to deal with this problem while drafting the pattern, but I guess that's what I get for just skipping around to the good parts.  My first try with the sleeves had them hanging way off my shoulders, more like an 1860's dress than an 80's one... which looks wildly ridiculous with a slightly puffed sleeve head.  I took at least an inch off the width of the shoulders, and I'll try again tomorrow.  It's nearly 2:00 in the morning now, so I concede defeat to the sleevils in round one of Battle of the Bodice.  Maybe I'll have better luck tomorrow.

Sunday, May 8, 2011

bodice in progress

I played around with the tabbed waist treatment on my bodice mockup for about 30 minutes earlier this weekend, then realized it was going to be too fiddly and time consuming, so I gave up.  I decided to go with one of the longer coat shaped bodices instead, like the one on the left side of this 1883 illustration.  I also added pleats in the back like the bodice shown here.  I liked how both of these bodices have 3/4 sleeves as well, which I think looks more summery than the full length sleeves.

So once that was finally decided, I forced myself to be brave and started cutting and assembling my real jacket.  I'm using wool twill for my bodice, and it is flatlined with cotton in a reproduction print that I didn't particularly like, but it was cheap and I figured it would make a fun lining.

The first time I tried it on, it was a wrinkly disaster, so I've been making adjustments and steaming and pressing for hours now.  I went back and used the fitting instructions in Fashions of the Gilded Age where you add darts to the lining layer at the bust, side waist, and back of the shoulders and then press and shrink the outer fabric.  This is supposed to make it fit the curves of the body better without having lots of darts on your outer fabric.  It seems to be working, but I could definitely do more steaming still.  The wool has a fair amount of stretch to it, so I think some areas like the side-back piece are just too stretched out, so I'm going to open up the seams and re-stretch and iron and try again.  It's a pain to have to unpick and redo the seams, but I'm determined to get this thing as smooth as possible before I add the sleeves.  I'm also going to add boning to the front bust darts, so I think the front is going to be okay, but the sides and back are annoying me.


Anyway.  I know it's not a very exciting post, but I just wanted to show you an in-progress shot of the jacket so hopefully we can compare it to a much smoother finished version once it is done.

Thursday, May 5, 2011

patterning the bodice


So as usual, everything is taking longer than expected, but I finally got a good mockup of my bodice made.  I wanted to try something different this time, so I used the single-breasted jacket bodice (p. 212) in Fashions of the Gilded Age.  This particular pattern is a reprint of a pattern from Complete Guide to Ladies' Garment Cutting from 1883.  You can see me drawing out the pattern in the artsy, but not incredibly clear photo above.  For these patterns, you plot out all the measurements using an apportioning scale (a.k.a. a little paper ruler) that corresponds to your bust size.  You just measure down a by a certain number, then across by a certain number, then make a dot.  All of these reference points are eventually connected like a big game of dressmaker connect the dots.  This scales it up to automatically fit your size, so in theory, no major size alterations are needed.

And much to my amazement, IT WORKED!!!  This bodice fits me like a glove, and the only thing that I'm going to have to change is to add an inch or two to the length of the torso, but since I am quite tall by Victorian standards, this is something that I always have to do when working from period patterns.  I haven't decided yet if I'm going to cut tabs into the bottom of the bodice like my inspiration pic or just leave it plain like this, but I am thrilled to finally have a good bodice pattern to work with so I can start cutting out my real fabric.


Saturday, April 30, 2011

a finished bustle skirt


Well, it took a week longer than I wanted, but I finally finished my bustle skirt!  Woohoo!  I love how it turned out, and it looks even better when it is on me and there are actual legs to help fill the bottom part out.  There is a ton of fabric in this skirt (8 yards of plaid + 3 yards of foundation), but all the fabrics are so lightweight that is isn't too heavy, and hopefully, it won't be crazy hot.  I expect hot - I just prefer to avoid crazy hot.  

And now, I need to get cracking on that bodice!  Just 2 weeks to go!  

Saturday, April 23, 2011

underskirt... check!

This week, I decided to focus on making the underskirt for my 1883 bustle outfit.  I waffled back and forth for a few days about whether I should attach the kilted section of the skirt to a yoke or a full foundation skirt, but I eventually decided that it might be easier to level the hem if I made the full skirt.  For the pattern, I used the foundation skirt from the 1887 dress in Patterns of Fashion, and I just used some random cotton shirting that I picked up at an estate sale for the fabric.  The foundation skirt, underskirt, and overskirt are all joined together at the waist to make a single garment, so this foundation layer will never be seen once the skirt is assembled.

The kilted part of the skirt is just a large tube of fabric, and I used a little less than 4 widths of the 45" fabric to make the tube.  The pleating was pretty tedious, but I was VERY grateful that I could use the lines in the plaid to measure my folds.  I sewed a stay tape to the inside of the pleats just above my knees to help keep everything in place.

When it came time to attach the kilted fabric to the foundation skirt, I caught a case of "teh stoopid" and I had a horrible time getting it all to come together right.  I'm going to fast forward through 2 1/2 hours of dumb ideas and miscalculations and just tell you about the last 30 minutes where I pinned the kilted fabric to the foundation skirt so that the hem just touched the floor, sewed it to the foundation skirt, and then covered the raw edge with some hem tape.  My dress form is a couple of inches shorter than I am, so the skirt is a little of the ground when I wear it, which is nice for tromping around outdoors.

Now I just need to re-bustle my overskirt, sew it to the waistband, and my skirt will be complete!  Hopefully I'll have time to squeeze that in tomorrow.

Sunday, April 17, 2011

bustle overskirt, v.1.0


For my train dress, I am using several images from my 1883 Peterson's magazine for inspiration.  This fashion plate is probably the closest to what I want for the shape, but with a plaid skirt and solid bodice like you see here.  I could probably just drape something that looks similar, but I thought it would be fun to use one of the 19th c. patterns in Francis Grimble's "Fashions of the Gilded Age".  


I thought the Sateen Dress from 1880 might do the trick, so I made it up exactly as the pattern shows.  But as usual with these period diagrams, the illustration and the actual results don't always match up very well. 

My main complaint is that the front of the skirt is so much longer than what you see in the picture.  Having petticoats and an underskirt to fill out the bottom would help this a little, but it still seems too long to me, and I really wish the folds across the front would be more distinct.  The slightly asymmetrical  bustling in the back also bugs me.  I know it is "right", but I can't help thinking that it just looks like I have a lopsided butt.  

But it's still a good start, and I think these problems are easily fixed.  I'm going to redo the front with much deeper pleats, which should take up the length and make the folds more obvious.  And for the back, I think I'll make both sides match, and I'll add a pleat in the center back at the bottom to make the tail into two points (like my inspiration pic) instead of the squared off look.  

And let me tell you - I'm so glad I basted this thing for the fitting instead of just sewing it up on the machine while hoping for the best (like I usually do)!  I guess I am capable of learning from past mistakes after all.  :)