Showing posts with label 1920's. Show all posts

Saturday, August 15, 2015

1920 Bathing Suit


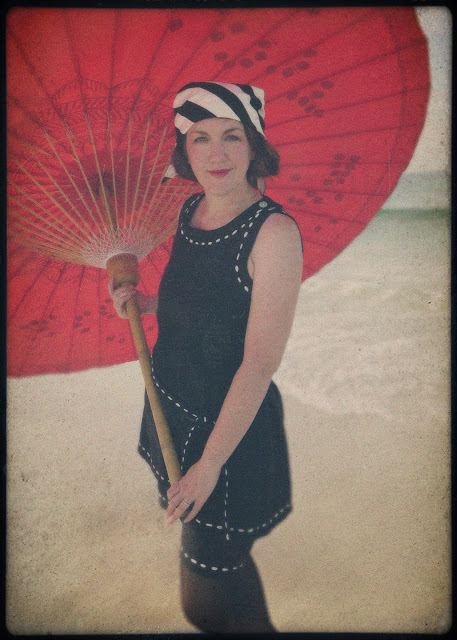
I’ve been madly sewing for Costume College over the past few months, and I finally have enough free time again to blog about my projects and show you all what I’ve been up to lately.  I’ll start by sharing the most summery of my new outfits – a late 1910’s/early 1920’s bathing suit.  I think these bathing suits tend to look pretty silly to our modern eyes, but they are comfy and fun and so easy to make, and I thought it would make a great low-stress costume to wear to the Costume College pool party after a long day of traveling.

bathing suits from 1918 New Idea Quarterly
My suit is not an exact copy of any one historical outfit, but the basic long tank top and boxy shorts were hugely popular in both photos and fashion plates of women (and men!) from the years around 1920.  You can see a wide variety of similar styles on my historical bathing suit Pinterest board.  Black was one of the most popular colors for bathing suits, and like most of the surviving examples, I made mine from wool.  I had a hard time finding wool knit for an affordable price, but I lucked upon some wool mommie cloth, which has a slightly stretchy crepe-like weave that worked perfectly for my project.  Then I decorated the edges with white rayon soutache.  I threaded the soutache onto a large eye tapestry needle, then sewed it directly into the fabric by using a big running stich around the edges.  The weave was loose enough that the soutache slipped through holes in the cloth with no trouble at all.  You can see a similar treatment on bathing suits like this one. 

I drafted my own pattern for this suit after consulting several 1920’s swimsuit pattern diagrams in the book Women's Wear of the 1920's: With Complete Patterns. I was very doubtful that the shorts pattern from that book would work for me - it’s just one rectangle for the front, one rectangle for the back, and a square gusset inserted into a slit for the inner legs and crotch - but it actually worked quite well.  Many of the 20’s bathing suits had the shorts attached to the top, but I made mine separate and used elastic at the waistline just to make it less fussy. Or if you wanted an even easier alternative, this type of suit would also be very easy to fake with a modern sleeveless blouse and shorts pattern.  


These early bathing suits are pretty plain on their own, so accessories go a long way to creating a more historical look.  The vast majority of women in 1910’s and 20’s photos of bathing suits are wearing some sort of cloth cap or bandana to cover their hair, so I just hemmed a large triangle of striped cotton to wear for my own beachy headwear.  

I also loved that so many of the women in the earlier photos were wearing black tights with their bathing suits, so I took some photos both with and without the tights, but I think I like the look of tights better just because it is more "old timey" looking. I was also curious to see how it felt to wear hosery on a beach or in water, but it was really pretty nice.  They offered protection from the itchy sand, and having wet tights next to my skin kept me much cooler than having the sun on my bare legs.  But it was also fun to take the tights off and get a more modern, later 20's look.  After having the tights on first, I have to admit that bare legs felt quite scandalous!  

For my beach shoes, I stitched some soutache around the edges of a pair of cheap ballet flats from Target and added some ties to wrap around my legs.  It was an easy alteration, and they held up well to wading through the water.  

But my favorite accessory of all was my parasol. The big one in my beach photos is made of canvas and bamboo, and it was sold at World Market a few years ago.  It is HUGE and heavy, but I loved how similar it looks to the beach umbrellas seen in some period photos, like this famous image by Jacque Henri Lartigue. I tried to take some similar photos, but it was harder than I thought it would be to look glamorous while running back and forth to take pictures with a tripod and automatic timer in the soft sand.  My umbrella kept rolling away and the waves would catch me off guard, so I'm sure I made quite a curious and memorable sight for the tourists watching me from their balconies at the condo!  


I obviously couldn't carry such a huge umbrella around Costume College, so I painted some swallowtails on a cheap paper parasol in a design similar to the parasol in this fashion plate.  It's not nearly as exciting as my big umbrella, but it definitely helped my outfit feel more complete.  The black and white is pretty severe without a little dash of color.  

So that's pretty much it for my first new Costume College costume.  I've uploaded all of my pictures from the weekend to this flickr album if you want to see some spoilers about what I'll be blogging about over the next month, and I also have another album with a few more of my beach pics. I also had fun indulging in my other hobby and turning some of my favorite shots into faux-autochromes and other antique photo fakes.  I think my favorite part about Edwardian and 1920s costuming is getting to Photoshop all the pictures when I'm done!  Autochromes are the best, and I always love getting new inspiration by looking at the real ones - aren't they gorgeous?


Monday, May 5, 2014

1-hour dress, lawn party edition


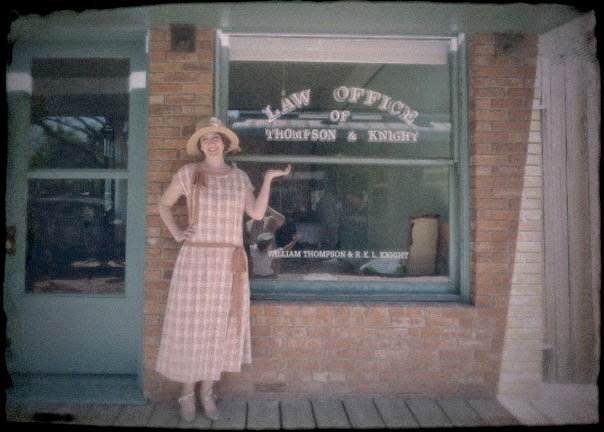
I've been so busy sewing and attending events this spring that I am falling WAY behind on blogging about my projects.  But before too much time passes, I wanted to share a few notes about a new 1-hour 1920's dress that I made for the Jazz Age Sunday Social at the end of March.

For this dress, I started with my Dowonton Abby 1-hour dress pattern but made a few modifications so the two dresses wouldn't look exactly alike.  I shortened the waist to remove the side gathers in the torso, slightly shortened the skirt, and created pleats at the hips instead of gathered swags.  I also shortened the sleeves a little and added a rounded neckline.  I created a pattern of this new dress so you can better see how small modifications to the basic 1-hour dress pattern can give you lots of variation in styles.

The other major difference is that I used some soft cotton plaid  to create a casual day-dress version instead of the slinky silk velvet that I picked for the Downton Abby dress.  You can see that the cotton dress is much less body hugging, and that combined with a slightly wider skirt means that the dress has a bit of a flare thanks to the stiffer drape of the fabric.  I don't mind that since I wanted something more casual for the picnic, plus a lot of these early 20's dresses had more fabric in the skirts than you would expect. But I thought it was fun to see the difference that fabric can make.


I think the hardest part about this whole project was deciding how to decorate it, and I spent more hours looking through fashion plates for design ideas than I spent sewing the dress.  In the end, I started running short on time so I finished it very simply with a contrast binding around the neck, a narrow belt, and a pair of long bows all made out of bias strips of scrap fabric.  This isn't a direct copy of one dress or fashion plate, but I had seen enough similar elements in various 1920's illustrations - like the ones seen on the fabulous What I Found blog - that I felt like it would be a plausible choice.


The best part about 1920's fashions are the hats, so I was thrilled to have an excuse to steal one of my husband's old straw garden hats and reblock it into a wide-brimmed cloche.  To do this, I removed the sweatband inside of the crown, completely wet the straw, then stretched it over a wooden hat block.  If you don't have a hat block, you could also reshape a hat like this on a styrofoam head that is used for holding wigs, and you can wrap thick towels over any type of head form to make the crown wider, which is very used for 20's styles.  After I left the re-blocked hat to dry overnight, I then cut down the brim so it was much shorter in the back and widest on the sides.  Finally, I stiffened the edge of the brim with thick jewelry wire (I ran out of millinery wire, but this works nearly as good) and covered the wire with a strip of straw braid that I removed from the edge of the original hat.  The decorations are made with bias strips of silk and a vintage mother-of-pearl buckle that a friend gave me.

So that's pretty much it.  It's nothing fancy, but it was quick and easy and all of the materials came from my stash, and that's always a good thing.  And once again, I bet you are wondering if it really took one hour to make, right?  Well... it was more like three hours this time because I didn't want to top-stitch all of the binding, and figuring out the pleat size in the skirt slowed me down a bit.  But that's still not half bad!  If you are interested, more photos can be found from my event album on flickr.


Tuesday, April 8, 2014

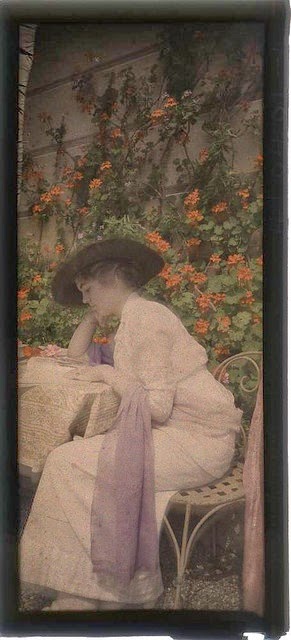
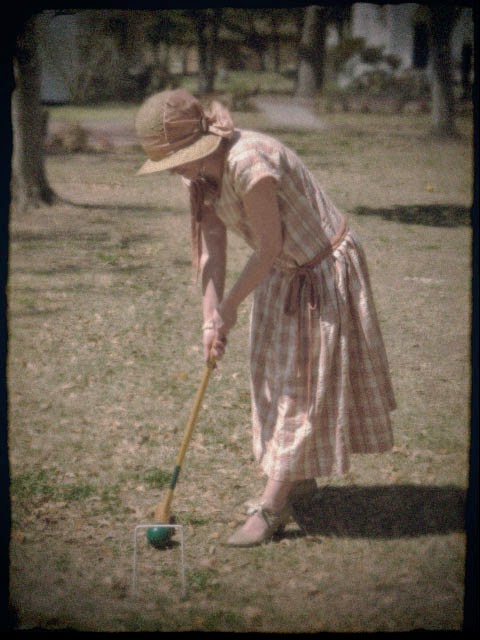
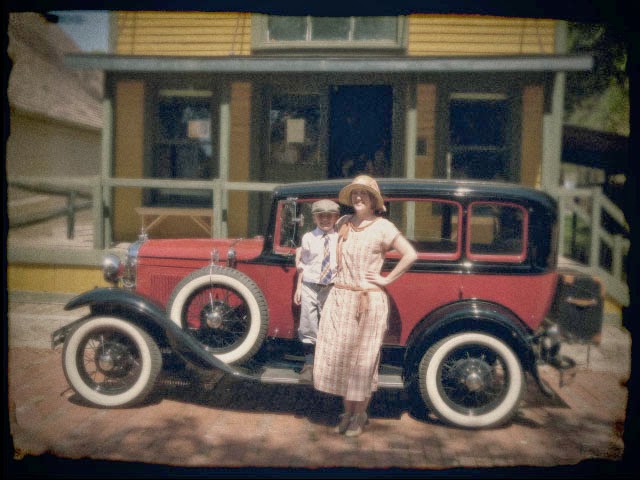
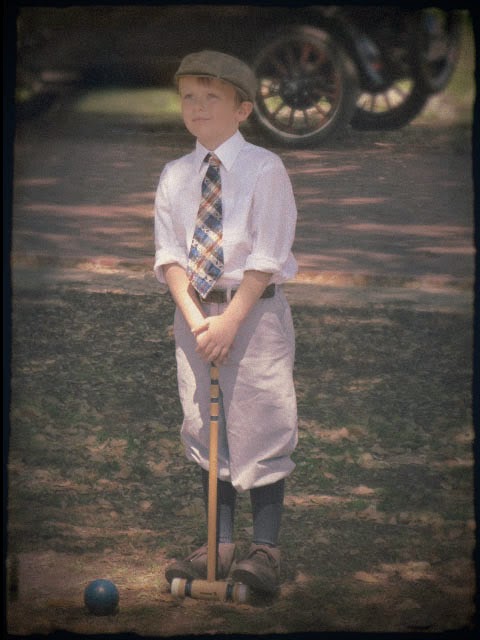
faux autochromes at the Jazz Age Sunday Social


So if you follow my blog, you might already know that in addition to making costumes, one of my other quirky hobbies is creating faux-antique photos.   Although I love all varieties of early photography, the antique photos that I adore most of all are autochromes, like this 1910s photo seen on the right from the George Eastman House collection.  This process was invented by the Lumière brothers in France, and it was used to produce the world's first commercially successful color photographs.  Most autochromes date from around 1905 through the early 1930s, and you can see more examples on my pinterest page devoted to the subject.  There is something so hauntingly beautiful about old autochromes with their hazy colors, soft focus, and pointillist-style coloring.  Their subjects exude such quietness and serenity, and I adore the dreamy, other-worthy feeling that you get from seeing 100 year old subjects in full realistic color.  
So after our recent DFWCG outing at the Jazz Age Sunday Social, I decided to try my hand at creating my own faux-autochromes.  The 20's era costumes, old cars, and historical buildings from that event made the perfect subject matter for this type of photography.  I used photoshop to make these, and I developed with my own custom techniques and actions to create an autochrome effect.  I also spent a good bit of time de-modernizing the backgrounds, as you can see in this "before and after" comparison.  It's a lot of work, but SO much fun to use my 21st c. computer skills to create images that play homage to this fascinating photo process from the past.


Sunday, January 19, 2014

Downton-esque 1-hour dress


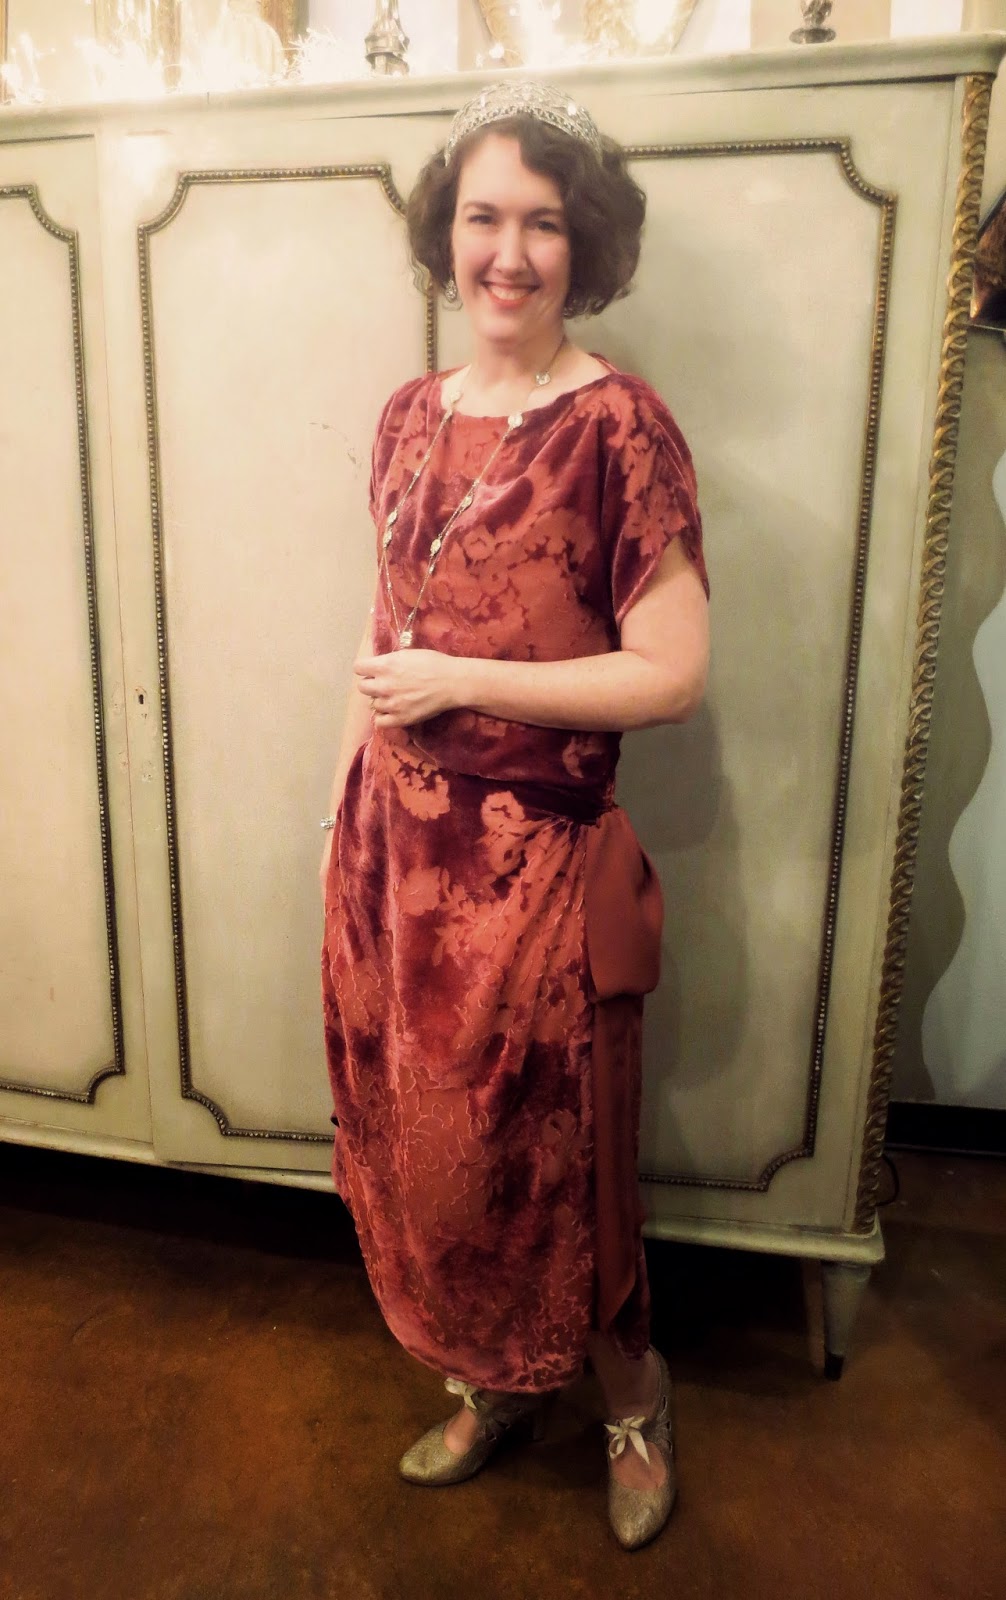
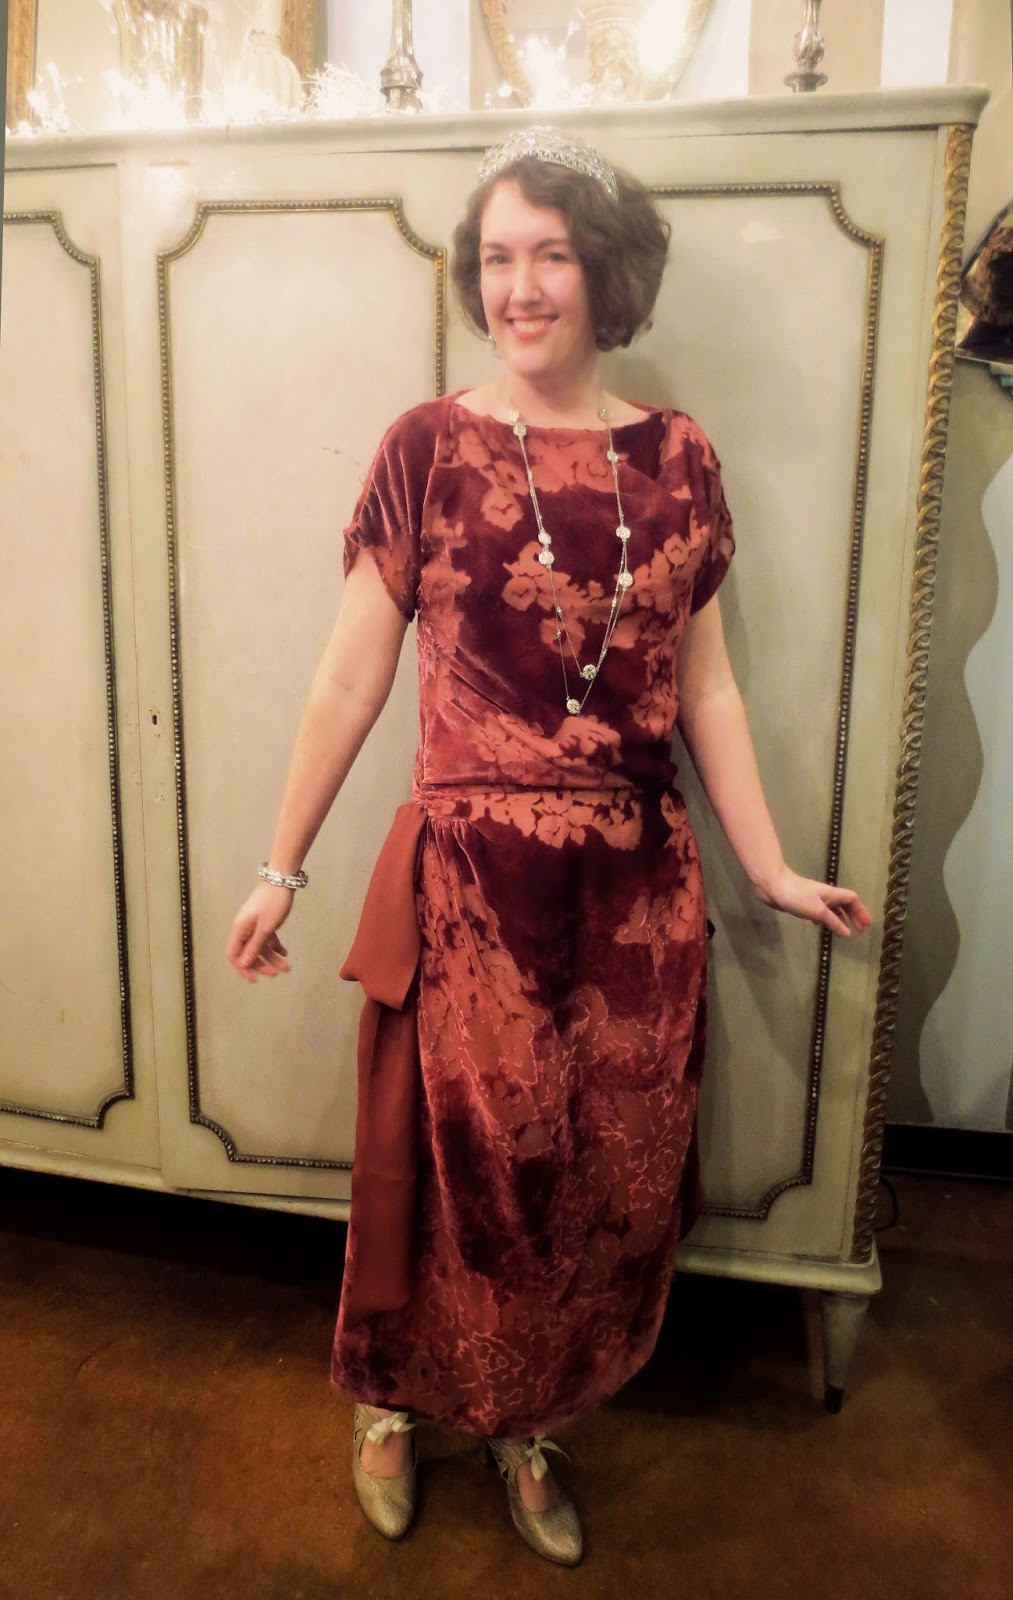
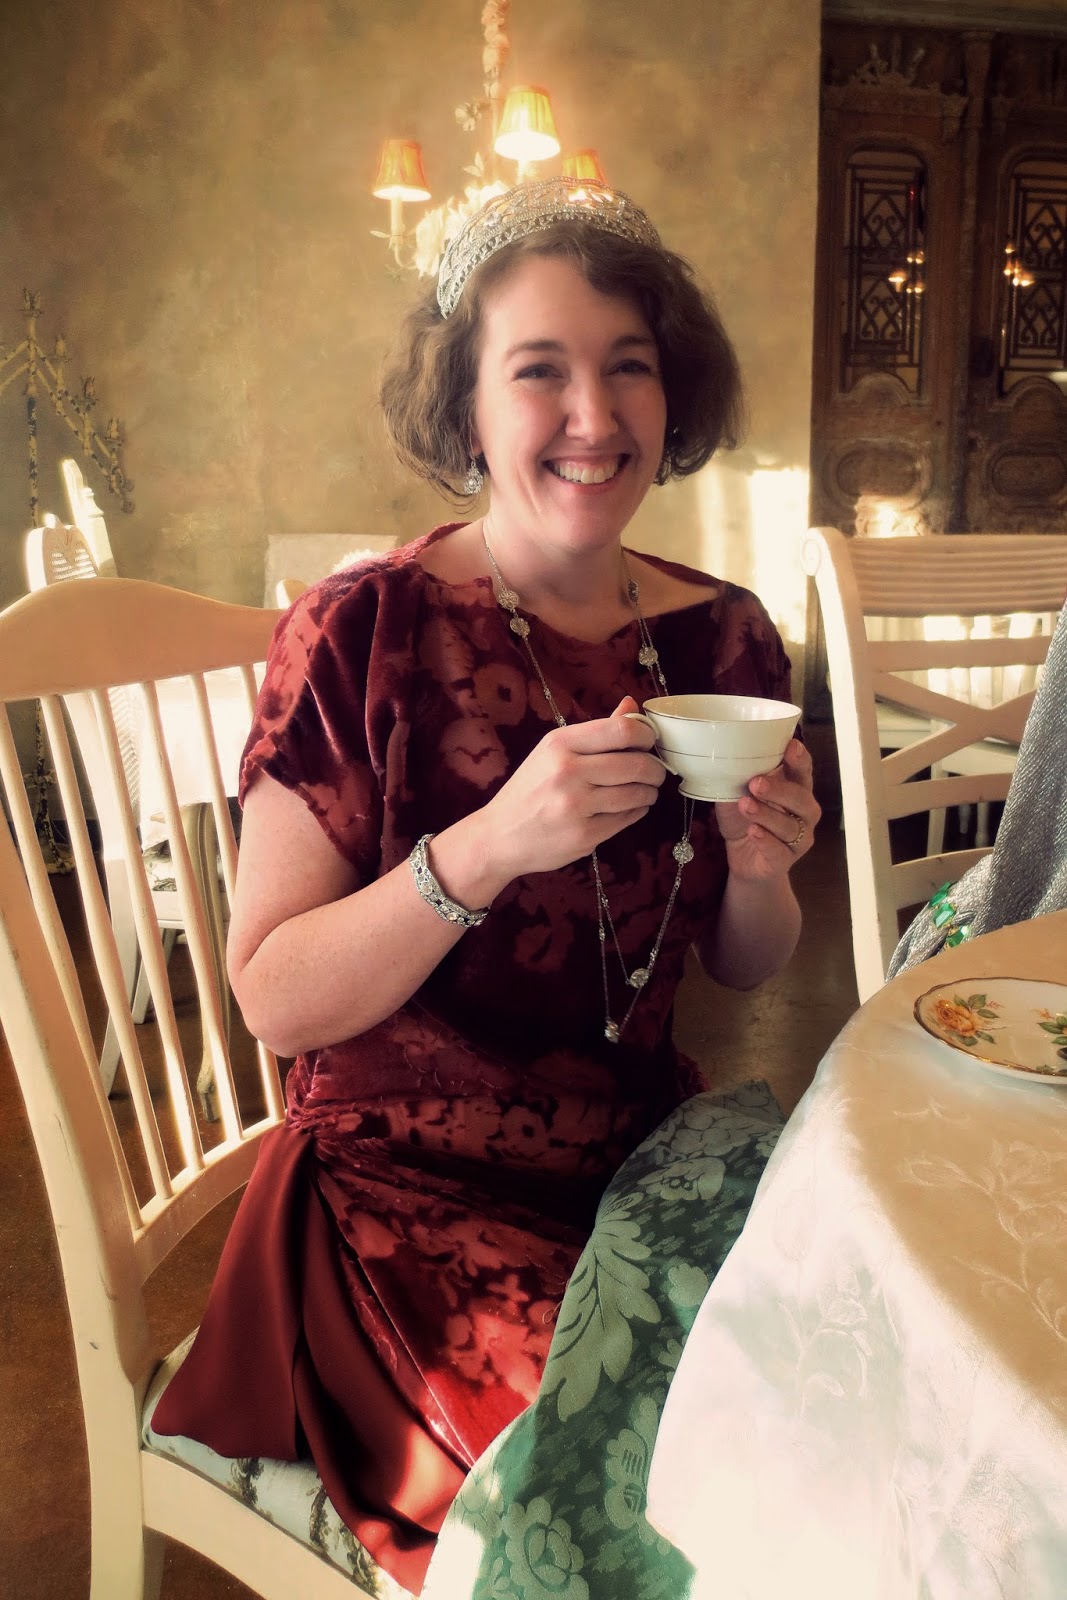
Last weekend, the Dallas / Ft. Worth Costumers Guild held a Tiaras and Top Hats Tea Party, and since I am a complete Downton Abbey addict, I decided to make an early 20's dress and indulge my inner Countess for the day.  

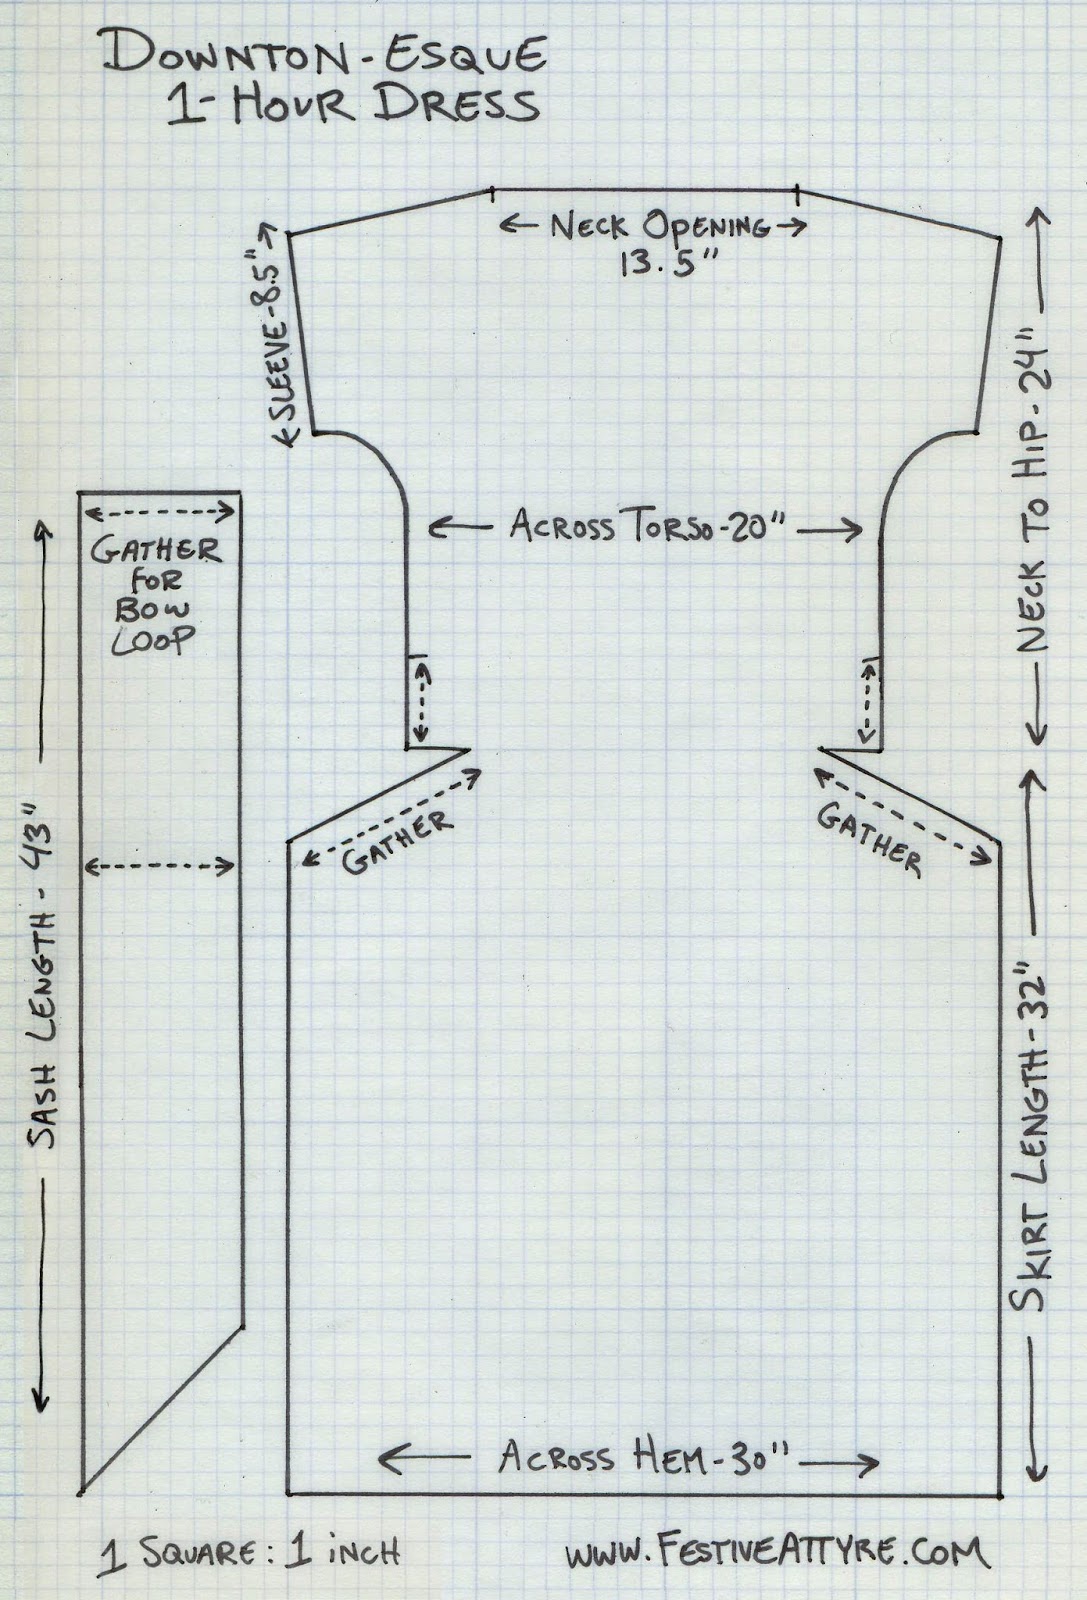
I had a little less than 2 yards of voided silk velvet that I bought from Fabrique's remnant bin earlier in the year, and this was just enough fabric to make a simple sheath dress.  I played around with some more complicated pattern options at first, but the fabric was so pretty on its own that I decided to keep it really simple and experiment with the infamous 1-hour dress concept that was so popular during this decade.  There are a couple of fun books from 1924-1925 that talk about making these dresses and give lots of variations on how they can be put together, so if you are interested in learning more, I've included links to those books at the bottom of my blog post.  But since the shapes are really simple, I thought I'd also give you my own freebie pattern so you can see exactly how my dress was made.  (here is the full-sized version if you need it)


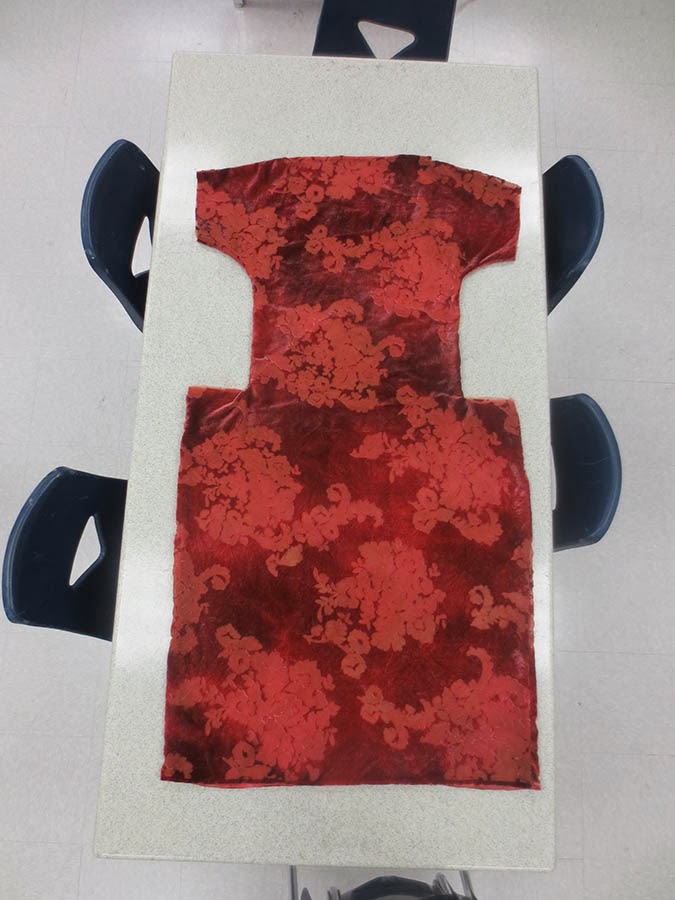
The cool thing about the 1-hour dress is that it is made out of mostly rectangular pieces and just pinned on the body to fit, so it is incredibly easy to draft and make.  The front and back pieces are exactly the same, and I went one step further by using a boat neck on my gown which also eliminated any need for a curved neckline.  These dresses don't look like much when they are laid out flat, but it's amazing how they come to life once they are on the body.  On the right you can see my dress before I cut the angle at the hips, which I did last because I wanted to check the draping before I cut.  
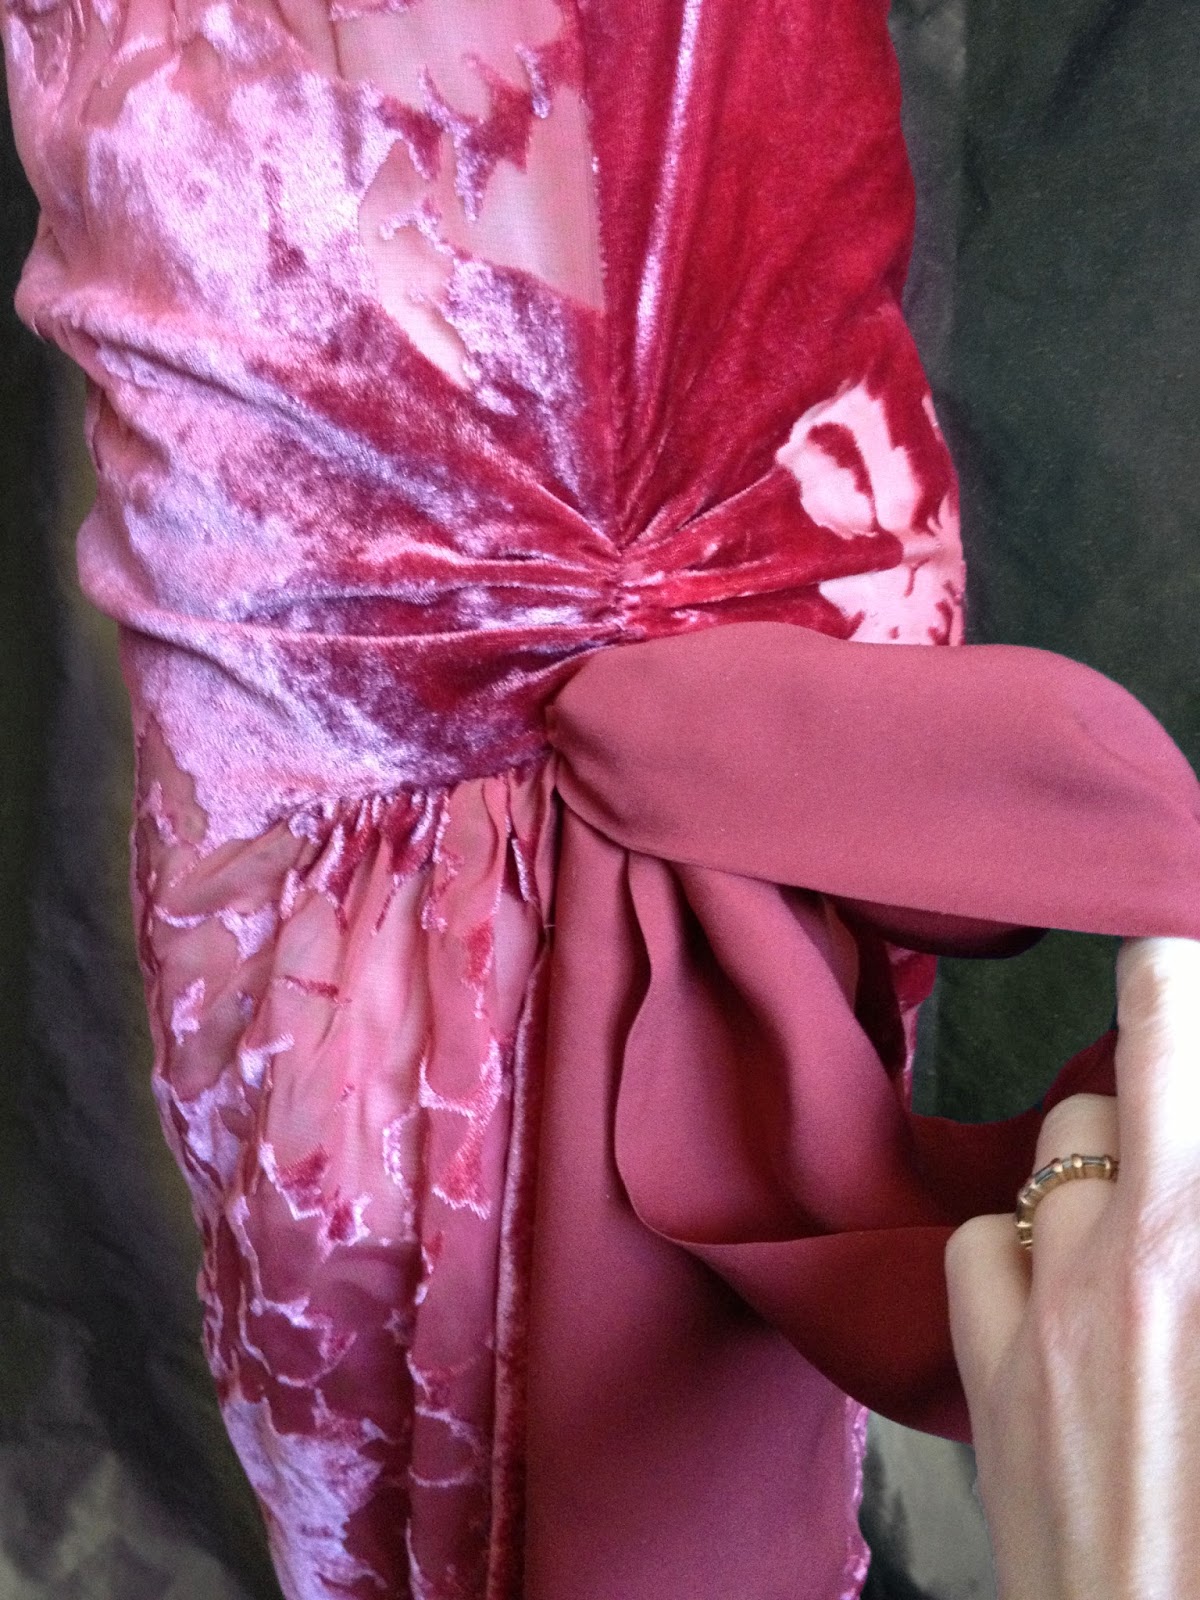
The only real shaping in the dress comes at the hip, which is gathered a little on the torso seam to make some soft folds at the waistline, and then it is gathered at the side extensions to give some fullness over the hips.  I made the hip extensions on my dress slant down, which draws up the sides and gives it a slightly curved hemline and some diagonal draping across the skirt.  I also made two looped sashes out of silk georgette and tacked these onto the hips to jazz it up a little more.   


I'm not going to do a full step-by-step tutorial because I think the books cover that well enough if you need more instructions.  But here are a few more of my own impression after making one of these dresses myself:

- I think one of the main reasons why my dress was successful was because of my fabric choice.  You definitely want a fabric that is very fluid and not stiff for this style - something like silk velvet, crepe, soft lawn, etc.  Drapey is definitely good!
- I made my dress quite narrow through the body, which keeps it from looking like a big shapeless sack.  It only has 2" of ease across the bust, and it is just big enough to fit over my shoulders, but just barely.  This narrow width also means that the waistline naturally falls at my high hip (around where I wear my jeans) since it can't go down any farther than that.  This is perfect for an early 20's look, and to my eyes, it is a lot more attractive than the later 20's dresses.  Many of those have a waistline that hits lower on the hips, which results in the whole body needing to be cut wider for us curvy gals.  
- The one part about this dress that I wasn't crazy about is that the neckline likes to shift around a lot because the fabric is so slippery.  I tried to combat that by sewing snaps into the shoulders and snapping it to my chemise, but it still moved more than I wanted, so I'll probably try snapping it to a firmly fitted 1920's brassiere next time.  
- So did the dress really only take one hour to make?  Uhhh... no.  But that's mainly because the silk velvet forced me to baste everything before sewing, and I took the time to hand-finish all the hems and bind the internal seams.  I probably spent about 4-5 hours on it total.  But if I was making this sort of dress in cotton and machine sewed all the finishing work, I think I could get pretty close to that 1-hour timeframe. 
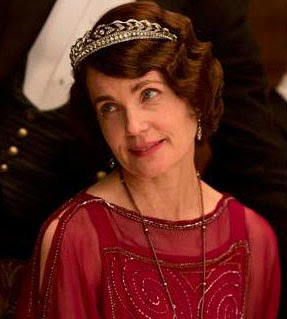
- And just because I am totally in love with my new tiara, I thought I'd let you know that I bought it from Venus Jewelry on ebay.  I think it is a pretty great match for the type of tiara that Cora wears in the latest season of Downton Abbey.  One of the best parts about 20's fashions is all the fabulous jewelry from that era, and I had a ton of fun picking out sparkly things to finish off my outfit!  I wish I had a better non-blurry picture, but maybe you can get the basic idea here.  

So that's pretty much it!  We had a wonderful time at the tea party, and I am even more in love with 20's fashions than I was before. If you ever need a quick and easy frock for your own Downton Abby adventures, I definitely recommend that you give the 1-hour dress a try!   


Monday, December 3, 2012

A late 20's dress for Lanternlight


This past Saturday, a group from the DFWCG attended Plano Heritage Farmstead's holiday celebration - Lanternlight.  The theme for this event is usually turn-of-the-century Victorian/Edwardian, but this year they switched things up a little and did 1920's, which was SO much fun! 

In the past, I've kind of turned up my nose at 20's fashions because I don't find them to be the most flattering styles, but I've really come around over the past few years and I'm enjoying them more and more.  I've discovered that not all 20's dresses look like shapeless feedsacks, and some of the styles are really chic and fun to wear. 


For my dress, I used an undated Pictorial Review pattern, which I am guessing from the styling is from 1930-32ish.  But you can see from the pattern diagram on the back that there is almost no shaping in the dress, and I discovered that if you wear the belt at the hips and shorten the skirt a little, it passes for a 20's dress with no problem. You could really see the changes going on in the pattern industry with the way this pattern was made.  It has a very brief instruction sheet like older patterns with only the most basic construction steps covered, but then it also has printing on the pattern pieces with cool little illustrations and extra hints and tricks for how to put it all together.  Compared to the other 1910's and 1920's patterns that I own, this wealth of information must have been such a welcome change for home seamstresses!  The only changes that I made to the Pictorial pattern was to leave off the cuffs (no good reason why - I just got lazy), and I also omitted the collar so I could wear a fur collar instead. 


Although you see a ton of fur collars on coats in the 20's, it's much harder to find them on dresses.  I got really excited when I found this 1927-28 dress illustration in the book Montgomery Ward Fashions of the Twenties (there's a link at the bottom of this post), since it appears to have an attached fur collar and it looks so similar to my dress anyway.  But there is nothing noted about it being fur in the text, so I'm guessing it was really some type of velvet or plush.  I have occasionally seen photos of women with fur collars worn with a dress, like this one, but I'm pretty sure most of those are stoles instead of anything that is attached.  Obviously, it doesn't make sense to put fur on a dress that needs to be washed, but I was really determined to have a fur collar on this outfit, so I did it anyway.  Shhh... don't tell the authenticity police!  I found this clip-on fox fur collar on etsy, and since it is not permanently attached, I can still wear the dress and wash the dress without the fur, so I don't feel quite as guilty about it. 

My dress is made from polyester crepe, which is another strike against me on authenticity.  But I had my mind set on making it in deep red, and when I was buying fabric for it last summer, this is the only dark red crepe that I could find.  The buttons and belt buckle are all vintage mother of pearl.

For the hat, I reshaped a modern wool felt hat using my vintage hat block.  I'm kicking myself for not taking pictures of that process now, but I was so tired this past week that it never crossed my mind until I was almost done.  But all I did was wet the hat and stretched it and pinned it over the block so it would sit down much farther on my head.  Once it was dry, I cut the brim to a shape that I liked, then wired and bound the edge of the brim with a strip of silk taffeta.  For the decorations, I had originally planned on making some fancy fabric flowers, but I ran short on time, so I ended up buying a huge velvet poinsettia from Hobby Lobby, and I hot glued the individual petals onto the hat. 

The shoes are from Aerosoles, and they are called Ticker Tape.  I thought they were so perfect for 20's costumes, and they were quite comfortable too.  I just replaced the leather cord with a ribbon since I didn't like the way the cord looked on its own.  Aerosoles has quite a few retro-styles of shoes, and they have good sales too if you are patient and keep checking back. 

So that's about it.  I had a blast wearing this costume, and I was pleasantly surprised at the number of compliments that I received at the event.  I guess 20's dresses might not be so terribly unflattering after all.  ;)  You can see more pictures from the event on my Flickr page.


Saturday, August 6, 2011

20's convert

DSC05606

I'm home from my big trip to Costume College in California, and I finally have a little bit of time for blogging again.  Hooray!  I had meant to do some diaries about the outfits that I was making over the summer, but I ended up running so short on time that I had to keep myself off the computer as much as possible.

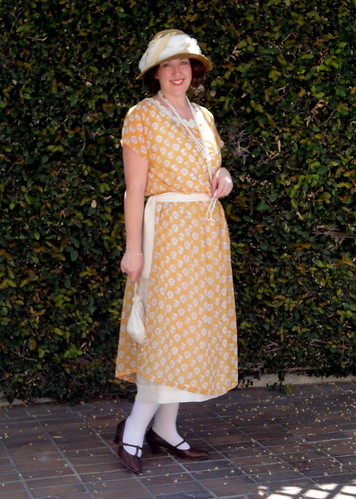
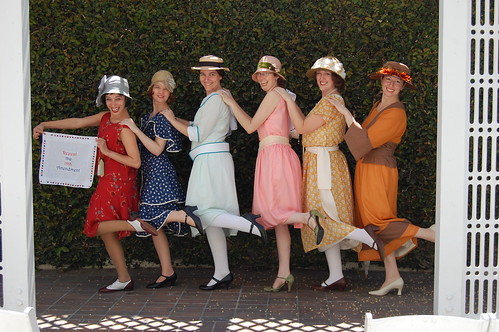
So the first new outfit that I'm going to tell you about is my early 1920's dress that I made to go along with a group of ladies who were all dressing up in prohibition-era attire.  Let me preface this by stating that the 1920's are some my my least favorite fashions ever, and I NEVER thought I'd find a 20's style that looked good on me.  The dress that I ended up with was actually my third try at making a prohibition-era costume this summer, but I am so happy that I stuck with it and kept looking for something that I could live with because I had a blast with the group, and I love the way my dress turned out!

1920s at Costume College


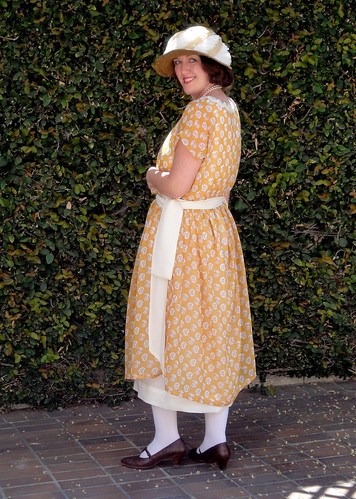
I decided to focus on early 20's styles since I like that the waists were still defined earlier in the decade, and I prefer the fuller skirts to the more severe styles that you see later in the 20's.  So I was thrilled when I came across this wonderful vintage pattern on etsy that was in my price range.  It wasn't dated, but I am guessing from the style that it is from around 1921.

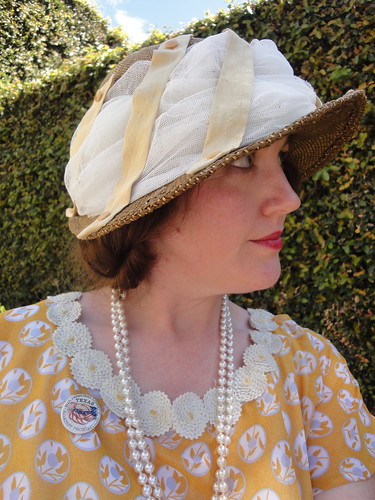
I looked around for a while trying to find some lace or net that I could use for a version like you see in View A, but when that failed, I decided to use a patterned silk crepe that had a vaguely art deco feel to it.  The underdress and sash are made out of georgette, and I used vintage ric-rack rosettes around the neckline to add a little decoration.  I didn't use the over-tunic on the blouse, but other than that, I made the pattern up exactly as it came, and it fit wonderfully with no alterations.

I think the best part about 20's fashions are the accessories, so I knew that I needed a hat to finish off the look.  Wide brim hats were more popular in the early 20's than the cloche styles that we usually associate with that decade, so I took a wide brim straw hat and stretched the crown over a hat block so it would sit further down on my head, then I cut the brim down to a more medium size.  I was wasn't really sure what direction I wanted to go with decorating this thing, but since I was running short on time, I ended up just wrapping the crown with net and adding some silk strips with vintage buttons to add some color and visual interest.  It's really random and a bit sloppy, but a lot of early 20's hats look very random and homemade, so I figured, "hey, why not?  It's period!"  I also made a reproduction of an antique anti-prohibition button that I found online.  It says "Texas - For Personal Liberty, Against Prohibition".  I thought it was cute, and I am a sucker for anything that says Texas on it.  I also wore a super-long strand of pearls that I found at an estate sale, a pair of T-strap shoes from etsy, and my Edwardian purse that goes with everything.  

DSC05638

This was a delightful costume to wear - especially after being in non-stop corsets for the two previous days.  I can TOTALLY see why women wore these fashions now.  They must have felt amazing after decades of more restrictive clothing.   I hate to admit it, but I think I'm a 20's convert now!  ;)

DSC05608