Showing posts with label dfwcg. Show all posts

Tuesday, November 22, 2016

1795 Half-Mourning Robe


Every year, the DFWCG holds a Georgian Picnic, and as usual, I waited until the very last minute to decide what to wear.  I had originally planned on wearing something old, but my state of mind since the election has been pretty gloomy, so I decided to wear my heart on my sleeve and make another mourning gown.

I was originally inspired by a fashion plate from Gallery of Fashion showing an "afternoon dress, in half-mourning" that combined a black robe with a white round gown.  I already had a white gown, and I found a 3 yard piece of black wool in my stash that would work great for the robe. Luckily, I also had some good 1790s patterns that I had drafted for previous projects, so it ended up being a really quick and easy garment to put together.

A black robe on its own is pretty boring, but I also found lots of examples of 1790s robes edged with fur, which seemed like a perfect choice for a November picnic (you can see a variety of robe fashion plates here).  I picked up a yard of faux fur and used this to trim the edges of the robe, and I also made a new muff since the 1790s is ALL about the accessories.

Turbans are the most common type of headwear that women seemed to wear with this type of gown, and the crazy-long feathers add such a fun finishing touch.  Since I was short on time, I made a really simple fixed turban by tacking a long strip of silk over a wool hat blank.  I also wore my curly grey wig to try to mimic the look of the ladies in these fashion plates.

So that's pretty much it!  My obsession with 1790's fashion knows no bounds, and it was a lot of fun to make another robe to add to my growing collection.

As usual, I'll post a few of my favorite photos here, and the rest are on Flickr.


Friday, May 27, 2016

rewear and refresh

Soooo... it's been 6 months since my last blog post, and I thought I'd drop in and let you all know what I've been up to. I had a big push of productivity last spring and summer, but then I crashed after Costume College and desperately needed some time to hibernate and recuperate. It's been good. I really needed a break from sewing to recharge my batteries a bit. But I haven't stopped going to costume events during this past year - I've just been rewearing older pieces from my wardrobe and giving each outfit a few tweaks to make them feel more fun.
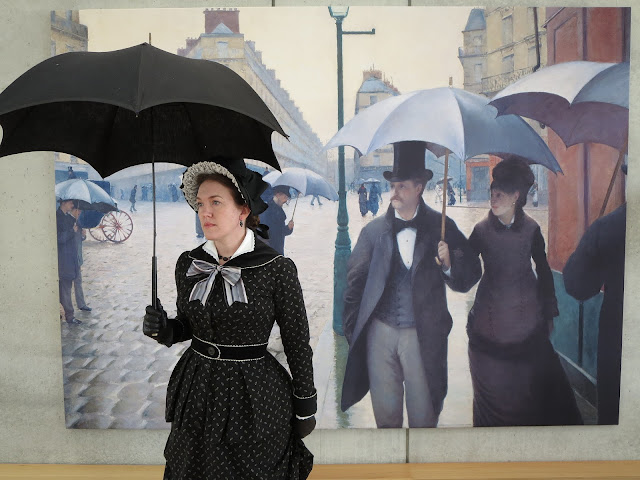

I started off last January by wearing my mourning calico to a exhibition of artwork by Gustave Caillebotte. I took this opportunity to make a new set of white collar and cuffs to finish off the dress. The inner collar and cuffs are items that you almost always see in original Victorian fashion plates and photographs, but as modern costumers, we tend to leave them off - probably because they were separate items and aren't typically included in the display of surviving Victorian garments in museums, so our eyes aren't as accustomed to seeing them there. But 19th century women used the inner collar and cuffs to protect the dress from dirt and body oils, and they could be easily removed and laundered, so it makes sense that they were essential finishing touches during the period. I ran out of time and didn't get to finish my own collar and cuffs for the first wearing of this dress at Costume College, but the dress feels SO much more complete now that I have them.
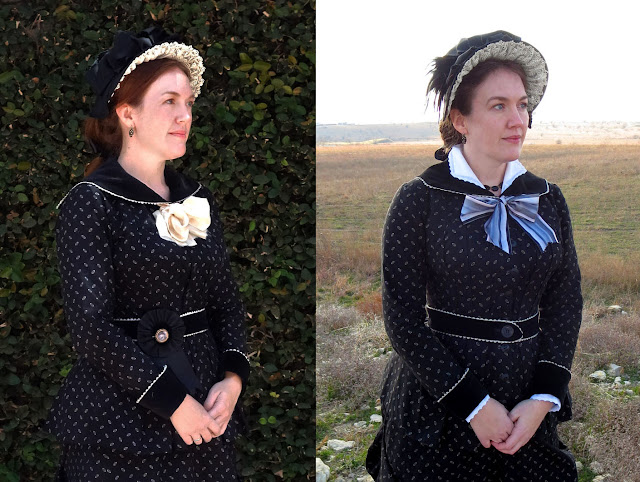

You can see the difference between the dress with and without the collar/cuffs in these pictures, and I also wore a new bow at the neckline to change things up a bit more. It's a subtle change, but I like it a lot better this way. The cuffs are just rectangular strips of cotton edged with eyelet that I tacked to the inside of the sleeves. The collar came from a mysterious little pattern on page 294 of Fashions of the Gilded Age, Vol. 2. The diagram is not labeled and there's no illustration showing what the pattern piece looks like when made up, but I suspected that it was one of those jaunty winged collars that you see so often during the natural form years. Sure enough - it worked perfectly!  
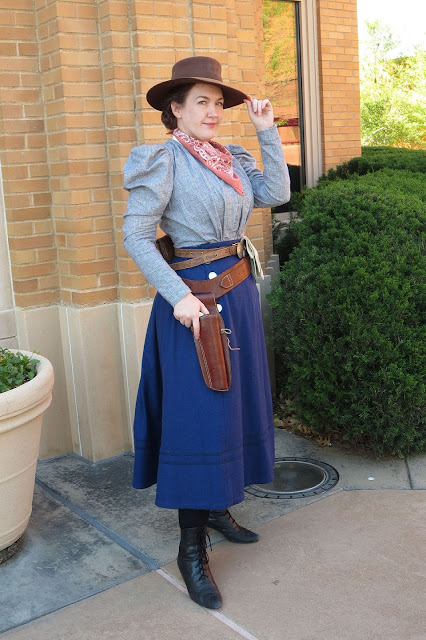

My next event was a trip to the Cowgirl Museum, so I decided to restyle my Victorian cycling outfit with some new accessories to give it more of an Old West look. This one didn't require any sewing at all, which was a wonderful treat. I just wore a different hat, a bandanna, some leather gloves, and an old belt and pouch with a turquoise brooch in the place of a buckle. I wish I could claim that the holster was mine too, but this piece was just on loan from my friend Christy for this picture.  


I found it amusing that Christy had also restyled one of her old dresses to give it a cowgirl vibe, and we happened to have worn these outfits together at another event 4 years ago. Even when we were supposed to be proper ladies, we still couldn't resist pretending to be outlaws! I guess it just runs in our Texas blood.


Finally, the local costume guild organized an 18th c. dinner party, so I decided to wear my black chemise once again. To change this one up, I wore my big embroidered kerchief, a new purple striped sash, and I rewound my turban with some purplish-grey silk. But most importantly, I styled a new wig that matches my natural haircolor, which was a HUGE improvement! (Good lord! What was I thinking with that crazy blond mess on my head?!)  


I have a bad habit of wanting to make new costumes for EVERY event that I go to, but this year has made me grateful to have some good pieces in my wardrobe that I can rework and rewear in different ways. Plus, I've really enjoyed focusing on the stress-free fun of wearing costumes vs. the often exhausting process of making them. I have to admit that I'm itching to make some new things again, and I've already started one big project that I'll be sharing here soon. But hopefully I'll be able to stay a little more balanced with my work load in the future, and I think this sewing hiatus has taught me to appreciate my older costumes a lot more than I used to.

BTW - if you'd like to see more pics from my recent costumed adventures, feel free to check out my flickr. Even when I'm not blogging, flickr is one place that always stays updated because I like to share my pics with my wonderful friends in the DFWCG. And if you happen to be in the area - come out and join us! We'll be adding a bunch of new events to our calendar over the next week!
Sunday, February 22, 2015

The Mojo Dress


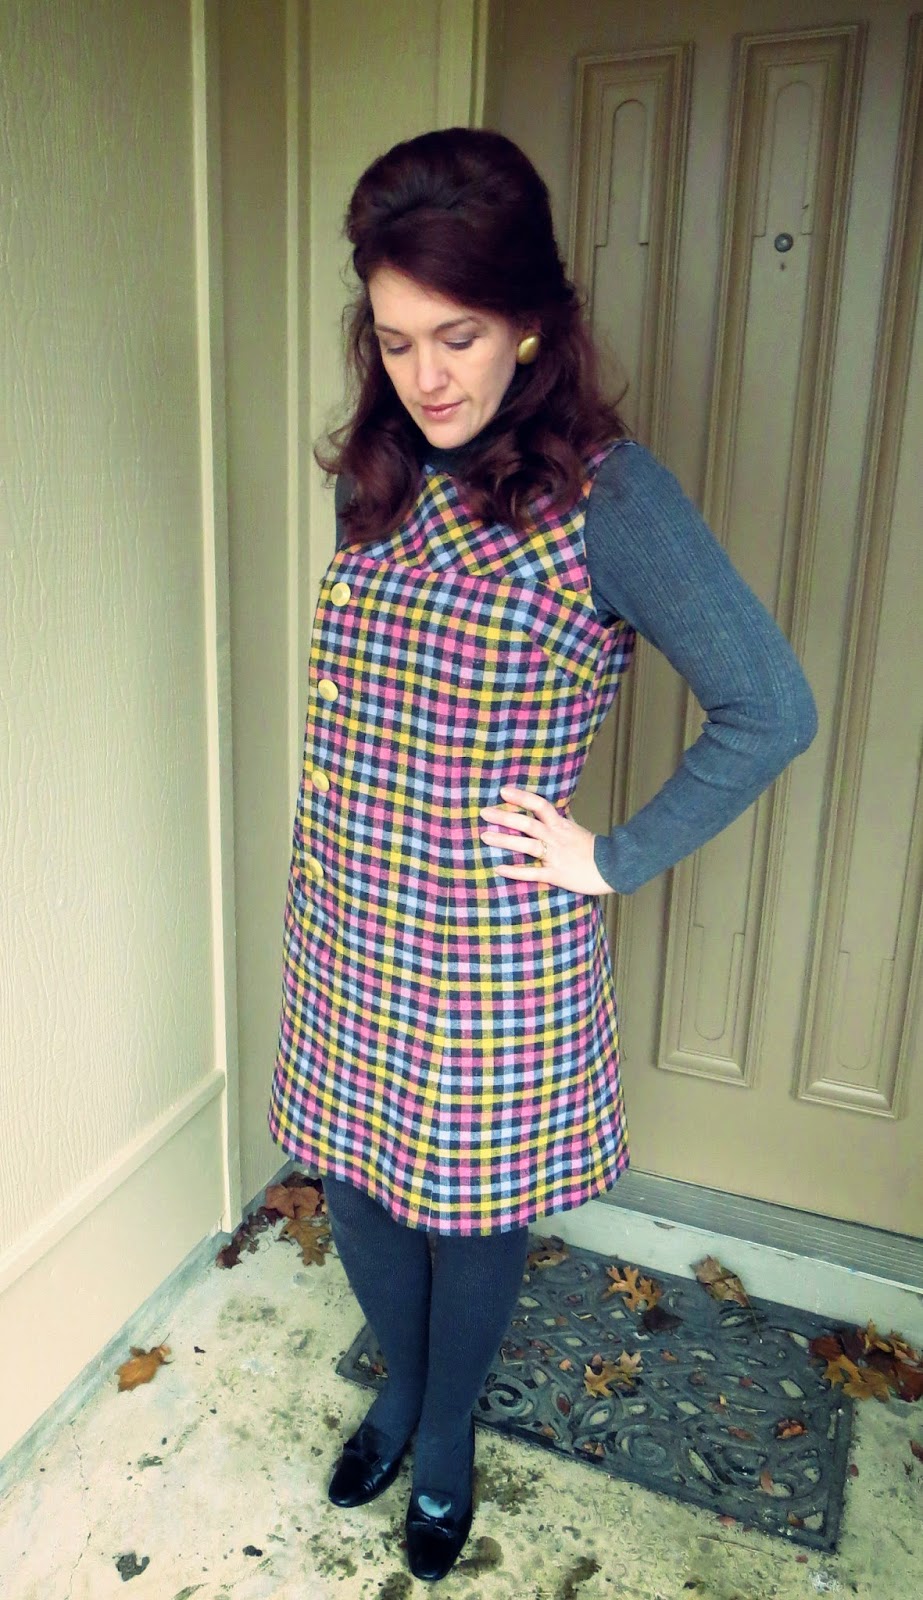
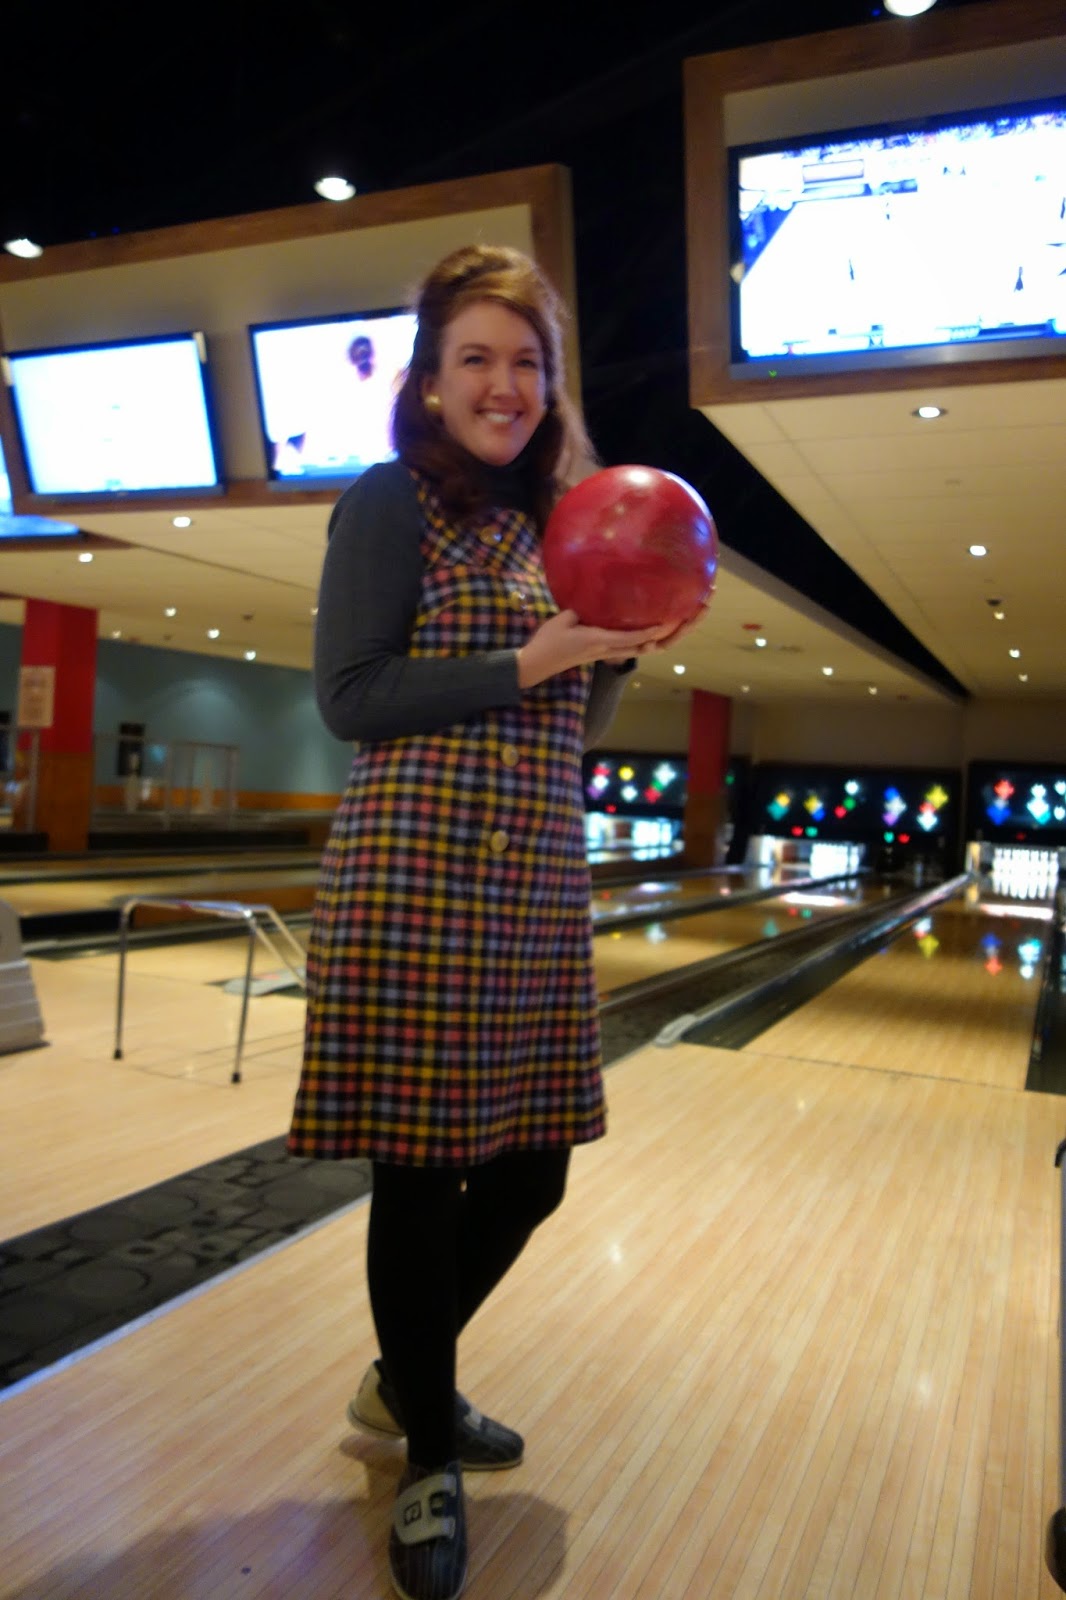
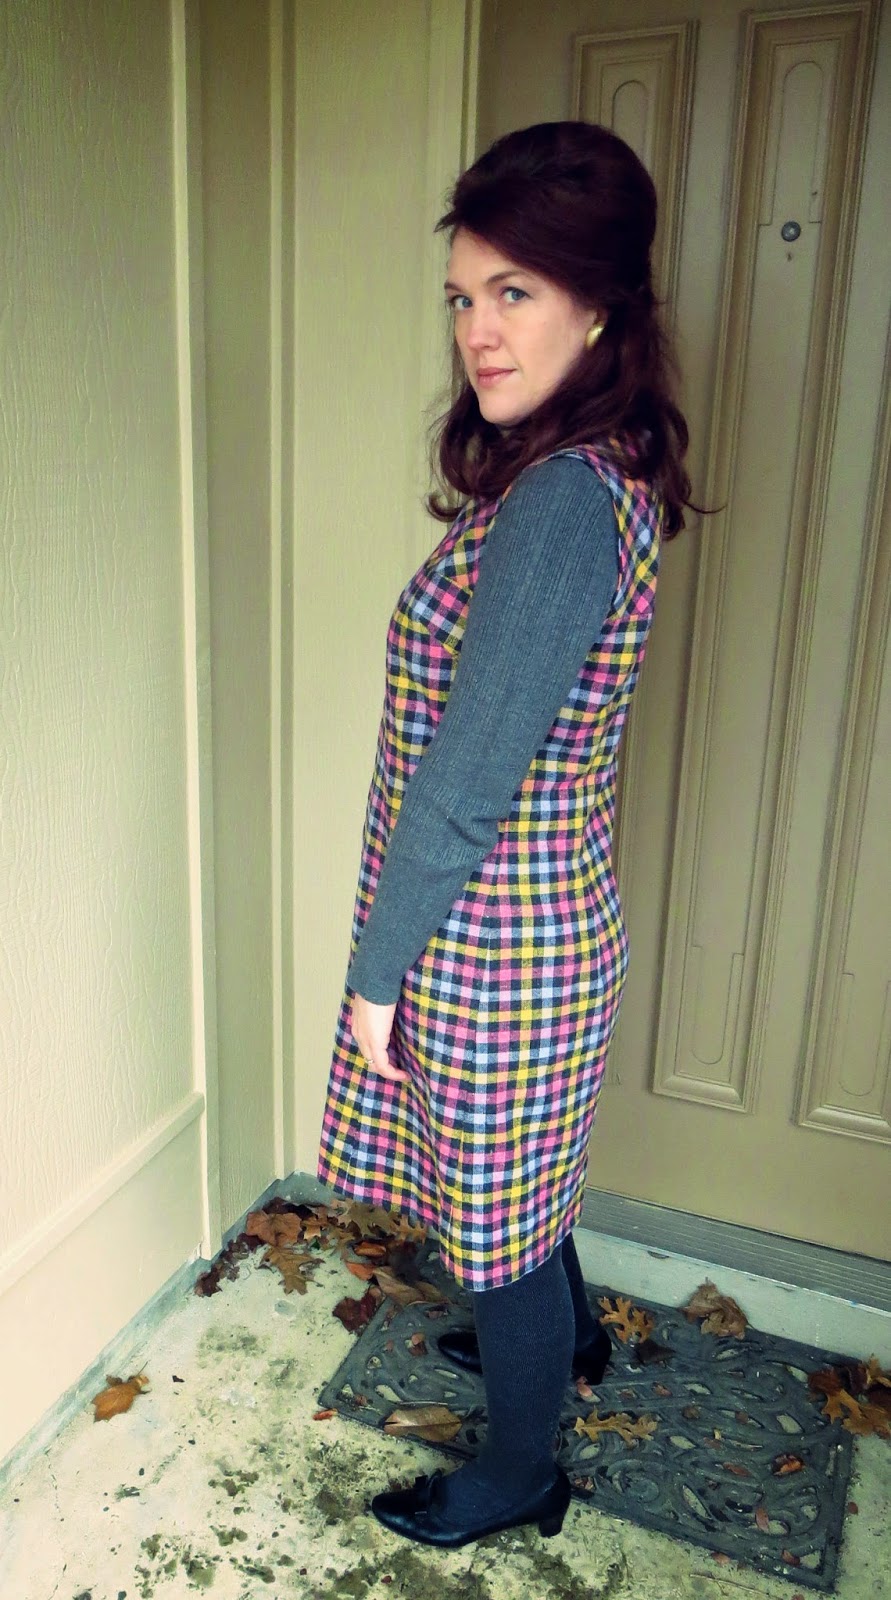
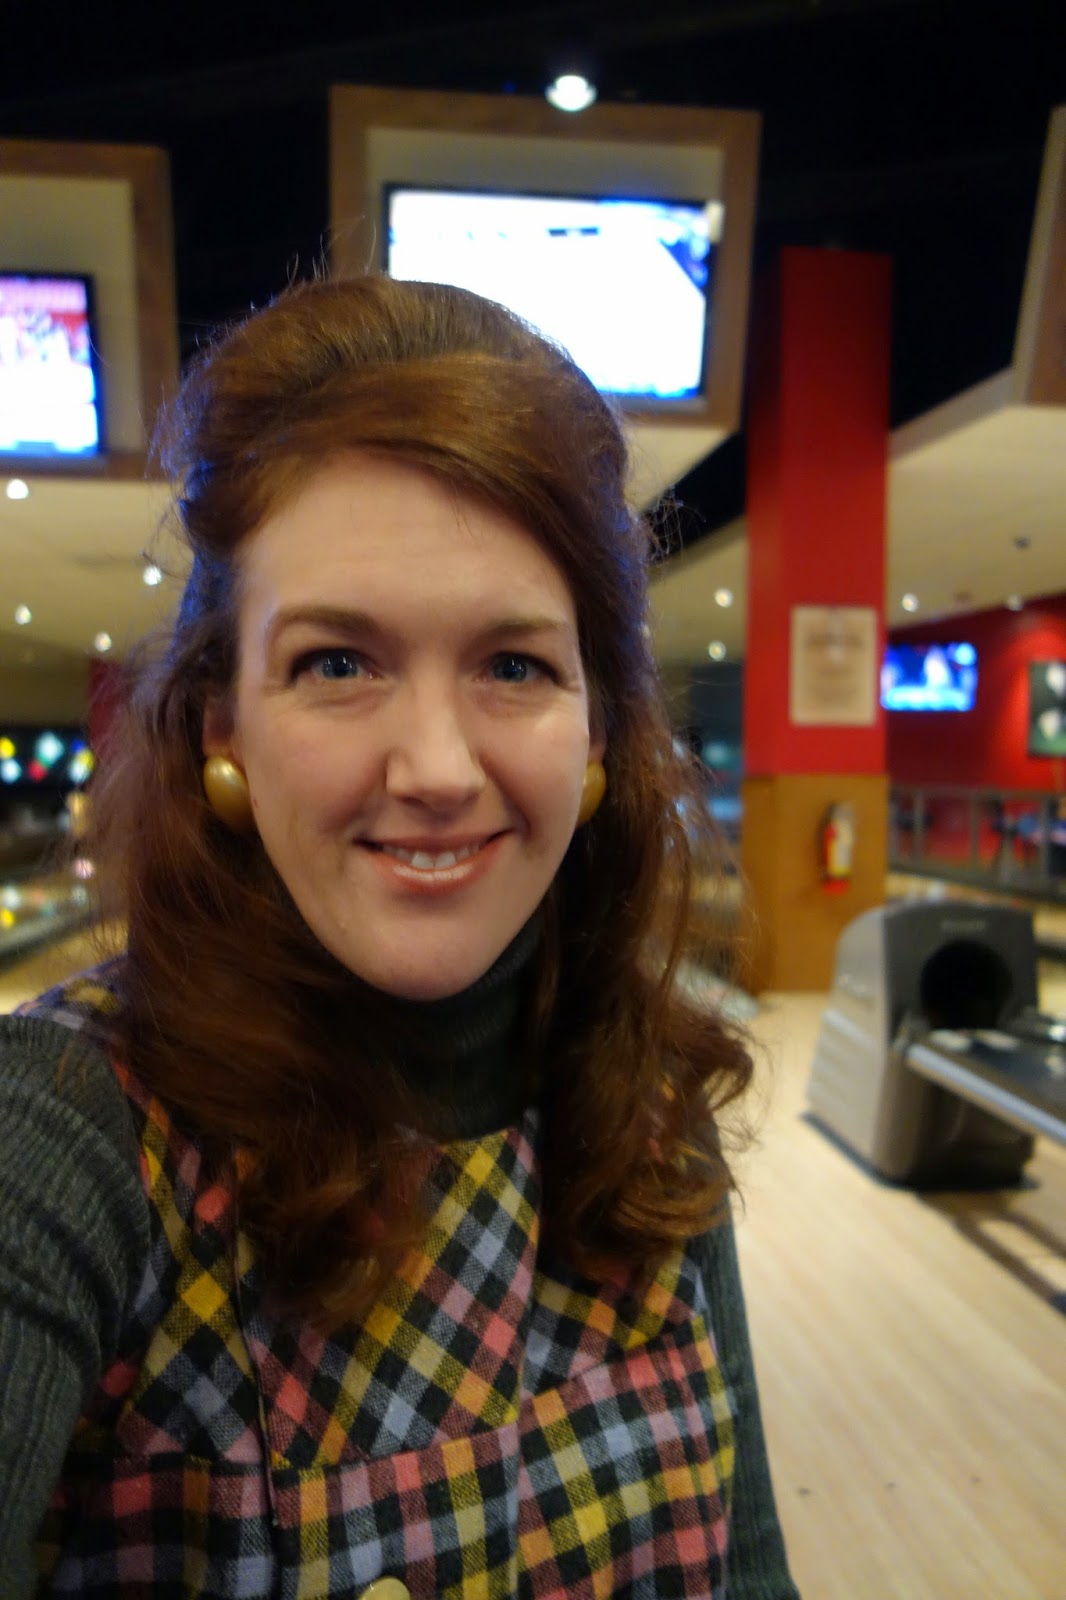
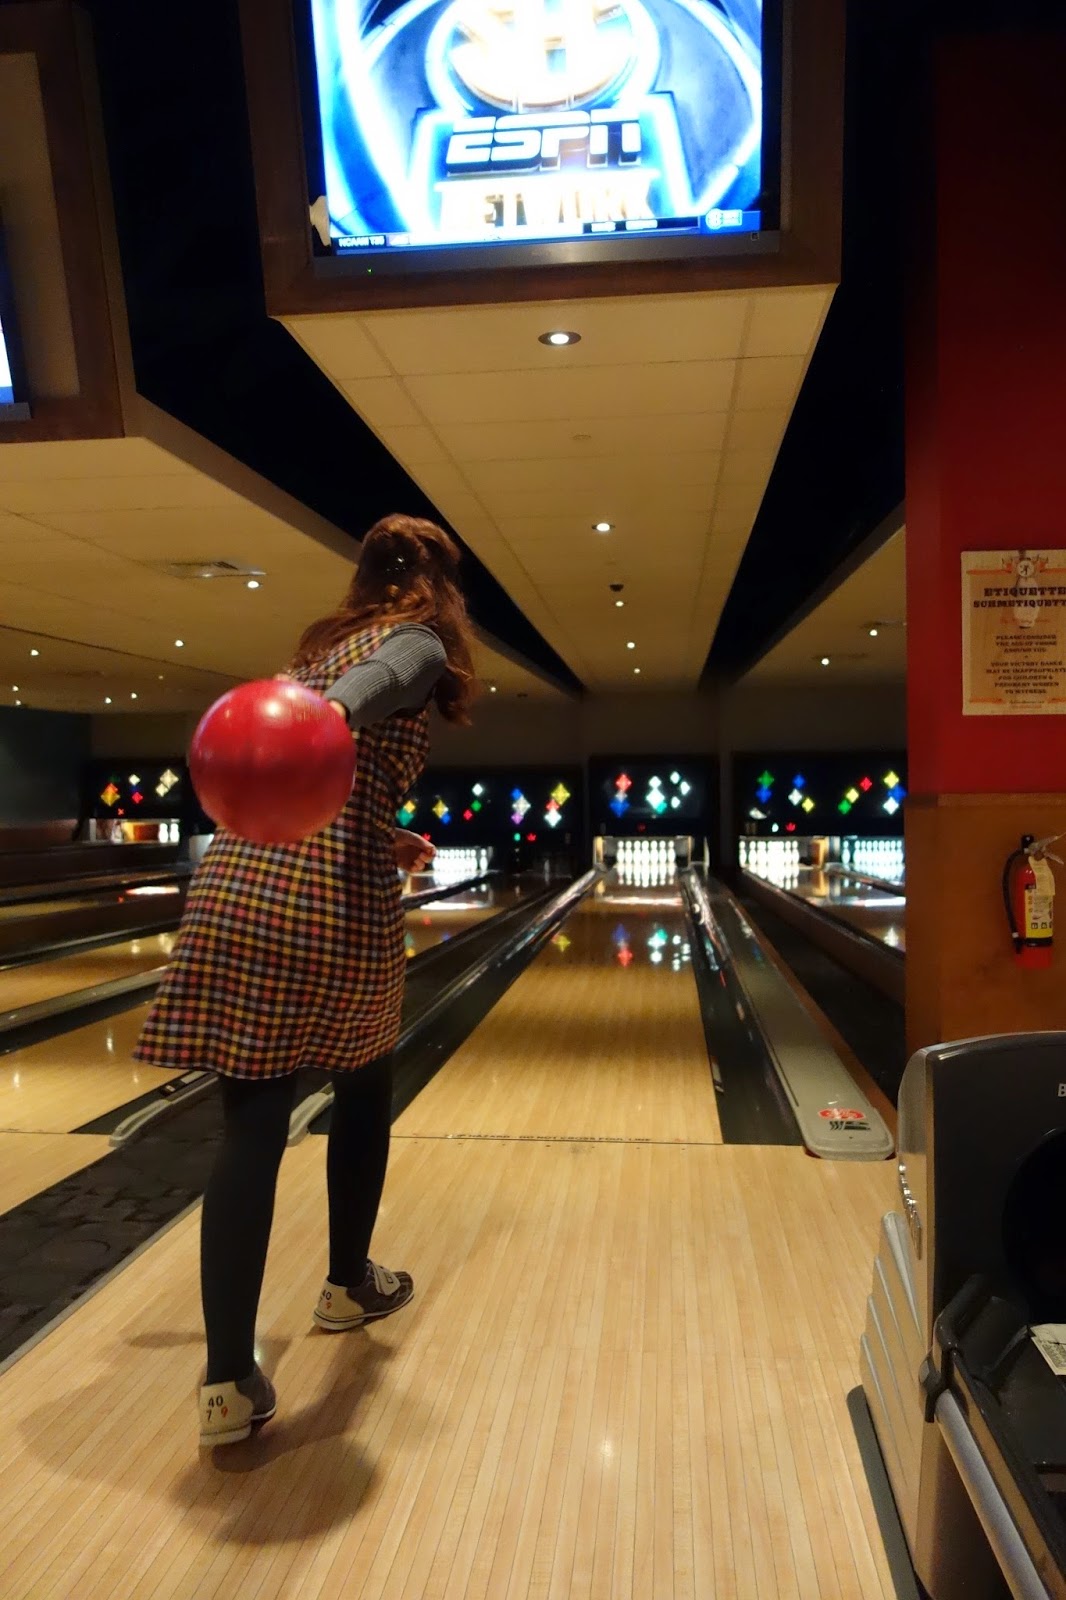
2015 has not been very kind to me so far with sewing projects.  I had a string of sewing/shopping disasters, so I finally got fed up and took a break from anything costume-related for most of February.  But inspiration comes from the strangest places, and for me, it was seeing the horribly tacky 60's/70's clothes in the new Mad Men promo pics.  I know most people would run screaming from all that pastel, plaid, and big hair, but I love it like crazy!  It's hideous and glorious and it made me want to sew something RIGHT NOW, so yesterday I whipped up my own pastel plaid monstrosity to wear to a retro-themed bowling event today.  It felt great work on a no-stress dress for a change, and hopefully it will help me get my sewing mojo back on track again.
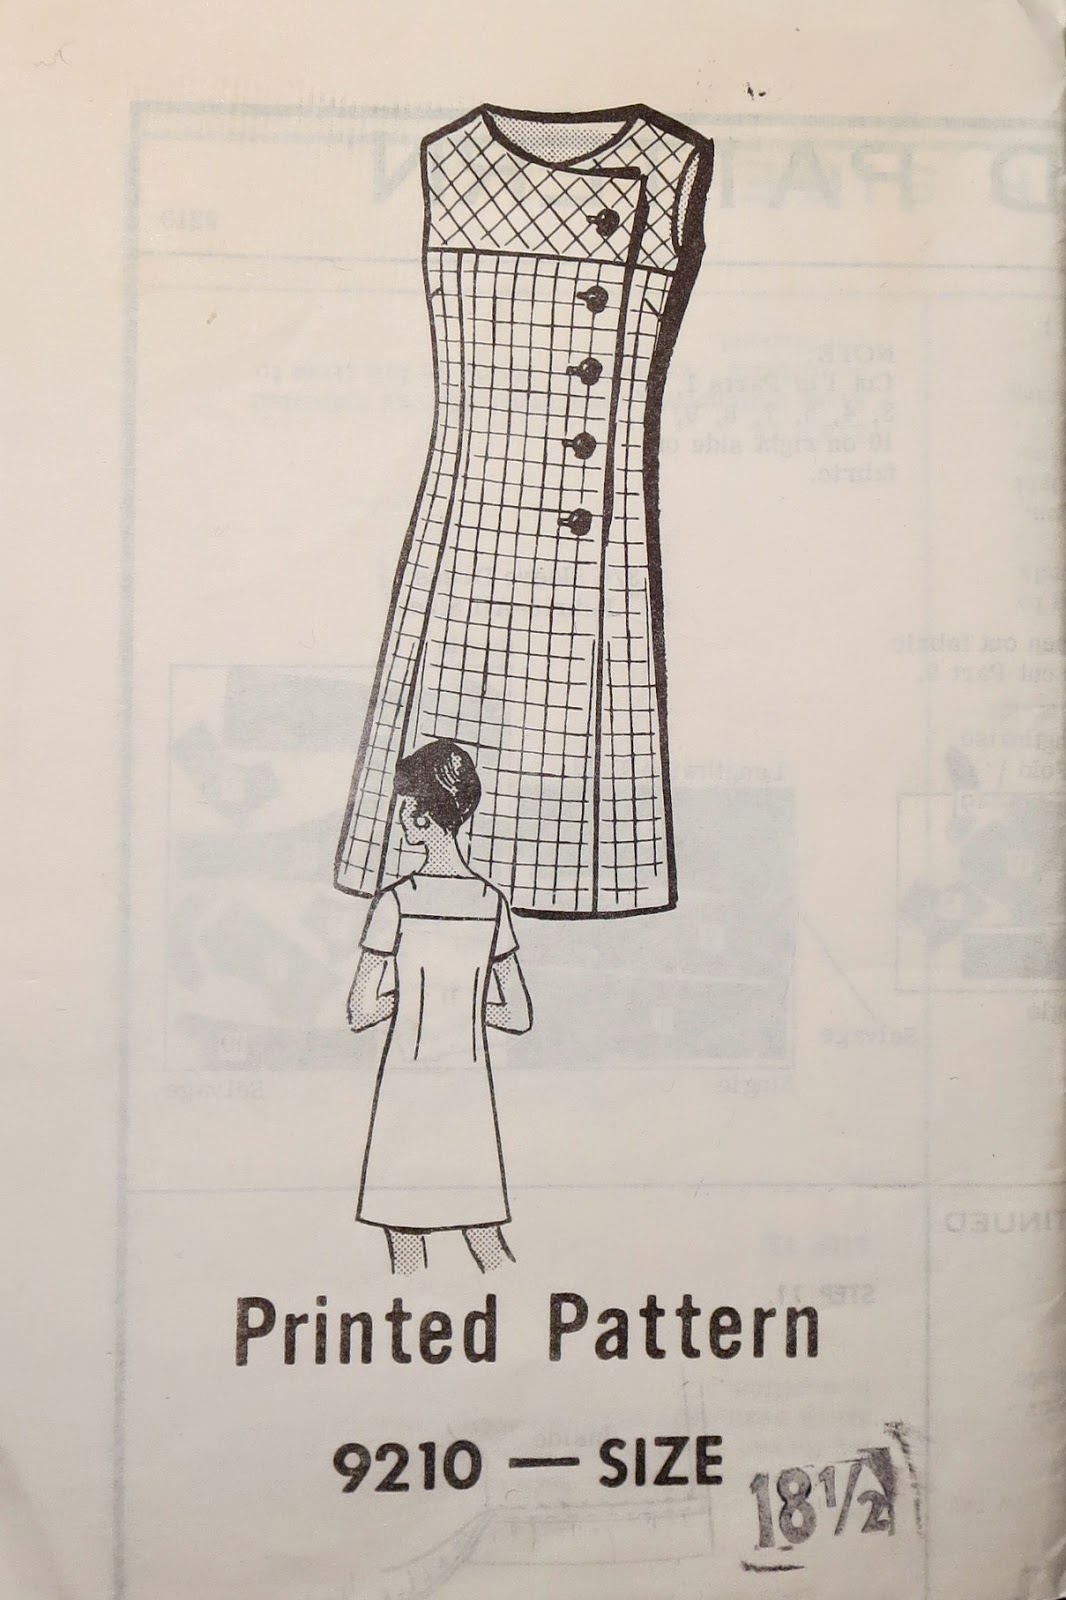
To make my dress, I used a very simple mail order jumper pattern from the late 60's or early 70's.  The fabric is vintage wool plaid that I found at an estate sale many years ago.  This is actually my second garment that uses this fabric - it also made an appearance in a pair of Victorian pants.  What can I say?  I LOVE crazy plaids!  The dress is finished off with a few vintage buttons that were given to me by my mother-in-law, but unfortunately, I wasn't paying attention and make the dress button on the wrong side.  Whoops!

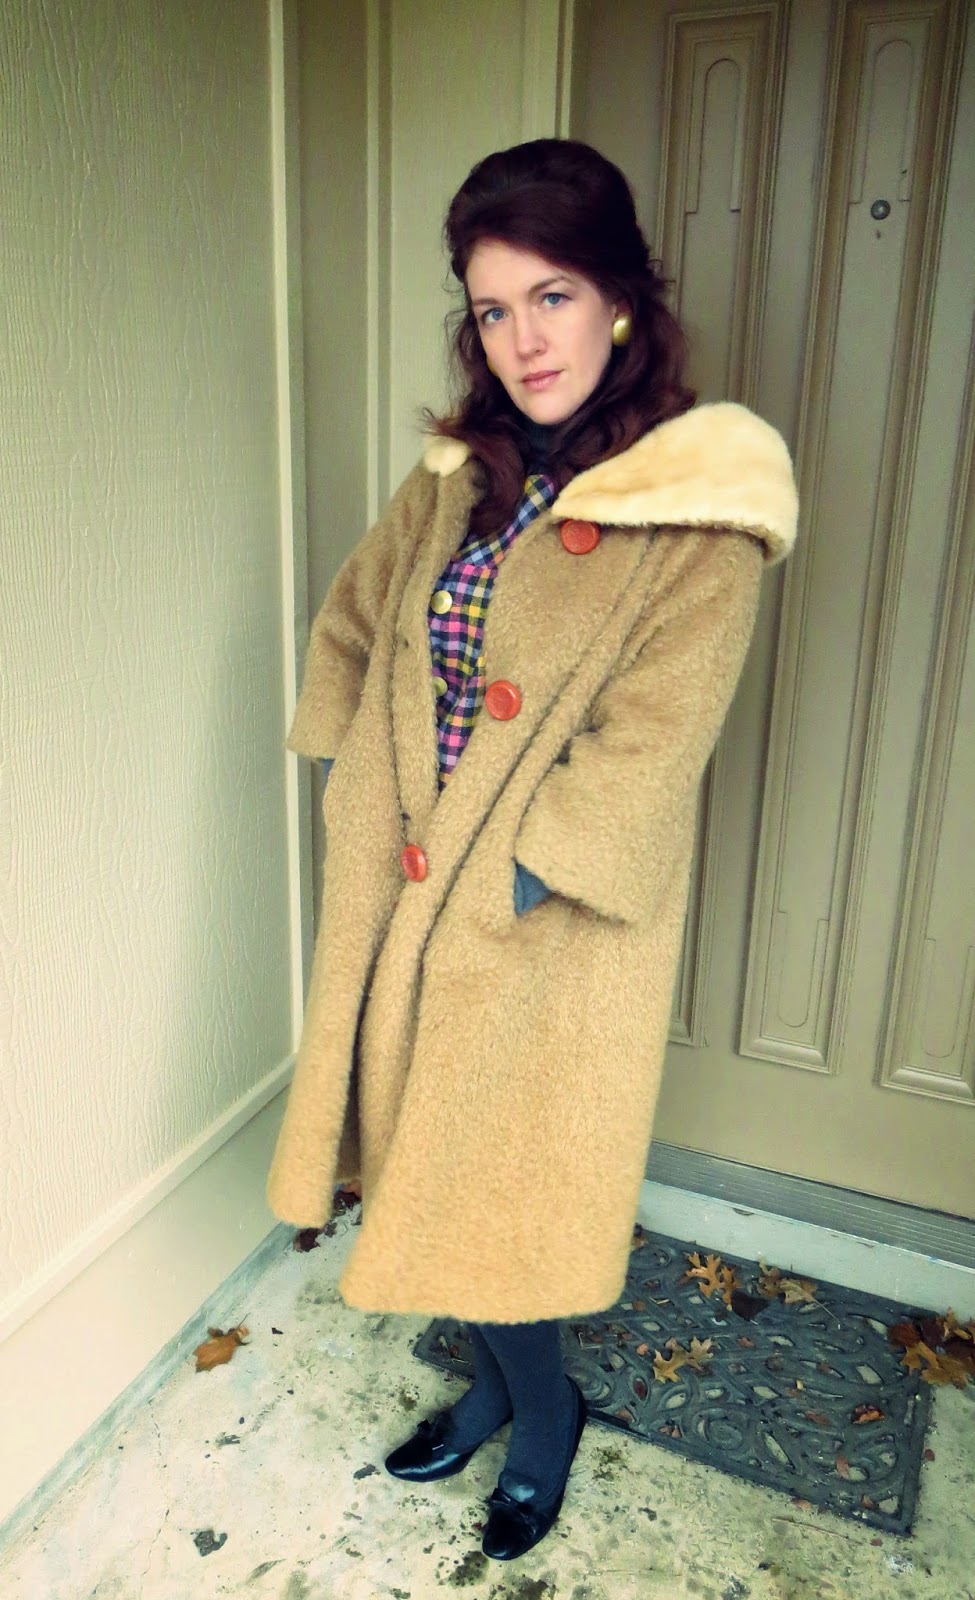
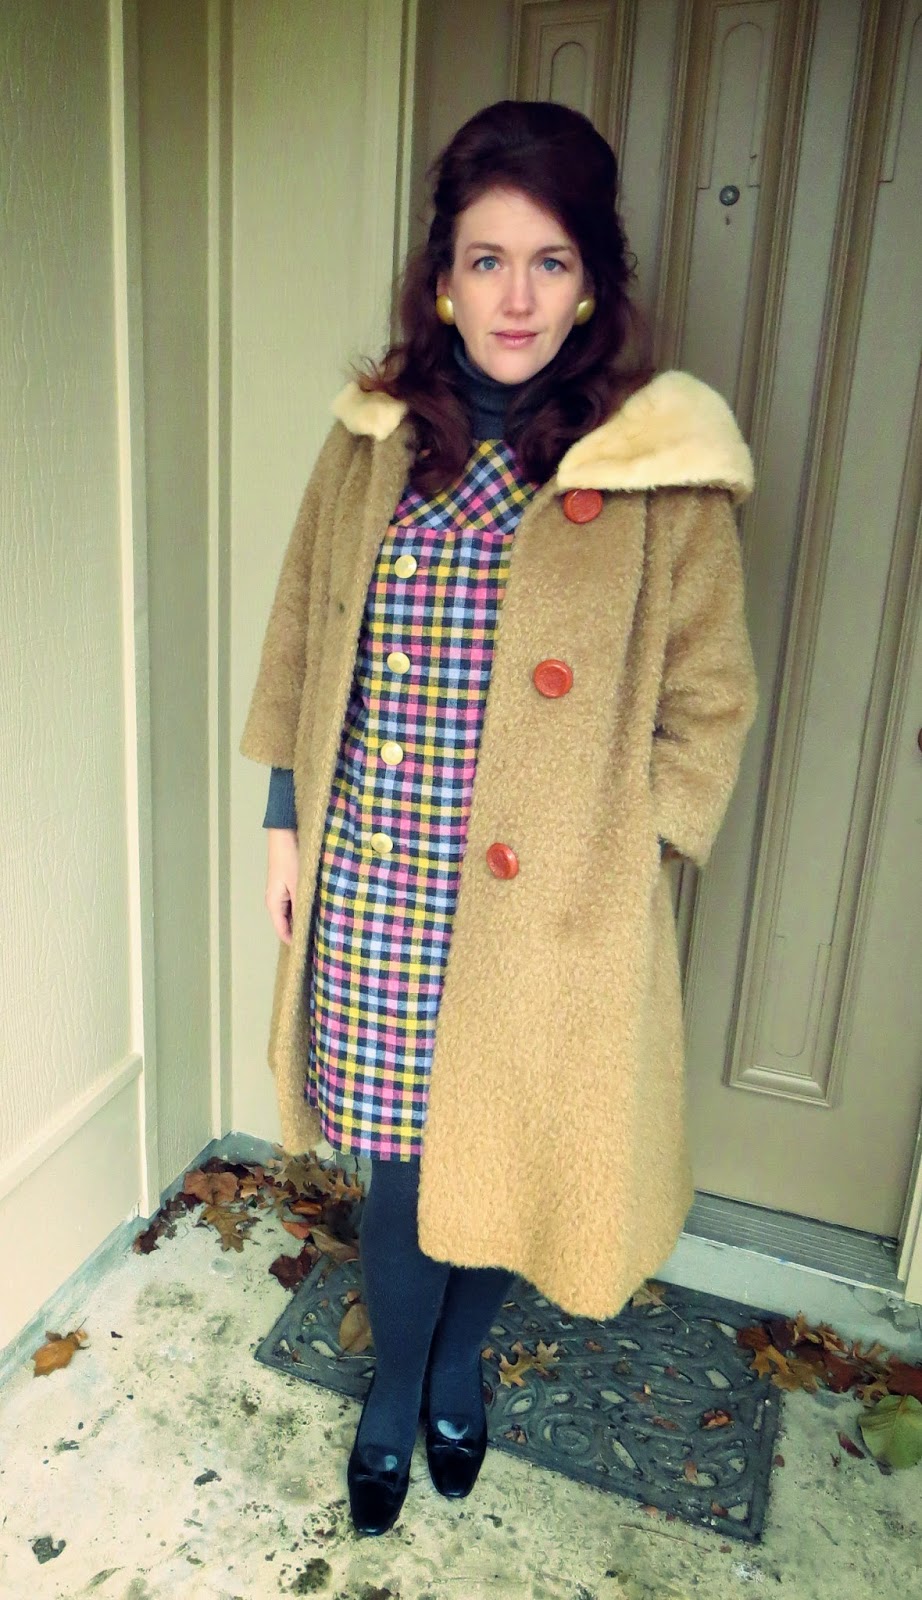
I also used today's outing as an excuse to wear my Vintage Coat of Awesomeness.  That was another amazing estate sale discovery.  God, I love that coat!


So that's about it.  It was fun to make, fun to get dressed up, fun to do something different, and fun to indulge in my Mad Men obsession.  A perfect palate-cleanser project.


Sunday, January 11, 2015

Little House natural form dress


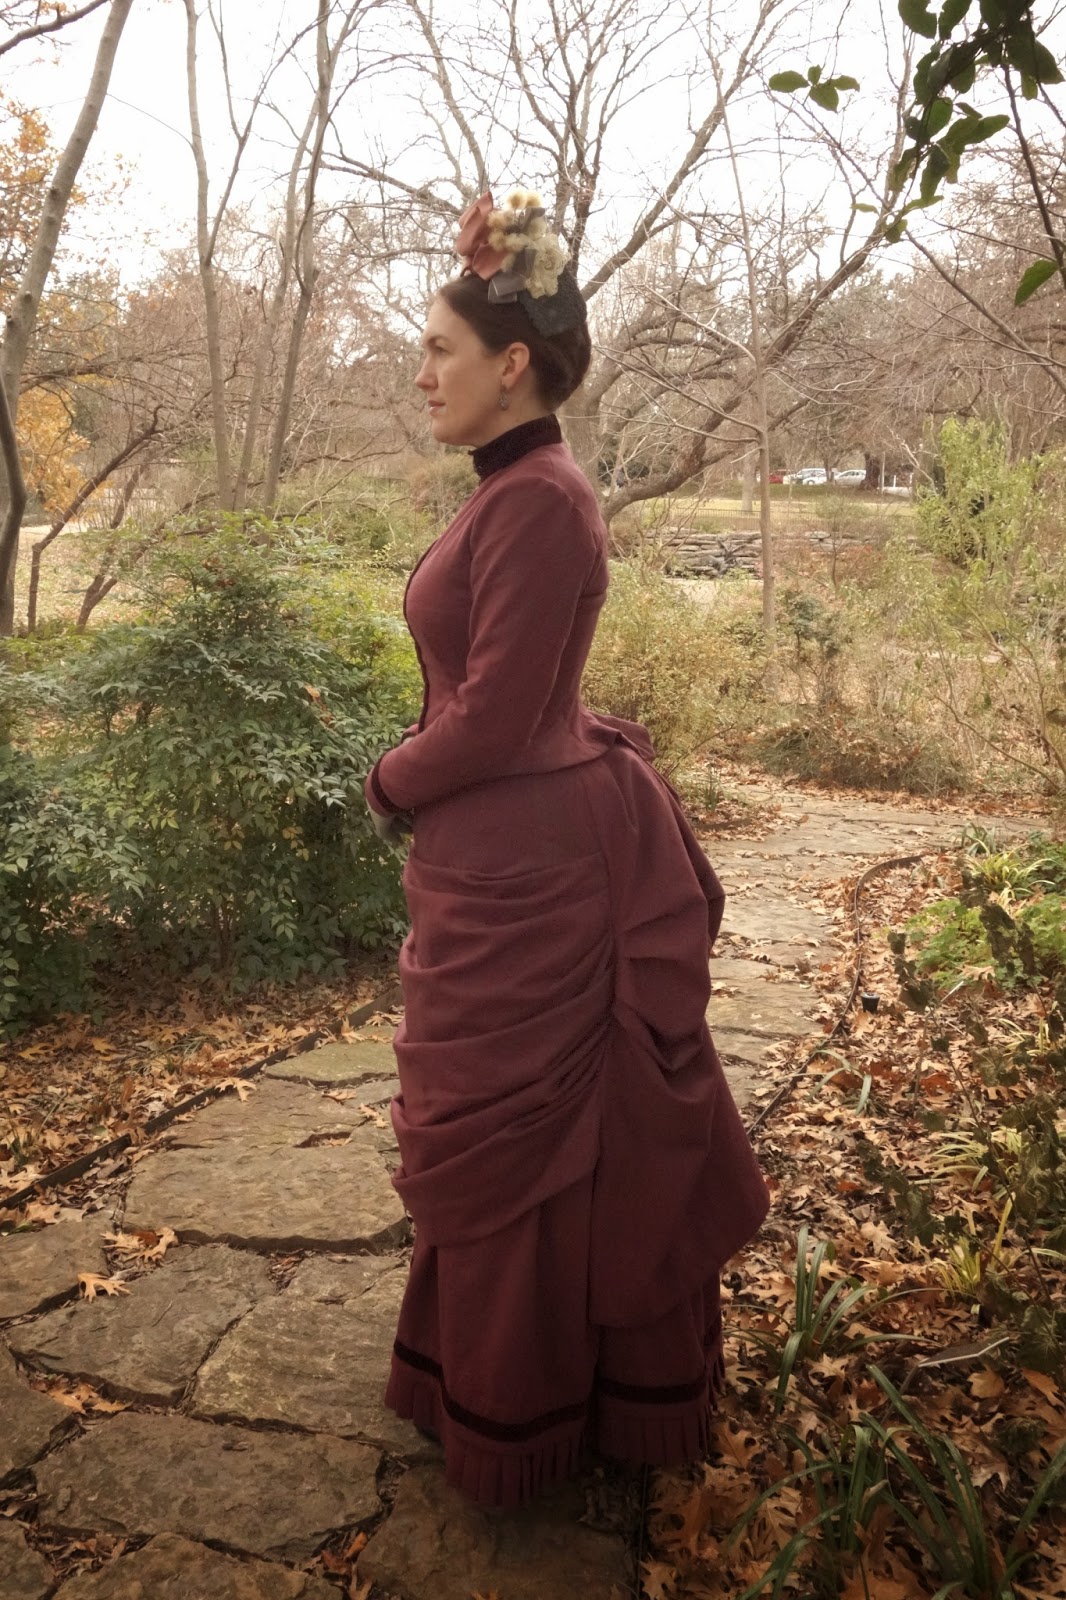
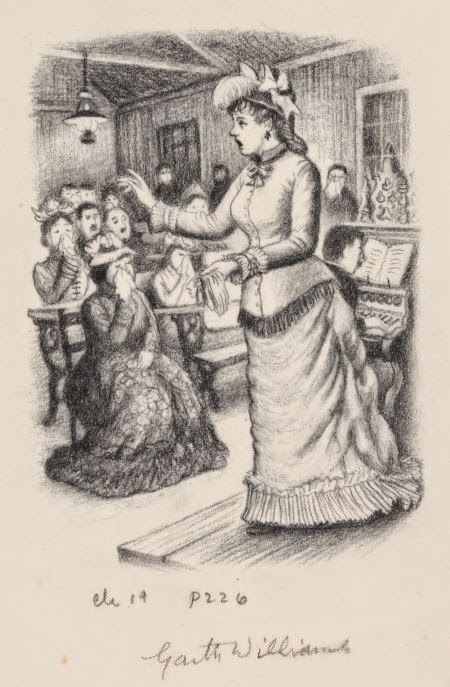
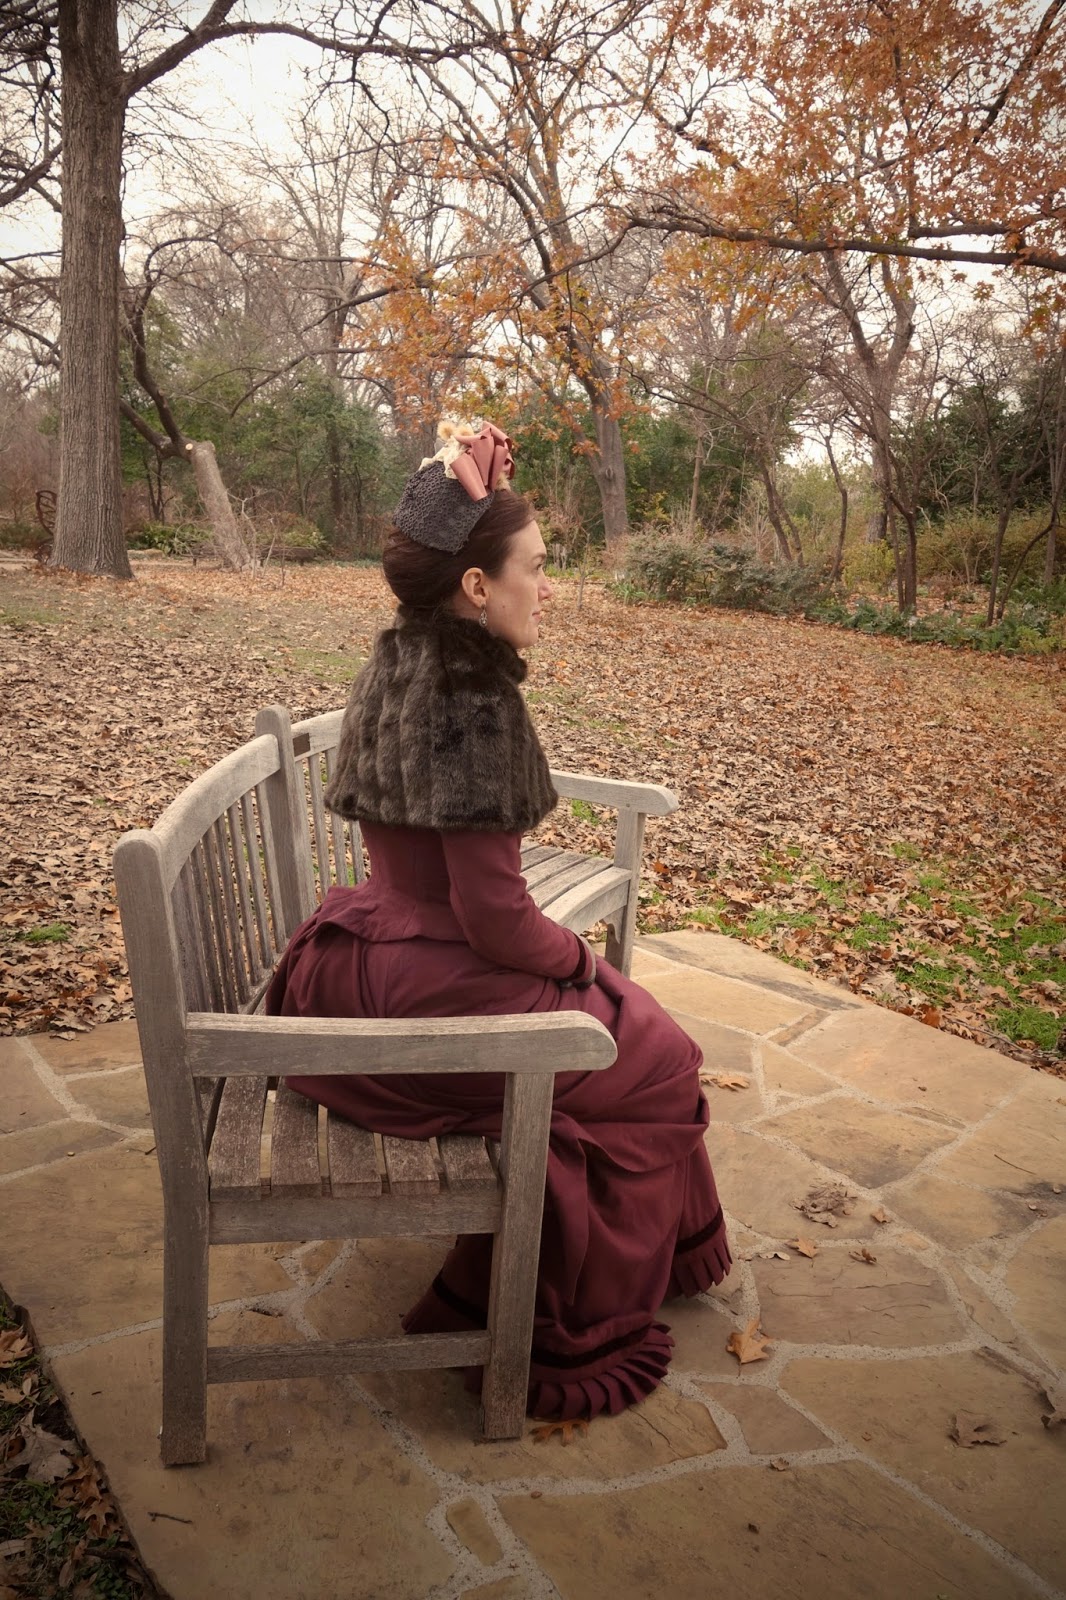
I'm planning on going to Costume College again this summer, and it is never too early to start making dresses!  The theme for this year is "Plucked from the Pages", so a couple of my friends and I are planning on wearing Little House on the Prairie inspired outfits for one of the days while we are there.  I have been obsessed with all things "Little House" for most of my life, so I decided to make a very simple wool natural form gown that would be right at home on the prairie during the early 1880's, which is when the last few books took place.  I remember spending many hours of my childhood (and adulthood!) pouring over the illustrations in those books and re-reading the passages that described their dresses.  Although my outfit isn't meant to copy one specific dress from the book, I was definitely influenced by several of the charming illustrations and descriptions from the series when coming up with my design.

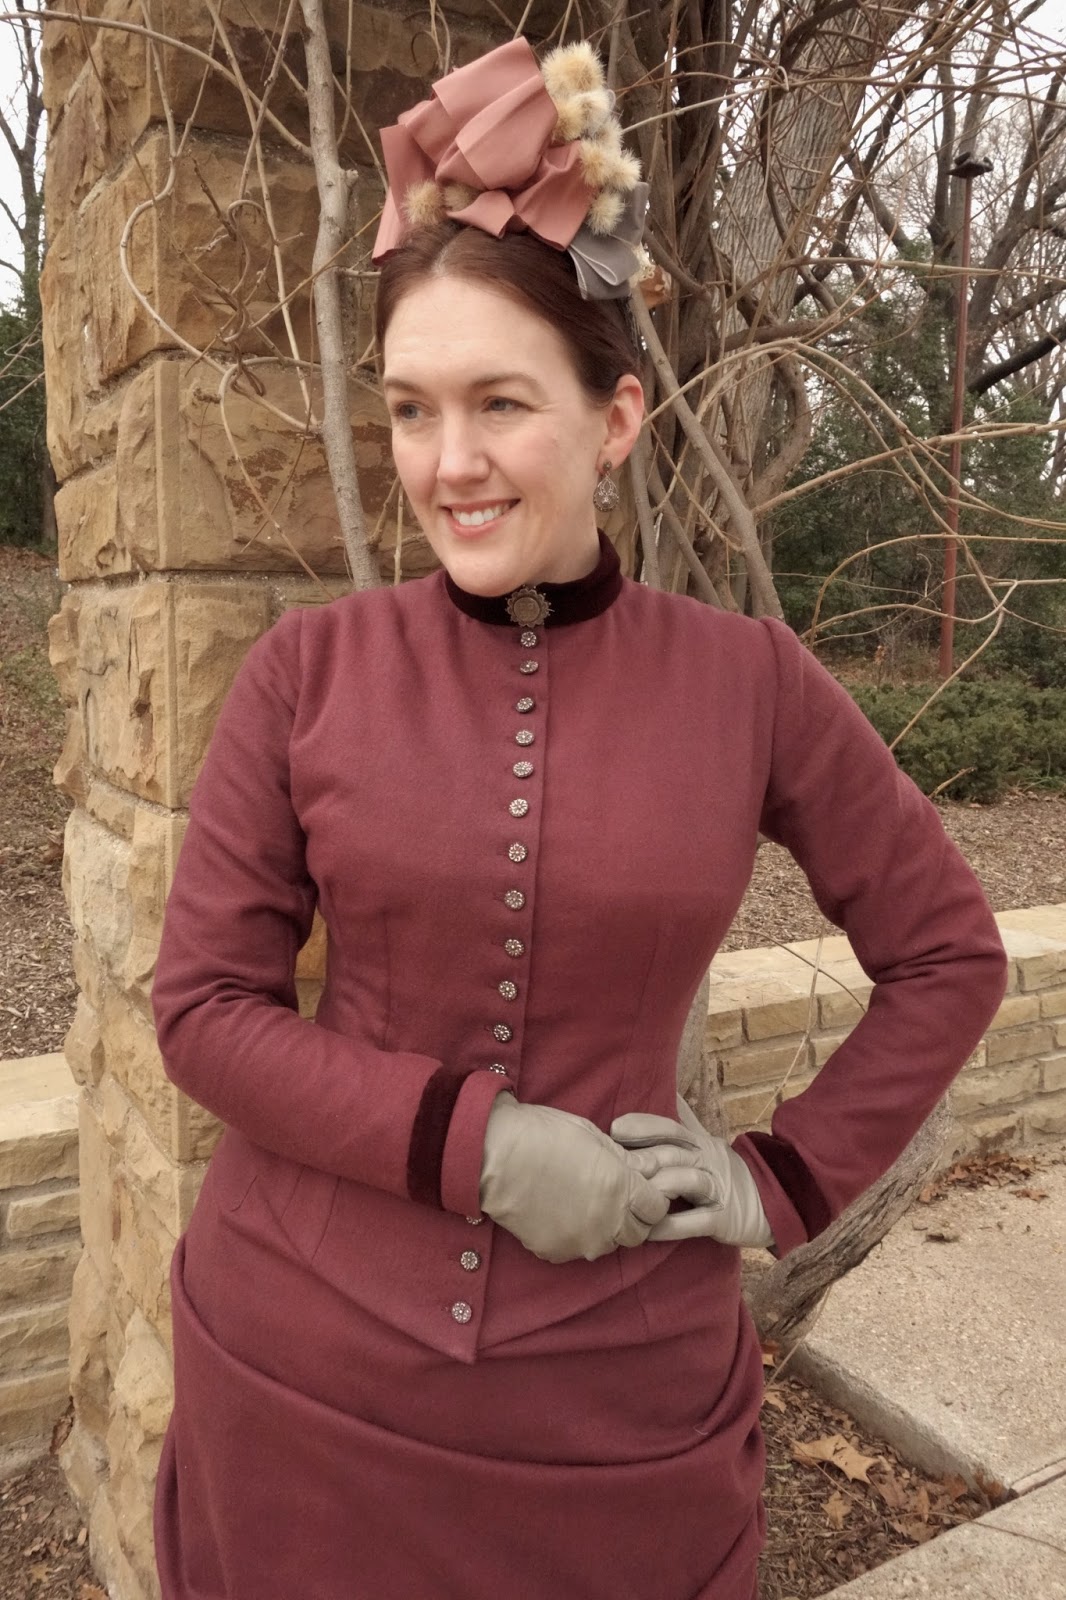
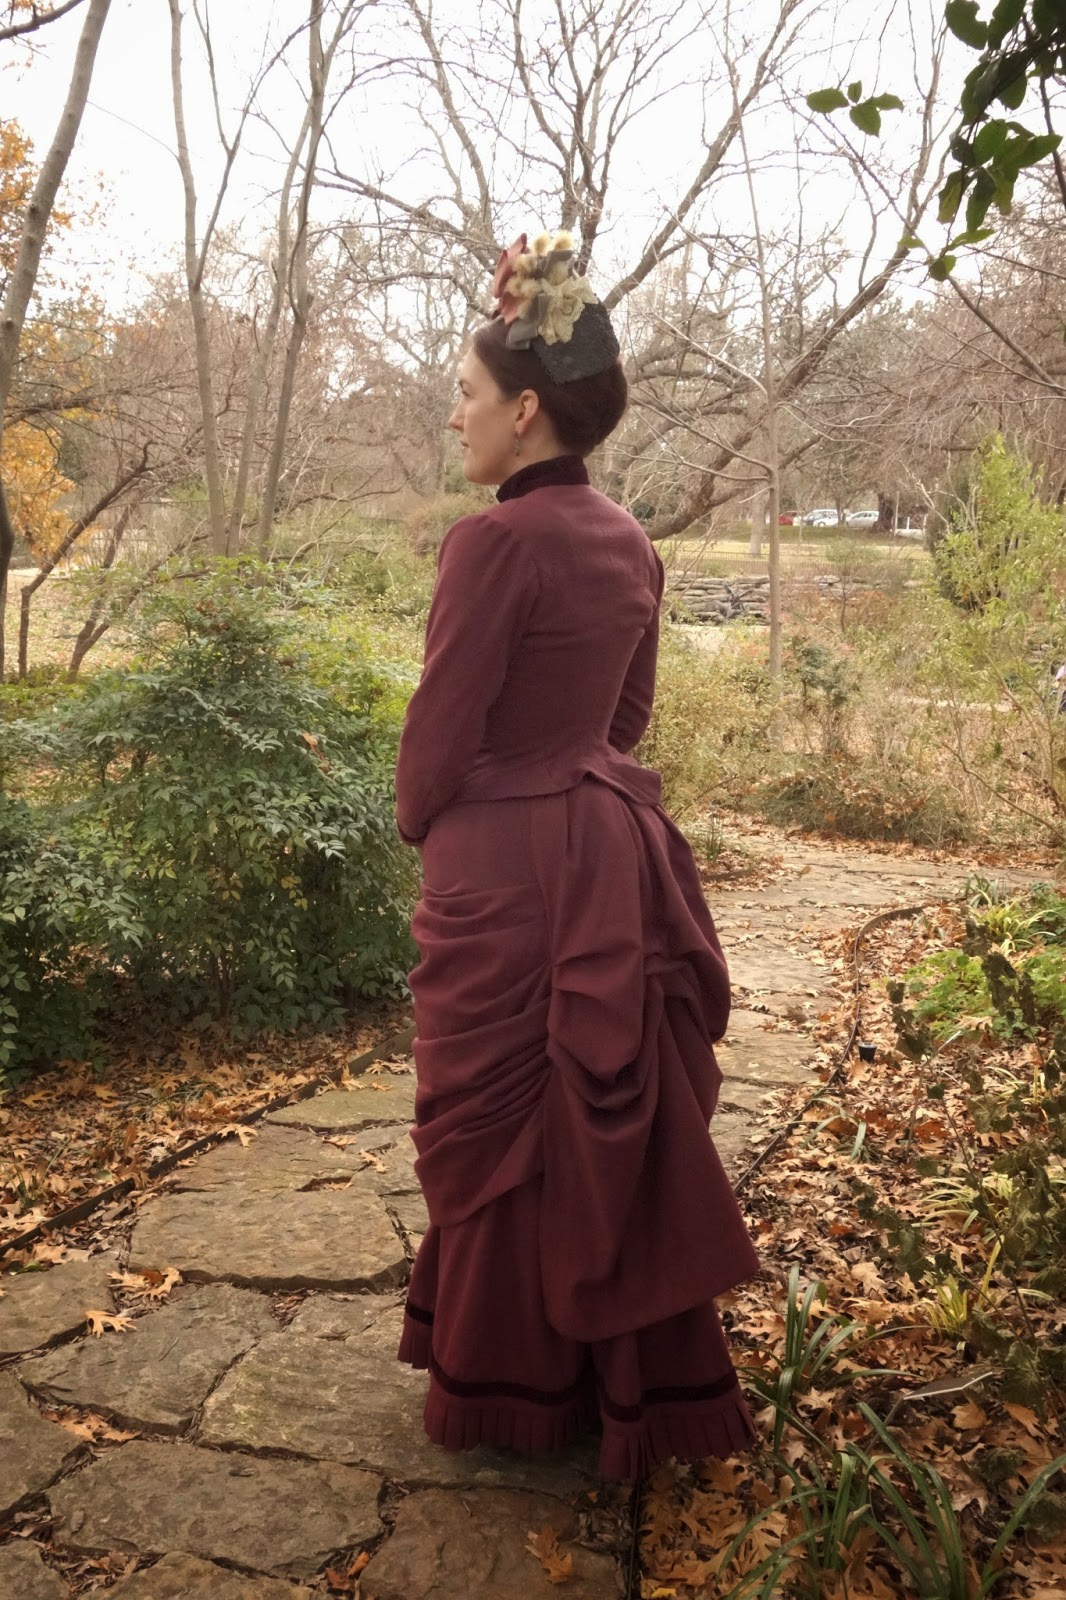
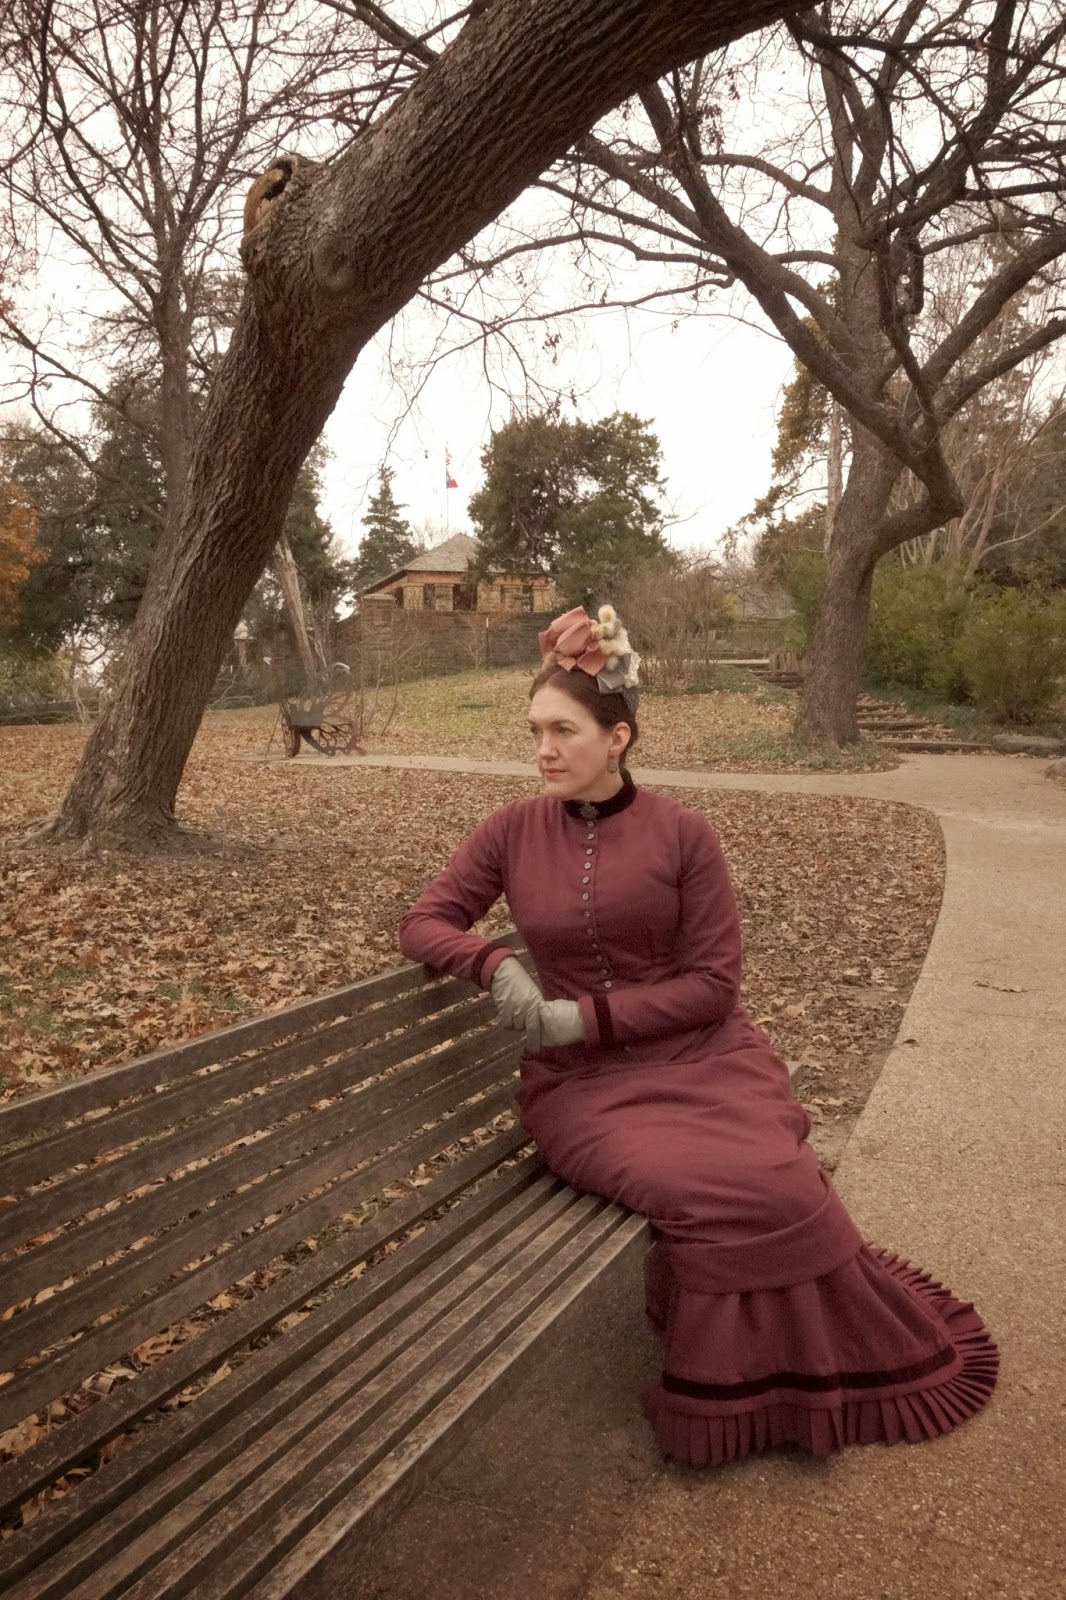
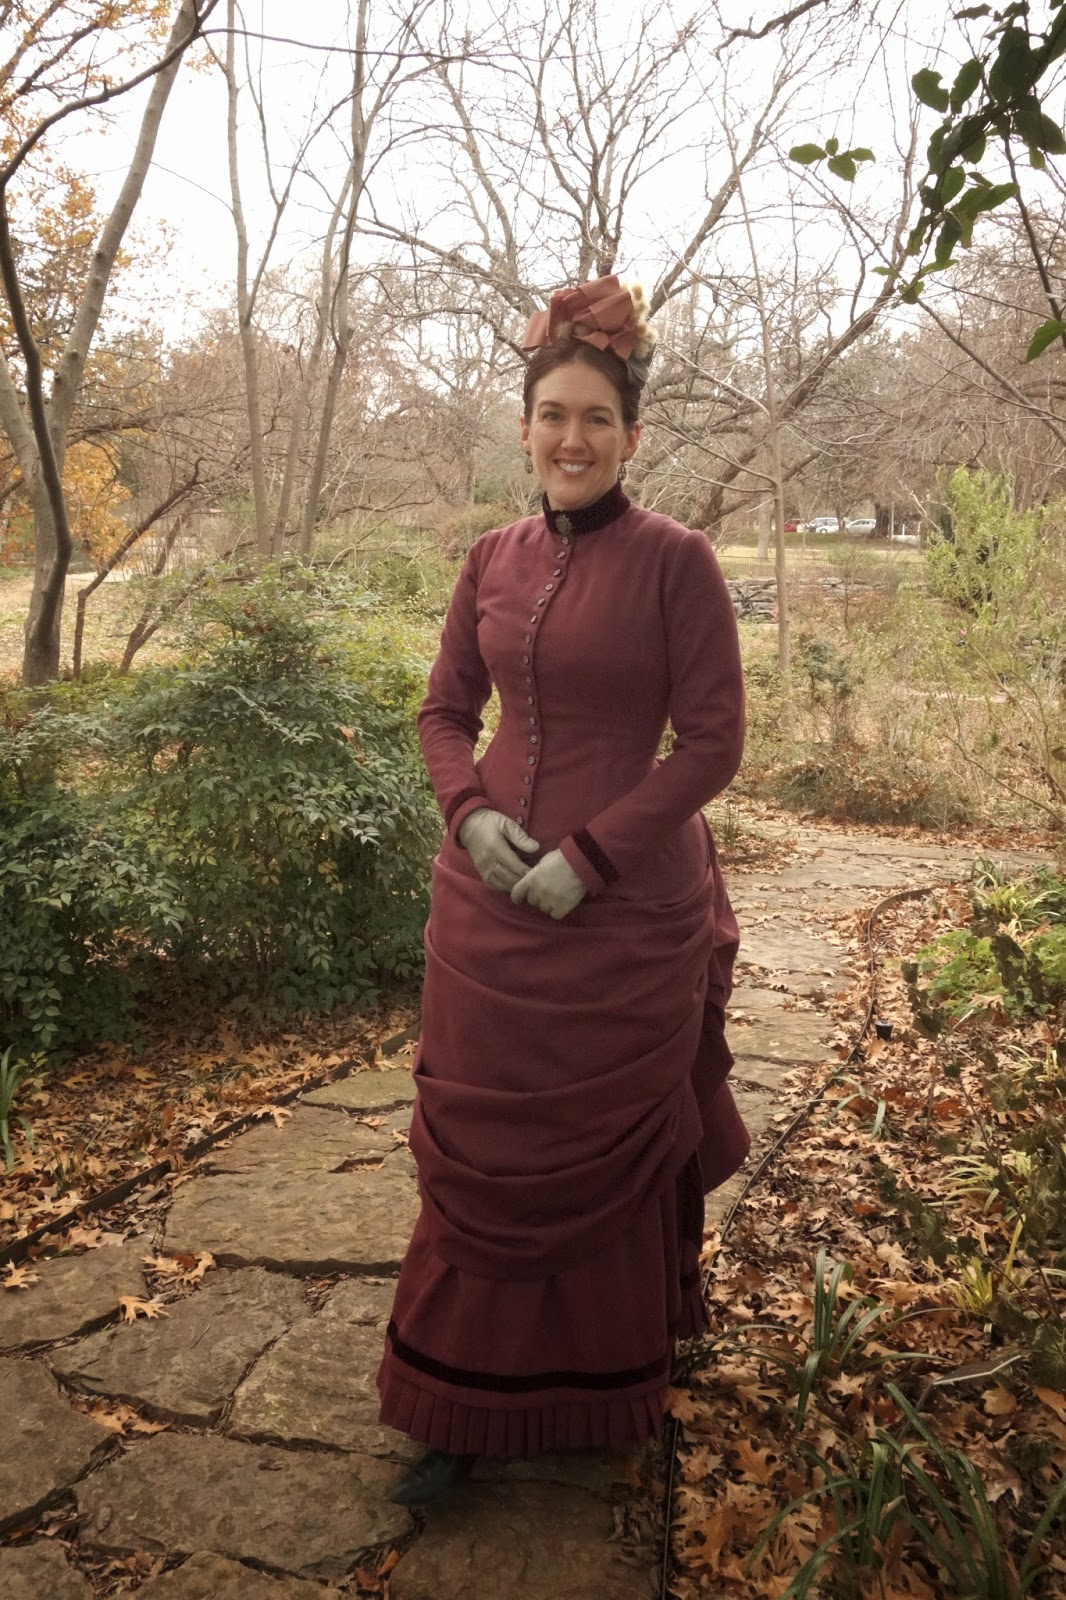
I also wanted to have something new to wear this weekend for an outing to the museum with the DFWCG. The wool that this dress is made from is quite heavy, which makes it warm and cozy for winter. Plus, the narrow skirts and lack of a train made it much more manageable around crowds, which was nice since the museum was packed. Unfortunately, I ran short on time and didn't get to fine-tune my outfit as much as I would have liked, so I'll probably go back and made a few minor adjustments before it gets a second wearing a Costume College. I know these are nit-picky things, but the peplum is a little unruly and refused to lay flat in back, the collar and cuffs need a bit of lace, and the velvet collar seems a bit awkward to my eyes. Is it too wide? Should it be wool? Or maybe I just need to add some ribbons or a lace cravat to dress it up some more? I haven't completely worked a solution just yet, but luckily I have 7 months to mull it over.

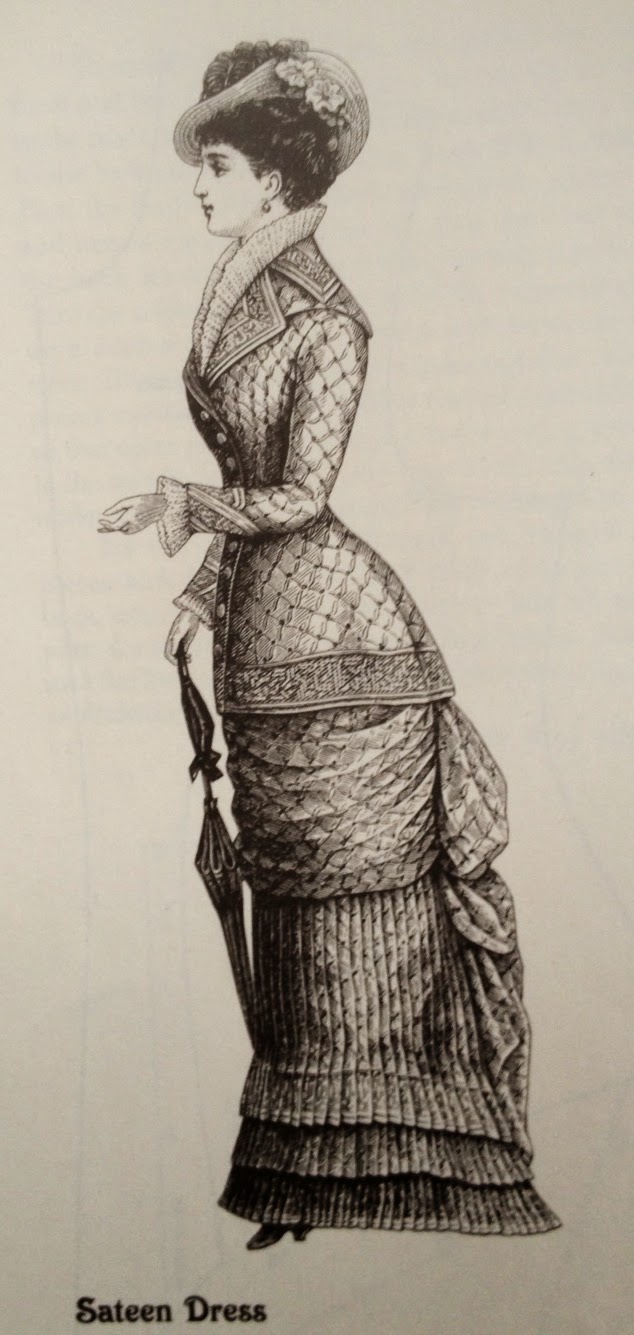
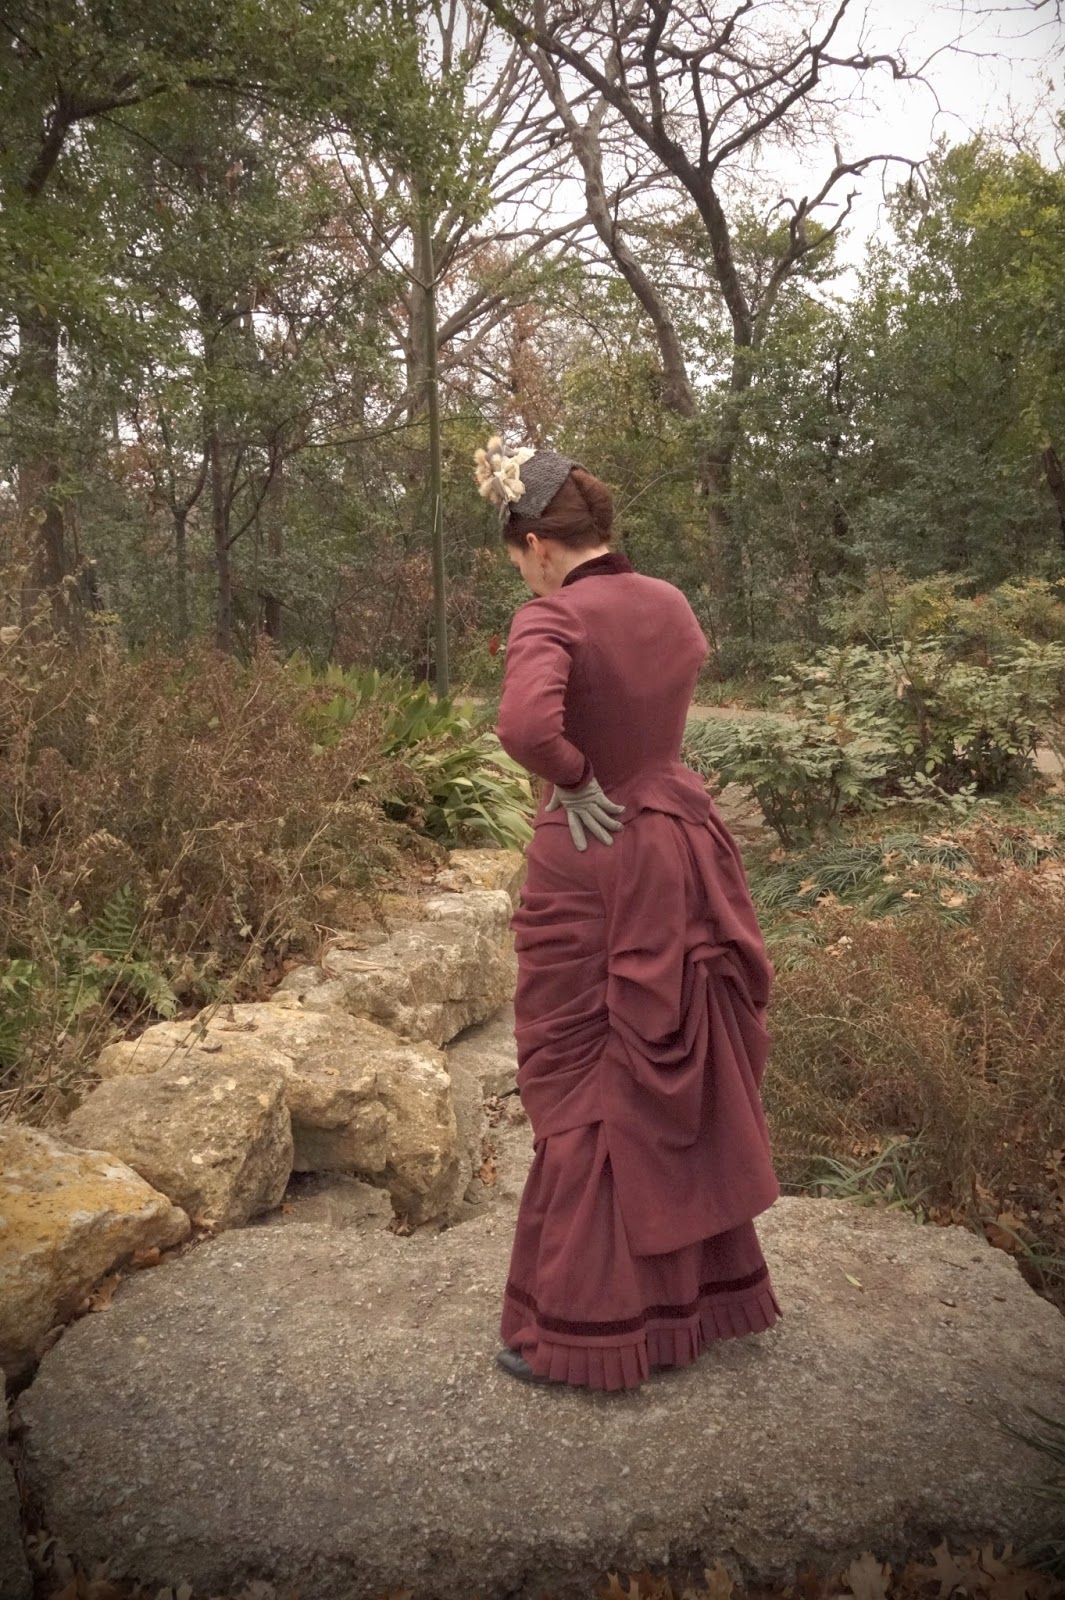
I used the same basic bodice pattern that I used last summer for my plaid dress, and I reused my bonnet from that project too since the colors looked so pretty with the maroon.  The overkskirt pattern was drafted from the 1880 "sateen dress" diagram in Fashions of the Gilded Age Vol 1.  I discovered that the front of the overskirt was a lot longer in real life than the illustration shows, and I had to add in extra pleats to make it match up with the back panel correctly. But that's okay because I like the look of the longer skirt just as well. I also used two straps of wide elastic to keep the overskirt pulled back tightly, and that seemed to help the draping of the front a lot while still giving me freedom to move.

My favorite part of the dress is the set of antique Victorian buttons on the bodice, which are nothing exciting in photos, but I think they are quite pretty in real life. I love being able to use old buttons on a new dress. It's such a fun finishing touch.


I also got to wear my fur capelet again, which made me incredibly happy. It's so warm in Texas that it's always a treat when I can find an excuse to wear coats and capes!


As usual, here are some of my favorite photos, and there are a few more additional pics on flickr.


Sunday, December 14, 2014

1869 dress for Candlelight


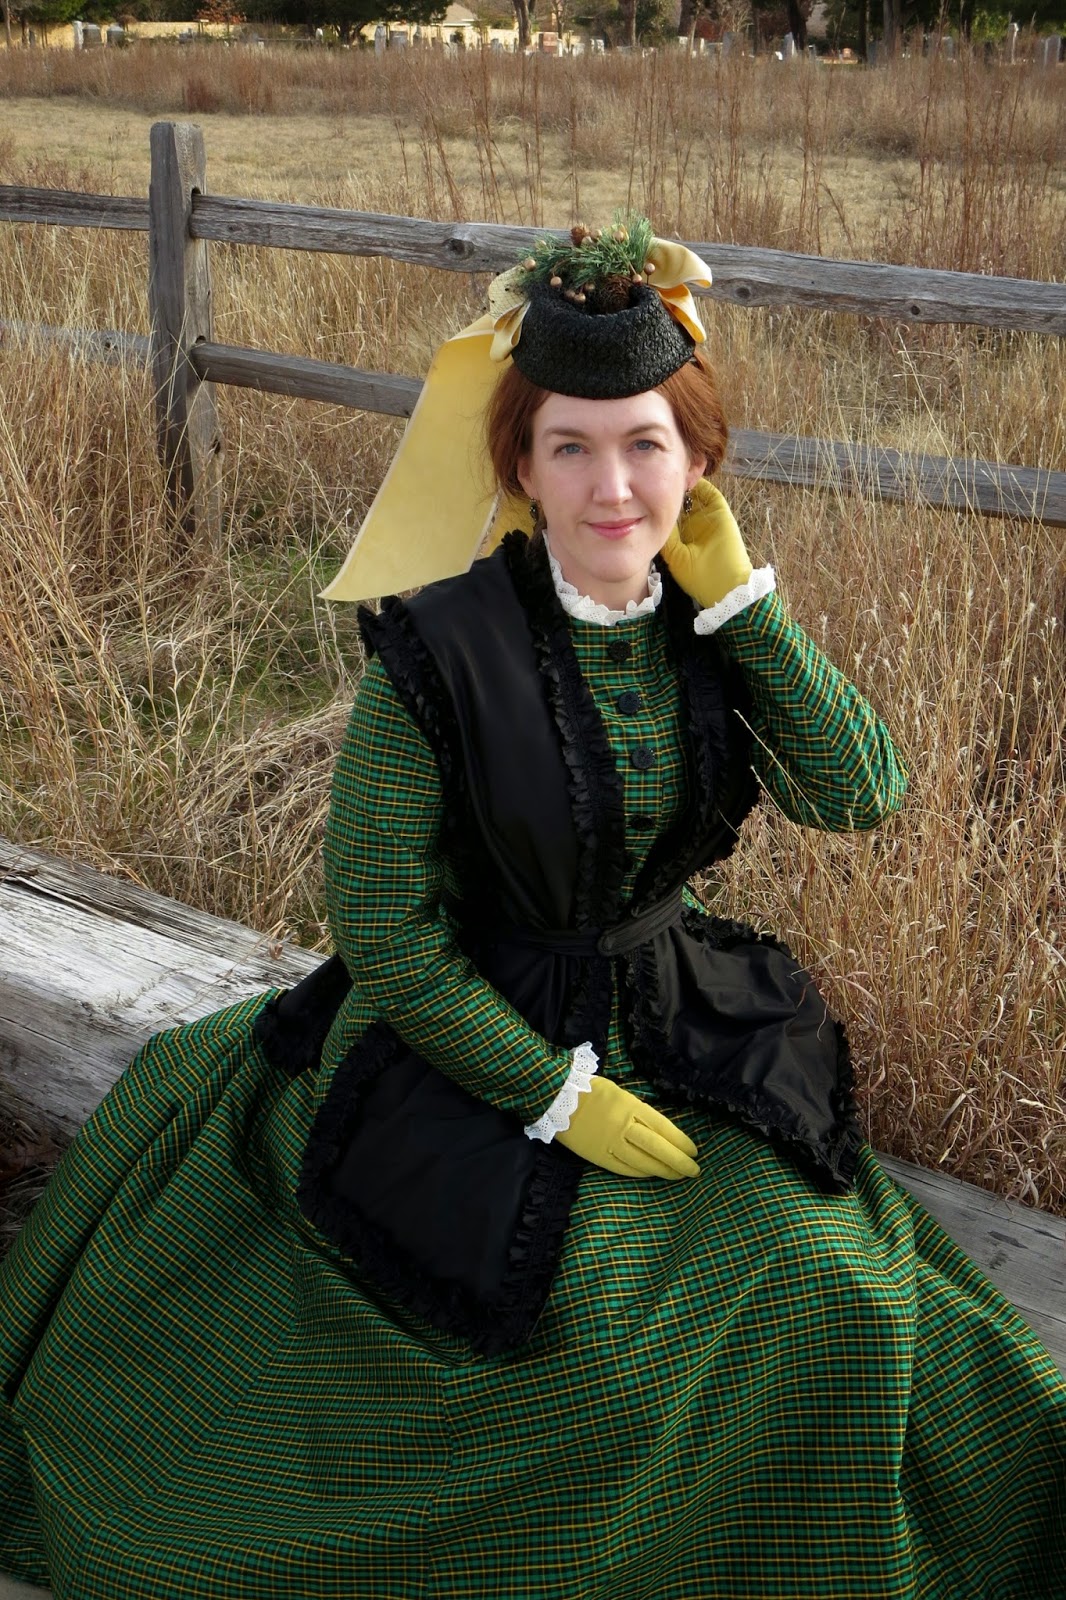
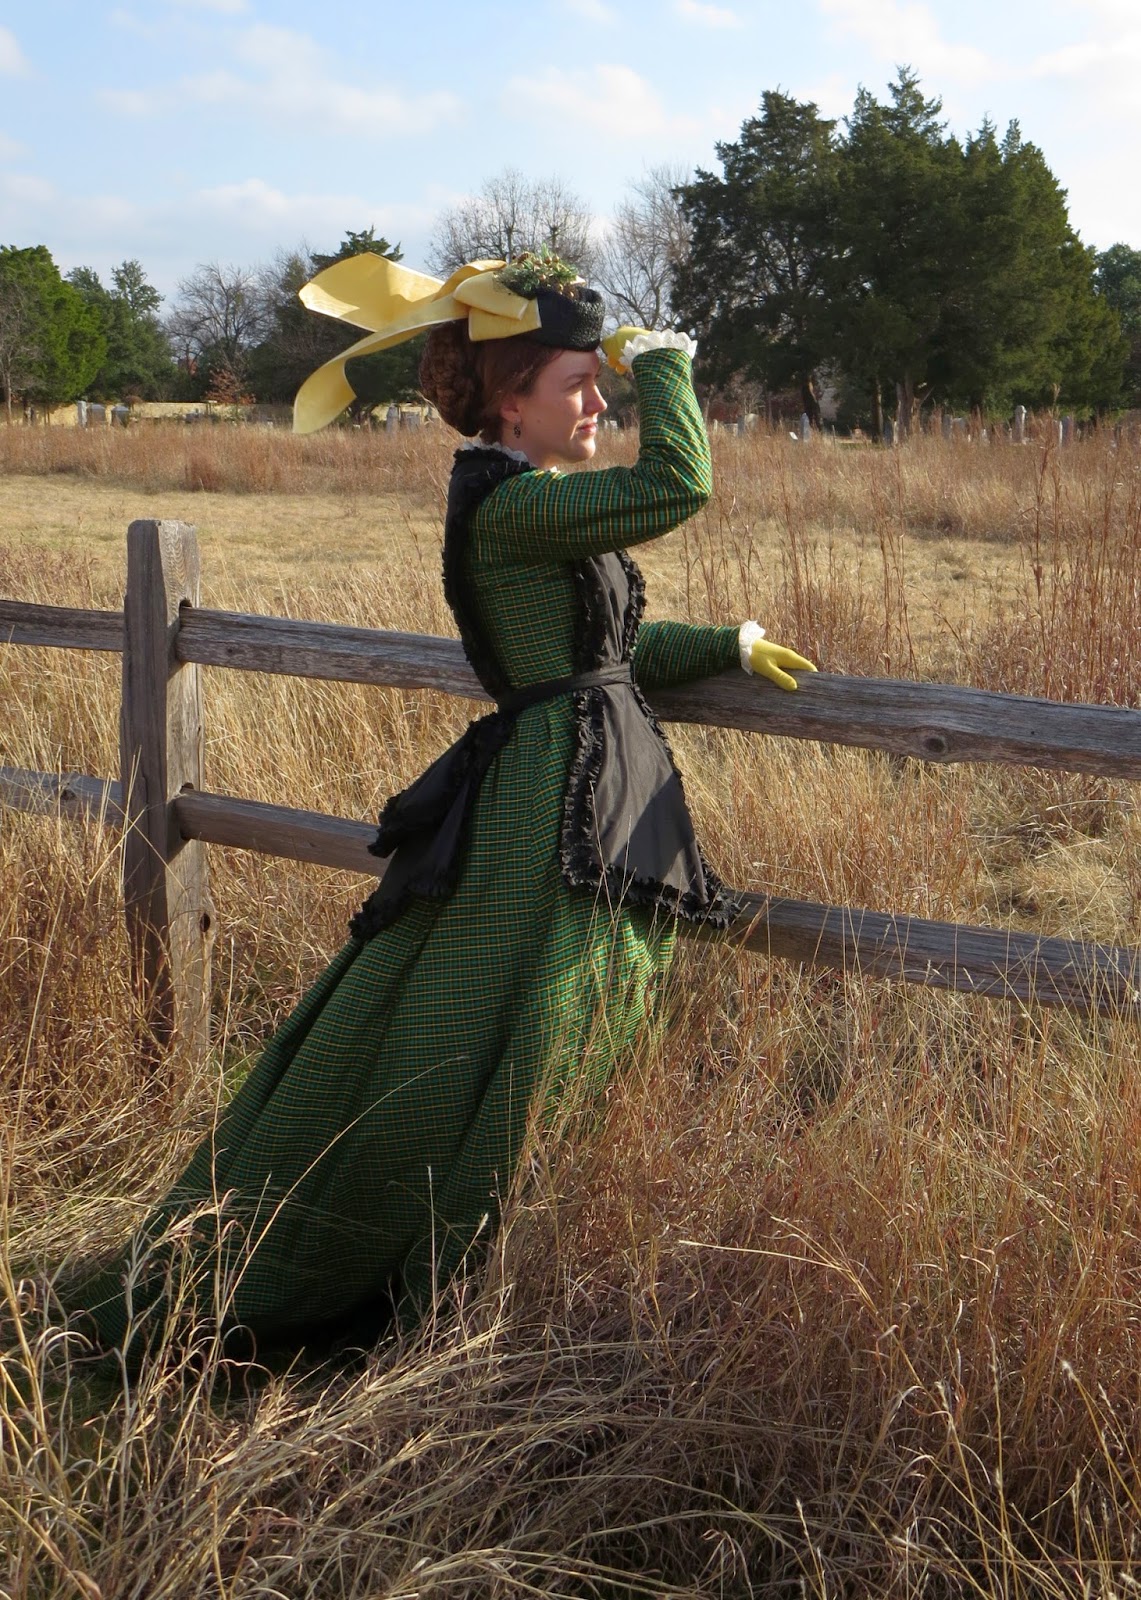
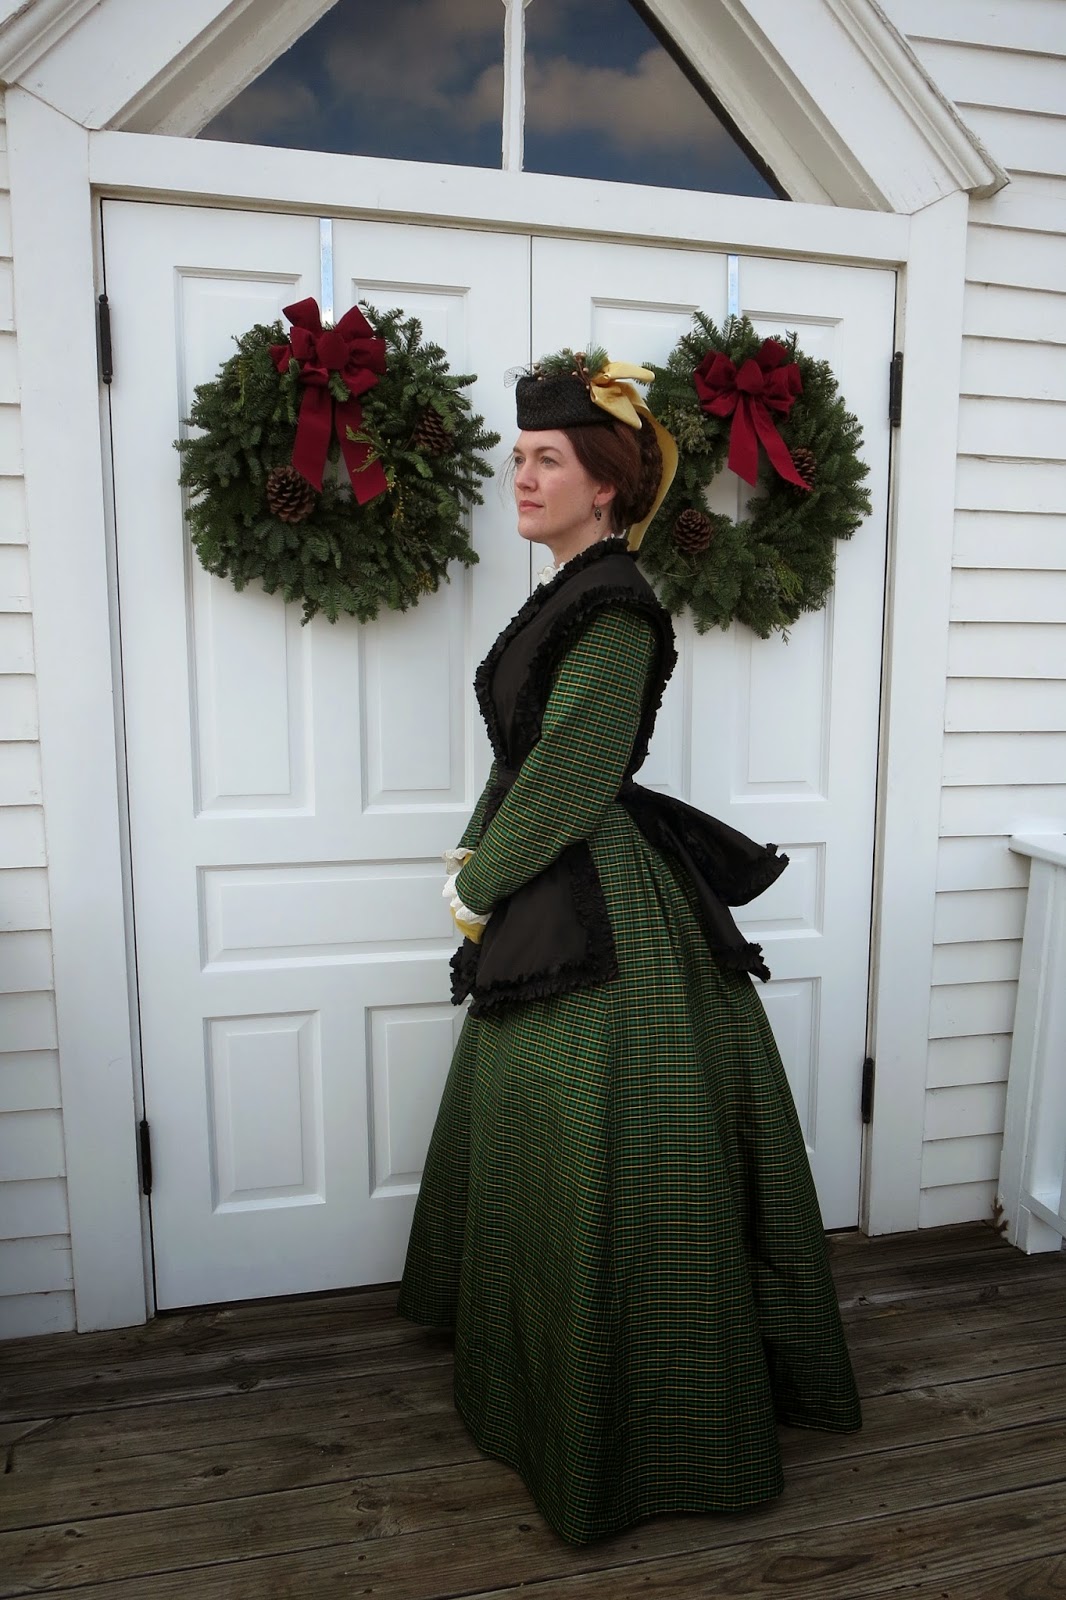
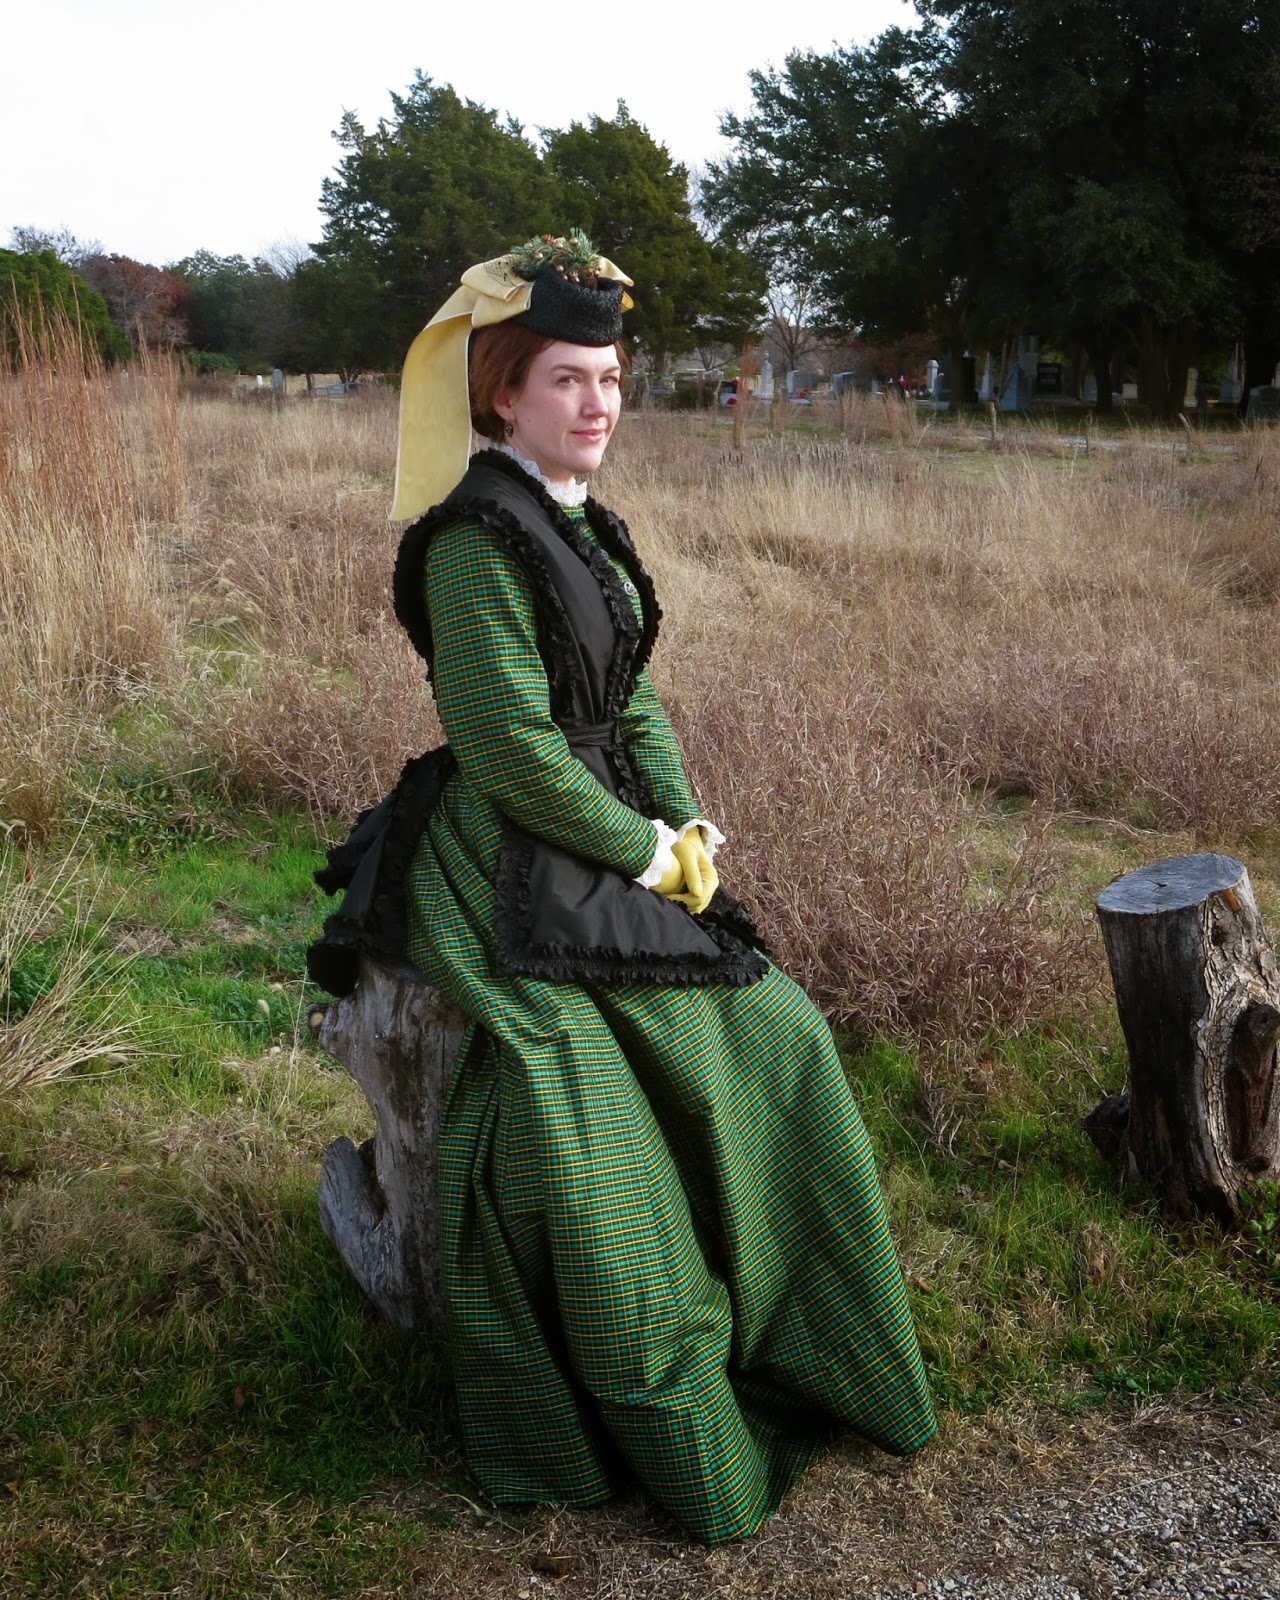
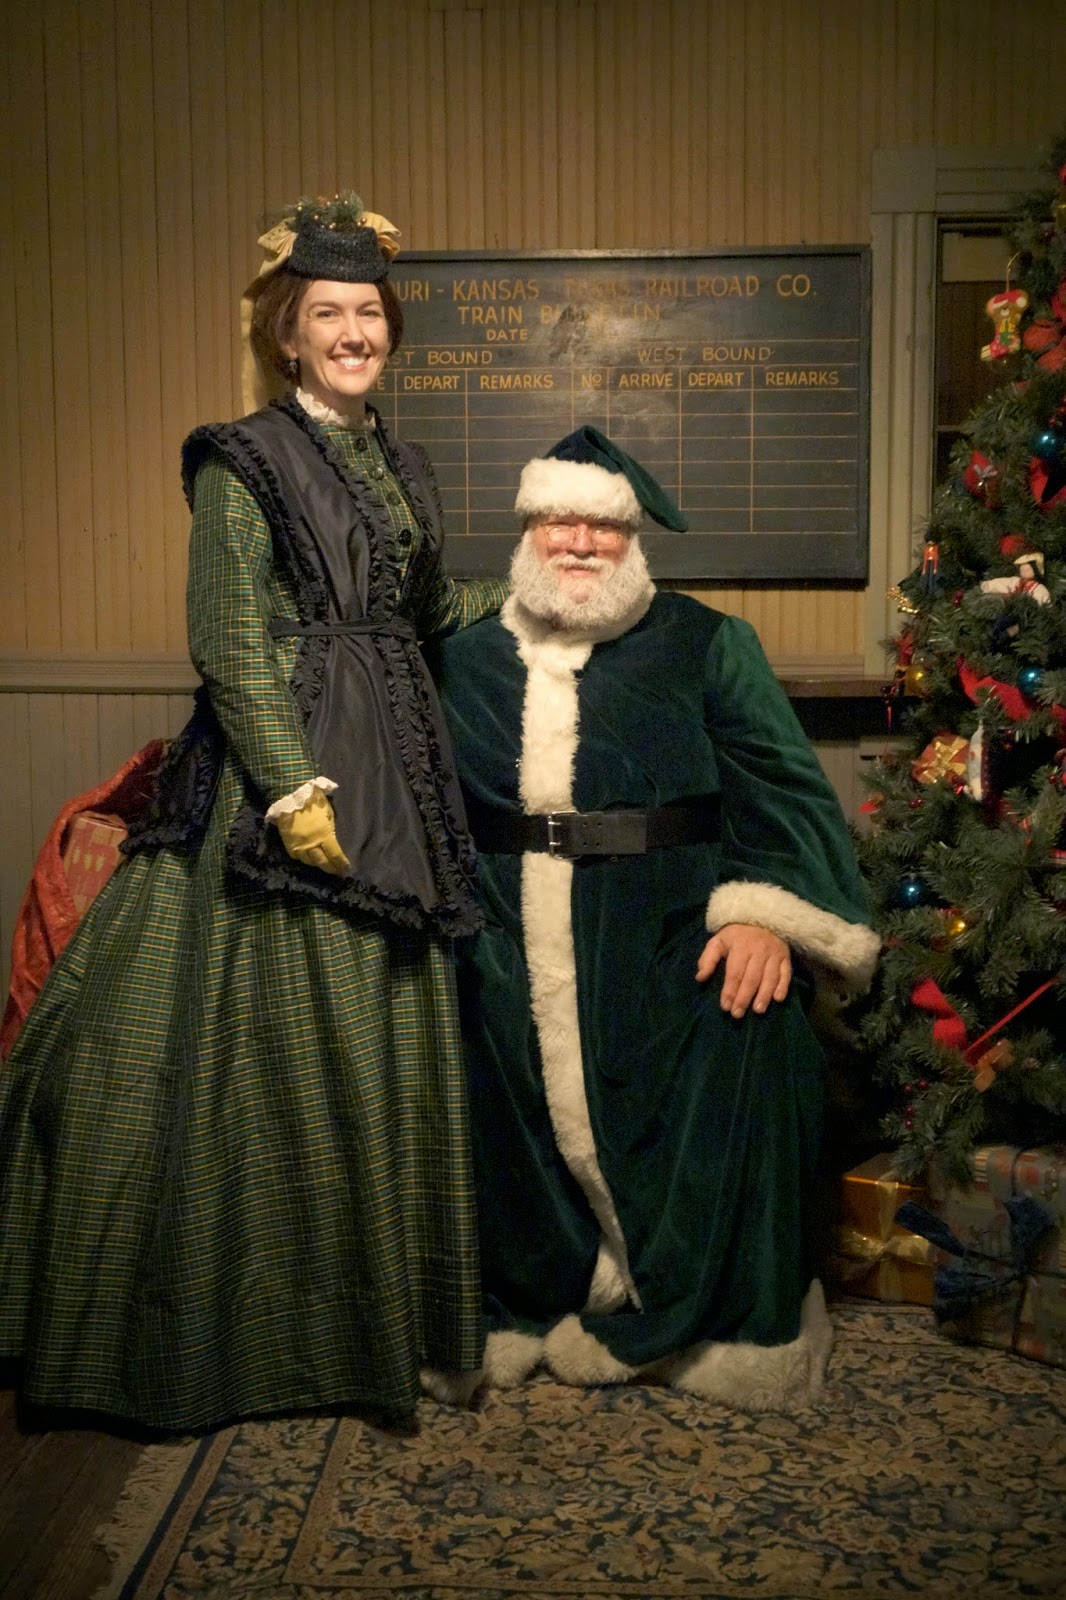
I got a bee in my bonnet last weekend and decided that I couldn't bear to wear my same old bustle dress to Candlelight two years in a row, so I made a new 1869 outfit for the occasion. Luckily, this style of dress goes together quite easily, and I was able to pull all the supplies that I needed from my stash. All I had to buy this week was a $1 sprig of greenery for my hat. Now that's my kind of Christmas miracle!

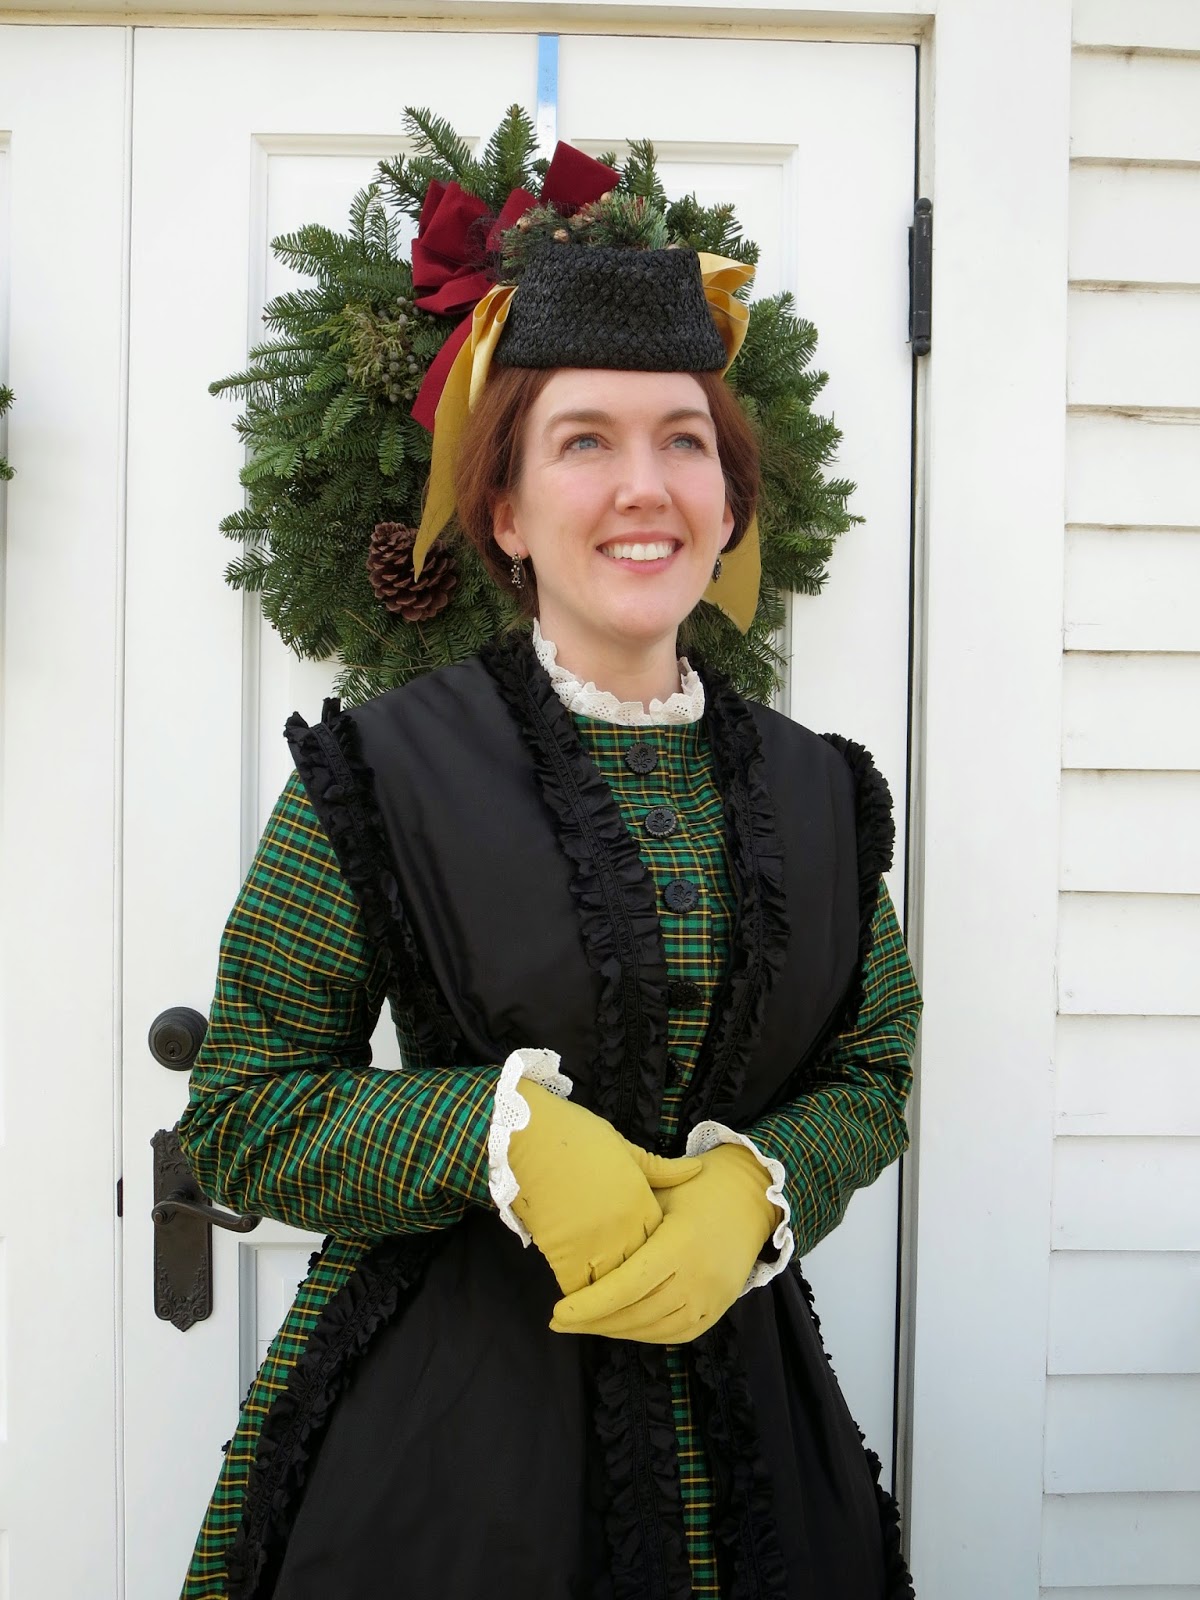
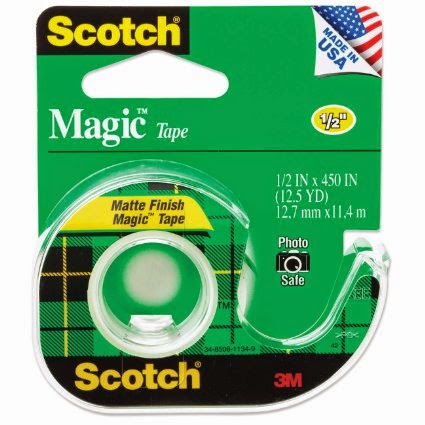
The gown is made with green plaid silk that I picked up at a Fabrique sale earlier in the year for $16. No, not $16 per yard - but $16 for the dress length. Best. Deal. Ever! I had no idea what I would make with it, and I usually try to avoid adding things to my stash without a plan, but this was just too good of a deal to pass up. My students pointed out that the fabric looks like a roll of Scotch Tape, and wow - yeah it does! Maybe I can convince Scotch to sponsor my dress if I sew a big product patch on my back like a race car driver. But even though I do look a bit tape-ish, I thought the green was quite festive, and I matched the event's Victorian Santa so well.


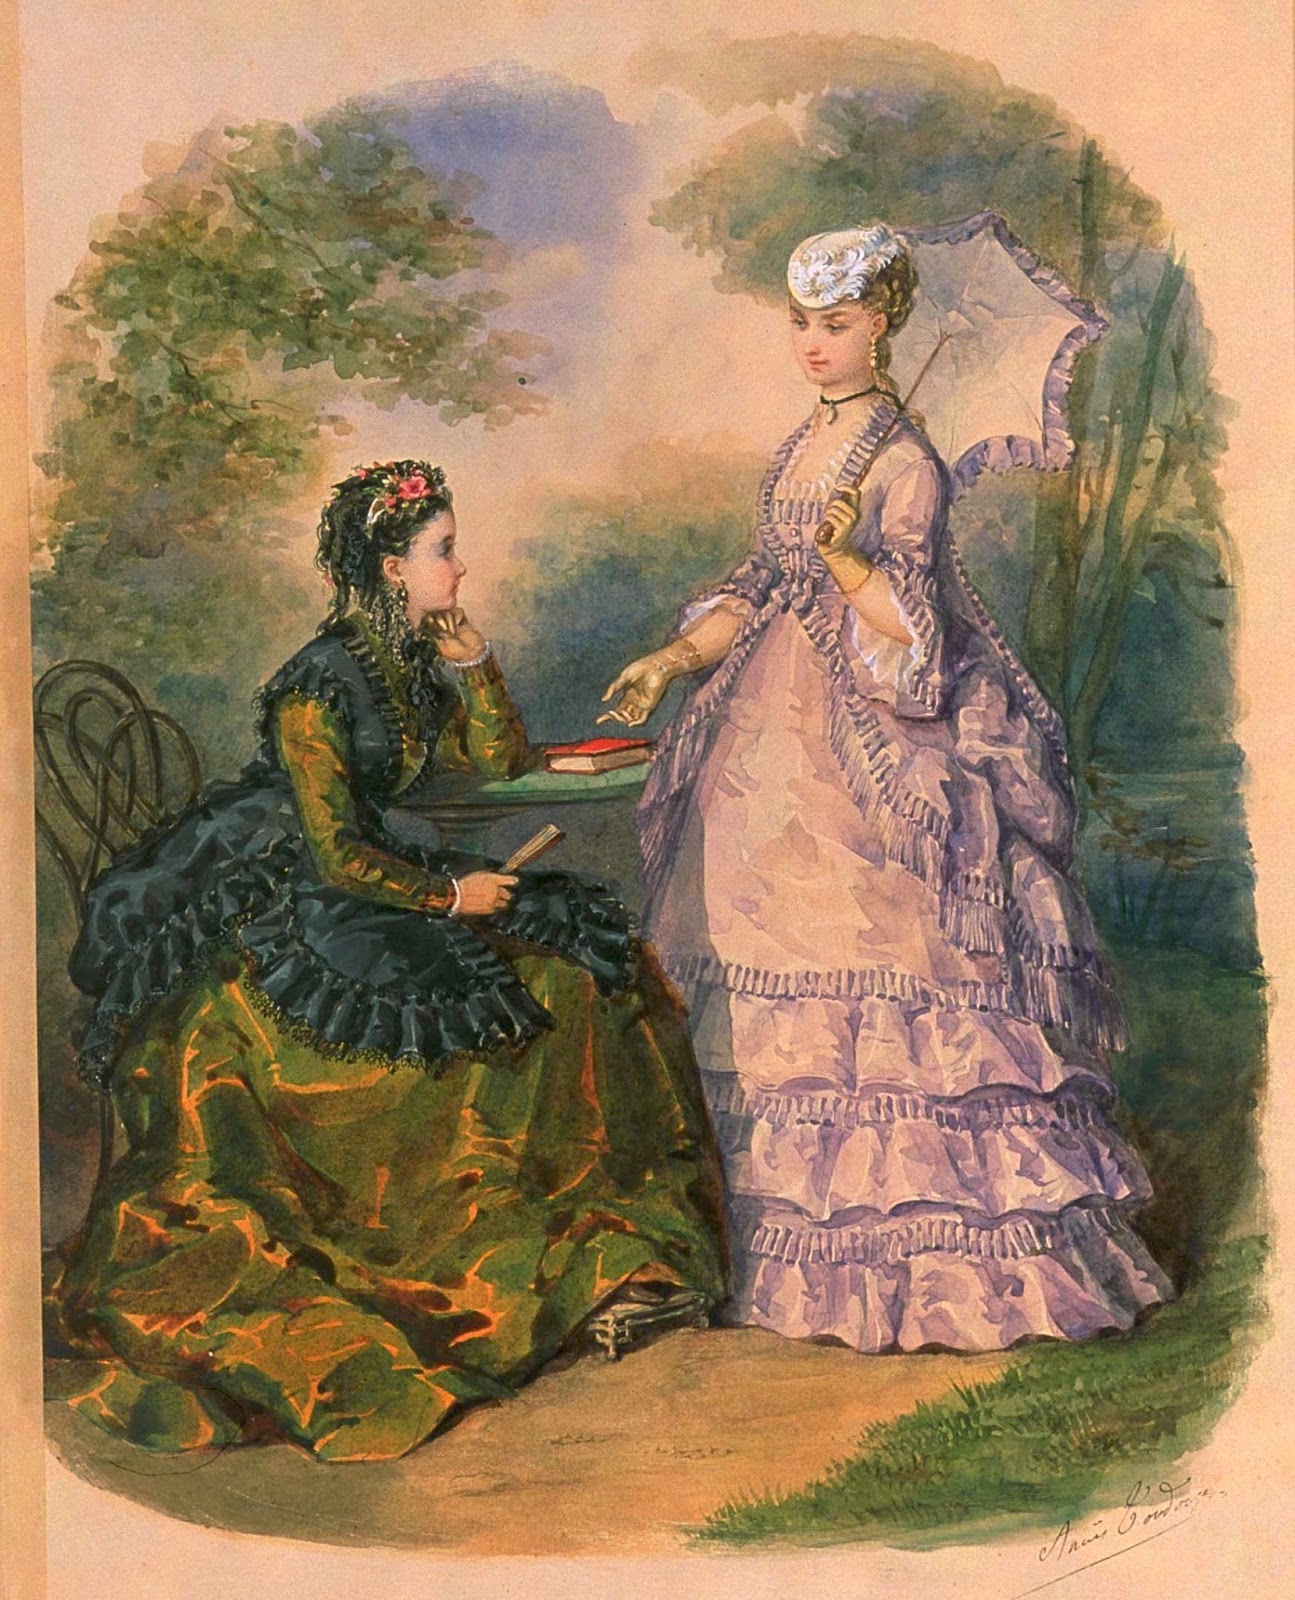
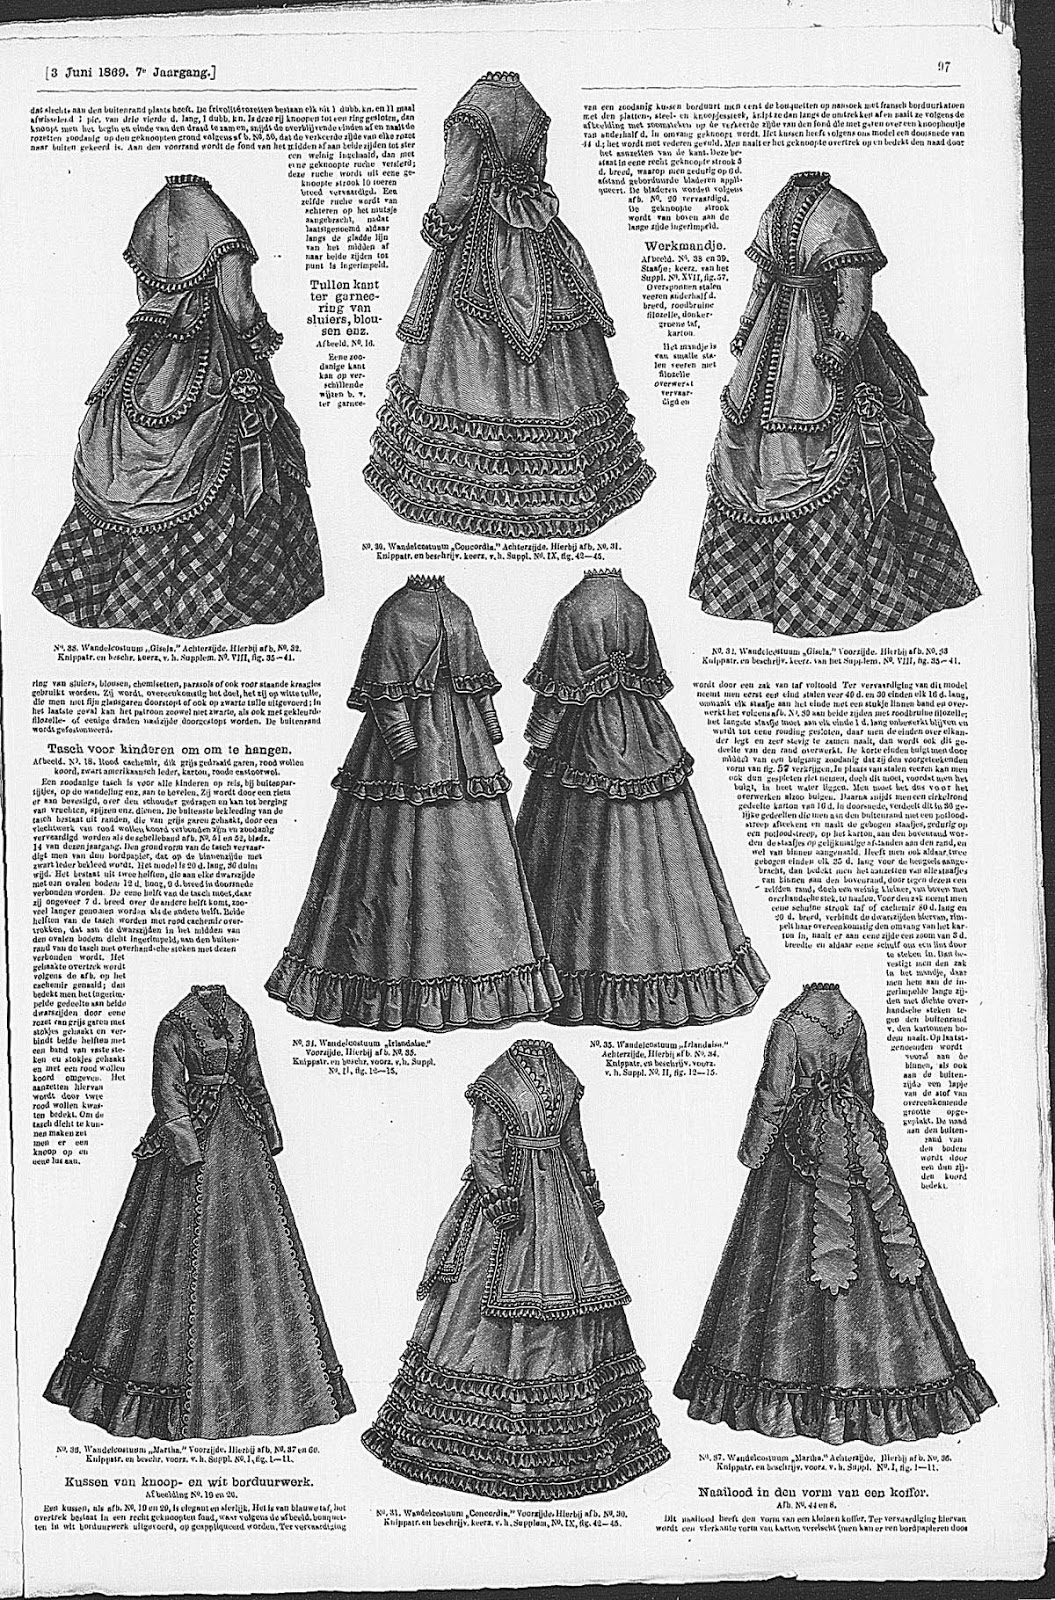
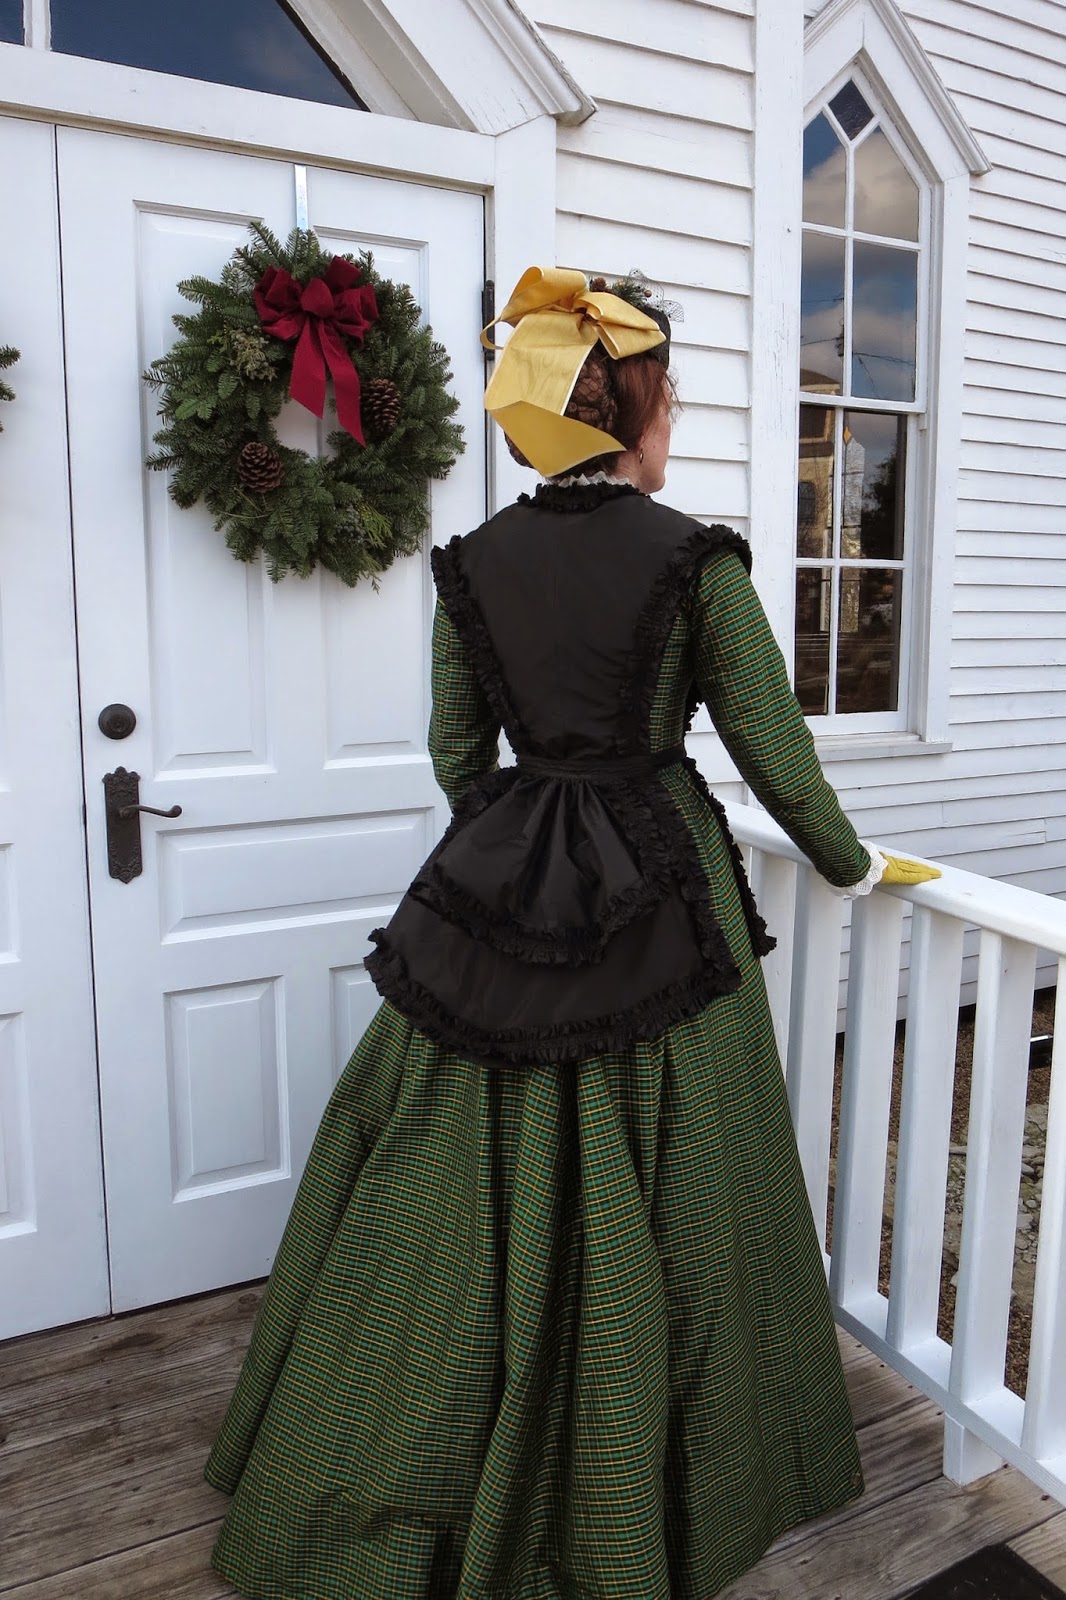
To make the dress, I used a combination of patterns from Patterns of Fashion and Theatrical Costumes for Stage and Screen. It's a pretty simple dress on its own, and the only embellishment is a set of antique glass buttons with flowers cut into them. At first, I thought about adding fringe or rows of trim on the dress, but then I fell in love with a 1869 fashion plate from La Mode Illustrée showing a similarly austere gown worn with a black tunic over it. I poked around and found several period patterns for this type of garment, including one in the book 60 Civil War-Era Fashion Patterns that is referred to as a "pannier mantilla". I loved the description, which states: "a more useful article of dress is not likely to appear this season, and will more than repay for the slight trouble of making it." How charming!


I also found a similar garment and pattern in an 1869 copy of de Gracieusse that is archived on the Het Geheugen van Nederland archive (search for "gracieuse" plus the year that you want to find the magazines). This mantilla, which you can see in the middle of the top and bottom row of the illustration above, is a little more fitted and has an open V-neckline, so I used the body from this pattern, and the pannier flounce from the other. I always love detangling the pattern sheets in these old magazines, and somewhere hidden in this jumble you can find the pieces for my mantilla.


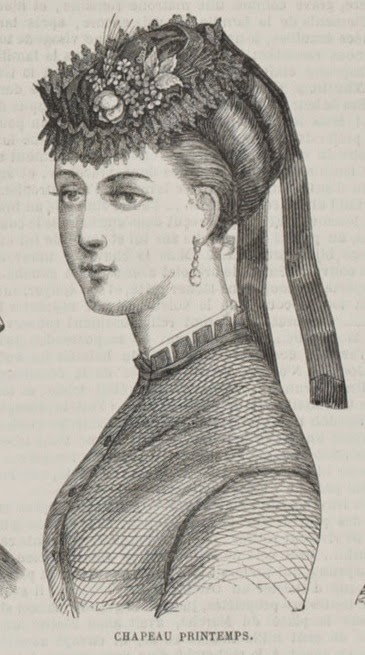
To finish the outfit, I dyed another pair of vintage gloves with Rit to match the yellow in my dress. I also took a straw pillbox hat from the 1960's and tacked the sides of the top together to make it look more like an early bustle tilt hat. I added a vintage moire ribbon to the back and a bit of Christmas greenery to the top, and that's it. The ribbons liked to flap around in the wind and stand straight up or wrap around my face and look ridiculous most of the time. I probably should have gone with narrower ribbon like the hat shown in this 1869 fashion plate, but the color matched my dress so well that I couldn't resist. Oh well. Go big or go home, right?  :)

On the way to the event, I stopped by my favorite Victorian chapel and took a few pictures. Here are some of my favorites, and as usual, there are more on flickr, plus a few others of our group at the Candlelight event.


Tuesday, July 29, 2014

the Grey Lady


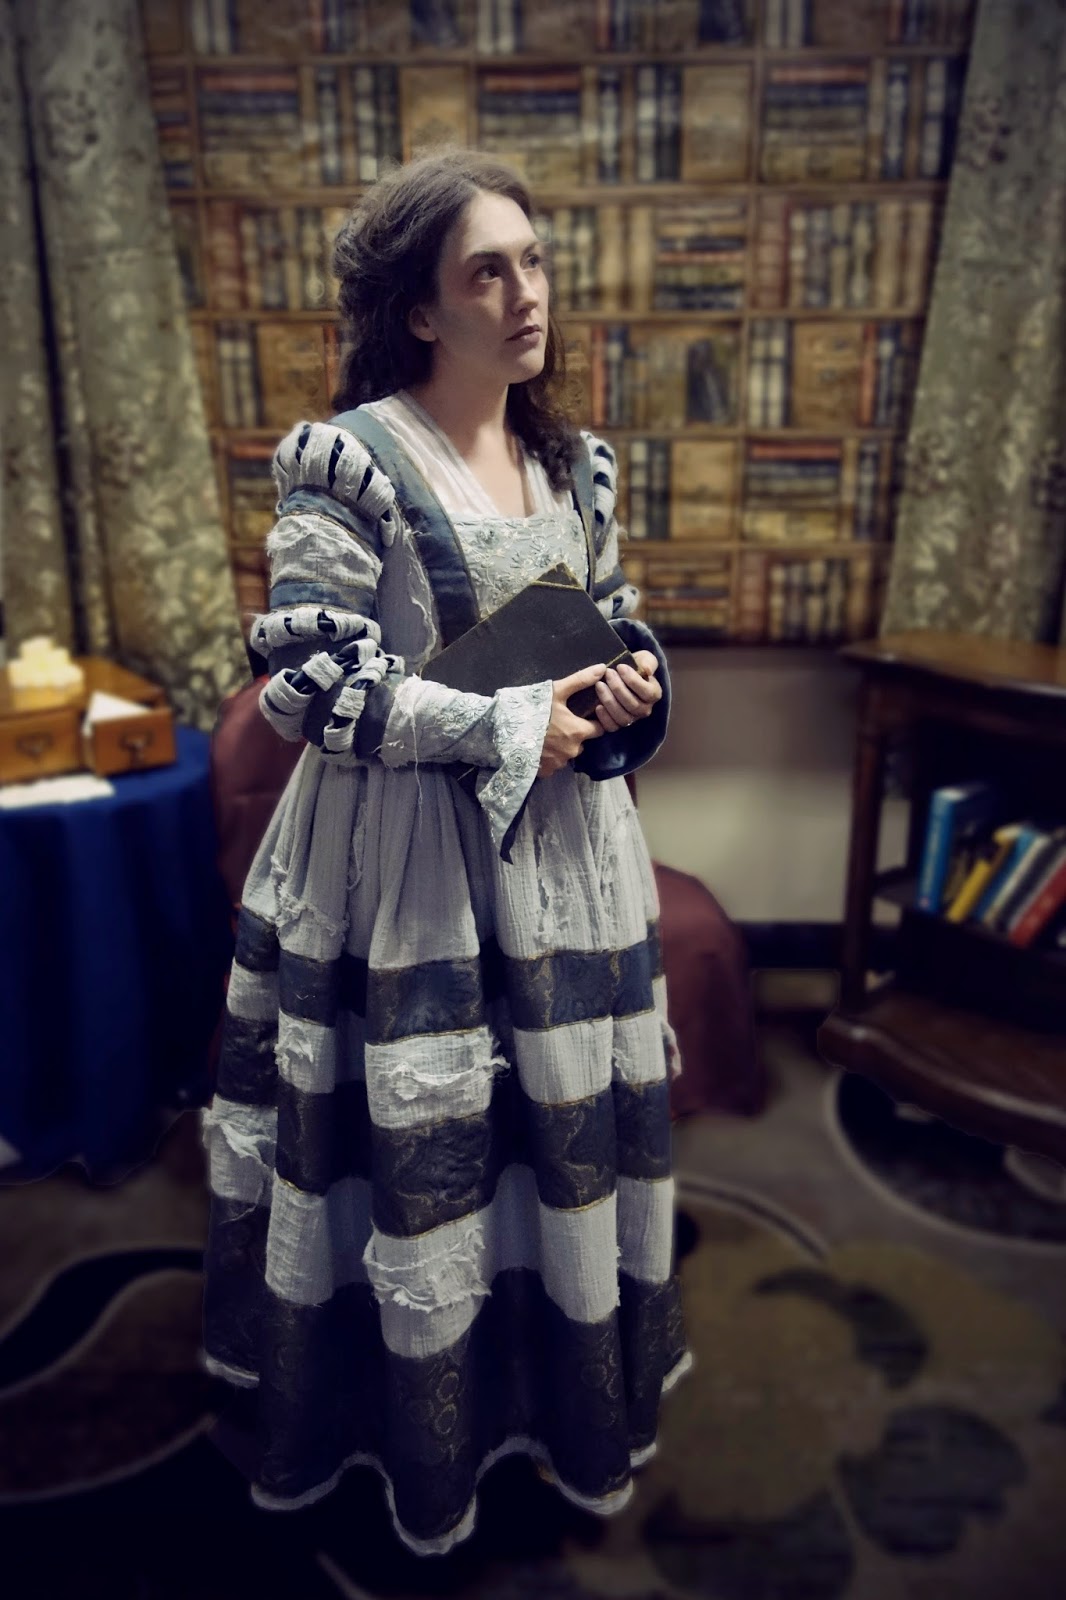
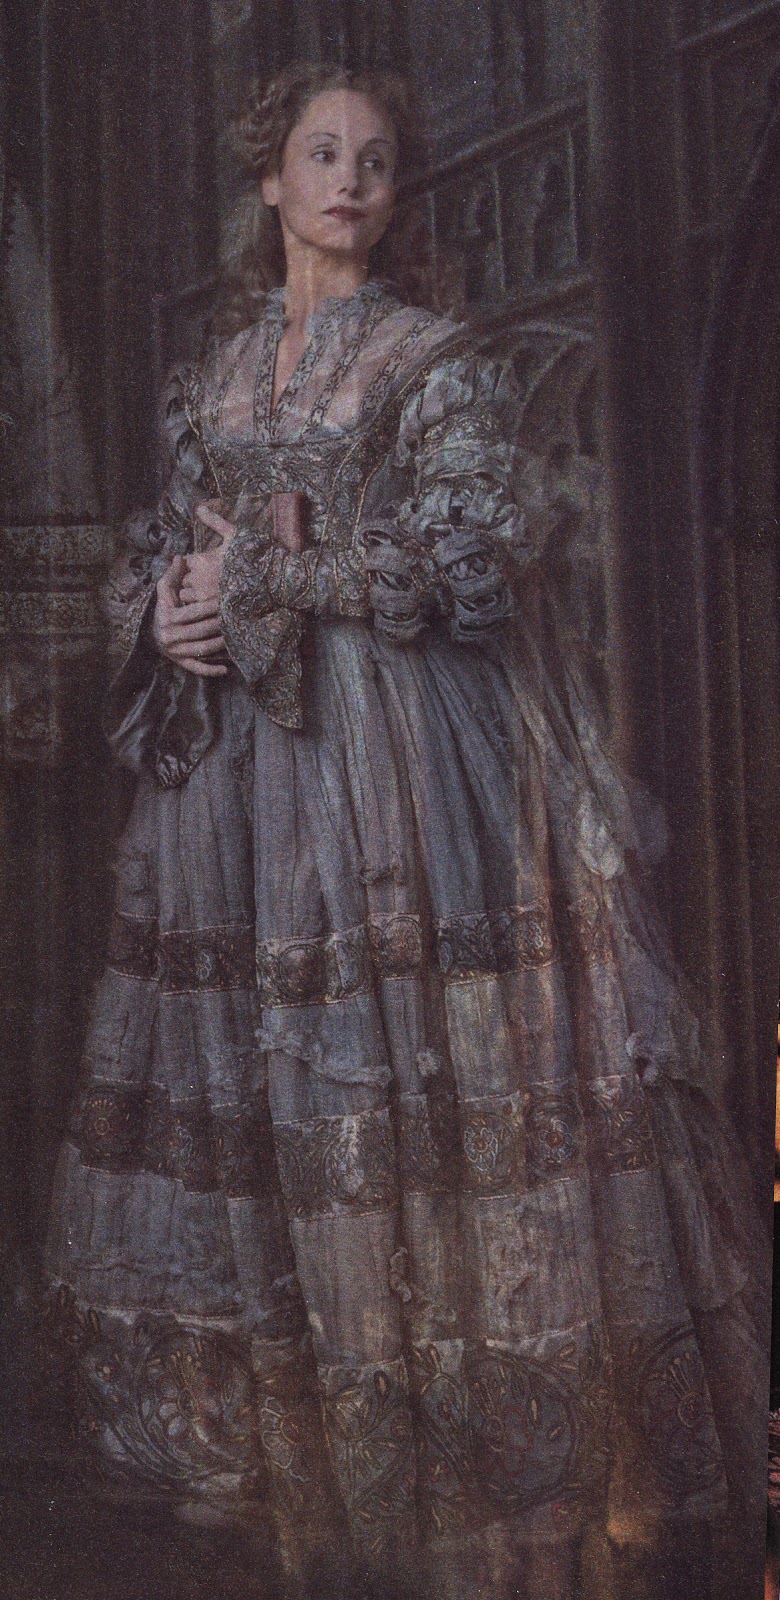
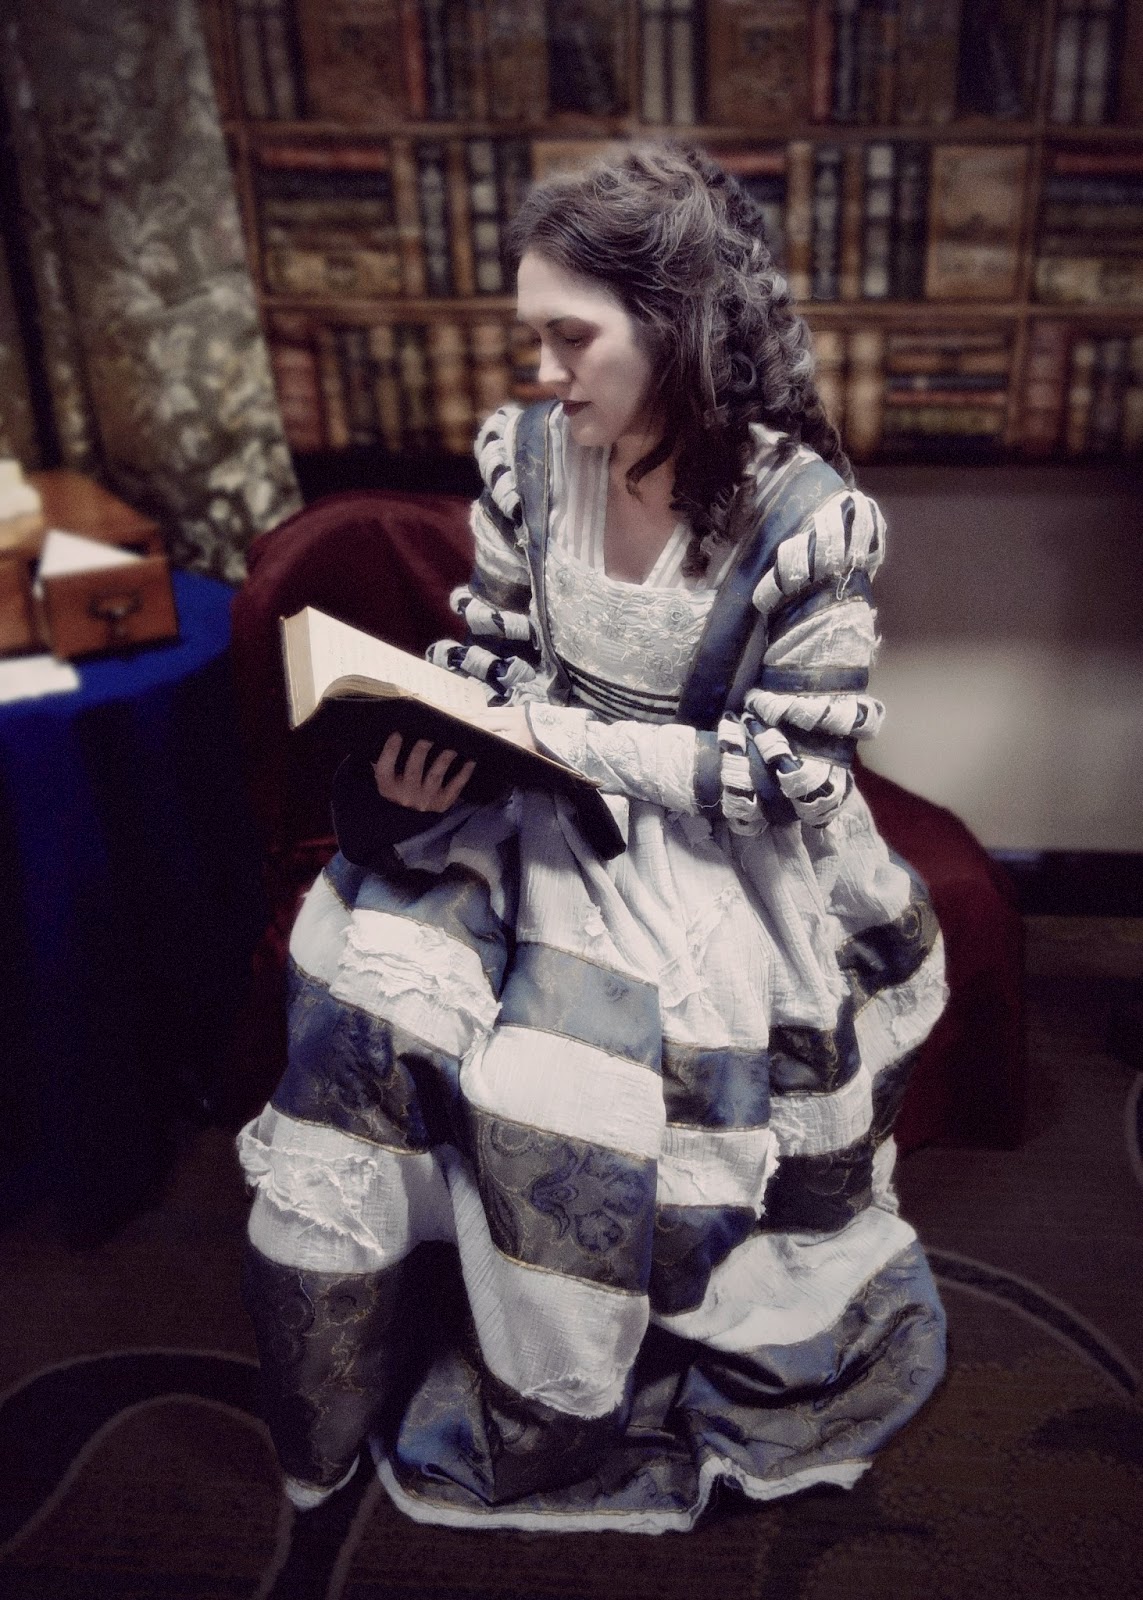
When Harry Potter and the Philosopher's Stone came out way back in 2001, I fell in love.  In a few brief scenes, you can see the ghost of the Grey Lady in an amazing Cranach-style 16th c. gown. This costume instantly found a home on my costume "bucket list", and although it's been 13 years since I first starting daydreaming about it, the stars all finally aligned and the dress is now a reality!  It all started when our family took a trip to the new Harry Potter theme park at Universal Studios earlier this month, which has gotten all of us in a Harry Potter frenzy again.  Then I stumbled across some amazing new photos of the actual Grey Lady dress while looking for quiddich robe pics for my boy on Costumer's Guide.  (thank-you, Maggie, and everybody else who shard their photos of that dress!)  Then I found a bunch of old fabric while cleaning the garage that I forgot that I had, and I realized that I could make almost the entire dress with stash fabric.  The icing on the cake was that our local guild was having a "By the Book" themed party at our Costumer's Lost Weekend this past Saturday, and I didn't have anything to wear to that event.  So even though I only had one week to make it, I decided that making the Grey Lady dress was fate and it NEEDED to happen right now.  lol!  

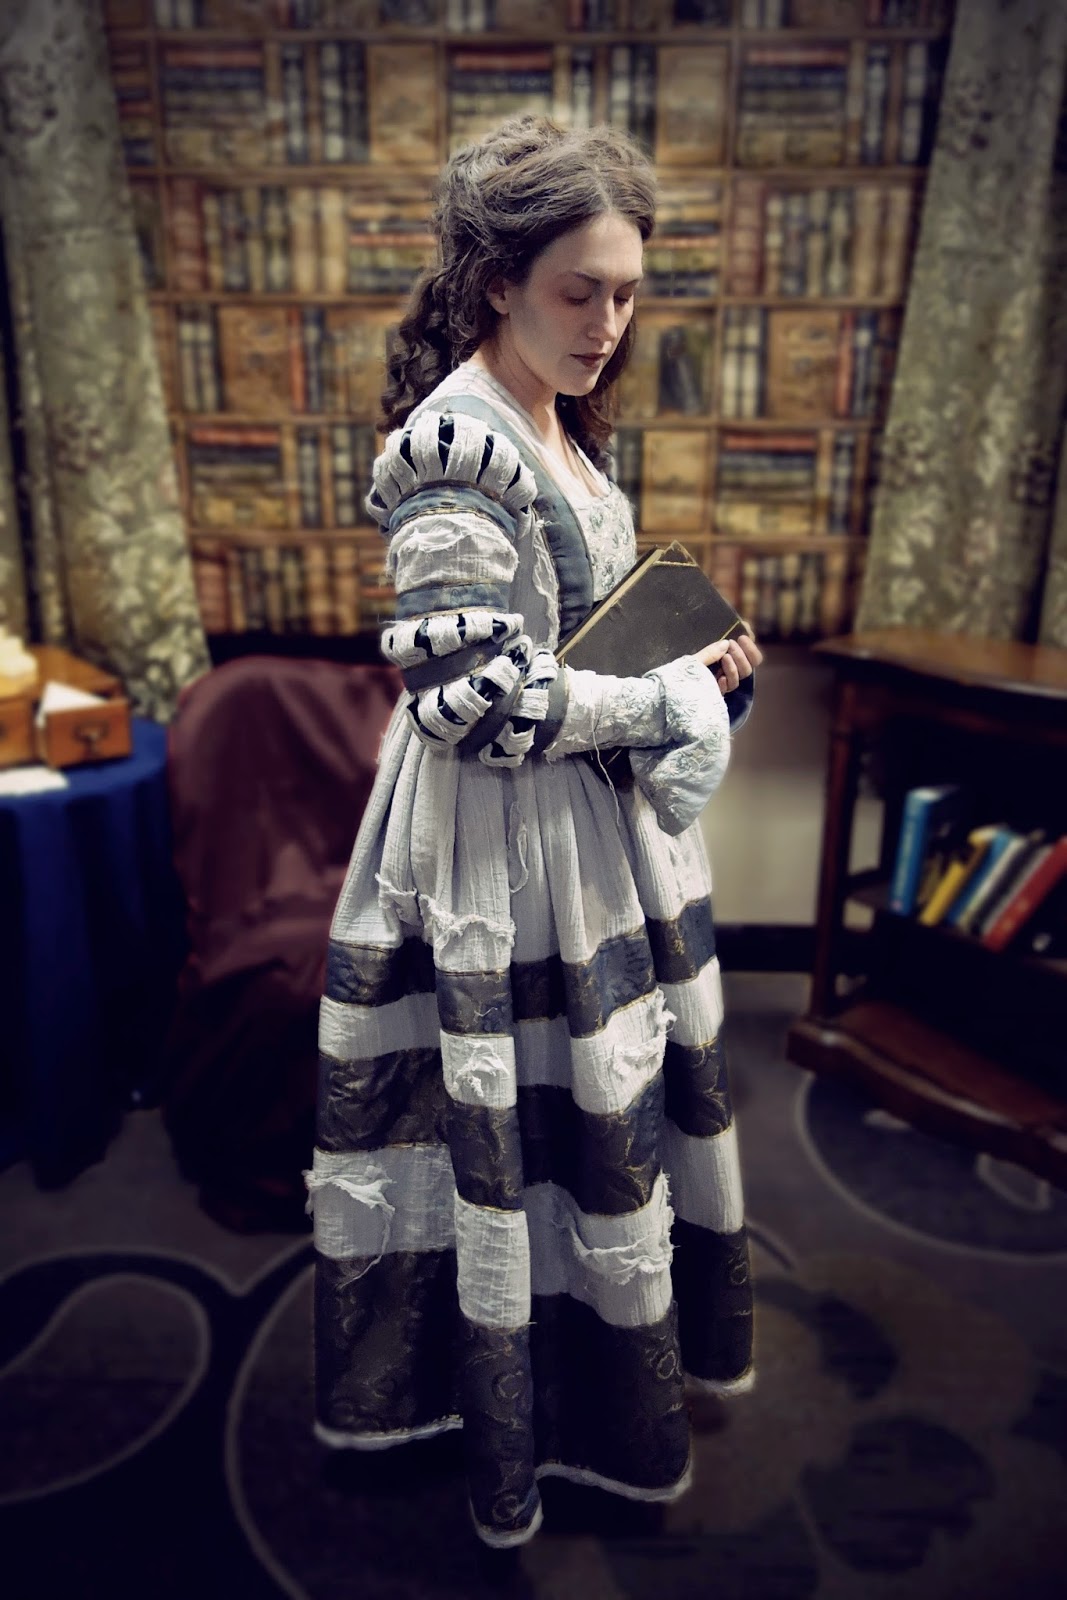
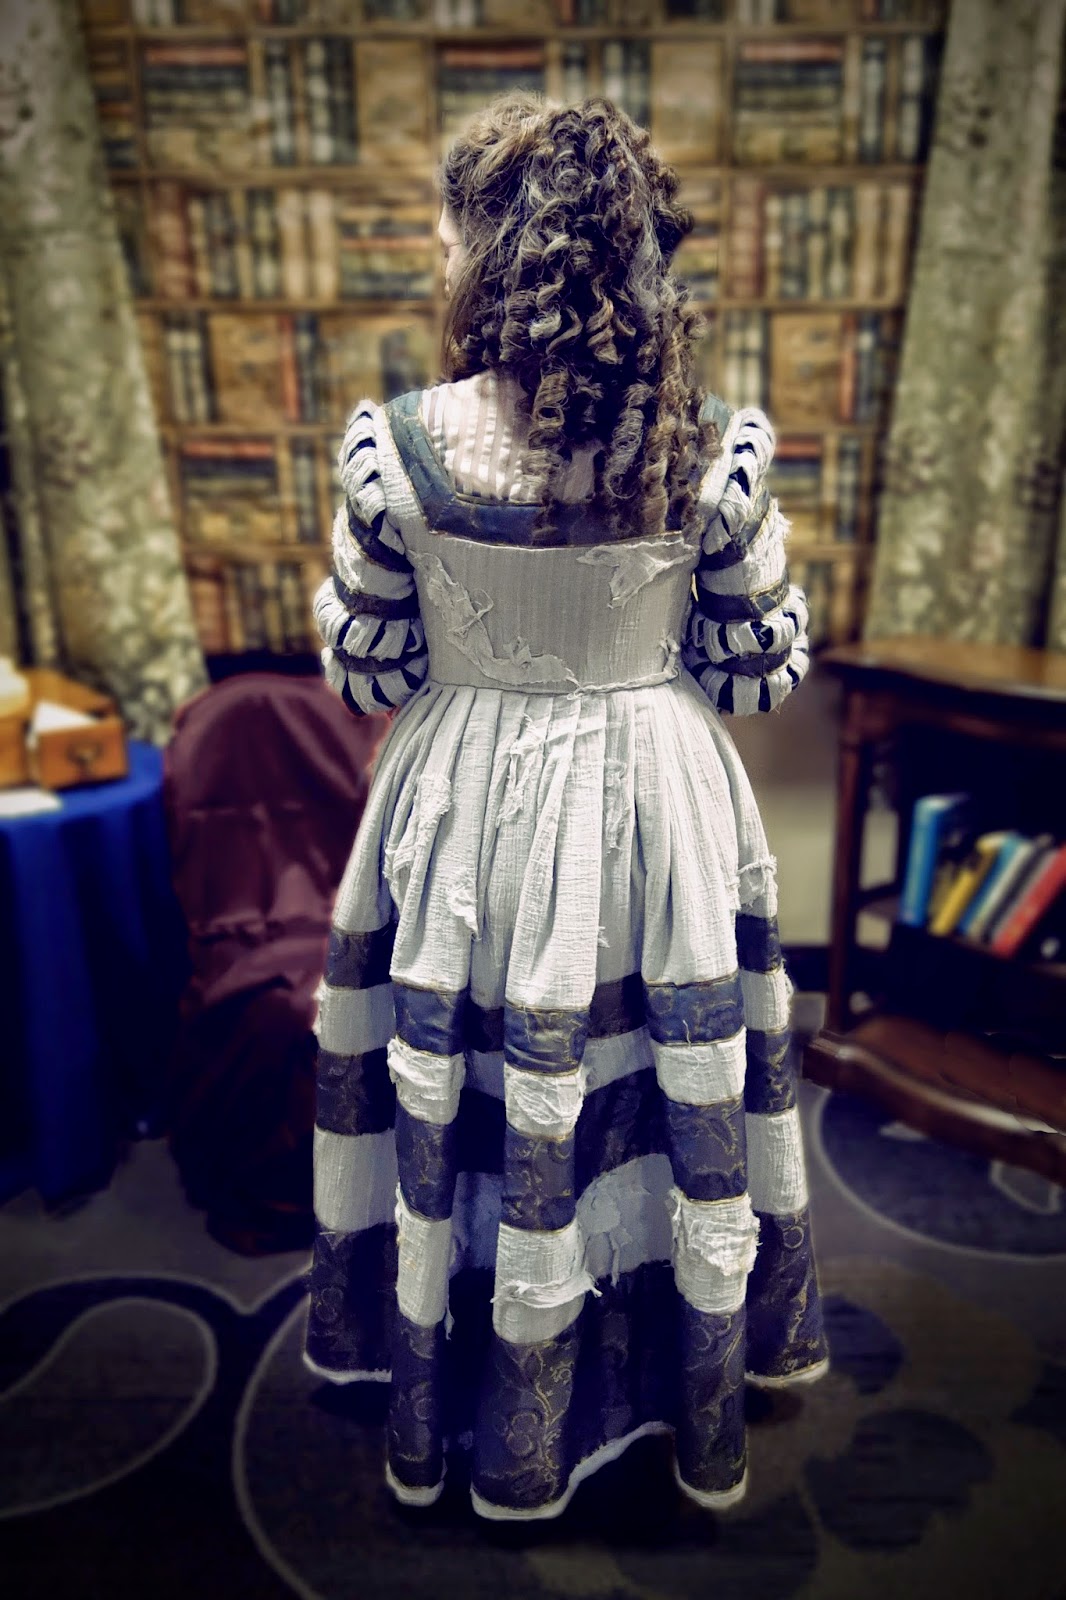
Luckily, it all went together pretty easily, and was such an enjoyable and fast project.  I used several of my old 16th c. patterns for the basic bodice, sleeves, and partlet.  It was fairly easy to alter the bodice to create a German-style look - I just cut a wide opening for the front that is closed with hidden lacing strips, then I attached a bustband and a stomach placket to one side and hooked it closed on the other side. Although the paned sleeves took more time and trial and error than the rest of of the dress, I found some helpful articles like this one from The German Renaissance of Genoveva that were very helpful for grasping the gist of the construction.  The skirt is made of 3 rectangular panels with the guards applied on top of the foundation fabric. It has a 150" hem and is just pleated with simple knife pleats. 


For the fabrics, I used a fairly thick wool for the foundation layer of the gown since I though it needed something springy and slightly heavy to make the panes and skirt drape correctly.  I covered this foundation fabric with cotton crinkle voile since that seemed to match the texture of the original dress quite well.  I dyed the voile, the embroidered fabric for the bustband and cuffs (which was recycled from the hem of a comforter), the sheer stripe for the partlet, and some while sateen for the stomacher with a mixture of denim blue and taupe Rit dye to give it all a pale blue-grey color.  The guards on the movie dress are lighter, shimmery, and have amazing designs painted on them, but I found some gold and blue synthetic brocade in my stash that got me close enough to the right look.  I did consider trying to paint my own guards, but I finally decided that although I'm crazy, I'm not THAT crazy!  I also saved some time and money by using the gold reverse side of the brocade to make my own piping for the guards instead of edging everything with cord.  The only fabric that I had to buy for the dress was a little bit of grey satin for the lining of the sleeve poofs and the cuffs.  I found a silk satin shirt at Goodwill for $3 that was the perfect shade of blue-grey, so once again, fate seemed to have a hand in the making of this dress. 

The movie costume has a good bit of distressing on it, so I wanted to give my dress a similar raggedy look.  I sewed narrow strips of ripped fabric to the hem and down each pane on the sleeves, and then I hot glued scraps of fraying fabric all over the voile sections of the dress.  To make these scraps, I cut out a bunch of small pieces of the voile and then washed them to make the edges fray.  It looks a bit hokey on close inspection, but I think from a distance and in photographs it does give it ghostly look.


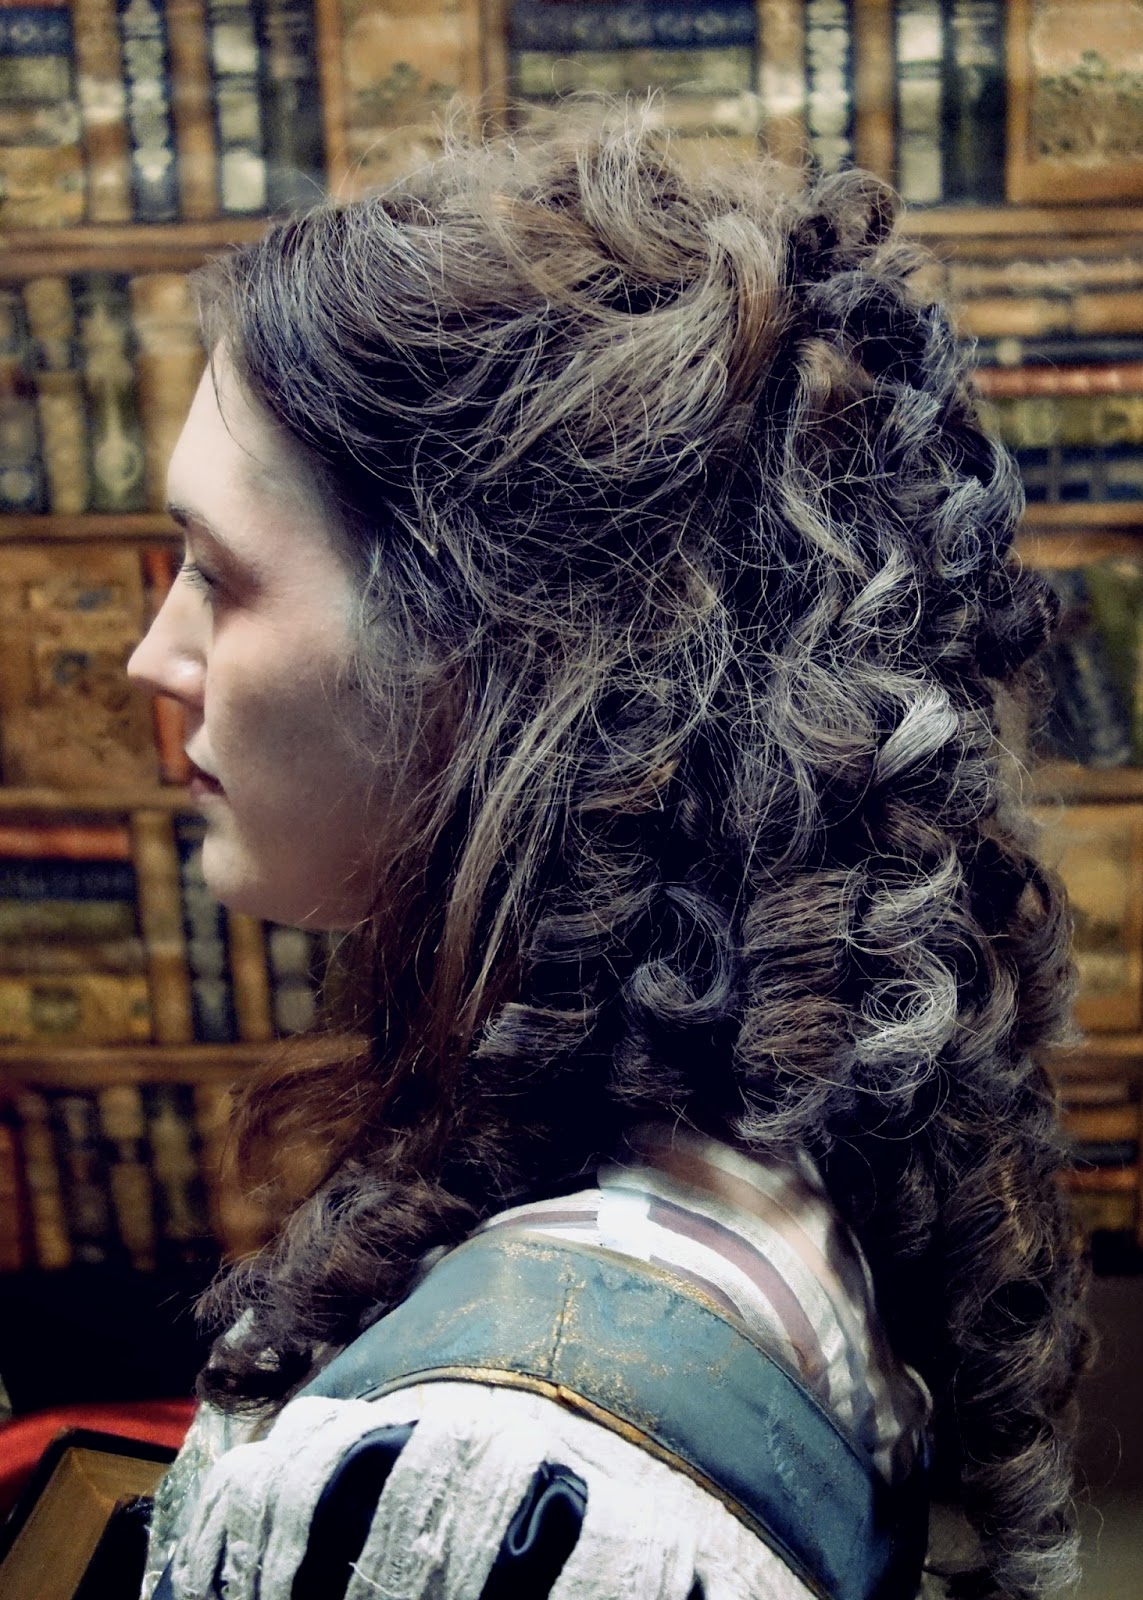
To finish off the look, I bought a cheap vampire make-up kit and used some white foundation along with black, blue, and red shadows around my cheekbones, eyes, and temples to give me more of a ghostly pallor.   I also restyled a cheap ponytail clip hairpiece by removing the claw clip to make it lie flat, then I brushed out all of the crunchy curls and formed them into better ringlets.  I just clipped this hairpiece over my hair in the back, then pinned my own hair over the top of the hairpiece.  Some white hairspray helped blend it all together and make it look somewhat grey.  


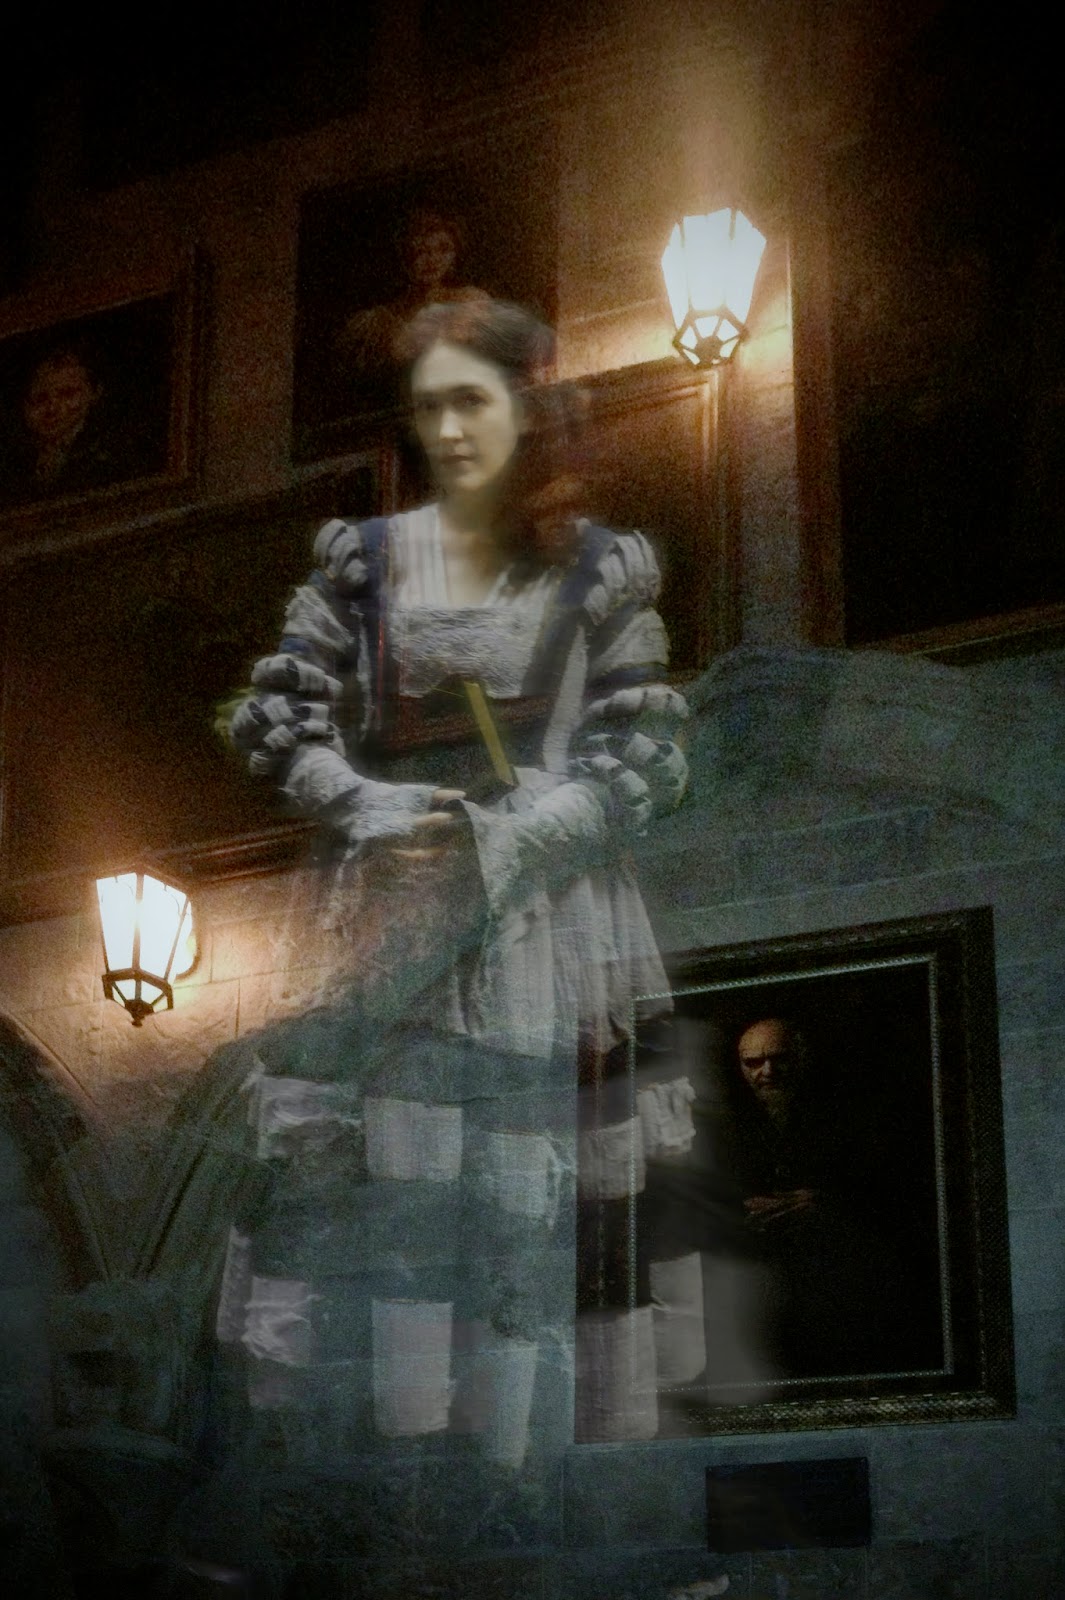
In the Harry Potter movie and promotional photos, the Grey Lady is often shown reading a book or sitting in a classroom, which is one of the reasons why I love her so much.  I had a lot of fun posing for pictures with one of my old bound copies of Peterson's Magazine.  Special thanks to Beth and several other photographers from this weekend who were patient with me while I tried to get some good shots to use for this blog post.   I also tried making my own ghostly photo using one of my pics from the Hogwarts castle at Universal Studios.  I wish I had known that I was going to make this costume at the time because I would have loved to have taken more authentic background photos to use for photoshopping.   But one is better than nothing I guess.  :)  Most of the pics are posted here, but there are 2 or 3 additional photos on my flickr album for this dress if you'd like to see those too.