Showing posts with label patterns. Show all posts

Saturday, August 11, 2018

Victorian Cycling Costume


Wow.  It's been a loooong time since my last blog post, but I'm so giddy over my new 1890's cycling costume that I decided to knock the dust off of this website so I can share a little bit about my new outfit and throw in a pattern review while I'm at it.

After hearing that a few of my friends were making cycling costumes for Costume College this year, I decided at the last minute that I desperately needed one too, so I ordered the Wearing History Bicycling Outfit pattern since I was in a rush and didn't have time to draft patterns from scratch.  This turned out to be a really excellent plan, and I couldn't be happier with the way this pattern went together.  Unlike a lot of historical reprints, Lauren has graded this one so that it includes multiple sizes, which was extremely helpful.  I made up one of the largest sizes, and I was really pleased with how close it was to fitting right off the bat.  I did end up taking in the bodice seams in a few areas, but that's totally to be expecting when working with a Victorian period pattern, and it's always easier to make something smaller than try to make it bigger.  The only part of the pattern that seemed a little odd was the neckline, which I found to be lower than it needs to be if you were attaching a high collar. But since I decided to change the design to an open neckline, this really wasn't a problem for me - just be mindful of it if you want to make up the bodice like the original and are using a larger size.  I also decided to make the shoulders on the bodice a little narrower so the sleeves didn't sit so wide (helps prevent the linebacker look!), but that's another easy change to make, and it's definitely more of a personal preference than a necessity.


Even though my final results might appear quite different from the original pattern illustration, I really didn't have to change much to get a completely different look.  The sleeves and bloomers are made up exactly like the pattern, and I love both of those elements SO MUCH!  The sleeves have the perfect amount of fulness to give you an 1890's shape without being so large that they are ridiculous.  I flatlined my sleeves with a layer of tulle to help give them body, but most of the "poof" is controlled by mounting the outer layer of fabric to the inner layer before assembling the sleeves.  It really does a excellent job of creating the right shape, and I'll definitely be using this sleeve pattern again in the future if I make more dresses from this decade.

The bloomers are my favorite part of this whole pattern, and they went together so quickly.  I used Wearing History's excellent YouTube tutorial to help me figure out how to assemble the pointed side plackets, and they both went in perfectly on the first try.  I've never used that technique before, and it was kind of like magic to see how well it works!  My only other tip on the bloomers is to cartridge pleat the bottom of the legs into the cuffs if you want maximum fullness - it makes them even more jaunty and fun, and it is much more practical than gathering or pleating if you are using a heavier fabric, like wool. 

To personalize my costume I decided to pull some inspiration from other 1890's fashion patterns and cycling imagery and convert my bodice into a jacket.  I used the pattern diagram for a "ladies' street costume" in Kristina Harris's 59 Authentic Turn-of-the-Century Fashion Patterns to create the jacket peplum, and these patterns also to helped me figure out how to add a wide collar and lapels to my existing bodice.  There are a lot of great historical patterns in Harris's book (and its companion, Authentic Victorian Fashion Patterns), and in my opinion, it's a million times easier to modify a good foundation pattern like the Wearing History one than to draft something from scratch.

Under the jacket, I am wearing a modern man's tuxedo shirt that I bought at a thrift store, plus a bowtie that a made from some silk scraps left over from a previous project.  I also re-trimmed a vintage straw hat with a long strip of striped silk that I sewed into a tube so that it looks like ribbon.


Amusingly, the part of my costume that got the most compliments at Costume College was my plaid stockings!   These socks were a lucky find on Amazon, and they come in a three-pack with red and tan as well.  I've always been completely charmed by images of Victorian women wearing checked and plaid stockings with their bloomers, and it seemed to be quite a fad during the 1890's.  Even if you don't have a cycling costume in the works, I highly recommend these socks if you want to add a bit of fun to your historical (or modern) wardrobe!

This costume turned out to be a real joy to wear.  It's quite comfortable, and the bloomers make you feel so free and liberated compared to heavy skirts.  I have to admit that I frolicked around like a big nerd when I was wearing this for my photoshoot.  All of that extra mobility makes you want to run and jump and flop on the ground!  I can totally understand why cycling outfits were so popular with Victorian women - they are just so much fun to wear!


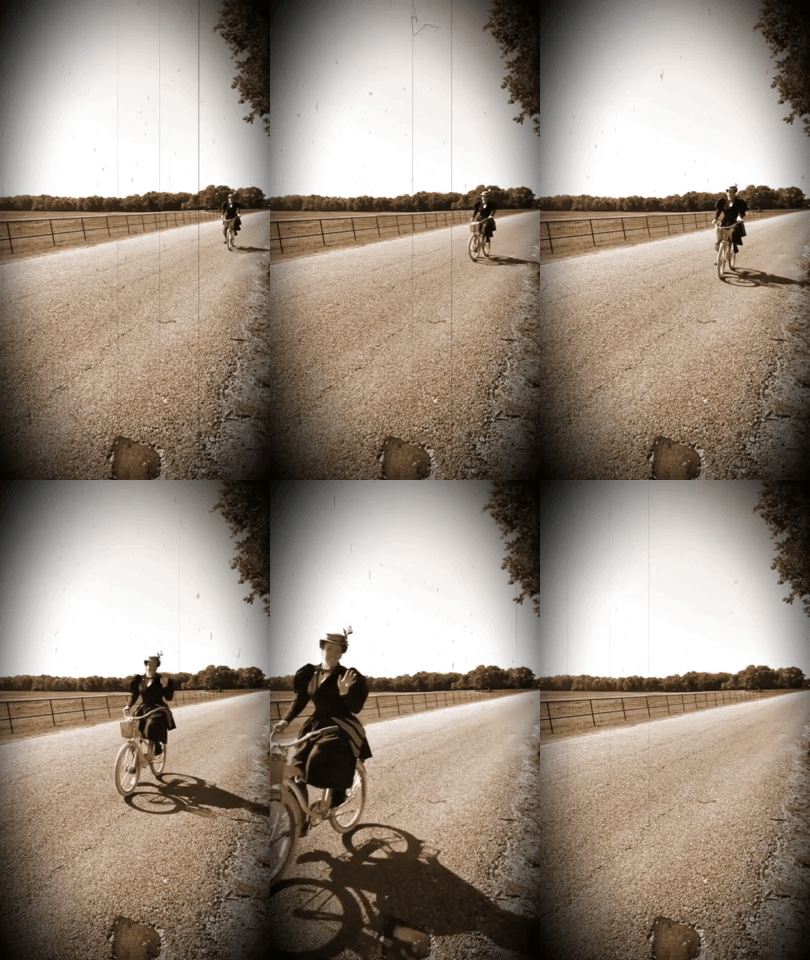
And because I'm officially Extra™, I also pulled out my bicycle and took it for a spin to see how this outfit feels on a bike.  The bloomers are really comfy while riding, although you still have to dismount carefully so they don't get caught on the seat.  My only issue was with my shoes, which tended to slip on the plastic pedals if I wasn't careful thanks to their smooth leather soles, but that issue could probably be solved pretty easily by adding some rubber grips.  I've had several people ask me if I would be wearing this outfit for any tweed rides, and I would absolutely love to do that if they host any more themed cycling gatherings in my area.  It was crazy fun to ride my bike in this kooky outfit, and the only thing that would be better is if I could buy an actual antique bicycle to add to the authenticity. 

I have some more photos and another video of me riding my bike on Flickr, and you can find more Victorian and Edwardian cycling costume inspiration on my Pinterest.  I'm also having a ton of fun using these photos to practice my faux-antique photo techniques using photoshop, so I'm sure I'll be adding more of those to my Flickr account whenever I find some more time to play.


Sunday, November 29, 2015

Grandma, the Wolf, and Little Red


The tale of this costume follows a long and meandering path, and to tell its story, I need to go back to the beginning, over a year ago: “Once upon a time, a lowly seamstress heard news of a magical ball in a far off land…”

*ahem* Okay, so maybe that’s a bit too dramatic for a blog post. Let me try that again:   
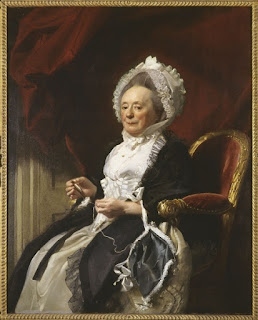
John Singleton Copley, Portrait of a Lady, 1780
In the summer of 2014, the organizers of Costume College announced that their next theme would be “Plucked from the Pages: Costuming Your Favorite Literary Characters”. I usually have a HORRIBLE time deciding what costumes to make for big events like this one, but I knew almost instantly want I wanted to make for the 2015 Costume College Gala. Out of all the old fairy tales, Little Red Riding Hood is my favorite, so I decided that I would be the Wolf wearing Grandma’s clothing. But I had no intention of being a sweet old grandma wrapped up in blankets with curlers in her hair. I wanted to be an elegant 18th c. grande dame like you see in so many paintings from that age. There is so much subtext and darkness and deeper meaning in old fairy tales, so I started wondering if the real Grandma was meant to be somewhat terrifying and wolf-like on her own, and maybe that’s why Little Red couldn’t tell the two apart. Who knows if that was the original intention, but it’s a fun thought, and one that you could easily imagine being true when you see the countless historical images of stern-looking matriarchs with silver hair and piercing eyes.


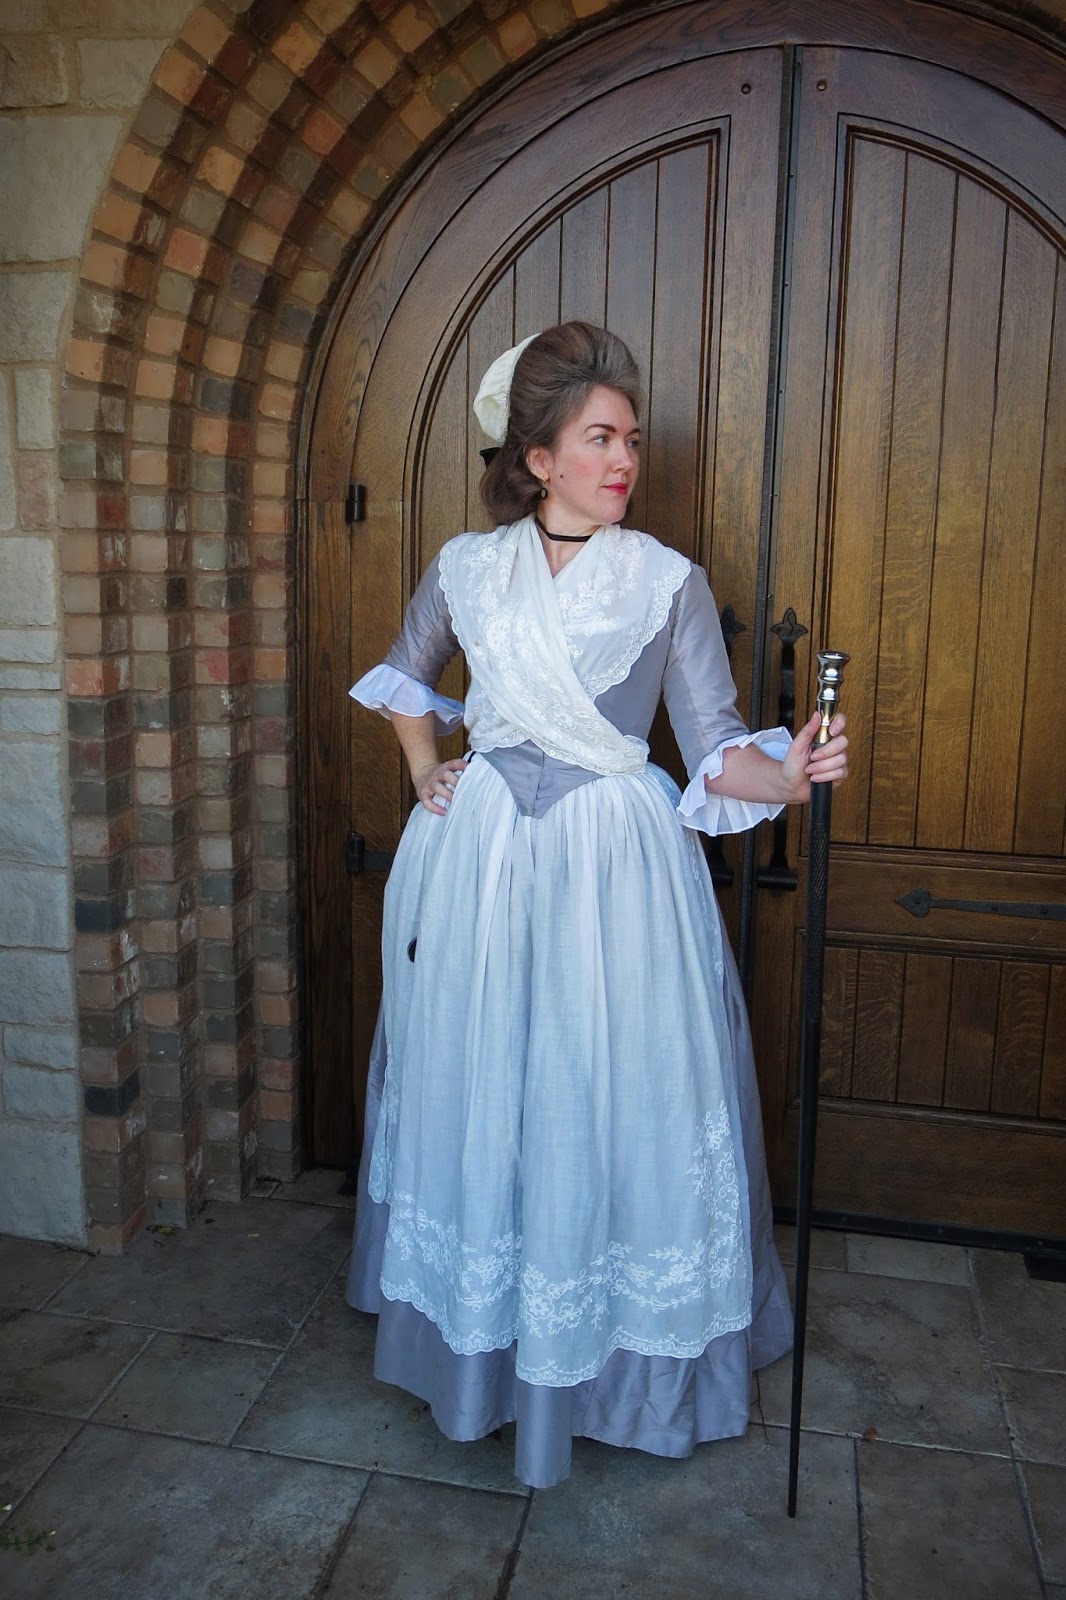
I started by collecting pictures of older women in Georgian paintings (check out my Pinterest board for lots of great Grannies). Many of these ladies are shown in grey or taupe gowns with an abundance of frilly white caps, aprons, and fichus, and this color combo already looked very wolf-like to my eyes. For my costume, I decided to make a simple grey silk taffeta round gown, and I drafted my own pattern by modifying and combining several of the dresses in Patterns of Fashion. Although my dress is quite plain on its own, I was lucky enough to find some gorgeous tambour embroidered curtain panels from the 1930’s at an antique show a few years ago, and they worked perfectly for my apron and fichu. The panels all had some staining and damage in various places, but I was able to cut around the bad spots, and I’m thrilled with the way they turned out. To finish off my gown, I made a pair of organdy sleeve ruffles that I just pinned in place. 


Although my dress was fairly simple, I decided that I wanted my hair to be more dramatic for the gala, so I made a large 18th c. wig based on the instructions in Kendra’s Van Cleave’s wonderful book - 18th Century Hair and Wig Styling. I used the instructions for the Lilac wig to build the wire base, and I used a Lioness wig plus several hanks of loose hair to cover the base and make the buckles. The wig was originally dark brown, but I sprayed it with Jerome Russell B Wild Color Spray in Siberian white to make it grey, and this was definitely the best white hair spray that I’ve tried yet. I’ve never worn a wig this big before, but it was lots of fun and surprisingly comfortable. The only unexpected side effect is that it gave me a bit of a face lift from the weight of it pulling backward on my head, which made me look a less matronly than usual. The funny thing is that even though this wig seemed MASSIVE when I was building it, it didn’t seem big at all once I had the whole outfit on. While I was wearing it, I kept thinking, “eh – I could have gone a lot bigger”, and if period painting can be believed, this ‘do was still quite modest compared to many. 

More than anything, 18th century grandmas seemed to love their ridiculous caps, but I wasn’t sure how huge and silly I really wanted to go with mine. What I ended up with was relatively tame compared to what you often see in period paintings and fashion plates, but that’s mainly because I put the cap off for the last minute and didn’t have time to keep hemming ruffles. My cap is made from organdy, and it is just a much larger version of a typical 18th c. cap. It is made from a large oval in back with a band that is wider at the sides and narrower at top, and I covered the band with several rows of box pleated ruffles and some poofed black ribbon. It also has a hanging tail of fabric in the back, which is a common look, even if it doesn’t seem to serve much purpose.   


While I was sewing my gown, I was also working on a wolf mask, which was quite an adventure as well.  I discovered the work of Joni Good and her book, How to Make Masks!. Joni makes some of the most amazing papier mache masks that I’ve ever seen, and you can find much more of her work on her website, Ultimate Papier Mache. I used her techniques and sculpted a mold for my mask using terra cotta clay, then I covered it with shop towels and the plaster/glue mixture that she describes in her book and instructional videos. I actually ended up making two wolf sculptures and papier mache shells because I forgot to use a release agent on the first one, so the paper mache stuck to the clay and wouldn’t come off. Whoops! But it all turned out for the best because I liked my second version of the wolf much better. 

photo by jennylafleur
While I loved making the wolf mask, I have to admit that I didn’t love wearing it. Very few people knew who I was when I arrived at the gala, and it was almost impossible to hear me when I talked because it was so noisy and the mask muffled my words. I also had a limited range of sight, so I had to be very careful not to step on trains or bump into tables. So it was fun for the grand reveal and a few pictures, but poor Wolfie didn’t last long at the party. But the best part about wearing this costume was that my friend Ginger decided to make an 18th c. Little Red costume to go along with my Grandma Wolf, and she made the most AMAZINGLY gorgeous polonaise à coqueluchon, which is a hooded gown that was popular at the time. Recreating the characters of this story in a more historical way was SO incredibly fun, and I was thrilled every time somebody had an “ah-ha!” moment and realized who we were. I’m so happy and grateful that Ginger decided to play along with me, and doing this theme with her was one of the highlights of my trip.


So that’s the story of Grandma and the Wolf, but this tale had one more twist that surprised even me in the end. Although I wasn’t planning on wearing this outfit again so soon, we had an unexpected cold front move in right before our yearly Georgian Picnic, and I decided that a silk round gown would be a little warmer than my semi-sheer cotton chemise dress that I had originally planned on wearing. I still desperately needed a cloak to block the wind, but when I dug though my stash, the only thing suitable that I found was some coat-weight red wool that I found at an estate sale many years ago. So I used the hooded cloak and mantle patterns in Costume Close-Up as a guide, and I quickly threw together a little red mantle to keep me warm at our picnic. So without even planning it, this costume now has become Grandma, the Wolf, and Little Red Riding Hood all in one!


Maurice Quentin de La Tour, 
portrait de Nicole Ricard, enfant, 1748-1750
I trimmed my mantle with strips of pinked, box pleated wool in a style that is very similar to this charming painting of a young girl. I think most winter cloaks were probably lined in the period, but I didn’t bother to do that on mine since the fabric was felted and quite heavy already. My only complaint is that the hood pattern that I used probably dated from the mid-1700s, so it ended up being a bit small for my later 18th c. hairstyle. I’m tempted to take the hood off and try adding a larger one in the future, but I still love my little red riding hood like crazy, and it kept me quite warm and cozy at the event. 

I also wanted to take a minute to thank several of my friends for giving me some of the gorgeous accessories that you can see in these pictures. My mitts, workbag, pinball, and muff were all gifts made by amazingly talented and generous ladies, and I can't tell you how much that I treasure them! So thank-you Kendra, Angela, Stephanie, and Mary - you are all so dear to me!


And as a final epilogue to this story (which I'm afraid has gotten quite long winded!), I also wanted to mention my new market cap and hair experiments. I had no interest in wearing my large wig to a windy outdoor picnic, so I decided that a more simple style of hair with a market hat would be much more appropriate. I bought a market cap pattern from Maggie at Undressed Lady last summer, and I made it up in a few hours last week from some scraps of black taffeta left over from older projects.

I’ve also been dying to try out the pomade and powder that I bought earlier in the year from Abby at Heirloom Haircare, but I had a huge disaster on the morning of the picnic and discovered that I had misplaced my pomade. So after a failed search and a lot of panic and cursing, I finally resorted to wearing my bushy white wig out of desperation. It’s not the right style of hair for my outfit, and it badly needs restyling, but it was better than nothing, so I sucked it up and just made do with my sad backup wig. Unfortunately, the market hat really needs a tall hairstyle to support it, so I was pretty disappointed with the way it looked at this first wearing (my picnic pictures are here if you are curious).

But then as I was cleaning my sewing room two days later, I found my pomade and decided to give it another try. OMG – I am in love! My hair is mid-back length right now and not overly thick, so I wasn’t sure if I would be able to pull off an 18th c. hairstyle without adding in extra pieces. But the pomade and powder thickens up your hair so beautifully, and I was amazed by how well it stayed in place with no need for teasing or hairspray. I started by pinning a rat of loose synthetic hair that was wrapped up in a hair net on the top of my head, then I combed my own hair over the rat and pinned it down in back. Then I made two large buckles and a loop with my remaining hair that was hanging down (I basically just copied Abby’s look shown on her blog). After it was all in place, I re-powdered it to make it more obviously grey, and I hid the parts in back where it was pinned with a cap and a bow. I don’t think I’ve ever had such good luck styling my own hair before, and I’m absolutely amazed that I managed to pull this look off on my first try! And as an added bonus, my market hat suddenly went from “wah, wah, waaaa…” to “WOW!” once I had the right hairstyle to support it.

Since I had such good luck with my practice hairstyle, I decided to get dressed up one more time and finally take some proper pictures of my dress. I didn’t get many that I was happy with at either Costume College or the picnic due to bad lighting and my failed hair, so it was fun to finally come up with some shots that I’m really happy with. Check out my flickr if you want to see more.


"... and they lived happily ever after.  The end!"
Tuesday, March 3, 2015

Regency Chemise


This year, I'm thrilled to be participating in a group project that will recreate the costumes illustrated in Vernet’s Merveilleuses and Incroyables from 1814.  (for more info, check out the Facebook page) We are supposed to keep the dress that we are making a secret until the grand reveal in December, so I decided to focus my blog entries on undergarments and accessories for most of the year and save my dress for the very end.  I’m really excited to have an excuse to make myself some new and improved Regency undies, and I am looking forward to hand-sewing everything from the skin out.  I know, I know… that probably sounds like madness to many of you, but I’ve grown to love hand-sewing over the years, so it seems like a fun challenge to me. 

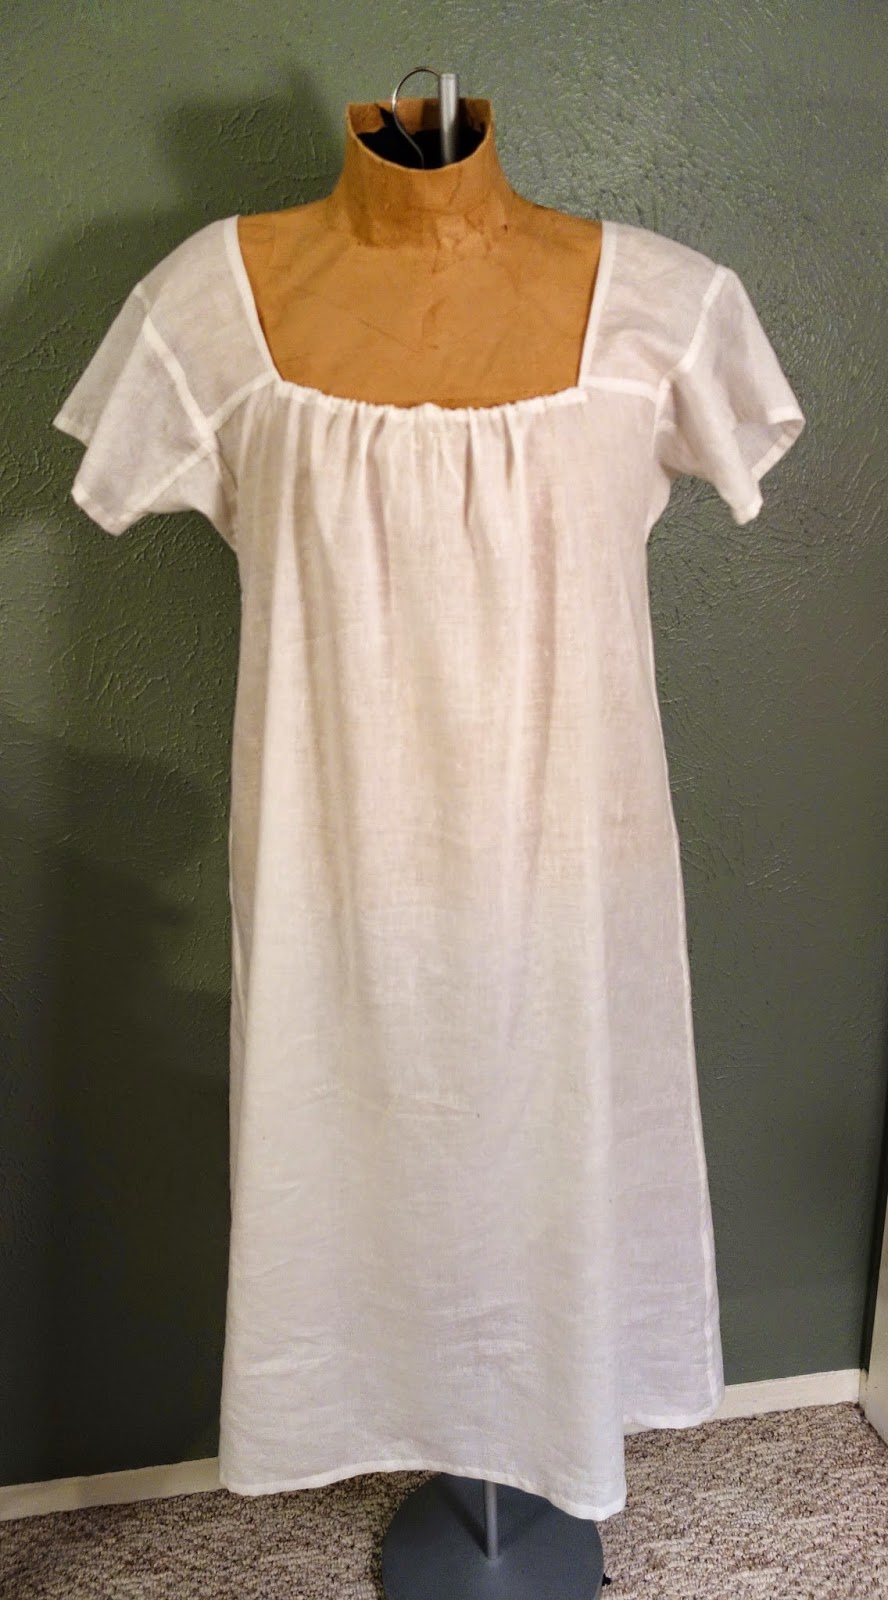
The first garment on my list was a new chemise.  There isn’t much to blog about with a simple shift or chemise, but I’ll share my progress here anyway.  My chemise is made from a lightweight linen/cotton blend fabric, and it is stitched with linen thread.  The seams are all sewn by hand with a small backstitch, then I flat felled the seams. 

I decided to use Laughing Moon #115 for this garment, and the pattern is based on a surviving chemise in the designer’s collection.  The sizing worked well, and it saved me a good bit of time and effort vs. drafting my own pattern from scratch. It would have been nice if the instructions had been more detailed about inserting the underarm gussets – those were tricky with the felled seams – but I worked it out eventually.  I’m sure there are some wonderful tutorials online somewhere, but I was too lazy (or maybe too stubborn) to go searching for them.

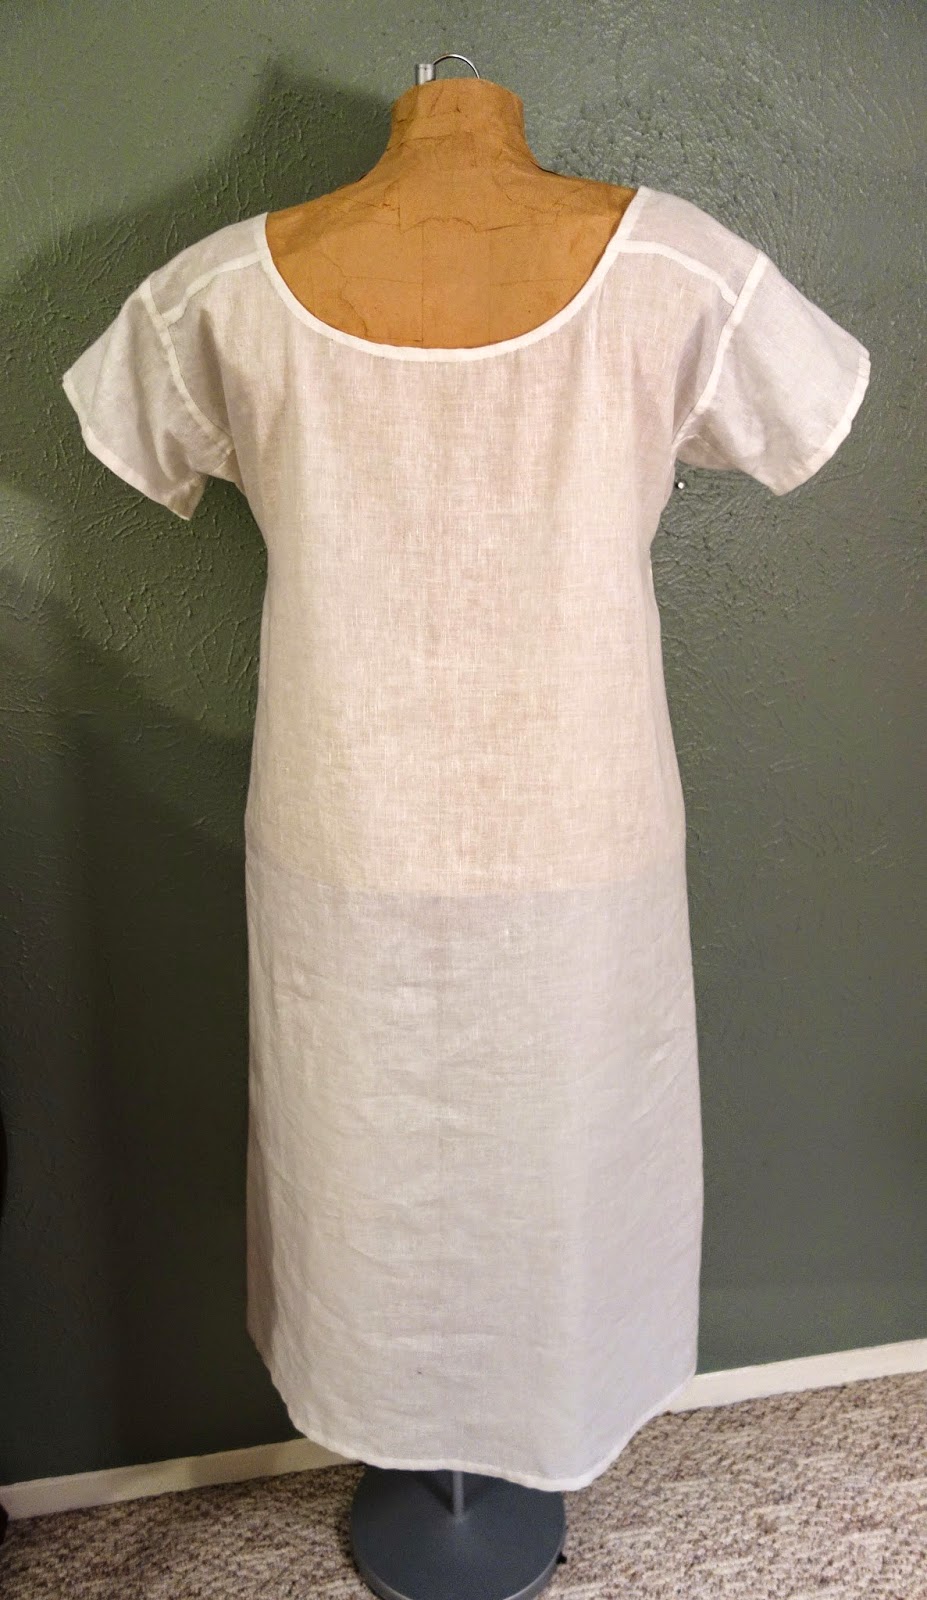
The only thing that I didn't like about this chemise pattern is that it has a very high neckline in back, so I cut it into a more rounded shape after it was assembled to lower the back edge.  Both square and round necklines were common in Regency chemises, although I'm not sure if they were ever combined into one garment.  I actually like the rounded back better than the square front, so I think if I made this pattern up again, I would choose the high neckline option for the front and then round off the shape of both the front and the back of the chemise.


I also wish that I had cut the selvage down to something narrower than 5/8" before felling the seams. Period undergarments usually have tiny seams, and mine look pretty ham-fisted in comparison.  But this was my first time to hand-sew a chemise, and I learned a lot from the process, so I'm still pretty happy with the end results.

My biggest discovery was that chemises don't take nearly as long to sew by hand as I had feared.  It always seemed like too much effort to hand-sew something that would rarely be seen by anybody other than myself, but this chemise made up so quickly that it was really no trouble at all.  I only worked on it for a couple of hours over 3 evenings, and it was a soothing and mindless project while watching movies and TV.  

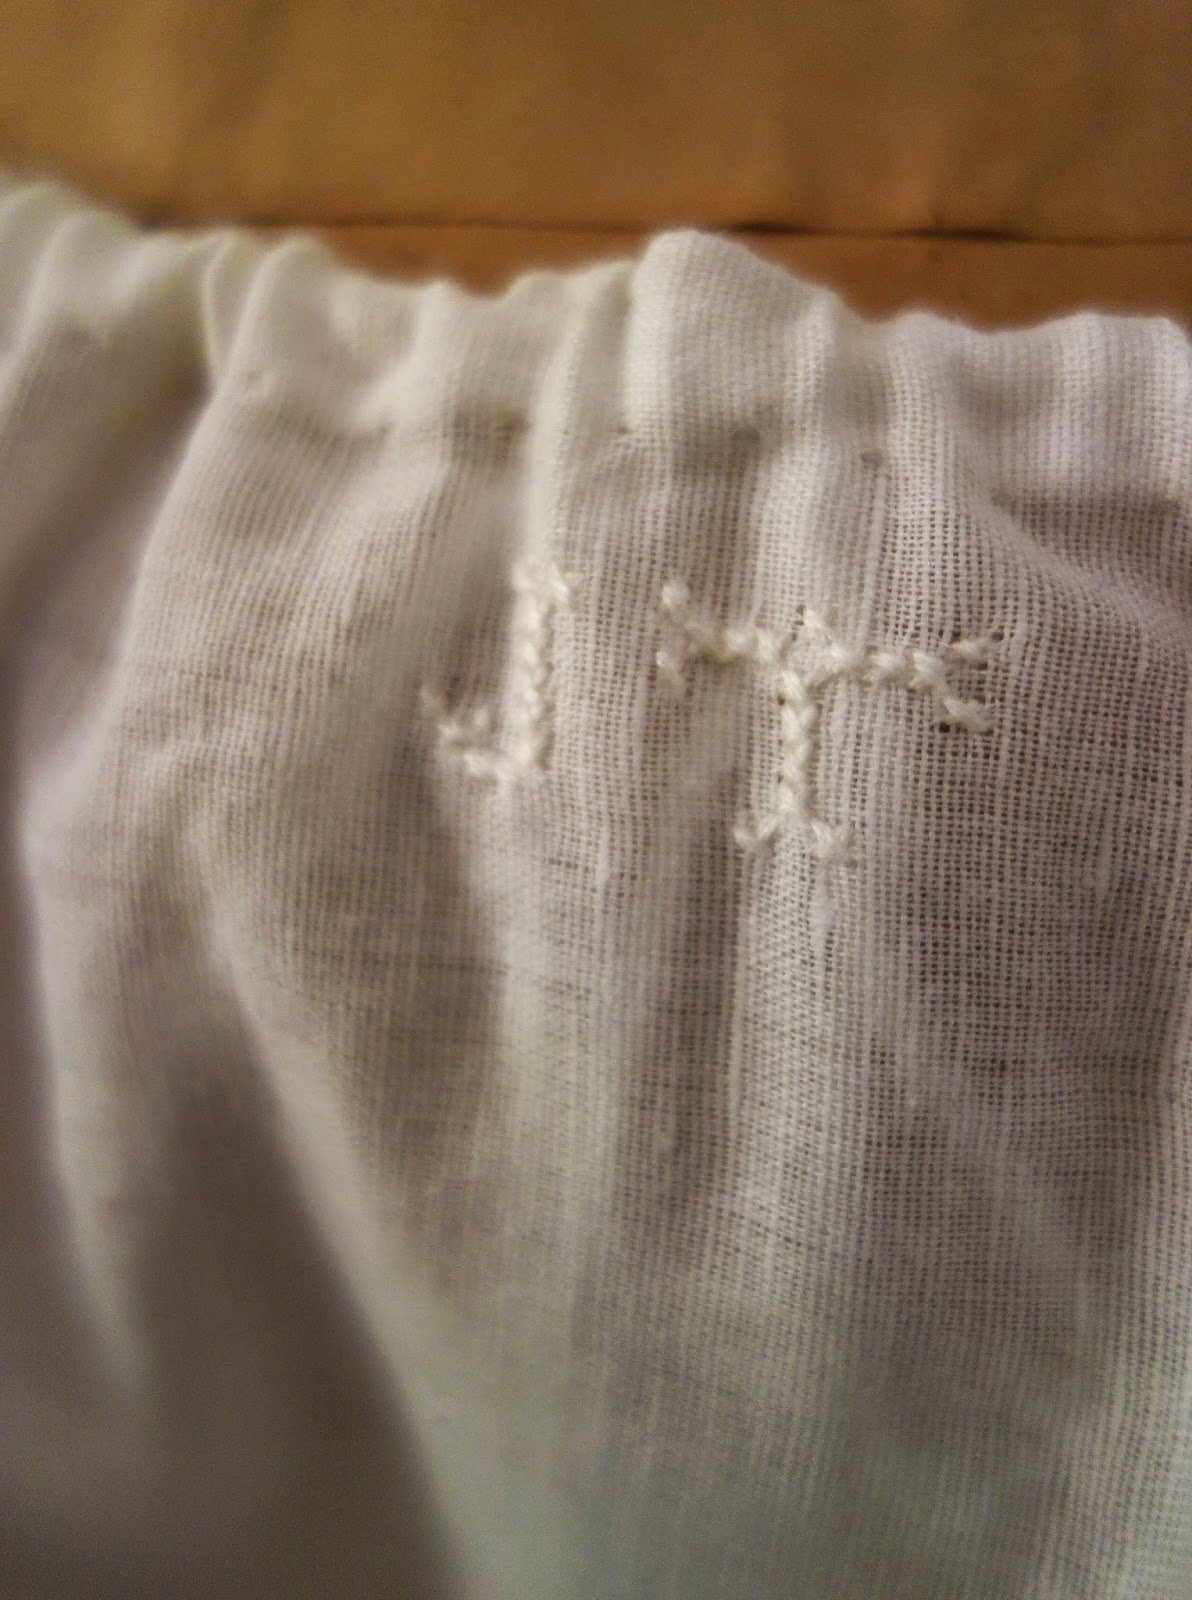
As one last finishing touch, I thought it would be a fun to embroider my initials on the front under the neckline.  Embroidered initial are commonly found on period chemises, and I can imagine that if you lived in a Regency household filled with women, it would be quite necessary to monogram your garments so that you didn’t end up wearing your mother’s or your sister’s underwear.  I'm afraid that if I was one Jane Austen’s heroines, I definitely wouldn’t win any praise for my needlework skills… but I guess this is good enough for a modern Janeite.  ;)    


Thursday, October 16, 2014

Edwardian half-mourning costume, pt. 1

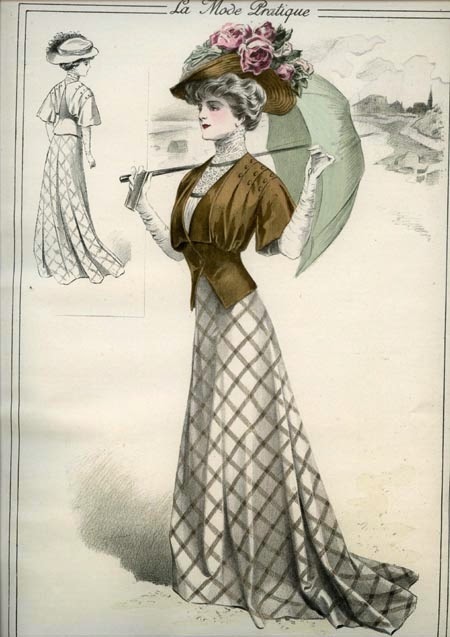
The next big event that I have on my lineup is a Mourning Tea Party with the DFWCG in late October, so I decided to make an Edwardian half-mourning gown inspired by this 1908 fashion plate from La Mode Pratique.  Although the original plate wasn't intended to be a mourning outfit, I thought it would translate well to half-mourning if I switched the brown colors to black and left off the flowers on my hat.

This is a new era for me, and I'm having to build quite a few costume pieces in order to make it come to life, so I thought I'd break this project down into a few different blog posts so I can talk about each garment in more depth.  Actually, the true beginning for this series was with my Atelier Sylphe Edwardian corset, which I posted about two months ago.  After making the corset, I moved on to three additional garments that I could make from commercial patterns.  I'll start  by sharing some more pattern reviews and give you a few sneak peeks at what I've finished so far.

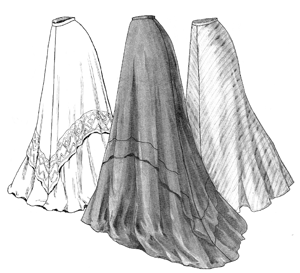
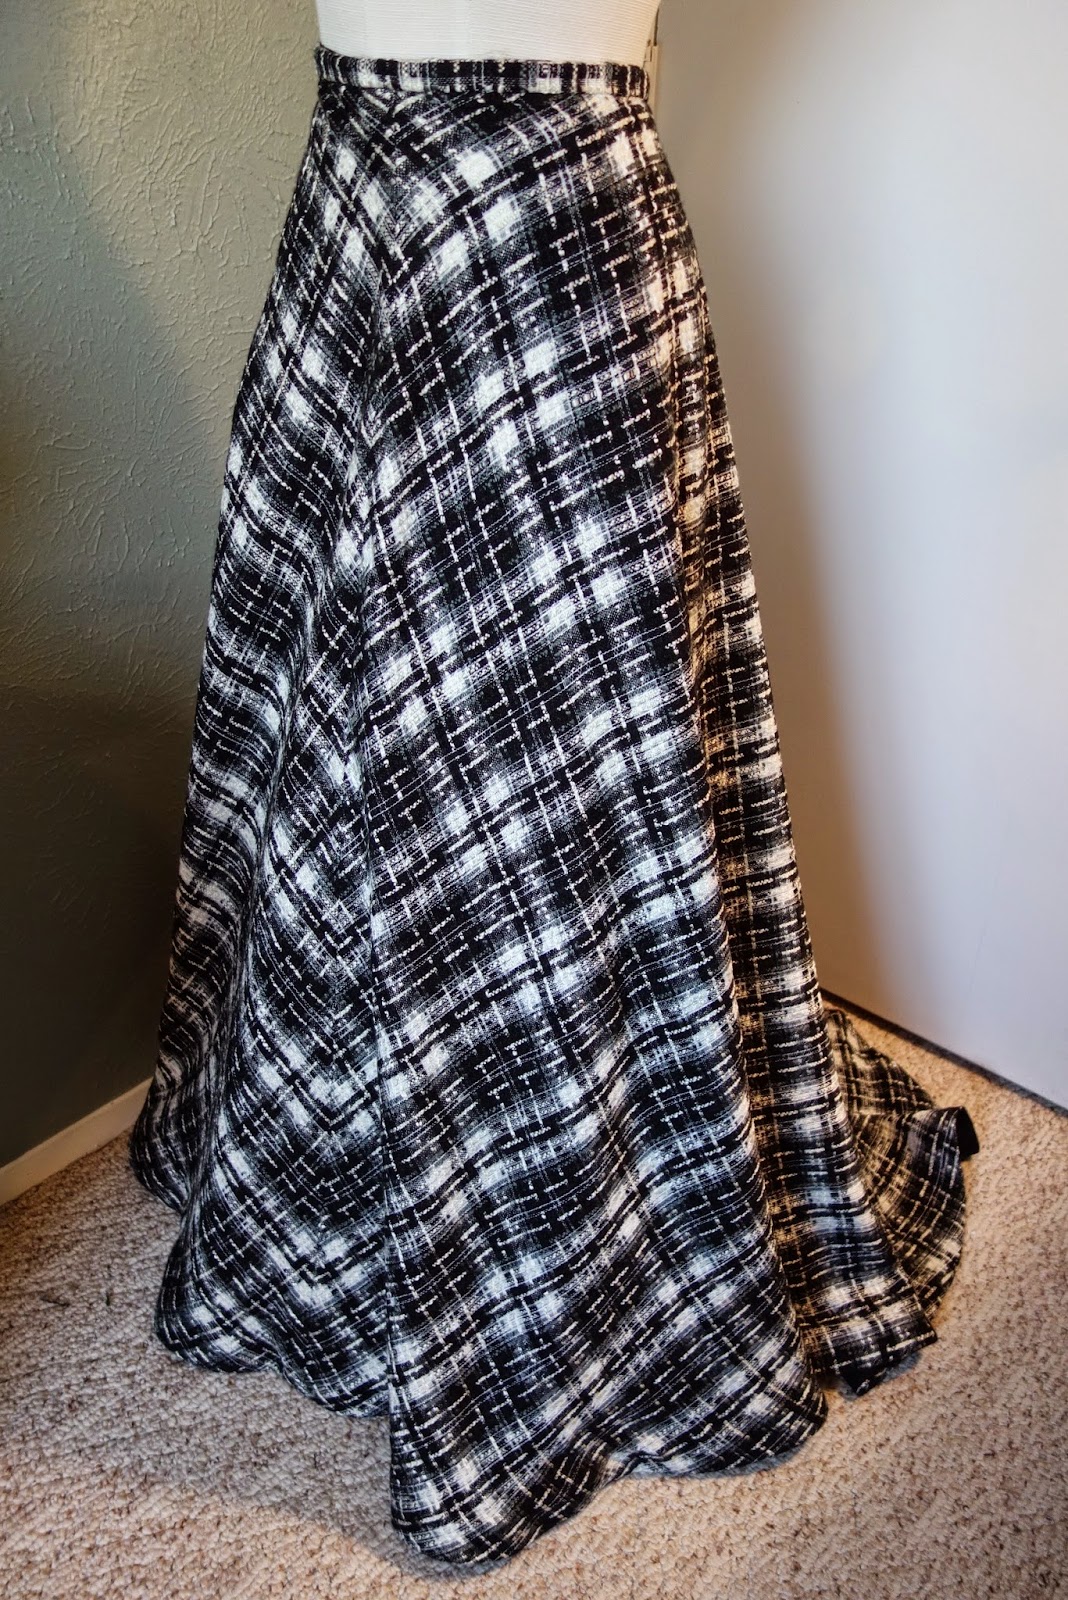
My first step was making the skirt, and for that I used the Truly Victorian 1905 Circle Skirt.  I'm a pretty huge cheapskate, so at first I thought about drafting this pattern myself to save some money.  After all, it's just a big half circle, so how hard could that be?  But then I came to my senses and remembered what a colossal pain it is to draft and fit large curved pattern pieces.  I am SO glad that I decided to buy this pattern in the end!  It saved a huge amount of time and aggravation for me.  Yes, it's a really simple pattern shape, but the massive size makes it tricky to work with.  I think it took longer to clear out a large enough section of floor and smooth out the fabric for cutting than it took me to cut out and assemble the entire skirt.  I was very pleased with the way the waist and hips fit (looks better on me than my non-curvy manikin), and it has a lovely sweep to the back. Definitely a good pattern to own.


I made a bit of a theatrical choice with the plaid that I chose for my skirt because I fell in love with some black and white boucle of unknown fiber content and authenticity.  I was worried at first that plaid boucle wouldn't be documentable for the Edwardian period, but a Google Books search came to the rescue, and I found over a dozen references to plaid boucle fabrics from the late Victorian period and the early decades of the 20th c., such as this reference in a 1903 Dry Goods Reporter stating:


So even though I haven't found any examples of plaid boucle fabric exactly like this one in Edwardian photos or surviving garments, at least I know that the concept was something that they were familiar with.  Unfortunately, that still doesn't solve the fiber content issue, but "shhhhh"... I won't tell if you won't.  ;)

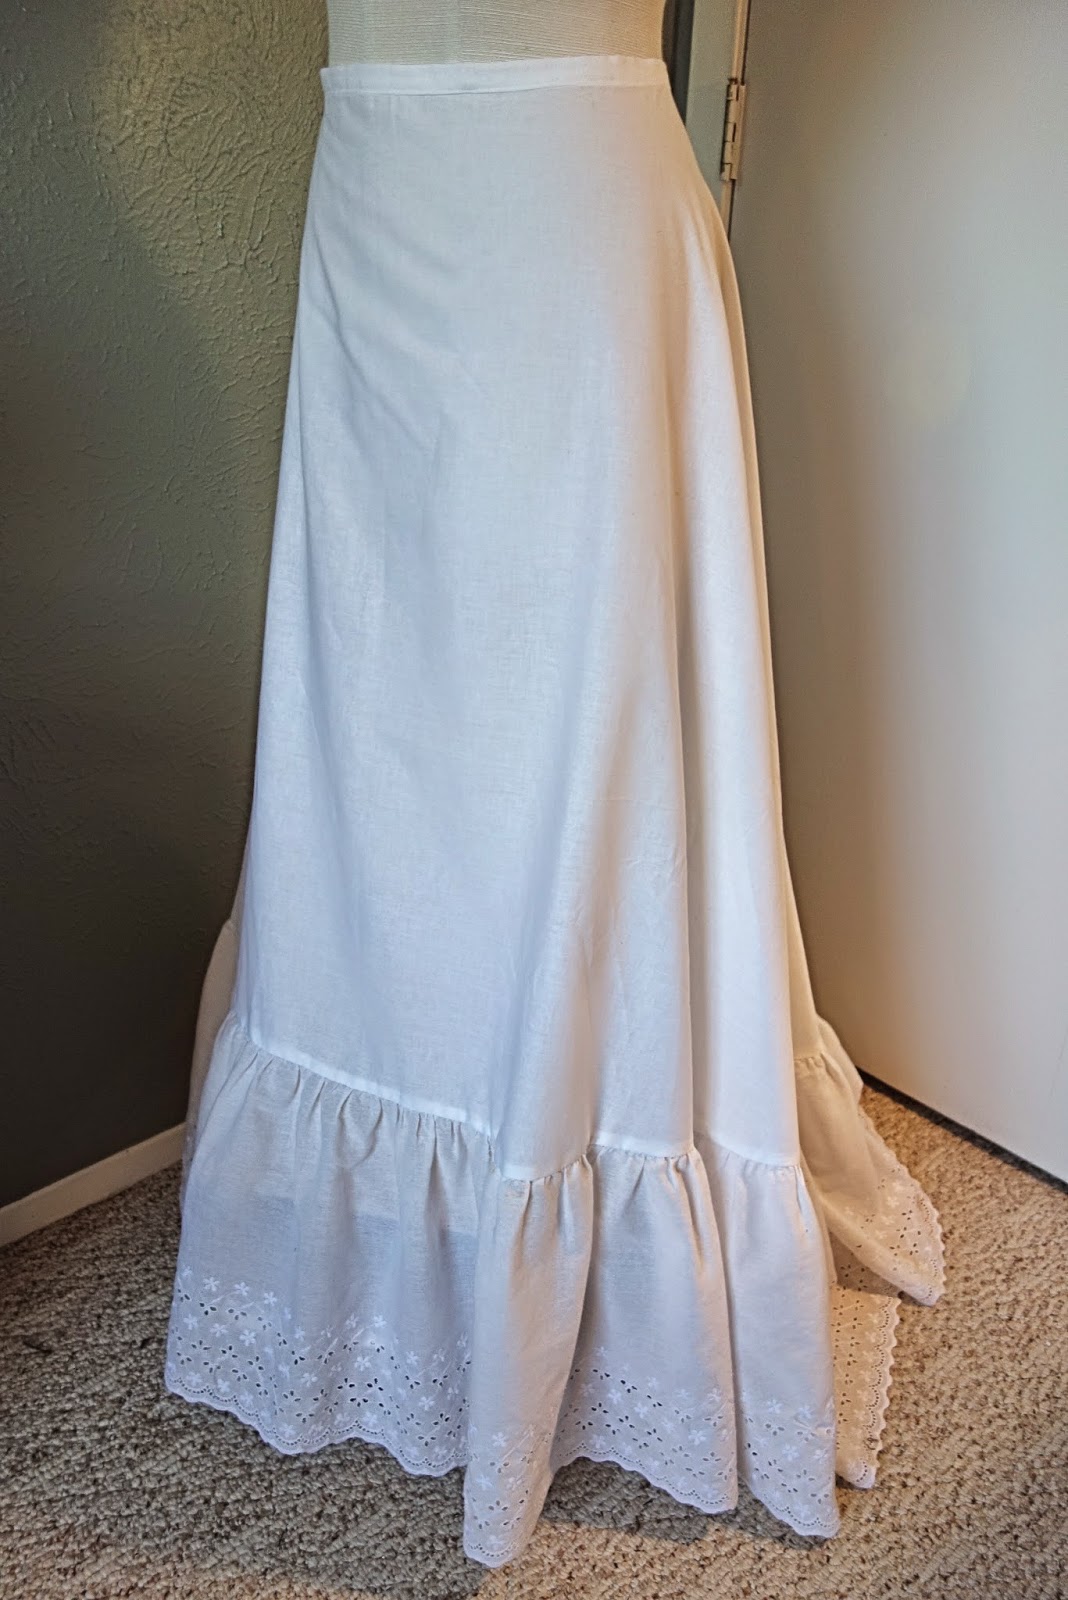
Because the skirt was so fast and easy to assemble, I decided to also make a new petticoat to wear under it using the same circular skirt pattern.  This time, I cut off the bottom 14" from the pattern and added a ruffle of eyelet fabric that came from a bedskirt that I picked up at an estate sale.  This made assembly even easier because the flounce was pre-gathered, and the whole thing only took me about an hour to make from start to finish. Nice! It's not the fanciest thing in the world, but I think the extra layer will help hold the demi-train out, and combined with a few other petticoats, it should give the skirt a pretty nice shape.  Once again, this circular skirt pattern really paid off.


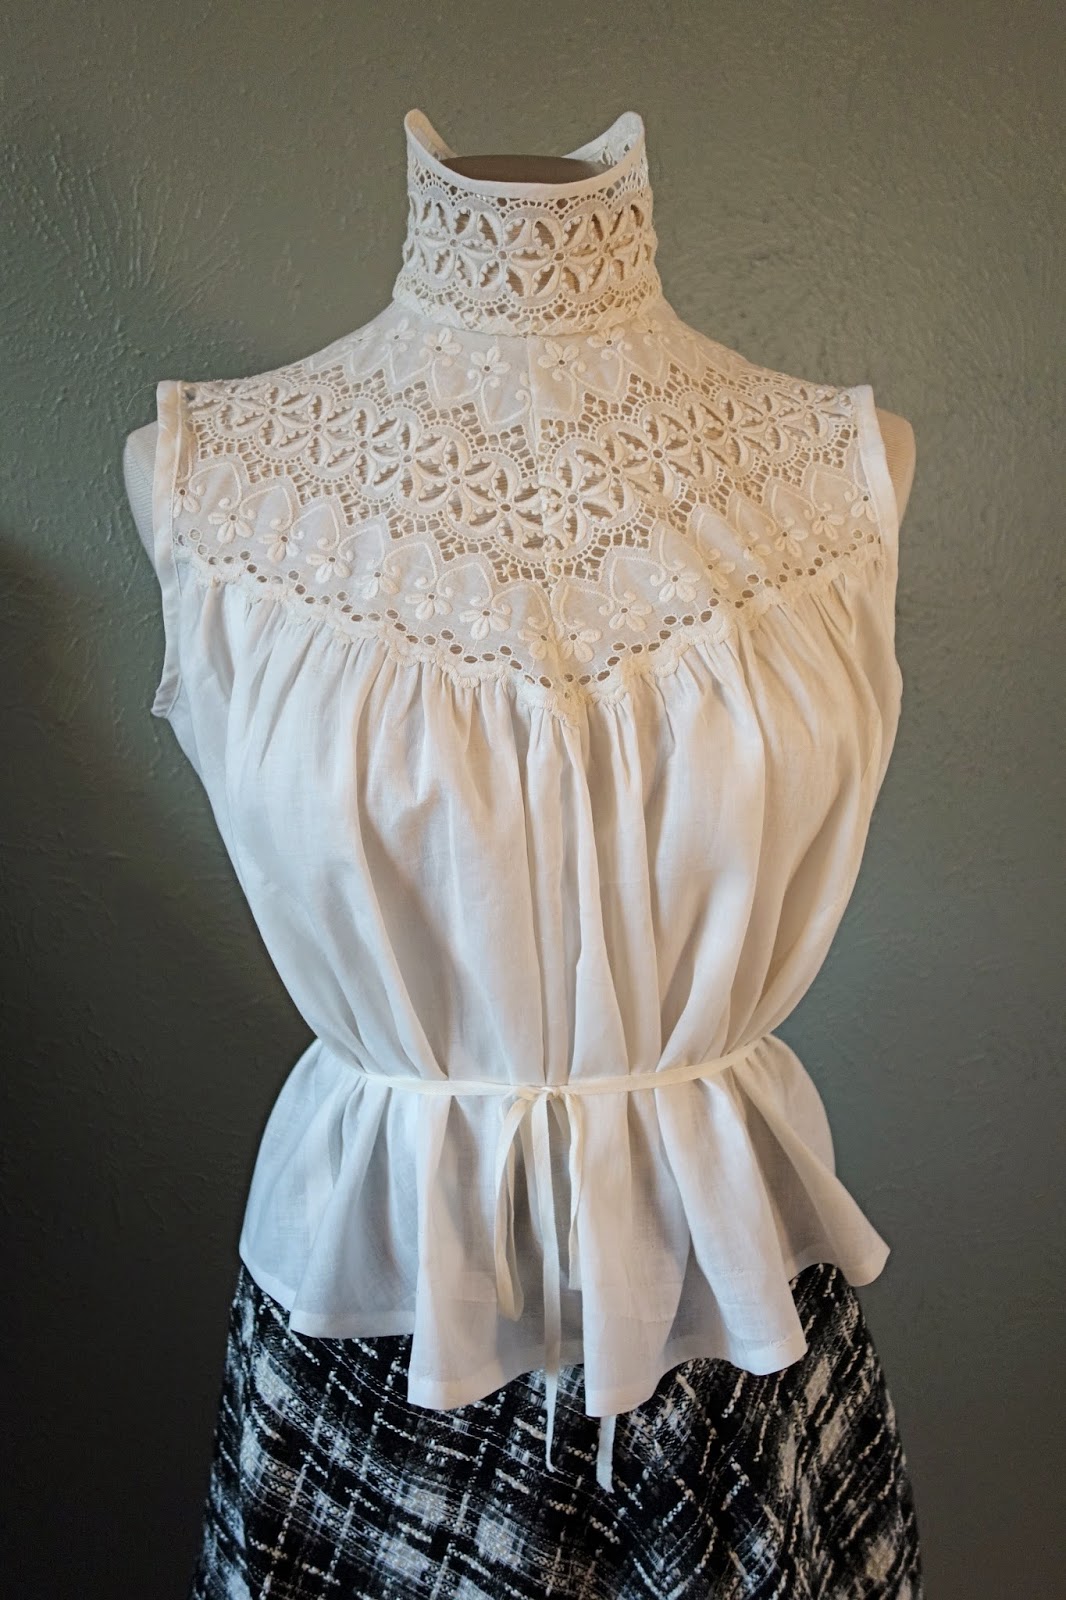
The other pattern that I tried out for this project was the Folkwear Gibson Girl Blouse, which I used to make a guimpe to wear under my jacket. This pattern only cost me $1 at a recent antique show, so I was super excited to give it a try.  I used some antique eyelet for the bib part of the blouse, and I changed the bib slightly so that it was V-shaped instead of rounded in the front.  I also made the top of the collar higher and left off the sleeves because Edwardian guimpes often left off sections like the sleeves or the back to conserve fabric when they were intended to be worn under other garments.  This pattern was a joy to work with too, and everything went together easily and fit well right off the bat.  It definitely made my task easier, and I would love to try making another version with sleeves at some point in the future. 


So now that the easy parts are finished, I'm working on the jacket, which has proven to be much more of a challenge.  I'll be back soon to show you how that project turns out!  

Sunday, September 14, 2014

Wearing History Kickstarter

If you haven't seen it yet, I just wanted to mention that my friend Lauren from the amazing Wearing History website and pattern company is currently running a Kickstarter campaign to raise money for a line of her own ready-to-wear vintage clothing.  Even if you prefer to make your own vintage styles instead buying them, you can help support her project by buying one or more of her amazing Victorian, Edwardian, or Retro patterns as one of the Kickstarter options, and the funds will go directly toward making a her dream a reality.   I bought two of her patterns, and now I'm wondering how I will ever narrow it down to just two - they are all so wonderful!

So if you'd like to pick up some fun new patterns, or even better, some fabulous retro clothing, go help her out!

Tuesday, August 12, 2014

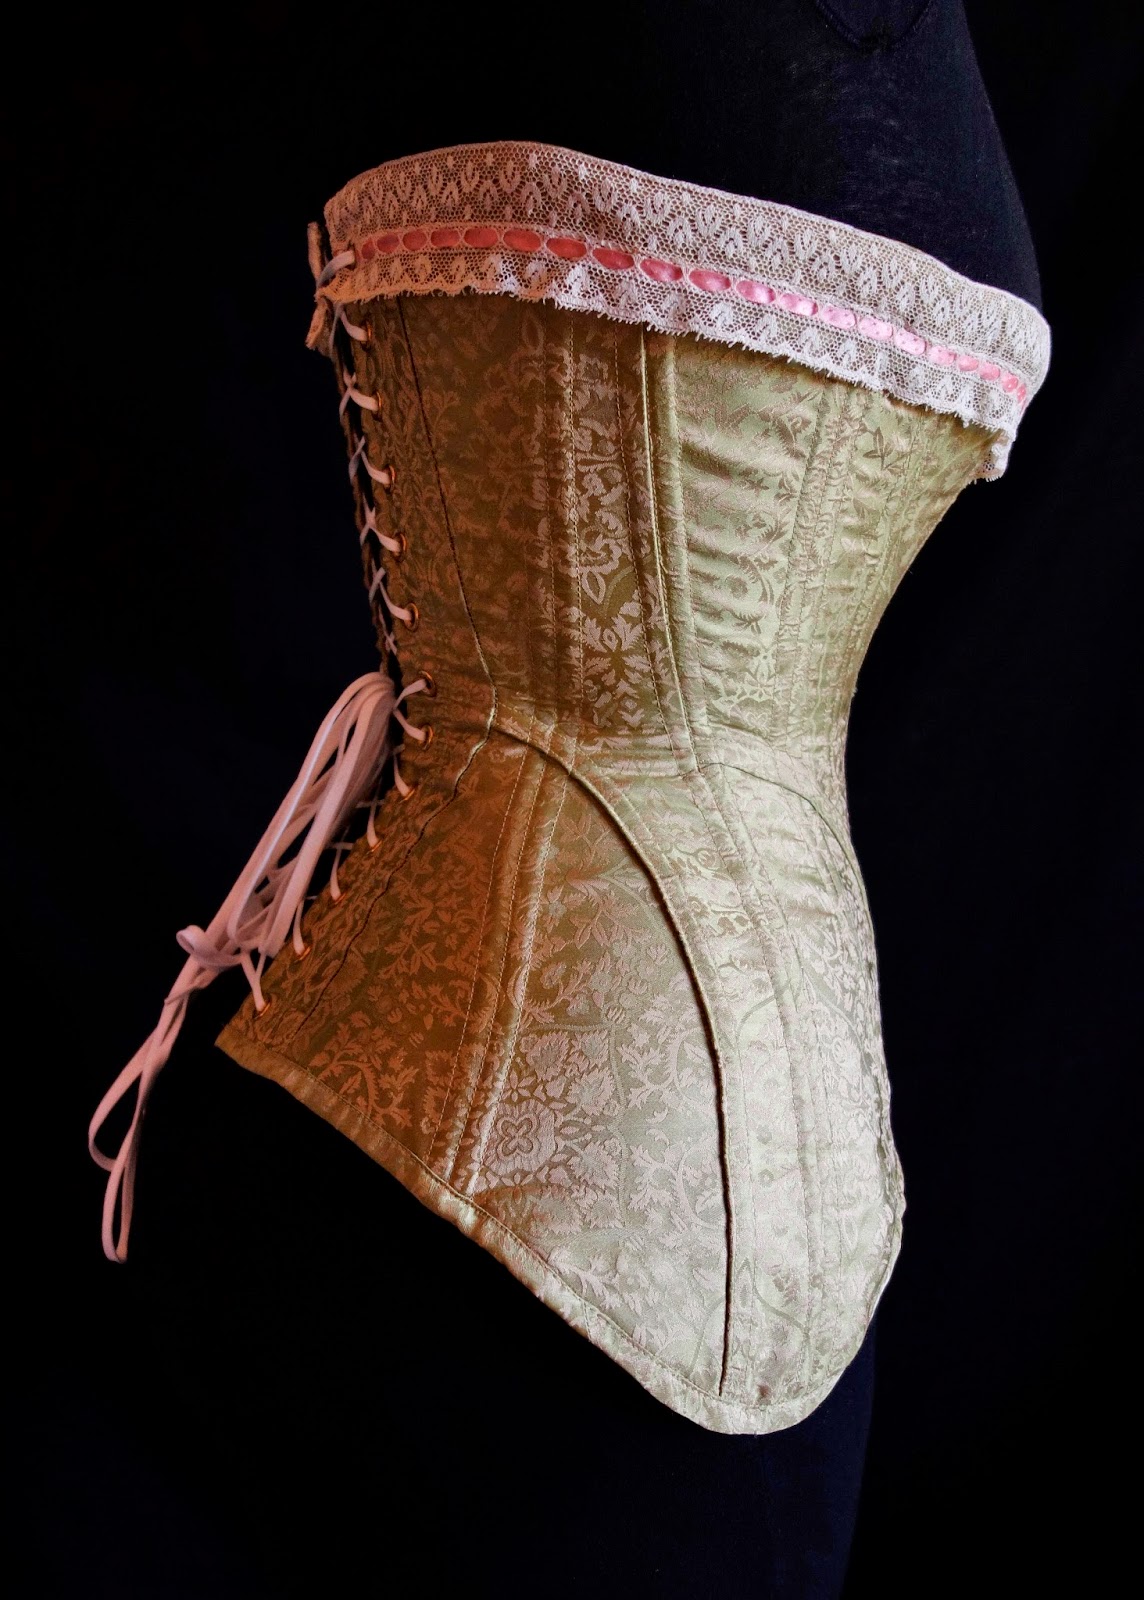
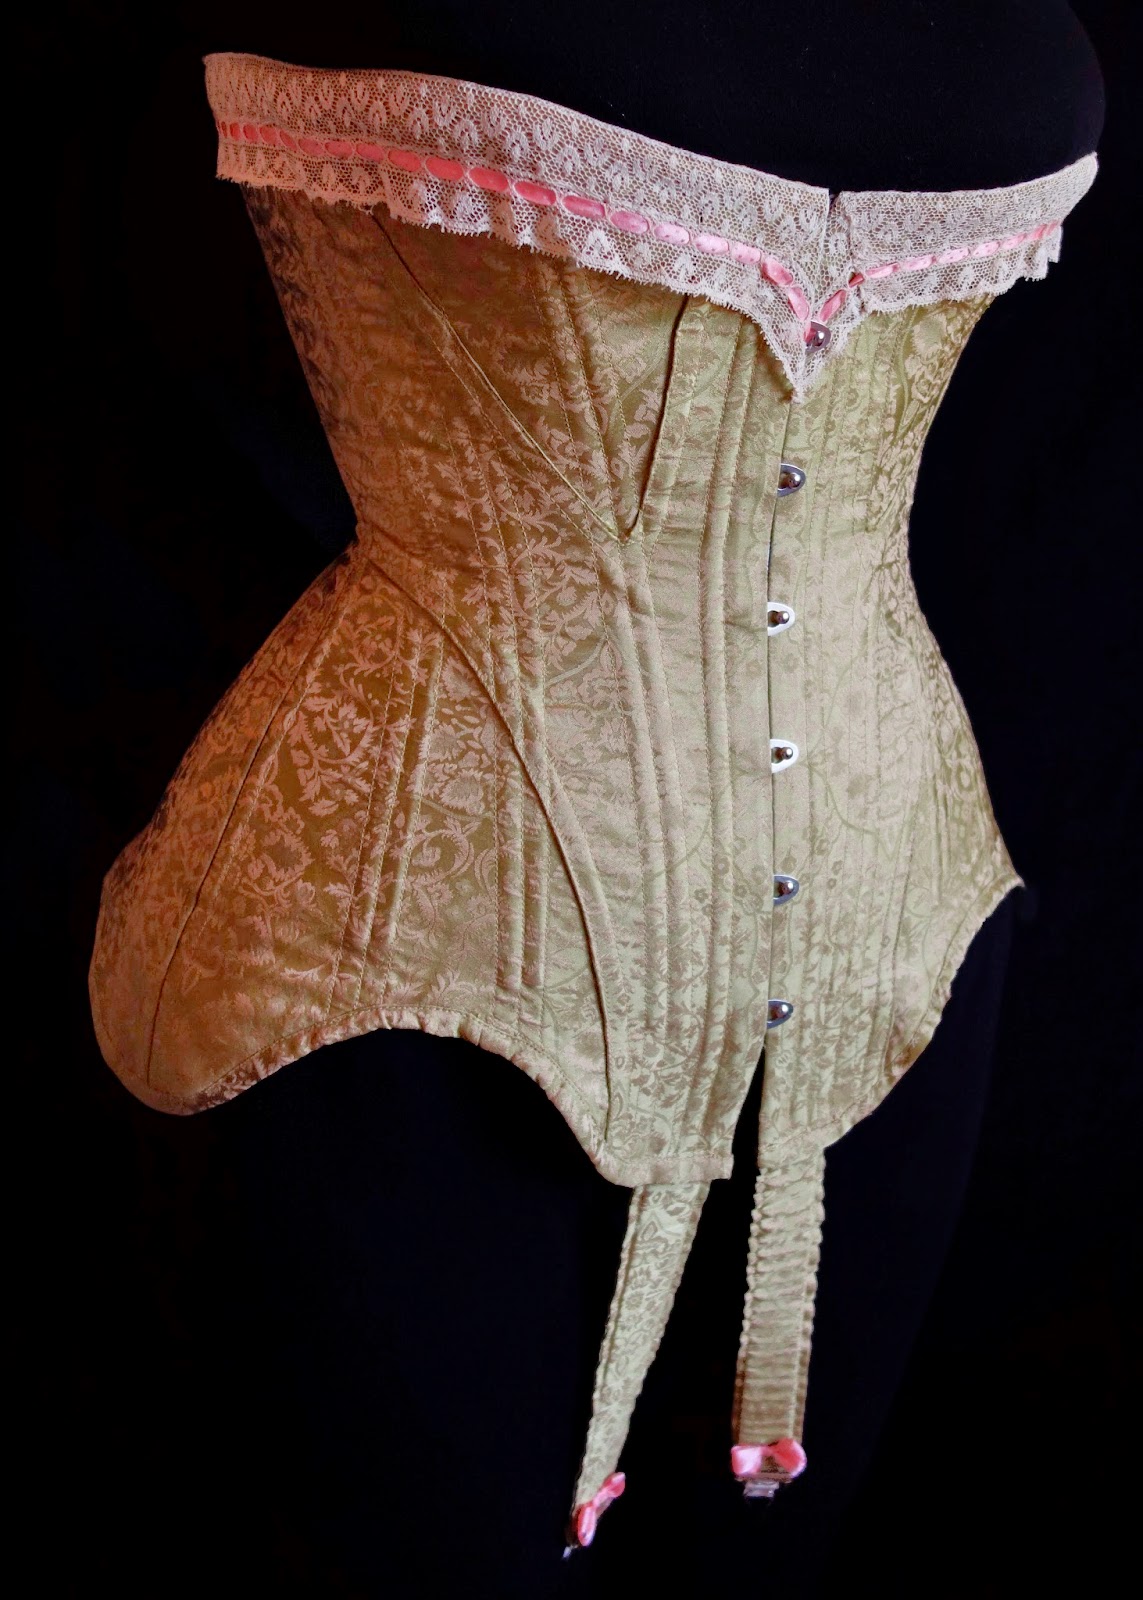
Edwardian corset and pattern review


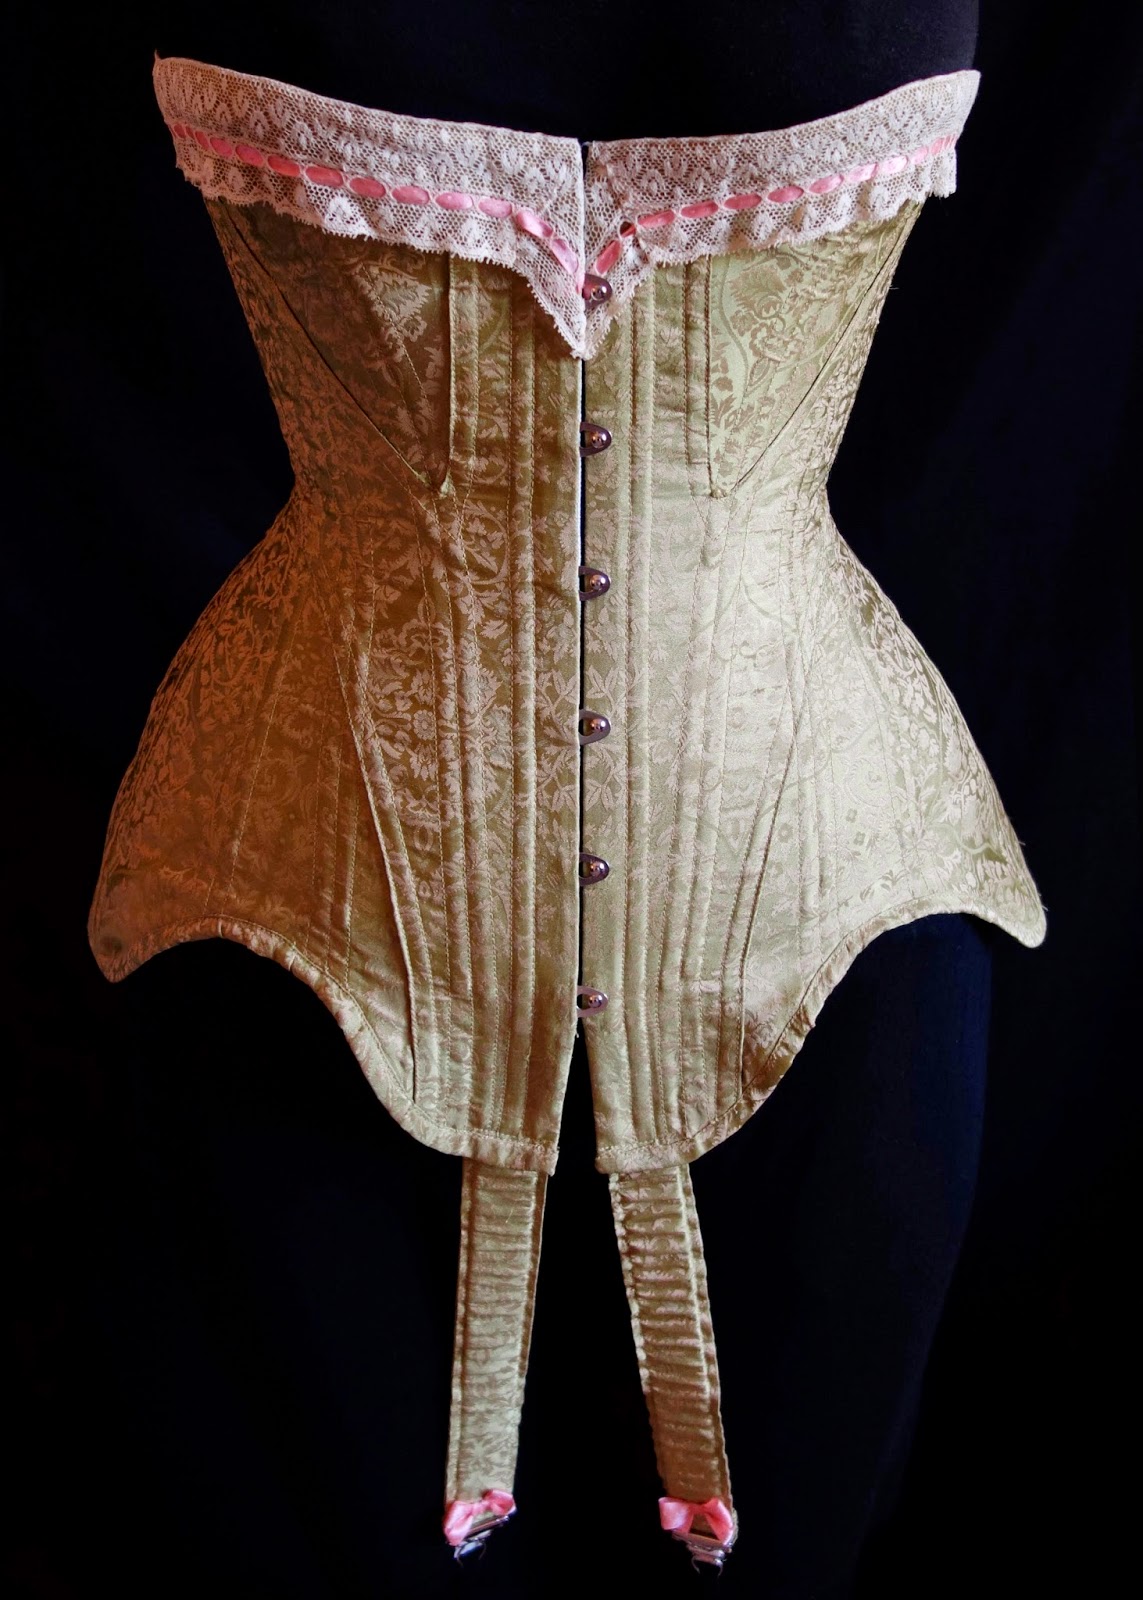
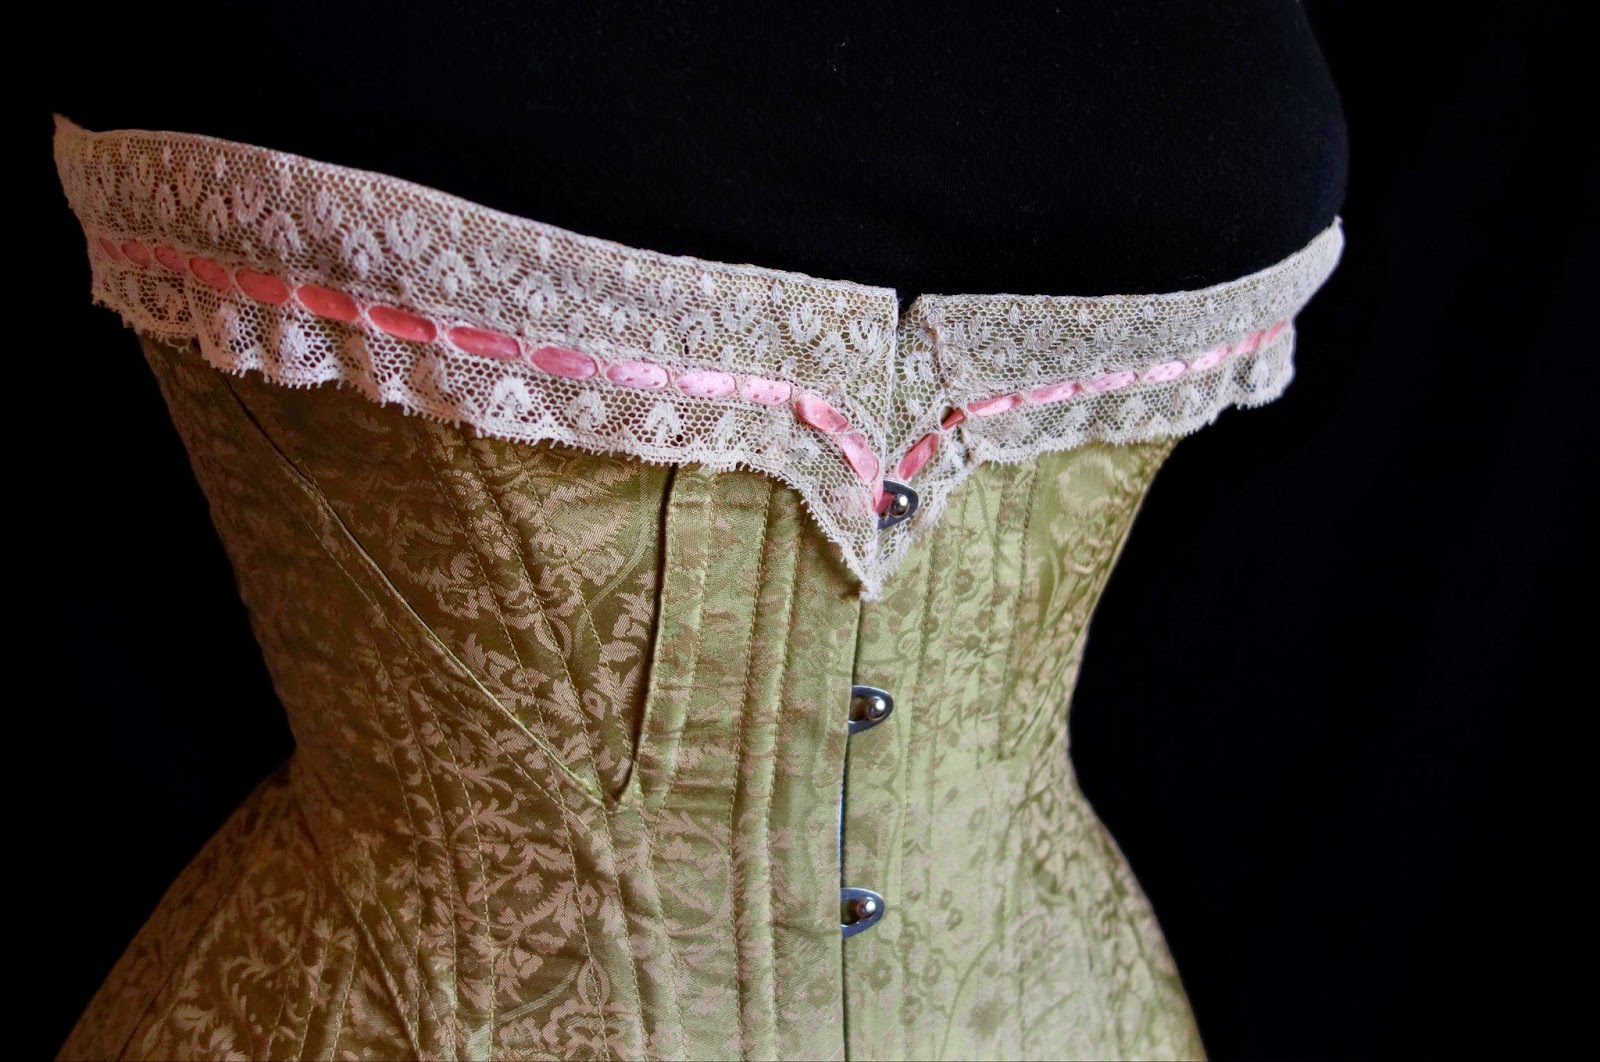
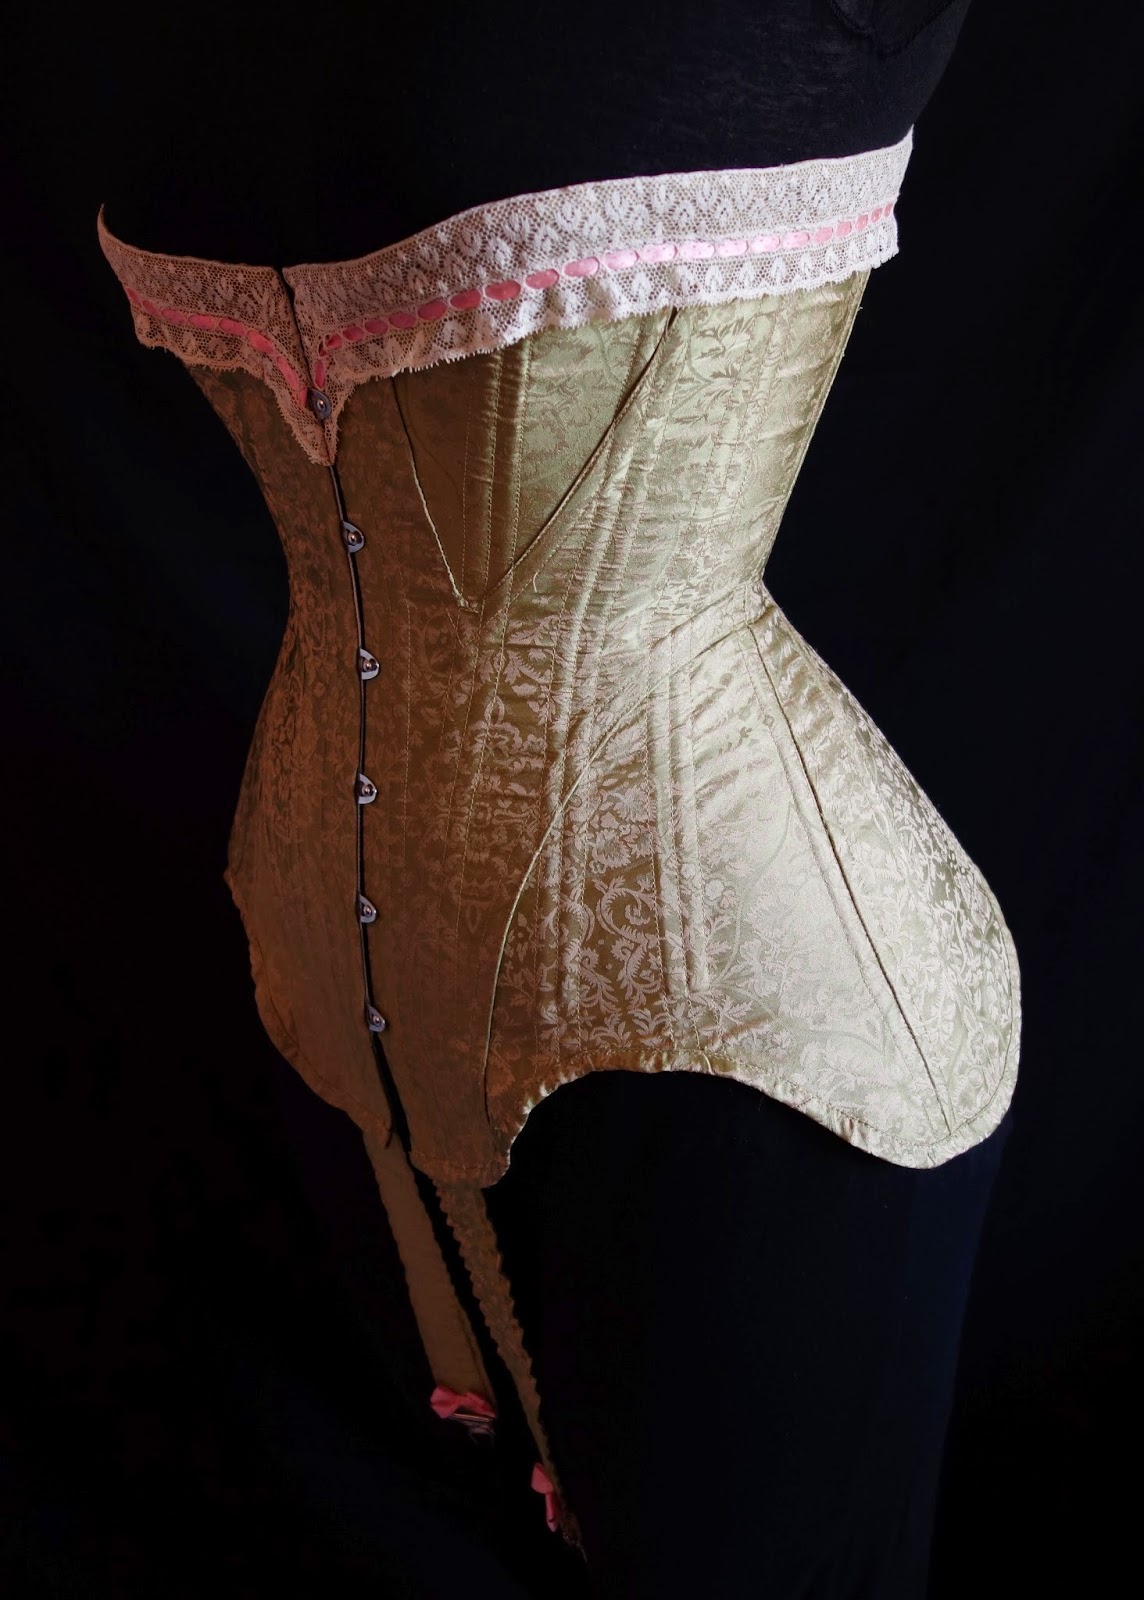
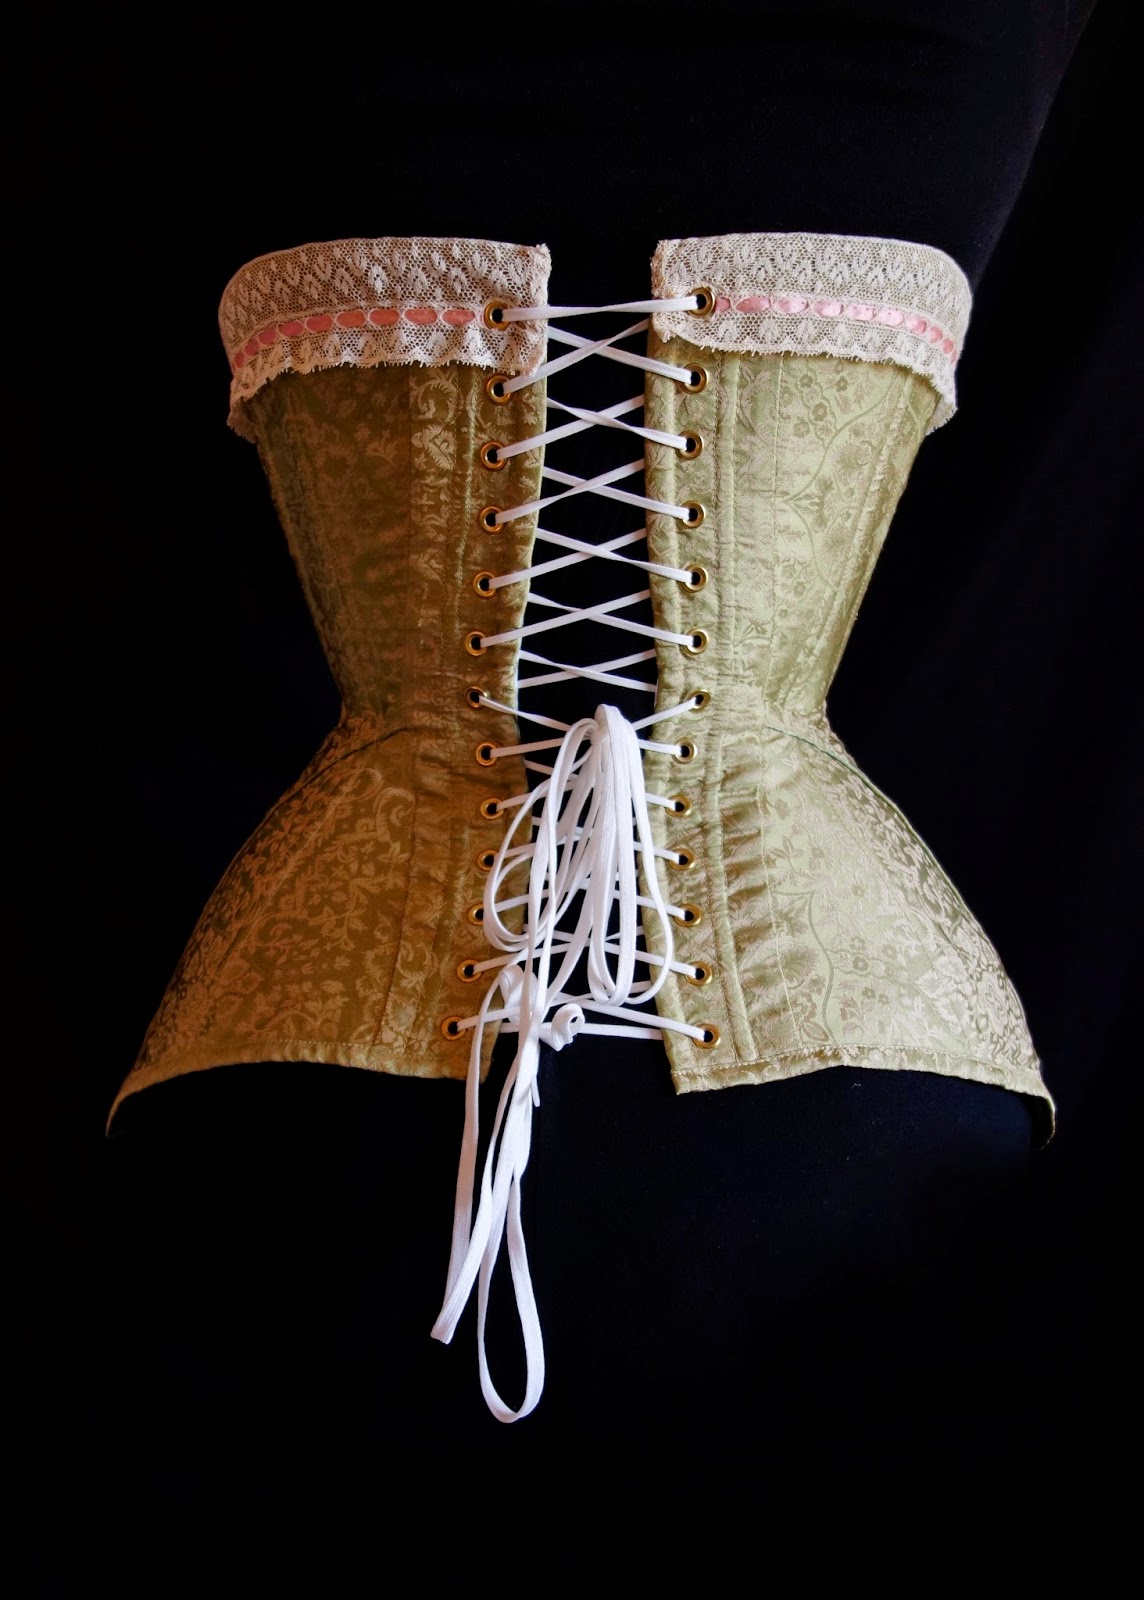
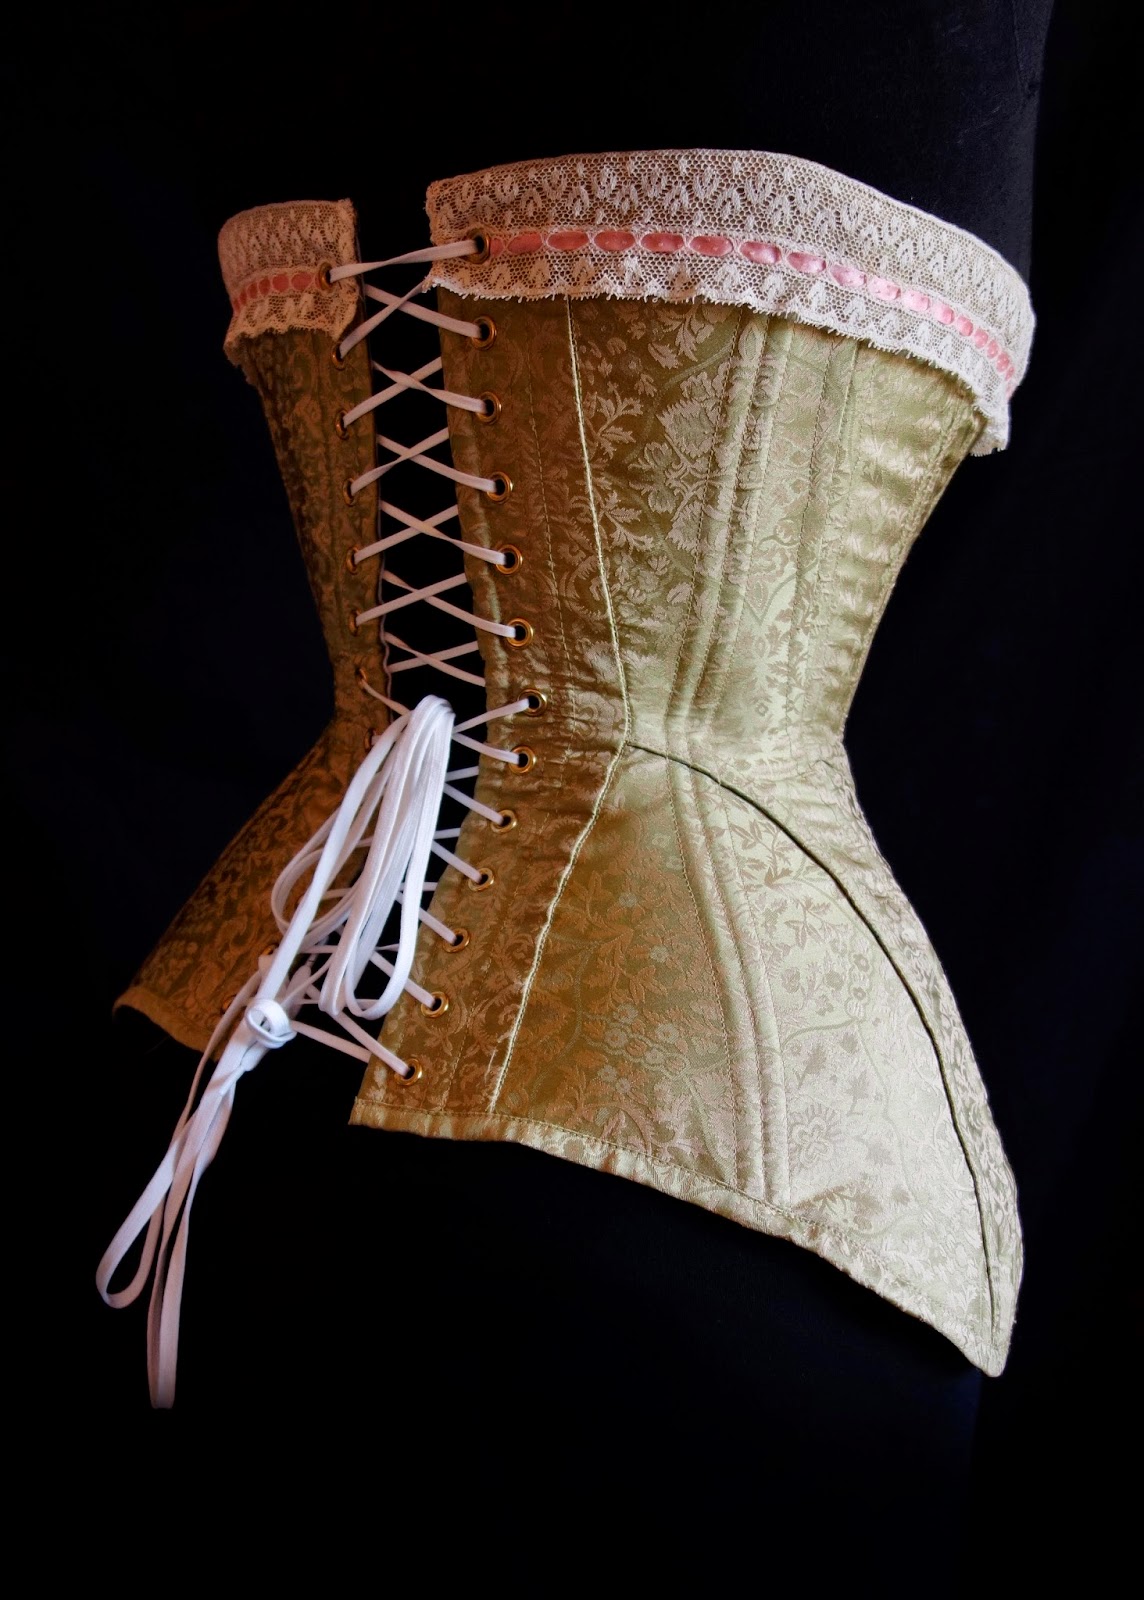
For my birthday last spring, I splurged and bought myself something that I've been lusting over for years - one of the gorgeous corset patterns made by Atelier Sylphe.  After a lot of waffling over the many beautiful choices, I finally picked corset ref W since it has such an amazingly curvy Edwardian shape, plus it looked like the construction would be relatively simple since it didn't have as many pieces as some of the other patterns from this period.

There aren't a lot of instructions included with these patterns - just some notes about the corset materials and measurements, plus a page of diagrams showing the construction method for the seams.  But for me, that was plenty, and I didn't have any trouble with assembly since I have made a number of corsets in the past.  However, if you are new to corsetry, the pattern designer gives you links to several of her incredibly helpful online tutorials, like this one showing you how to set in bust gores.  She also provided about 20 additional photos in an online download showing the original corset from every angle imaginable, both inside and out.  I really loved that!

The pattern itself is beautifully drawn and very accurate when assembled.  My only tiny complaint is that the boning length was not marked on the channels in this pattern, and since it appears that some of the bones in the original were shorter than their channels, it would have been nice to know exactly where they ended.  Another thing that I wanted to point out is that different pieces of the pattern have different seam allowance widths, which I found to be a little confusing at times if I wasn't paying close attention to the pattern after I cut out my fabric pieces.  Personally, I think it would have been easier for me to cut down the paper pattern to the exact measurement of each piece and then draw my own more standard seam allowances, but that is easy enough to do on you own if you aren't used to the specialized seam allowances that are common in corsetry.  I really appreciate how accurate the designer was by including information like this in regards to selvages, but unfortunately, it was a little over my skill level since there were no written instructions specifically telling me how to make each seam for each piece. But I think advanced corsetmakers would love it, and it's simple to change for the rest of us.
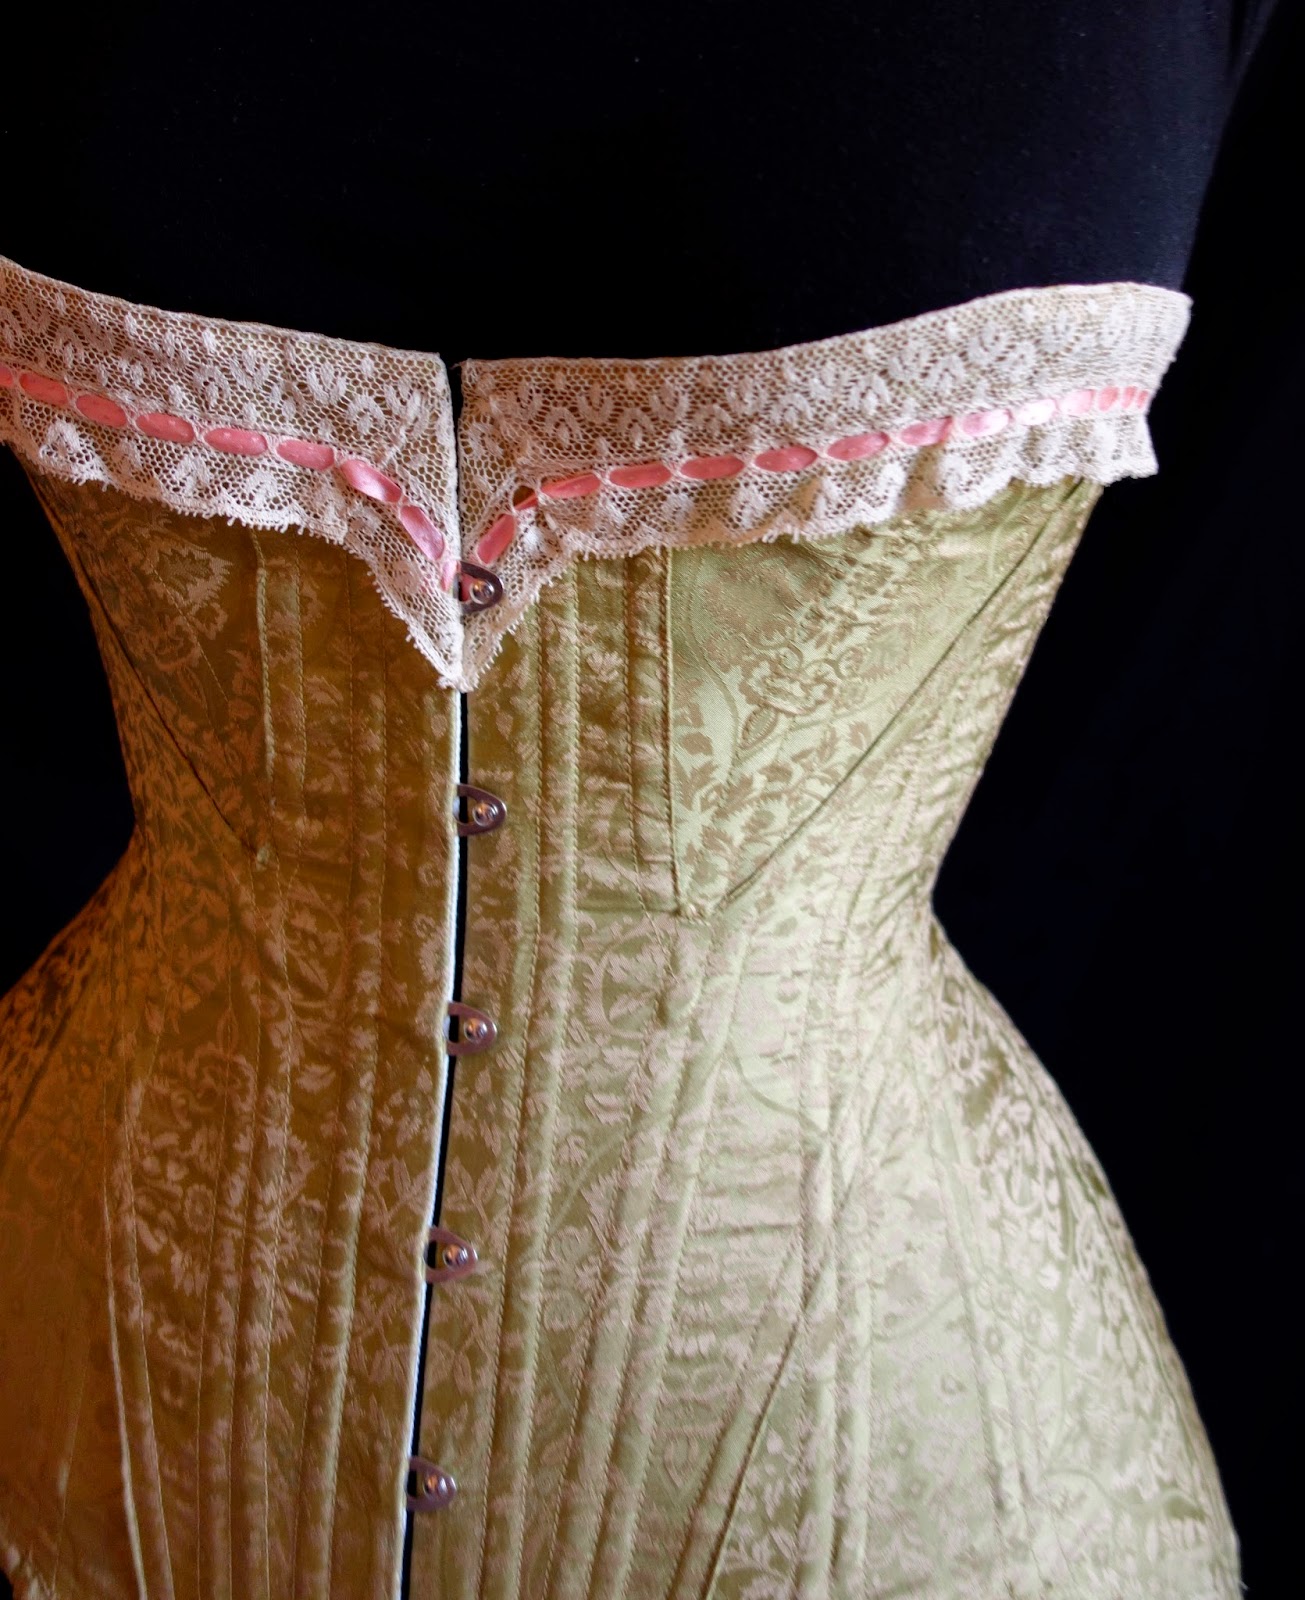
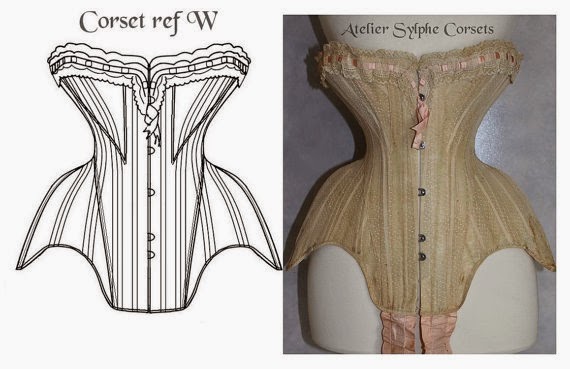

I made my corset with a layer of coutil and a layer of silk brocade treated as one.  There are boning casings on the inside of the corset, and it is boned with spiral steel.  I built my version almost exactly like I made my 1910's corset.  My favorite part of this project was finding some beautiful antique lace with silk ribbon beading for the top of the corset.  Good lace is so hard to find, but such a wonderful treat when you stumble across the perfect piece.  


I did not alter the proportion of the bust/waist/hips on this corset at all, but I did enlarge it by a few inches just by making slightly smaller selvages on a few pieces and adding a bit to the CF and CB edges.  I also added 1" to the length of the torso since I am long waisted and have to use this adjustment on almost everything that I make.  The only other change that I ended up making is to cut down the length of the bones in the front so that they don't go all the way to the bottom edge of the corset.  During the final fitting, I discovered that the bones dug into my legs when a sat down, so it was much more comfortable to raise them a bit, and it didn't change the shape of the corset at all.  

I was a little disappointed at first that my corset didn't create the extreme waspy shape that you see in the original, but I think I have finally accepted that corsets can only do so much. There are some body types that are more naturally suited for that sort of exaggerated hourglass look (I'm looking at you, Beyond the Automobile!), and I'm sure years of waist training would probably help too, but even the best corset pattern in the world can't work a miracle on an average modern body.  But this pattern still creates a gorgeous shape, is comfortable to wear, and I'm thrilled with the final results!  I definitely recommend this corset pattern to experienced corsetmakers or anyone who is ready to "level up" a bit.  I thoroughly enjoyed making it, and I hope I get a chance to try out more of the Atelier Sylphe corset patterns in the future.