Sunday, January 27, 2013

Pirate UFO


For this week's Historical Sew Fortnightly challenge, we were supposed to complete a "unfinished object".  I have a number of UFO's in my sewing bin, but the project that I most wanted to finish was a pirate costume that I started six years ago.  I was originally making this to wear to the a Pirates of the Caribbean premiere, and I was SO in love with my design concept, but then I got pregnant and this project was placed on hold due to my growing belly.  But every year or two, I start thinking about how much fun it would be to wear a pirate costume to faire.  I've dragged it out several times over the years and made attempts to work on it some more, but unfortunately, I never can seem to make much headway.

And once again, life has thrown up roadblocks on this project, and I didn't get as far as I had hoped.  But I did finish the petticoat, so that's better than nothing.  I keep reminding myself that this is an unfinished OBJECT challenge, not an unfinished OUTFIT challenge, so I'm counting this as a minor victory anyway.


The petticoat is made out of some machine embroidered voile that I bought on clearance for next to nothing.  It's not authentic, but I thought it was reminiscent of the beautiful embroidered petticoats from the 18th c.  The construction is based on petticoats like the ones covered in this tutorial.  The only thing creative about this whole project is that I spent a lot of time distressing it so that it looks worn and old.  I dyed and splattered the hem with a mixture of brown and dark green dye.  Then I ripped holes all along the bottom and tried to fray the bottom edge.  I also stitched up some of the rips with some hand-spun yarn, and I added a few patches here and there with scraps of striped fabric.


I'm going to continue working on the jacket over the next few weeks, and I hope to have the whole outfit done in time  for the embellish challenge.  I've changed up the jacket design quite a bit from my original sketch - the big frockcoat looked great in the drawing, but when it started coming together, I discovered it was much less flattering in real life.  I'm still not 100% sure what the jacket will look like when I'm done, but hopefully I'll figure something out this month.


Sunday, January 13, 2013

a dress for the Titanic


I was so thrilled to discover that he next challenge for the Historical Sew Fortnightly corresponded perfectly with the DFWCG trip to the Titanic Artifacts exhibit at the Ft. Worth Museum of Science and History.  So my entry to the centennial challenge is a complete 1913 outfit based on this reproduction dress pattern from Past Patterns, which is listed for the years 1911-1914.

I enjoyed working with this pattern, and I am very pleased with the way the dress turned out.  One of my friends recently asked me if I would recommend this pattern to others, and I would have to answer that with a conditional yes.  If you are comfortable making a dress with no instructions, you are good at resizing, and you just want some basic pattern shapes to get you started, then this is a really nice authentic historical pattern.  I love the shape of the skirts, and there are very few pieces in this dress, so it goes together quite quickly.  There were a few odd areas, like the fact that the bodice is HUGE!  I had to take 4" out of the circumference of the bodice, and took another 3" off the length.  The skirt runs a little short too, so if you are tall, you'll want to add quite a bit to the hem. The only other major change that I made was substituting a shawl collar for the ruffled one just to make it more tailored looking.  But other than those small alterations, I thought the pattern came together very well.

But... and this is a pretty big "but"... there are NO helpful instructions on this thing at all, and you need to be somewhat familiar with 1910's construction methods or you will be completely lost.  It took me 2 days of head-scratching and theorizing to figure out how to close the dress, and I'm still not sure I did it correctly.  I finally went with a center-back closure with snaps that opened from mid-back to the hips, because that is the only way you could have the collar connect across the back (unless there is a split in the collar, which would just be weird).

Also, it helps to know that 1910's dresses often used lapped and top-stitched seams, and the center-front panel of the skirt and the lower sleeves on this dress are both joined this way.  The edge of one piece gets folded under and ironed, then you place it over the next piece and stitch them together from the top, which makes a decorative flap of fabric that looks like a tuck.  It's a fun little detail, but I only knew to do it like this thanks to another antique 1910's pattern that I made up that had much better instructions.   Anyway, if you decide to give this pattern a try, these are the two best tips that I can give you, and hopefully the rest is more straightforward.


My favorite part of this project was making the hat.  I wish I could show or tell you more about how I reshaped it, but I didn't take any in-progress photos because it looked like a such complete hot mess until the very last minute that I was convinced that it was going to be a failure.  But mostly, I just wet the hat and then kept stretching and ironing and re-steaming it over my generic hat block until I eventually bent it to my will.  I was too lazy to go by gelatin to make proper sizing for it, so once it was shaped and dried, I painted a few coats of fabric stiffener on it, and that worked great too.  I love these mid-teens hats that are more vertical vs. the wide-brimmed variety that you more typically see from the early 1910's, so I had a blast making this one. I totally love the weird asymmetry and crazy plumes shooting off in odd directions (here's a great collection of examples). Although the dress could pass for a wide variety of years in the early 'teens, the hat style is very 1913, so I thought it would be a nice finishing touch for the SHF challenge.

This was a 100% stash project, which was fun and very satisfying.  I only spent $1 on a bit of interfacing for the collar, and everything else came from odds and ends that I've had hanging my sewing room for years and years.  My dress fabric came from estate sales - I think it was $5 for a large trash bag completely filled with fabric.  I picked out two shorter lengths of fabric that I couldn't do much with on their own, but when combined together, I had just enough for this dress.  The burgundy velvet came from an old bedskirt, and the tassels were freebies from my husband's work.  I bought the wool hat blank on clearance from Target last year (I still can't figure out how on earth you were supposed to wear a floppy, wide-brimmed blank as a modern hat!), and the feather, shoe buckles, and eyelet dickey were all odds and ends from the Antique Elegance show that I picked up with no specific project in mind, but they were too cheap to pass up.  Lately I've been trying really hard to not buy fabric or other costuming materials unless I have an actual project in mind for it, but this outfit totally justified collecting a bunch of random materials "just in case" from time to time too.  I have decided that 2013 is going to be the "year of the stash" for me, and this was a great project to get the ball rolling.

So that's about it.  You can see more photos of all of the fabulous 1910's ladies and gents from the DFWCG on flickr, and here are a few more shots of my dress for good measure.


Wednesday, January 2, 2013

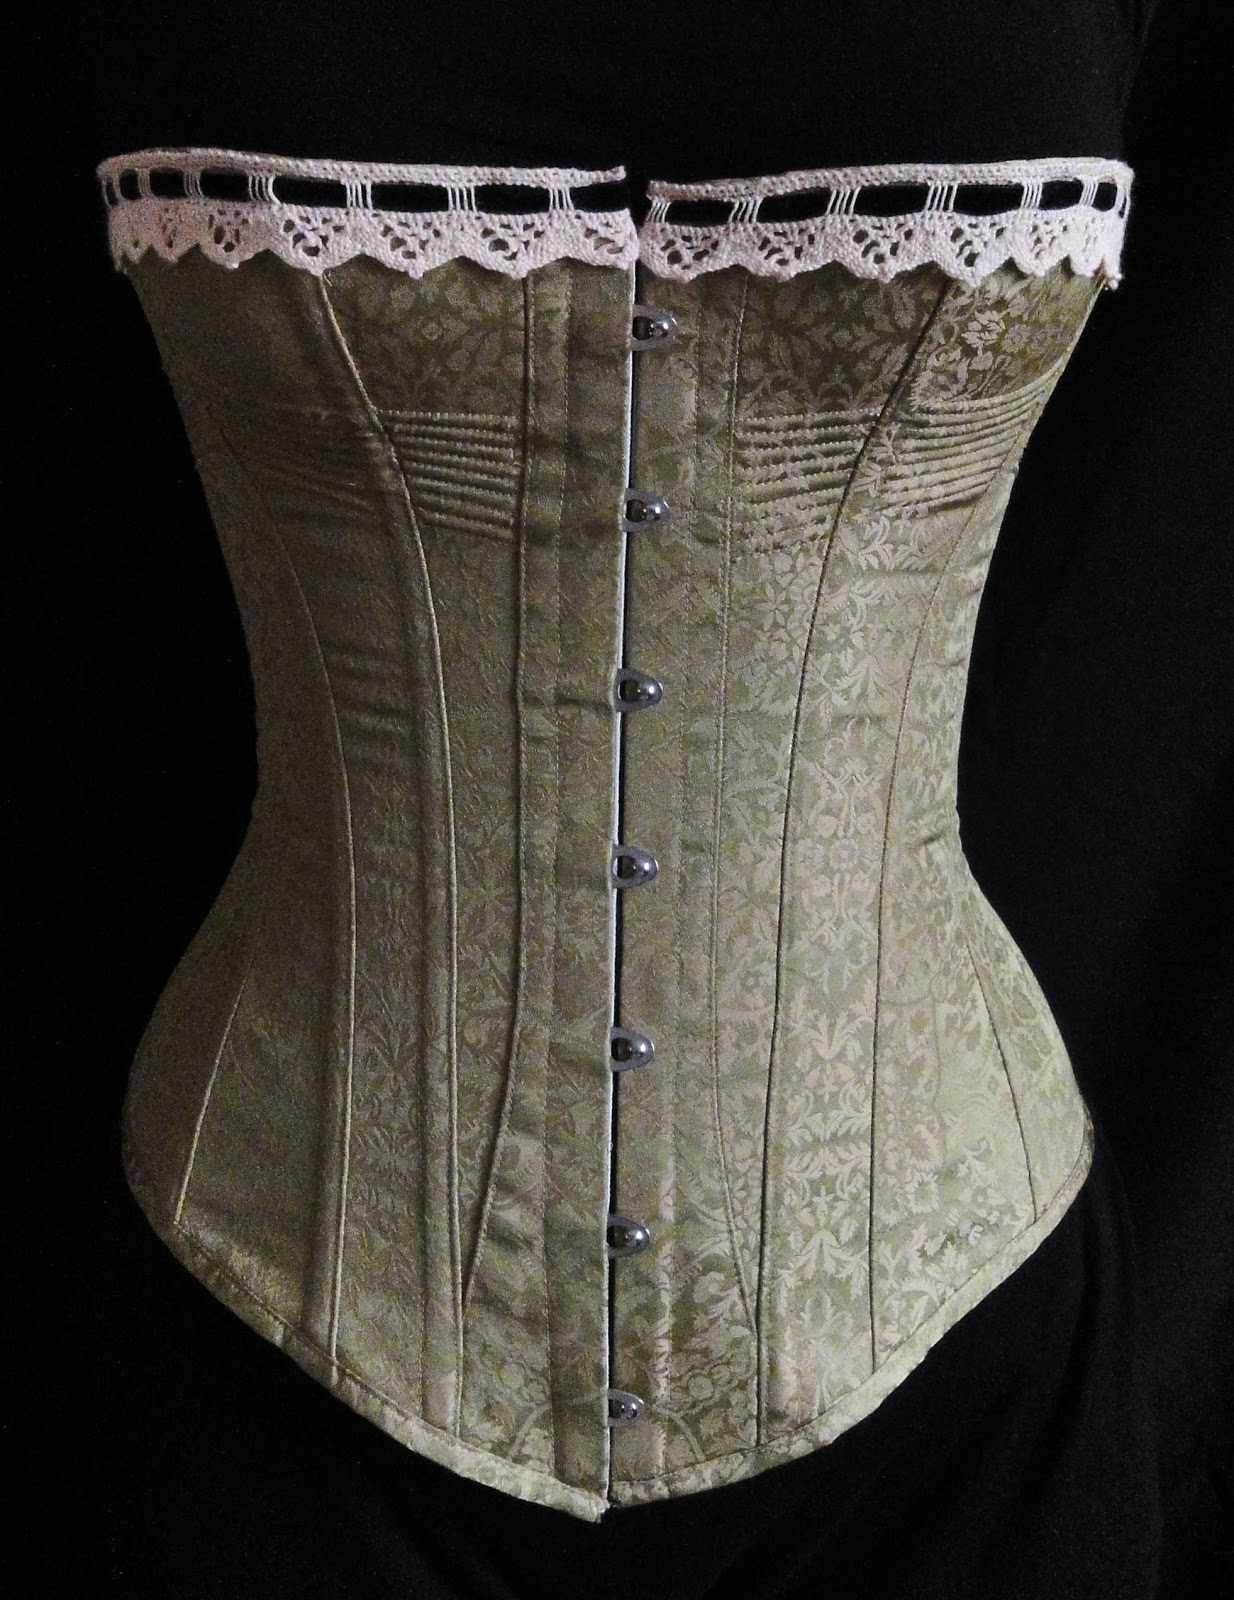
a natural form corset

So I'm sure most of you know about the very cool Historical Sew Fortnightly project that is going on in 2013.   I wasn't sure if I should join this one because my project calendar is already packed to the brim, but it just looks like so much fun that I can't resist!  I know I won't be able to do all of them, but if a project that I already have planned happens to correspond with a challenge, then I figured I might as well join the party!

So luckily, the first challenge happened to line up perfectly with a goal that I had already set for myself for the last week of 2012:

 #0 (the bonus challenge): Starting Simple - due 31 December NZT.  Finish a project, make a very simple garment, or something you have made before.  


I'm not sure if a corset counts as "very simple", but it was something that I had made before and I knew I could knock one out before the New Year.  I also have several new Victorian dresses that I am wanting to make in 2013, so it seemed like it would be a good idea to get the corset out of the way early so I could focus on the dresses when I am back at work and have less time on my hands.

So I looked at a variety of patterns of corsets from the years 1875-1885(ish) and made paper mockups to compare the shapes and see which one I liked the best. The paper mockup on the far left is a 1877 corset from a de Gracieuse pattern diagram. It makes a pretty shape, but it was way too high-waisted to work on my body.  The middle one was the 1880's corset from Corsets and Crinolines, but I decided against this one because it didn't seem very curvy.  The one on the right is the 1880's "exotic" corset from the book Corsets.  I loved how curvy this one was, so I decided to give it a try.

I enlarged the pattern to 113% so it would come closer to fitting my waist measurement, but I didn't make any other changes to the bust/waist/hip proportions, and I followed the pattern as precisely as possible.  However, I am tall and pretty long-waisted, so I had to add 2" onto the torso to make the bust hit me in the right place.  I also had to remove 2" from the bottom edge in front because it was so long over my belly that it buckled when I sat down.  I'm guessing that this corset was meant for a lady with a higher waistline than mine, but I don't like having the tightest part of the waist hit at my ribs, so I deiced it was worth making some adjustments.  

Even though I didn't change any proportions other than the length, I was surprised at how non-curvy my corset turned out when compared to my paper version.  To be honest, I'm a little boggled by it considering how little I changed the pattern. The only thing that I can guess is that the extra length makes the curves less apparent, or maybe I'm just not busty enough to fill out the top as intended.  But even though this corset didn't turn out exactly how I had hoped it would, I still think it'll work fine for my projects this year.  The shape will be nice and smooth for natural form styles, and it also reminds me of the long and lean corsets from the 1890's like the one on the right.  It'll be a good foundation garment to have in my closet.

My corset is made with silk brocade and coutil treated as one layer, and the spiral steel boning is held under tapes on the inside.  The original corset was boned with cane, so I left off some of the boning channels on my version since the steel is so much stronger.  However, the missing boning caused the top to wrinkle under the bust a little, so I added cording in that area like the example from Corsets and Crinolines to add a bit more support.  I still need to add flossing, but I'm going to put that off for sometime further down the road.  Maybe that can even be my entry for challenge #4 - Embellish!  


Wednesday, December 26, 2012

snow-day photoshoot

I hope you all had a wonderful holiday!  This year, we were treated to a very rare white Christmas in Texas, and my whole family had so much fun frolicking in the snow.

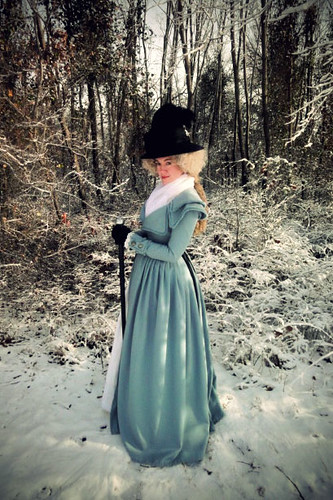
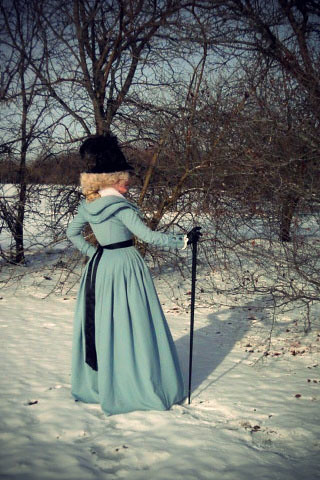
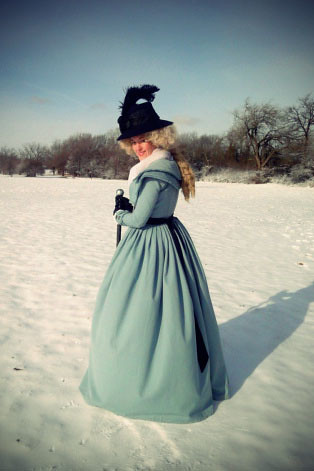
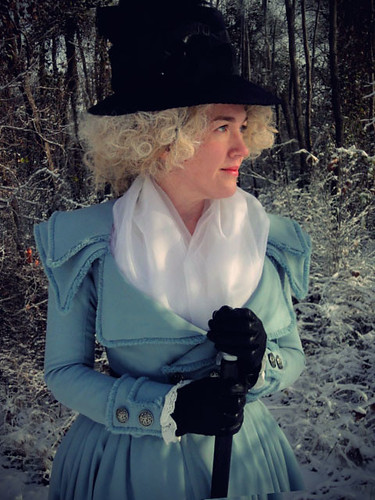
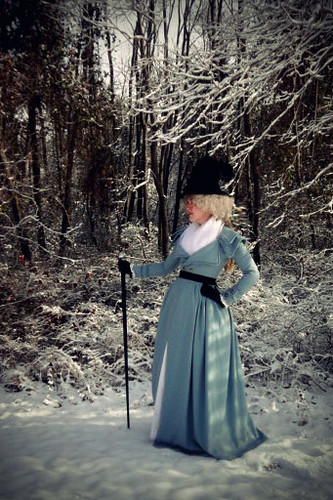
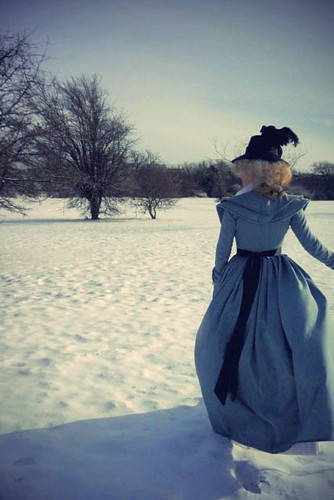
Since I didn't get a lot of good posed pictures of my new redingote last month, I decided to make use of the pretty winter backdrop today and snapped a few more pics at the park.  It was so much fun wearing this outfit in cold weather.  I stayed nice and warm in my gown, and the colors seem to go so perfectly with the snow and bare trees.  I could have kept going for hours, but my son decided that more snowball fights were in order, so I changed back into my street clothes and returned to 21st century mom-mode.  Unfortunately, my camera doesn't like cold weather and all of my pictures are a bit out of focus and hazy, but we're going to call that blurriness "artsy" and go with that.  ;)  But anyway, it was a fun little excursion and a perfect Christmas gift from mother nature for a costume nerd like myself.

DSC06255


DSC06262


DSC06271


DSC06233


DSC06272


DSC06254


DSC06250


DSC06234


Monday, December 3, 2012

A late 20's dress for Lanternlight


This past Saturday, a group from the DFWCG attended Plano Heritage Farmstead's holiday celebration - Lanternlight.  The theme for this event is usually turn-of-the-century Victorian/Edwardian, but this year they switched things up a little and did 1920's, which was SO much fun! 

In the past, I've kind of turned up my nose at 20's fashions because I don't find them to be the most flattering styles, but I've really come around over the past few years and I'm enjoying them more and more.  I've discovered that not all 20's dresses look like shapeless feedsacks, and some of the styles are really chic and fun to wear. 


For my dress, I used an undated Pictorial Review pattern, which I am guessing from the styling is from 1930-32ish.  But you can see from the pattern diagram on the back that there is almost no shaping in the dress, and I discovered that if you wear the belt at the hips and shorten the skirt a little, it passes for a 20's dress with no problem. You could really see the changes going on in the pattern industry with the way this pattern was made.  It has a very brief instruction sheet like older patterns with only the most basic construction steps covered, but then it also has printing on the pattern pieces with cool little illustrations and extra hints and tricks for how to put it all together.  Compared to the other 1910's and 1920's patterns that I own, this wealth of information must have been such a welcome change for home seamstresses!  The only changes that I made to the Pictorial pattern was to leave off the cuffs (no good reason why - I just got lazy), and I also omitted the collar so I could wear a fur collar instead. 


Although you see a ton of fur collars on coats in the 20's, it's much harder to find them on dresses.  I got really excited when I found this 1927-28 dress illustration in the book Montgomery Ward Fashions of the Twenties (there's a link at the bottom of this post), since it appears to have an attached fur collar and it looks so similar to my dress anyway.  But there is nothing noted about it being fur in the text, so I'm guessing it was really some type of velvet or plush.  I have occasionally seen photos of women with fur collars worn with a dress, like this one, but I'm pretty sure most of those are stoles instead of anything that is attached.  Obviously, it doesn't make sense to put fur on a dress that needs to be washed, but I was really determined to have a fur collar on this outfit, so I did it anyway.  Shhh... don't tell the authenticity police!  I found this clip-on fox fur collar on etsy, and since it is not permanently attached, I can still wear the dress and wash the dress without the fur, so I don't feel quite as guilty about it. 

My dress is made from polyester crepe, which is another strike against me on authenticity.  But I had my mind set on making it in deep red, and when I was buying fabric for it last summer, this is the only dark red crepe that I could find.  The buttons and belt buckle are all vintage mother of pearl.

For the hat, I reshaped a modern wool felt hat using my vintage hat block.  I'm kicking myself for not taking pictures of that process now, but I was so tired this past week that it never crossed my mind until I was almost done.  But all I did was wet the hat and stretched it and pinned it over the block so it would sit down much farther on my head.  Once it was dry, I cut the brim to a shape that I liked, then wired and bound the edge of the brim with a strip of silk taffeta.  For the decorations, I had originally planned on making some fancy fabric flowers, but I ran short on time, so I ended up buying a huge velvet poinsettia from Hobby Lobby, and I hot glued the individual petals onto the hat. 

The shoes are from Aerosoles, and they are called Ticker Tape.  I thought they were so perfect for 20's costumes, and they were quite comfortable too.  I just replaced the leather cord with a ribbon since I didn't like the way the cord looked on its own.  Aerosoles has quite a few retro-styles of shoes, and they have good sales too if you are patient and keep checking back. 

So that's about it.  I had a blast wearing this costume, and I was pleasantly surprised at the number of compliments that I received at the event.  I guess 20's dresses might not be so terribly unflattering after all.  ;)  You can see more pictures from the event on my Flickr page.


Thursday, November 29, 2012

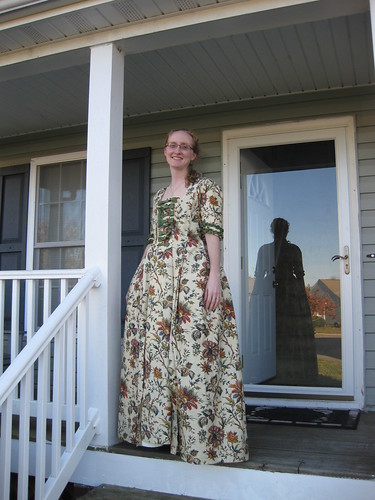
Featured Curtain-Along Sacque, by Mary Burbage

This week, we have another amazing Curtian-Along dress made by Mary Burbage.  Mary made a 1750’s Indienne print sacque, petticoat, and stomacher, and she sent us this fabulous write-up to tell you more about her work:

For the Festive Attyre Curtain-Along project, I made a 1750’s sacque, petticoat, and stomacher.

1750's Indienne Print Sacque - Front

Materials:
  • three Waverly Felicité curtain panels (from Amazon)
  • 4 5/8 yd 1” moss green china silk ribbon (from Silky Way)
  • 1 1/8 yd bleached muslin (from JoAnn)
  • 2 ½ yd 1” cotton twill tape (from JoAnn)
Patterns:

The bodice lining was a modified version of the Simplicity Pirates of the Caribbean gown (S4092). I adjusted the armscye shape a bit to make it more accurate. I also moved the side seam back further, again to make it more accurate. I omitted the lacing because I didn’t feel like fooling with it this time around. I knew it should fit reasonably well since it had been fine when I made my celadon sacque a few years ago.

The sacque itself was draped on the dummy following the tutorials on The Fashionable Past (http://koshka-the-cat.blogspot.com/2011/03/draping-sort-of-sacque-part-one.html) and patterns in Patterns of Fashion: The Cut and Construction of Englishwomen’s Clothes 1660-1860 by Janet Arnold  – the 1745-1755 sack for wide hoops on pp. 32-34 and the 1745-1755 pet-en-l’air on pp. 28-30. The sleeves were taken from the 1770-1775 sacque on pp. 34-35, mostly because I already had that pattern piece printed out from last year’s rust taffeta en fourreau gown.

The petticoat was the same as my rust taffeta petticoat from last year, which used the 18th century petticoat tutorial on Katherine’s Dress Page. This tutorial is similar to the petticoat tutorial on A Fashionable Frolick except that it also covers waist shaping.
The stomacher is just cut to a pleasing shape.

Construction:

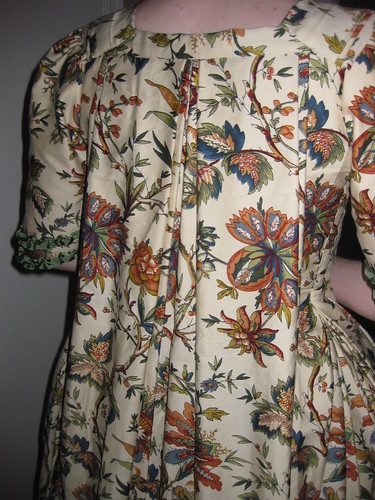
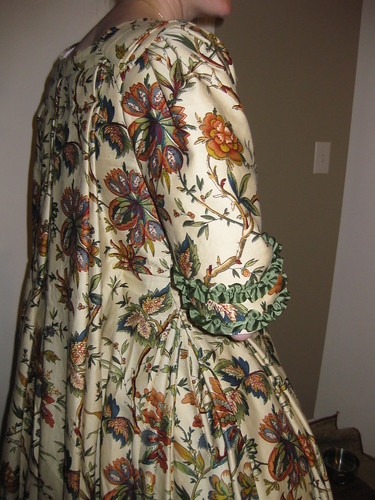
The sacque, petticoat, and stomacher are made of indienne print cotton sateen. The bodice, sleeves, and stomacher are lined with muslin. The sleeves are trimmed with two rows of ruched china silk ribbon, and the stomacher is trimmed with eight china silk bows in graduated sizes. All pieces were sewn by hand.

There’s really not much else to say about construction since the tutorials are so detailed.

I’m still not quite sure that trimming the sleeves with ruched ribbon rather than having cuffs was correct for the 1750’s, but I can use the fabric out of the curtain tiebacks if I decide to make cuffs in the future. I’d have to do a lot of piecing if I were going to try to do it with the scraps from the curtain panels.

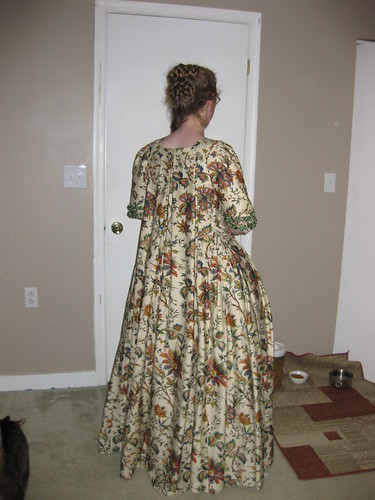
Because of the method of making the bodice by cutting out the armscye and folding/pleating the rest of it, this really did take practically all of the three lengths of fabric. I was able to make the matching petticoat without piecing in a different fabric at the top, but I did have to do a little piecing to make it work. I did not cut this with a train so that I could dance in it. I saw several online that were trained, which was appealing but not so practical.

1750's Indienne Print Sacque Closeup 1750's Indienne Print Sacque Closeup

Undergarments:

I wear this gown and petticoat over a chemise (Simplicity 3635), fully boned stays (Simplicity 3635), pocket hoops (Simplicity 4092), and two petticoats based on the same tutorials as the print petticoat.

Thoughts after wearing:

I love this dress. It was great to wear and had great range of motion for the arms. I had absolutely no problems dancing in it, even doing “The Duke of Kent’s Waltz” where the lady keeps turning under the gentleman’s arm.

I am definitely looking forward to wearing it again at Holidays at Smithfield. I doubt anyone will mind the 1750’s gown at the 1770’s plantation!

1750's Indienne Print Sacque - Back

Saturday, November 24, 2012

two new curtain dresses

A few people have asked me how they can share pictures of their curtain-along dresses if they don't have a blog, and the answer to that one is easy - just send it to me and I'll post it for you!  It'll be fun to showcase the work of others here on my blog, and it brings back good memories of when I used to do that years ago on the Featured Attyre section of my old website.


So I'm incredibly excited to get the ball rolling with two new curtain-along projects made by some of my local friends in the DFWCG.  First up is Chloe Hinton who made a lovely jacket using the caraco pattern in Janet Arnold's Patterns of Fashion.  To dress it up a little, she trimmed the edges with box pleated grosgrain ribbon.


And next is Erin C. who sent me this description of her gown:
The dress was made using Sense & Sensibility's Portrait Dress pattern. I'd never made one of their patterns before, and was pleasantly surprised that I didn't have to make any adjustments aside from sleeve width and cutting the neckline slightly lower. The mustard petticoat is a linen I bought at Joann's. Shoes by American Duchess (of course). The hat I decorated from a plain straw one from Jas. Townsend.


If you have any questions or feedback for either of these lovely ladies, just leave it in the comments and I'll make sure they get the message.  And if anybody else has completed curtain-along projects that you would like to share, email me at jen(at)festiveattyre.com