
For the past few years, I’ve been searching for a good pattern for a 1910’s corset, but I discovered that the number of commercial patterns and pattern diagrams from books for this type of corset is surprisingly limited. Then when I tried making up a few of the available patterns, I was further frustrated by poor fit and difficulty enlarging the patterns to my size.
So I was thrilled to buy a 1910's corset off of ebay for under $30. Judging from corset advertisements from this decade, I am guessing that it dates from the mid-1910's. It has many similarities to the 1916 corset shown here, although the shape it gives is similar to corsets from throughout the 1910's so it works well for a variety of styles.
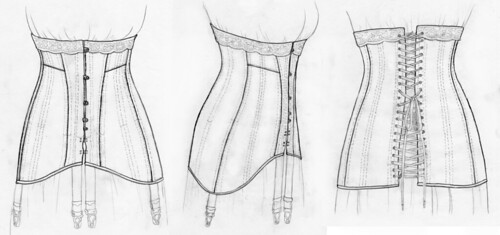
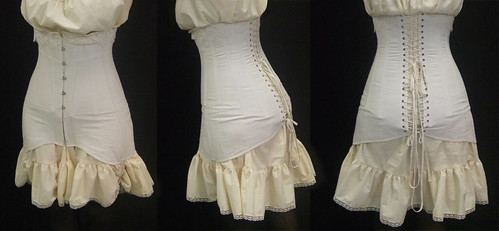
This corset was a larger size with a 29” waist and 45" hips, not including the lacing gap. The corset was made with a single layer of herringbone coutil and boned with ¼” and ½” flat steel boning that is covered with paper. The boning is held within casings on the inside of the corset. It closed with a front busk and two large hook and eyes at the bottom. It originally had four 1 ¼” wide non-elastic garters and a row of 1 ½” wide lace along the top edge, although the garters had been cut off and the lace was in very poor condition.
The construction of this corset was very streamlined with only five pieces and no gores or bias-cut seam-lines. Although the condition of this corset is not great from an aesthetic standpoint, I found the construction to still be sound, and it has proven to be an excellent piece for study and patterning.


Enlarging the pattern
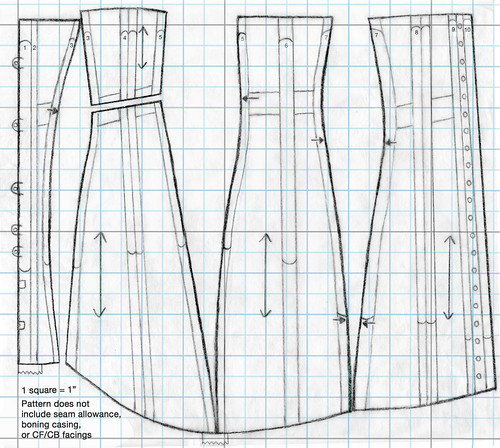
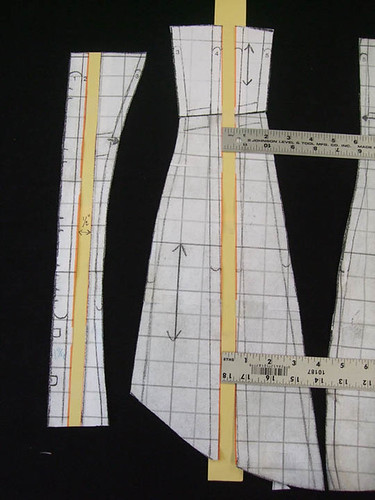
The first step is to print out the pattern and enlarge the pattern on a copy machine. I checked my size carefully by making sure that 8 squares equaled 8”, which is more accurate than just checking the size of a single square. After I had enlarged every part of the pattern, I then taped it all back together and cut the pattern pieces out.
Size alterations
If you need to alter this pattern, I recommend that you simply use your waist measurement as a guide and adjust the width of the panels uniformly to keep the original proportions of the corset intact. Corsets during this period were sold by waist measurement only, so it was assumed that the lacing gap would take care of any fine-tuning that was necessary through the ribcage or hips. I also find that you can get a more authentic-looking silhouette if you try to avoid micromanaging the fit of historical corsetry. Instead of worrying about fitting the corset exactly to your body, I’m a firm believer in letting the corset do the job that it was made for - molding our non-ideal bodies into a more idealized shape. Of course, all figures are different, and I am sure there are necessary exceptions to that rule, but I feel that most women would have good results using the original 1910’s proportions.The original corset has a 28” waist, and it is typical to include a 1”-2” lacing gap, which means that it would result in a 28”-30” waistline when worn. To determine the waist measurement needed for your own corset, I recommend subtracting 2-3 inches from your natural waist measurement.
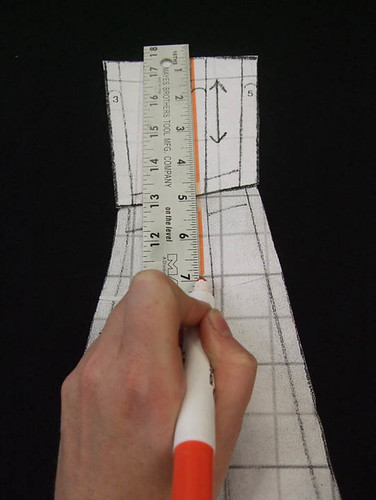
If you need to enlarge or reduce your corset, draw a line down the middle of each pattern piece and cut along that line. I also tape the side-front top and bottom pieces together temporarily before altering their size. (as shown in the pic on the right) Since there are 8 total body panels in this corset (I’m treating the front side panel - which has a top and a bottom - as one piece), every 1/4” that you adjust on each panel will result in a 2” change to the overall measurements. Due to the narrowness of the center-front panel, this system only works with the larger sizes though. This chart shows you how much to add to each of the four body panels if you wish to enlarge the corset from its original size. Keep in mind, this measurement is for your desired corseted waist size, and it does include a 2" lacing gap for fine tuning:
| Desired Waist Measurement | Amount to add to each piece |
| 30” | No changes needed |
| 32” | + 1/4" |
| 34" | + 1/2" |
| 36" | + 3/4" |
| 38" | + 1" |
| 40" | + 1 1/4" |
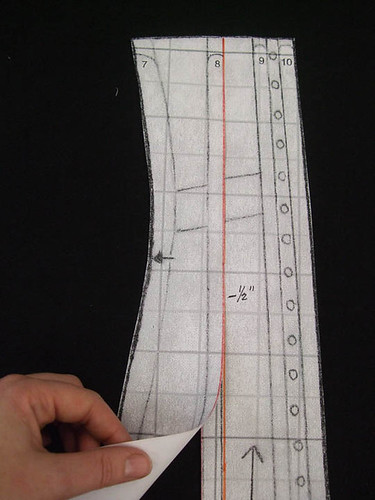
 To enlarge the garment, you will spread the pattern pieces apart along the cut line and make sure the edges are parallel. Re-trace the pattern pieces or add a strip of paper to fill in the cut. The top and bottom edges will need to be smoothed out after the width is adjusted.
If you tried to use this same system for waist sizes under 28 inches, you boning channels would begin to overlap each other on the center front piece. I suggest that you take an additional ¼” off the back panel to adjust for this. Here is the amount that you should remove from each piece for the smaller sizes:
| Desired waist measurement | center-front | side-front | side-back | center-back |
| 28" | - 1/4" | - 1/4" | - 1/4" | - 1/4" |
| 26" | - 1/4" | - 1/2" | - 1/2" | - 3/4" |
| 24" | - 1/4" | - 3/4" | - 3/4" | - 1" |
| 22" | - 1/4" | - 1" | - 1" | - 1 1/4" |
To reduce the size of the corset, you will overlap the cut edges instead of spreading them apart. Measure in from the cut line by the amount that the piece is to be reduced, mark this line, and then you know exactly where the other half should be positioned. Again, you will finish by taping the pieces together and re-drawing the top and bottom edges.
Assembling the body
Use the attached supply list to order boning lengths and fabric. For my corset I used herringbone coutil from tutu.com, and I ordered my boning from voguefabricsstore.com. Both of these stores have very reasonable prices and good customer service.
 I did make one change to the construction of my reproduction corset that you should be aware of before we begin. The original version does not use a separate facing piece for the center-front edge – it just has an extra-large, ¾” selvage that wraps around to the inside of the corset, and the raw edge is covered by a narrow boning casing. Small slits are made in the fabric to allow the busk hooks to pass through the folded edge, and these cuts are not finished at all. I find this to be a less desirable solution than using a facing, but if you want to stay 100% true to the original, you will omit the front facing instructions and use a ¾” center front selvage instead.
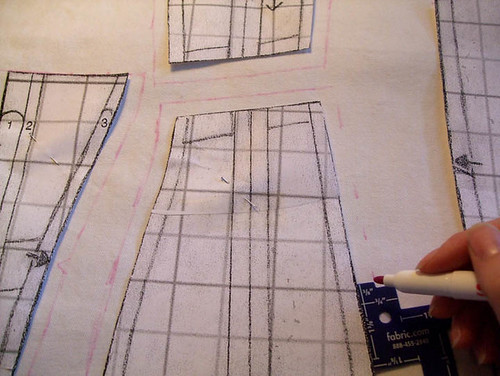
My pattern does not include any seam allowances, so you will need to add those yourself. I used a 3/8” seam allowance for mine. You DO NOT add seam allowances to the top or bottom edges of the corset, although you do need a seam allowance on the edges of the two side-front panels where they join at the waist.
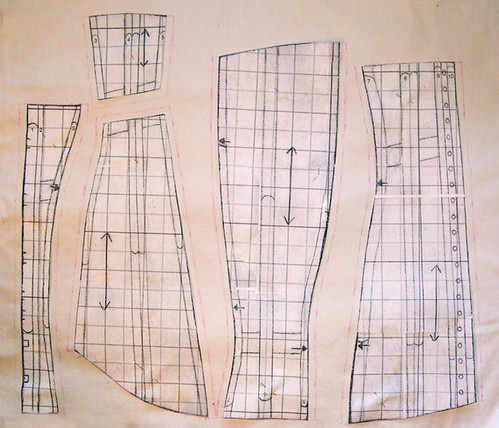
When the pattern is completely traced, it will look like this. I turned the side-back piece upside down to conserve fabric.
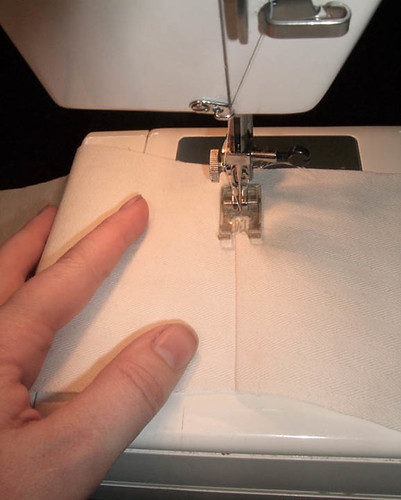 Begin assembly by joining the top and bottom sections of the side-front panel, right sides together. Press the selvage down and then topstitch over the pressed selvage 1/16” away from the first seam to reinforce.
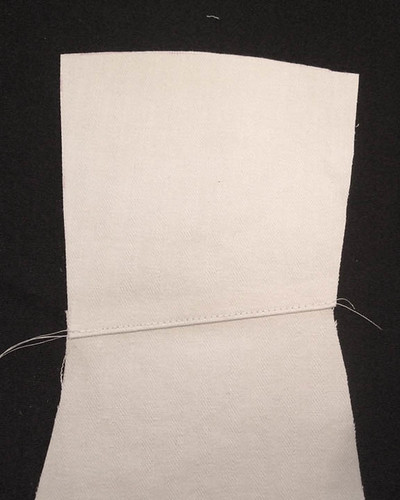 When the pieces are joined, they will look like this.
 Next, you will pin the center-front piece to the side-front piece, right sides together.
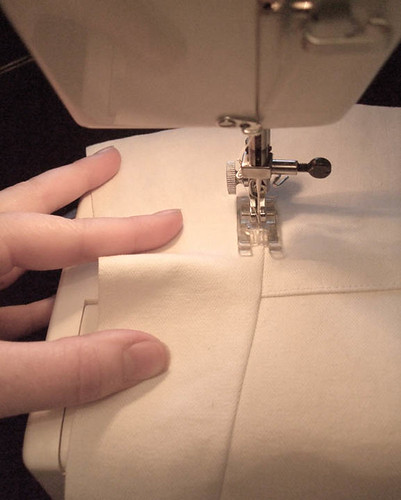 Sew these pieces together, then press the selvage toward the front of the corset. Topstitch over the pressed selvage 1/16” away from the seamline.
 Next, join the side-back piece to the side-front piece. Press the selvage toward the back of the corset, and topstitch.
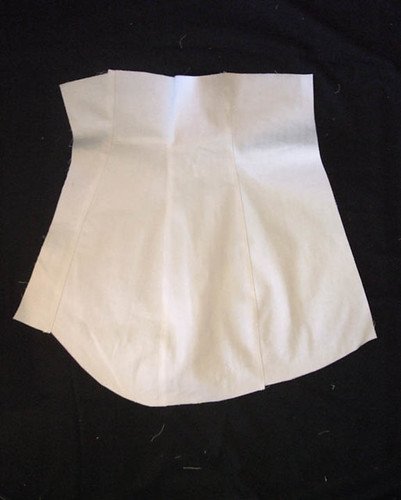 Finally, join the center-back piece to the side-back piece. Press the selvage toward the front of the corset and topstitch. The finished half of the body will look like this.
Repeat this process for the other side of the corset, but be sure to flip the pieces over to make a mirror image of the first side.
Inserting the busk
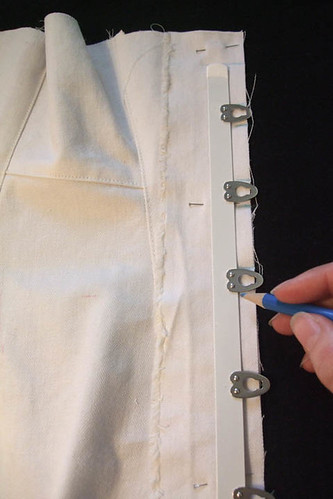 Next, you will add the facing to the center-front edges to hold the busk. Cut two rectangular strips of fabric that are 1 1/2 ” wide and 17” long. This will be the front facing. Lay the facing on top of the center-front edge with the right sides together. Place the hook side of the busk on top of this facing, 1” down from the top edge. When laid flat on the table, the hooks should be pointing to the right. Use a fabric marker or pencil to mark both sides of each hook.
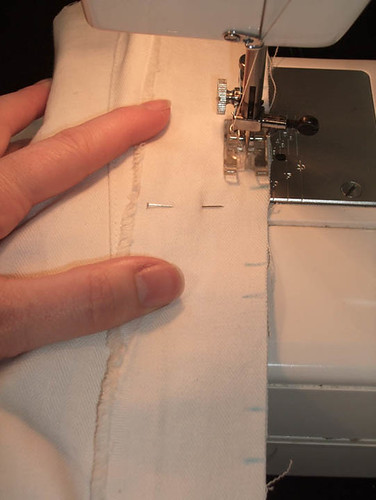 Next, you will sew the facing to the front edge, but stop your stitching at each of your marks where the busk hooks will pass through. Jump over that section to leave the seam open there, and then continue stitching to the next mark. Once again, skip a space for the next hook, and continue the process until you reach the bottom edge.
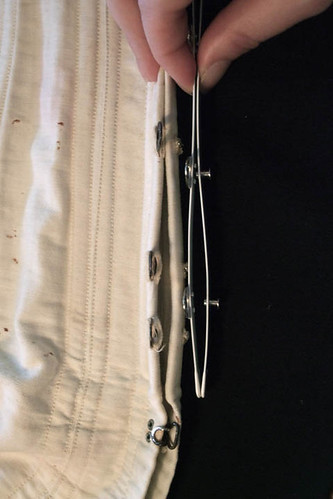 The 1910’s corset has a slight, permanent curve over the lower belly, like you would find in a spoon busk. This keeps it from jutting out at the bottom edge when worn. Before I inserted my busk, I added a slight curve to the metal just by bending it with my hands. I tried to only bend a small section at a time, and then move to a new spot on the busk and bend again so that there were no drastic angles or weak spots. The spoon shaped belly curve covers the bottom 4” of the busk. When placed together as you see here, there is ¼” between the busk stays at the widest point.
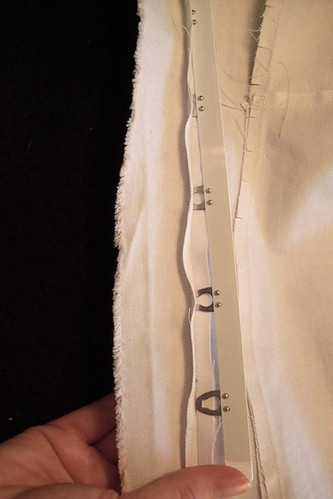 Once the facing is added to the hook-side of the front edge, turn it to the inside and press. Then you can insert the hooks though the open areas of the seam. Once it is in place, pin the layer of fabric together beside the busk to keep it from falling back out.
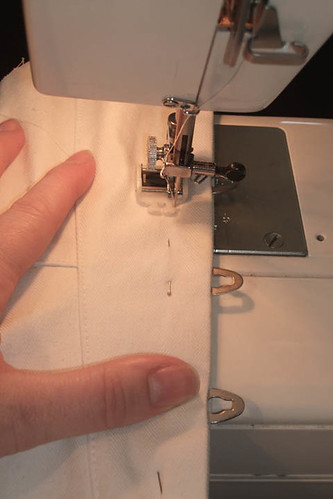 Using a zipper or cording foot, stitch right next to the edge of the busk and continue this line all the way to the bottom edge of the corset.
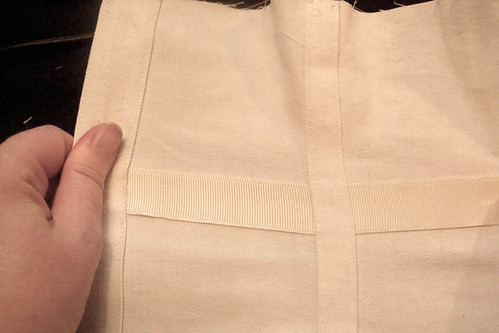
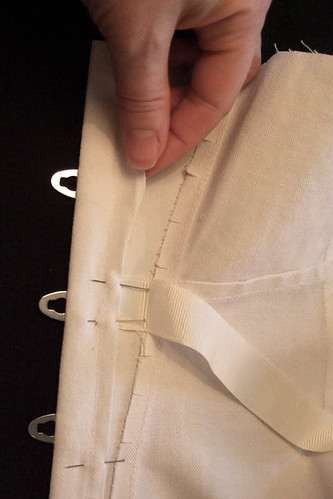 On the inside of the corset, fold the raw edge of the facing under and pin it. You will also need to add your waist tape under the folded edge. I used a 1” wide grosgrain ribbon, but you could also use twill tape or a strip of fabric. The original corset uses a strip of lightweight, straight-grain fabric with unfinished edges for the waist tape.
 Stitch ¼” away from the first seam that you made next to the busk. Make sure that the folded edge and waist tape are securely caught in this row of stitching.
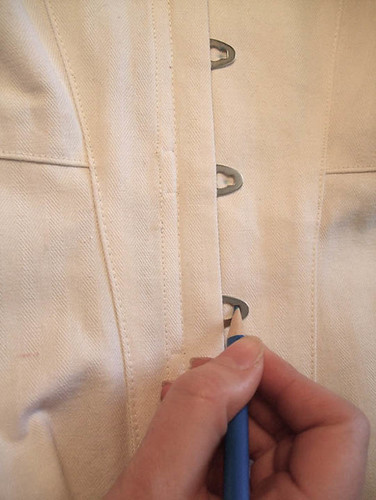 On the other side of the corset, sew the facing to the front edge, fold it around to the inside, and press. Lay the two center front edges together and mark a dot in the center of each hook to show you where the posts of the busk will go.
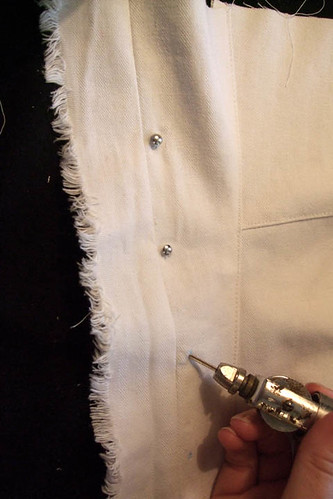 Using an awl or knitting needle, poke a hole in the fabric and stretch it out enough that you can insert the prongs of the busk. The original corset has small, unfinished cuts to accommodate the prongs, but I prefer to just stretch the fabric.
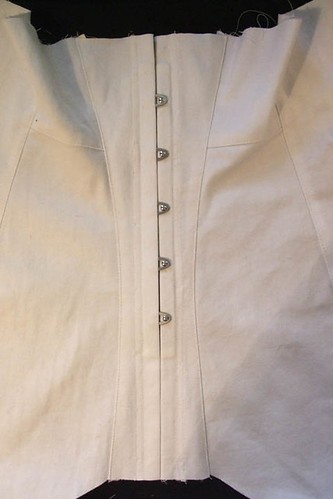 Once the prong side of the busk has been inserted, finish that side using the same steps as the hook side. When it I finished, it will look like this.
Sewing the boning casings
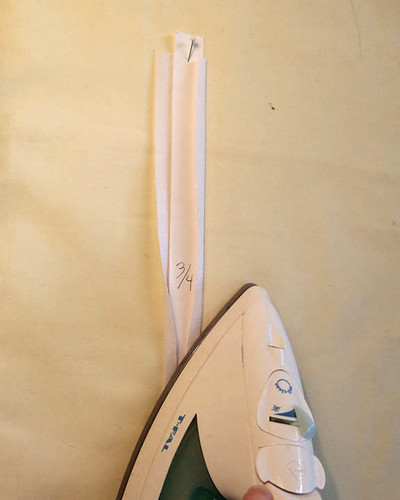 You could probably save yourself a good bit of time by using pre-made boning casings or twill tape, but I made mine out of strips of coutil, as was done in the original corset. The casing for double-boned strips is 7/8” wide (1 3/8” wide before pressing the sides under), and the single-boned casing is ¾” wide (1 ¼” wide before pressing). Check the pattern and notes sheet for directions on how much you will need of each. I cut two templates out of poster board to help me iron the edges under.
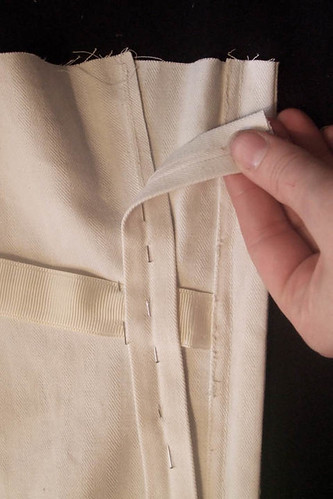 The boning casing is sewn over the seams on the inside of the corset, which hides the selvage, and provides an easy guide to follow for placement. To help me center the double-boned strips, I folded the casing in half and ironed it so that I could place the fold exactly over the seamline. Make sure that the waist tape is properly positioned under the boning casing and the rest of the tape is pinned out of the way. You might need to trim down the selvage to make sure it is completely covered by the casing.
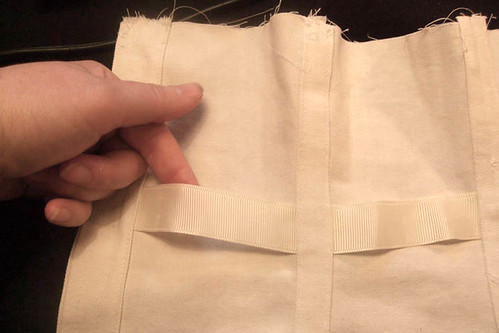 |
 |
 Once the boning casing is pinned in place, flip the corset over and use a zipper or cording foot to sew the center seam right next to the raised edge of the seamline.
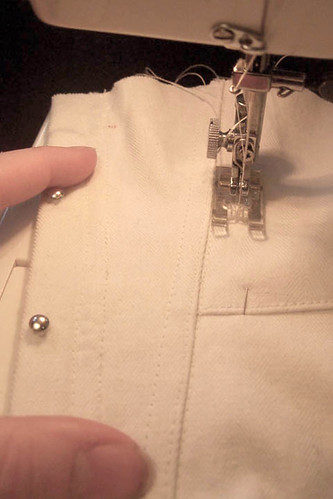 Switch out the presser foot, then sew the outside seams of the boning casing 5/16” (just a bit over 1/4”) on either side of the center seam. I used the width of my presser foot to measure the distance from the middle.
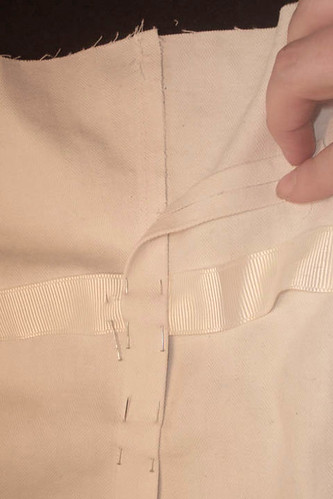 Repeat this same process for the boning casing that covers the side seam. The seam between the side-back and center-back panel is covered with the narrower, single-row casing. The easy version is to sew the edges of this casing down from inside of the corset so you can see exactly where is casing it (which is what I did), but you could also baste in it place and sew it from the top using your basting stitches as a guide. The space between the seams should be 9/16” (just a bit over ½”)
 The center-back is finished off with a facing strip that is 1 3/4” wide and 18” long. Sew this strip to the edge, fold it to the inside, and press. Topstitch the facing 1/16” away from the edge, then add an additional row 5/16” in from the first one to hold the boning. Skip over 3/8” to accommodate the eyelets, then sew another seam. The last step is to fold the raw edge under, pin the waist tape under the folded edge, and then sew the final seam 5/16” in from the 3rd seam. This will create another row for boning. Make sure the waist tape is securely caught under the facing.
 There are additional rows of boning casing that run down the middle of the side and back pieces. These are centered in the middle of the panels and sewn the same way that you did the others.
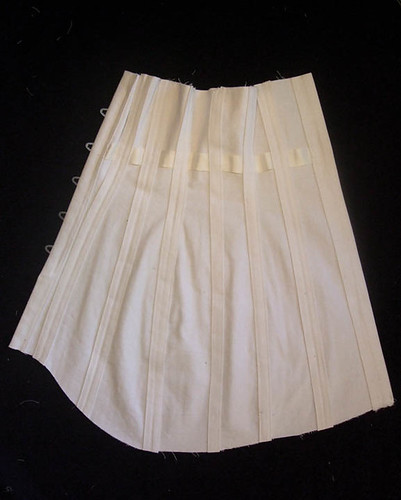 When all of the boning casings are in place, the inside will look like this.
Finishing the corset
Add boning lengths as shown in the notes and pattern diagram. There are no stitches to secure the placement of the bones in the channels, although you could add some if you find that your boning shifts too much. The original 1910’s corset has the top and bottom edges finished off with narrow, straight-grain binding, but I used store-bought ½” bias binding.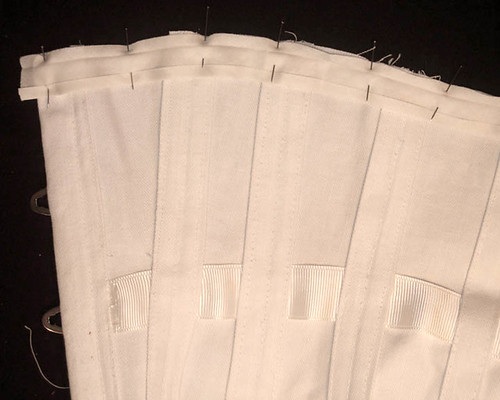 I started by opening up one side of the bias binding and pinning it to the inside edge of the corset. I then sewed along the fold line.
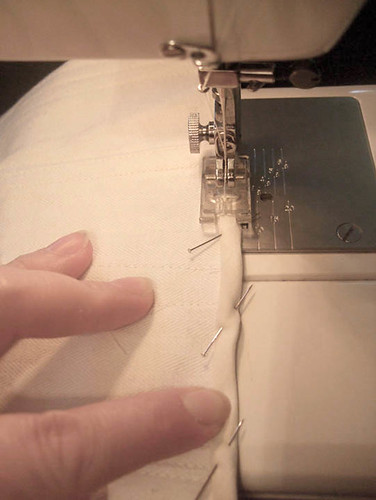 Next, I folded the bias strip around to the front and top-stitched it down. I tucked the ends of the binding under at the center front and back edges, but the original corset simply cut off the extra binding and left these ends unfinished.
The bottom edge is finished in the same way.
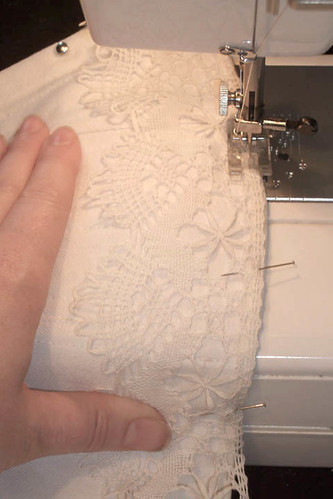 The top edge of the corset is trimmed with a row of wide lace that is topstitched over the binding. The lace is folded around to the inside at the center front and back, and tacked down with a few hand-stitches.
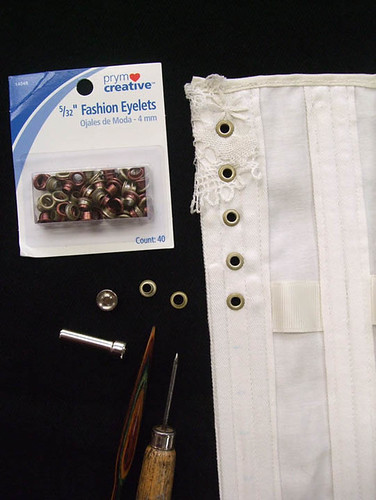 The small, two-part eyelets that I used were bought at Walmart. Once again, I used an awl to stretch holes in the fabric instead of cutting holes, which weakens the fabric. Use the pattern diagram to space the eyelets.
 At the center-front, add two large hooks below the busk to hold the bottom of the corset closed. Use the pattern to mark the placement.
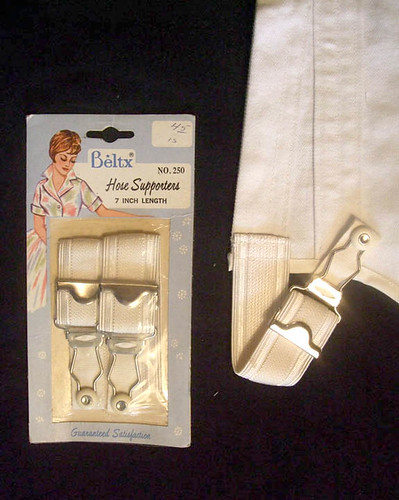 For the garters, I found two sets of 1” wide vintage hose supporters on ebay. The original corset had woven garters instead of elastic ones, but I thought that elastic would be more comfortable. I sewed them to the inside with two rows of stitching.
The final results
I also love the way it supports and smoothes the lower abdomen and hips, which actually makes me feel much more relaxed and comfortable in my Edwardian clothes.
It does help if you wear an Edwardian-style brassiere with the corset to provide bust support and smooth the corset ridge at the top where the flesh is displaced if you lace it tightly. I am created 2 patterns for 1910's brassieres that work great with this corset, and that article will be added to my website after it is featured on Foundations Revealed for a year. You can also read my article about Edwardian brassieres on Foundations Revealed, or get inspiration from Edwardian brassiere images on my Pinterest boards for surviving garments or brassieres in print.

