Sunday, January 29, 2012

the "oh crap" moment

Have you ever had that feeling when you try on a project for the first time and you discover that the absolutely perfect costume plan that you've had in your head for months and months is nowhere near as perfect in reality?  Unfortunately, I had one of those horrible "oh crap" moments today.

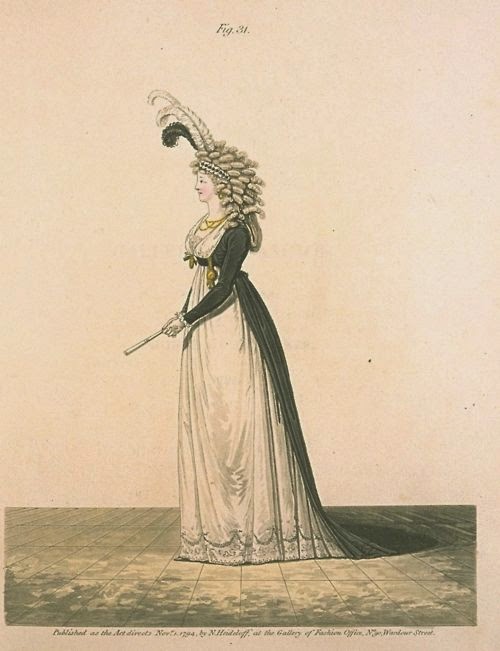
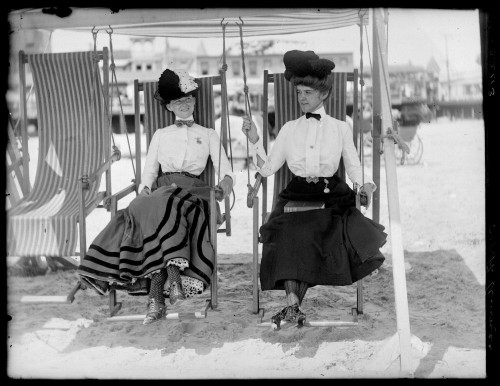
This March, the DFWCG is having a steampunk tea party, and my plan was to make a super fabulous 1890's cycling costume based on this:


I found the perfect pattern for the jacket in 59 Authentic Turn of the Century Patterns, and I used my nifty apportioning scales to enlarge it to my size this week.  The enlarging went pretty well for the bodice.  The fit through the body is great, and all I would need to do is adjust the darts a little.  The back collar piece was slightly too big, but it would be an easy fix.  The sleeve, on the other hand, was WAY too big, which happens fairly often when you are enlarging one of these patterns that uses the bust measurement ruler for everything.  I could go back and try to draft another one with a smaller scale, or I could just alter the sleeve that I have to make it fit better.  I am not overly fond of the pleating pattern this sleeve uses, but again, I could change that with no problem.  I also messed up and used the bust scale instead of the waist scale for the skirt of the bodice, so it was way too big and I will definitely need to redraft that if I decide to move forward.

So the pattern is working fine, but here's the problem.  I underestimated the amount of effort it is going to take to tailor this thing correctly.  The lapels and collar are going to take a MASSIVE amount of pad stitching and stiffening to make them lay right.  And I honestly have no idea how to get the sleeves to poof out enough that they won't look sad and limp.  There is obviously some major engineering going on in a jacket like this, and I'm not 100% sure that my skills are up for the task.

Of course, I shouldn't judge a project too harshly based on the first mockup, but I tried my muslin on today and all I could think was "meh".  It makes me feel top-heavy and even with all the weight that I've lost this past year, I'm still not sure that my waist is small enough to offset the poofiness in this outfit.  Plus, the thought of all that tailoring is daunting to say the least.

I just don't know.  Maybe I'll put it aside for a week or two and let it ferment.  I don't have a plan B costume for this event, and I've already bought all the fabric for the cycling suit, so I sort of feel obligated to push on through.  What do you do when you discover that you are no longer in love with a costume that you were once super-excited about?  Continue anyway?  Find something else and not waste your time and energy on something you no longer love?  I usually try to keep going no matter what, but the results of that have been mixed in the past.  Sometimes I'm happy with the final results and I'm grateful that I didn't give up, and sometimes I waste weeks or months on something that I ultimately hate and often never finish anyway.   Maybe I should try a different plan this time and cut my losses now and start looking for another costume idea.

We'll see...

Friday, January 20, 2012

pattern drafting with apportioning scales

A lot of people seem to be intimidated by the pattern diagrams in the Frances Grimble books that use apportioning scales to help you enlarge the patterns.  This technique uses special rulers that allow you to draw out the pattern in your own unique size for a custom fit.  Once you get the gist of how it works, this technique requires almost no math and very little thinking.   I *LOVE* using this type of pattern, and I've had really great results with the dresses that I have tried in the past, so I thought I would make some video tutorials to show you all how easy they really are to use. Please excuse my choppy endings. My video editor refused to work with these files, so they are pretty rough around the edges.

The first video talks about how to select the correct apportioning rulers based on your own personal measurements.


The next video walks you through the process of drawing a pattern piece with your custom rulers.


Important things to note:

1.  The apportioning rulers in the Edwardian Modiste book can also be used for Kristina Harris's books of 1890's dress patterns (links to all below).  Harris doesn't include the apportioning rulers in her books, so this is a huge help if you want to use her patterns!
2. The Grimble and Harris books that use pattern systems from the 1880's and 1890's only use the bust measurement ruler for everything that you draw, including the sleeves.  But the system used in the Edwardian Modiste is slightly different, and there is a somewhat complicated way that you are supposed to measure your arm length.  Finding this sleeve length measurement is probably the most difficult step of the entire pattern drafting process, but there is a description of how to measure your arm length on pages 7-8 of the Edwardian Modiste.  You then use your arm length for the vertical measurements in the sleeve pieces (just like we used the waist length for the bodice), while the bust measurement ruler is still used for the width of the sleeve pieces.  Grimble advises that you can also use the modern technique for measuring your sleeve length (simply measuring from shoulder to wrist), and this will get you close enough.  I haven't tried either of these methods with the Edwardian Modiste patterns, but I'll let you know when I do.
3. As I mentioned in the video, skirts are drafted with a different set of rulers from the bodice.  You use your waist measurement for all the horizontal lines (i.e. the 28" ruler if you have a 28" waist). For the main vertical line, you measure from the waist to the floor to determine the length of your skirt, and then select the ruler with that measurement for the vertical baseline on your pattern (i.e. use the 41" ruler if you want your skirt to be 41" long).
4. For dresses with the bodice and skirt all in one, you will use your waist length ruler for the vertical line on the bodice section, and the skirt length ruler for the vertical line on the skirt.
5.  Be warned that the hips on these patterns will probably be too large for most modern figures, but you can always take them in if you need to on the muslin.
6. Even when seam allowances are not marked on the pattern pieces, they sometimes ARE included on the patterns.  The armscye is a good example of this - you might not need to add selvage to the armscye and sleeve-head on some patterns.  But you won't know for sure if you need the extra fabric or not until you make the pattern up, so it is better to add seam allowances just in case.  You can always cut them back off if you find that you don't need them.
7. The type of corset that you are wearing is very important when selecting the proper rulers.  The waist position on my Edwardian corset is much higher than it is on my Victorian corset.  If I am wearing the wrong corset (or none at all) when I measure my back length from my neck to my waist, it will completely throw off the fit of your garment - especially on these late Edwardian patterns where the waistline is intended to be relatively high.

Well, I hope this was helpful!  Let me know if you have any questions on any of this.  I am actually more familiar with using the apportioning systems in the Fashions of the Gilded Age and the Harris books, but I know that the Edwardian stuff is the most popular right now.  But all of the systems are very similar, so once you get one under your belt, the rest are much easier.  Now go forth and draft fabulous patterns! :)

(P.S. - if you would like to buy one of these books that uses apportioning rulers to draft patterns, feel free to use one of these links and I will get a little bitty contribution to my book fund. Thanks!)

Sunday, January 15, 2012

Mat Hatter costume

DSC07694

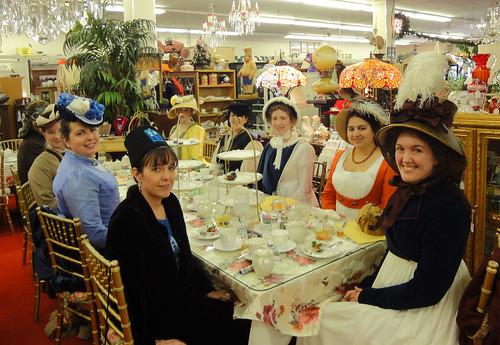
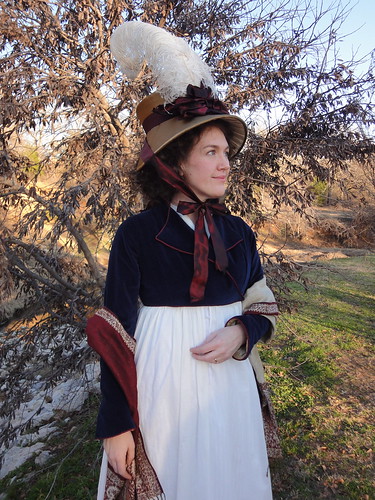
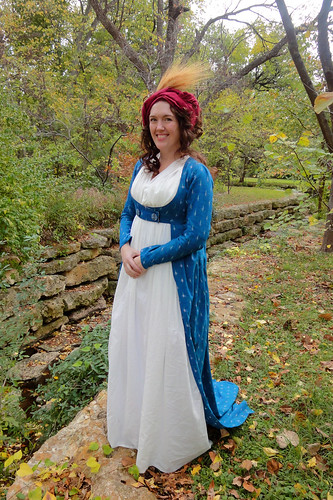
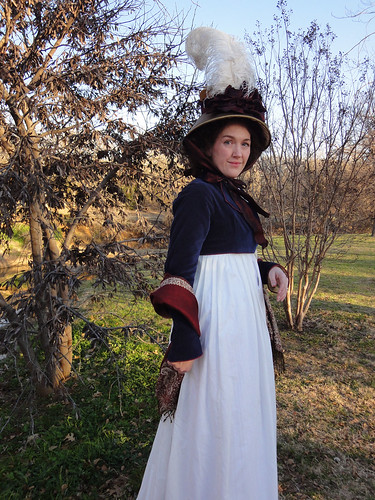
Yesterday was the DFWCG's Mat Hatters Tea Party, so I wanted an appropriately flamboyant hat (and new costume to wear with it) to celebrate the event.  I've spent the past 2 months angsting about what to make, and I think I started working on at least 3 or 4 other possibilities before I finally settled on a simple 1790's spencer and bonnet.  But I ended up loving the final outfit so much that now I can't imagine wearing anything else!

DSC07762

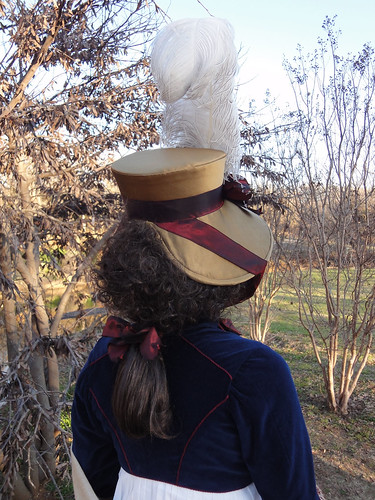
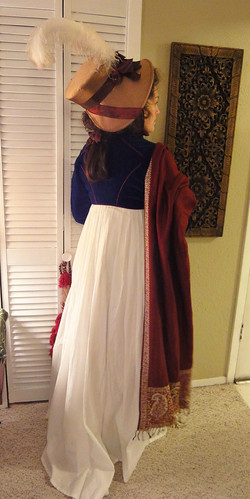
To save time, I focused on making something new to dress up my round gown that I made for the Georgian Picnic in November.  I didn't know a lot about Empire spencers, so I started by creating a Pinterest board of all the 1790's examples that I could find.  I was amazed by how many dark blue spencers there were in the illustrations, so I went digging through my stash and found a dark blue velveteen curtain panel that I picked up at an estate sale last year.  It was just enough fabric for a spencer, so I decided that it must be fate!  It is lined with some golden yellow striped silk that also came from my stash, and I even found some burgundy cording in my bin of ribbons that was perfect for accenting the edges and back seams like you see in many of the jackets from this period.

I usually have some sort of period pattern diagram to get me started with my costumes, but this garment was 100% draped from scratch.  I knew where the seams should be thanks to the illustrations and a few surviving examples, so I used one of my paper tape dress forms to drape the body and collar.  I did look at a pattern diagram for an 1790's youth's skeleton suit to get the general shape for the 2-part curved sleeves, but then I just free drew the shapes and tweaked them for a few days until I got something that fit just right.  I know it is not an overly complicated garment to make, and there are still a few nit-picky things that could be improved, but I am really proud of the results considering that this was the first time for me to make something using this method.

DSC07766

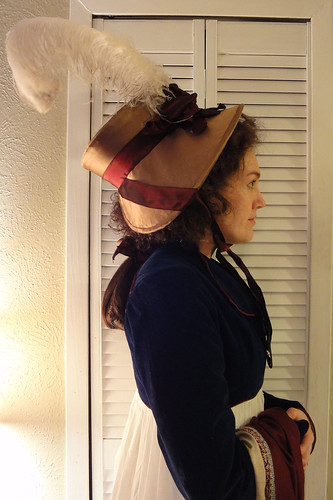
The most fun part of this outfit is definitely the hat. Once again, I made a Pinterest board to help me research 1790's bonnets, which was extremely helpful when it came down to deciding on the shape and adding the decorations.  I found several examples of wide brimmed bonnets with a big bow and super-tall feathers decorating the middle front of the crown, and I thought that look really captured the quirky Empire style that set these fashions apart from other Regency period headwear.

The bonnet also marks another first for me - it's the first time I've ever built a fabric-covered buckram hat.  I used Lynn McMaster's seaside bonnet pattern to make it, but I cut the crown down by an inch because I preferred some of the more moderate-sized examples in the fashion plates.  It is covered in a remnant of bronze silk satin and lined with ivory silk, which also both came from my stash.  I sewed the entire thing by hand and there is not a drop of hot glue on it, which is a small miracle for me.  I am usually a HUGE fan of hot glue millinery!

DSC07810

Since the costume was made completely from materials that I had in my stash, I decided to splurge a bit on the finishing touches.  I bought another Lioness wig in chestnut brown this time (I also used this style of wig for another 18th c. outfit from a few years ago).  It is great for making a huge hedgehog style hairdo and there is a ton of length for various types of tails in the back as well. This time I straightened the long part in the back with a flat iron and looped it like the style seen in many illustrations from this period.  I had some flyaway pieces that tried to escape from the ponytail at first, but I added a long flat barrette across the back of the loop after these first pictures, and that seemed to solve the problem pretty well.

DSC07640 DSC07646

I also have lusted over regency shawls for years now, so I asked around for suggestions on where to buy one.  My friend Aubry from A Fractured Fairytale suggested this ebay store, which has a variety of rectangular shawls with paisley borders, which is exactly what I was looking for. It still wasn't as long as real regency shawls should be, but at $19.99 I couldn't pass it up! I actually ended up loving this thing so much that I bought a second one that is exactly the same, and I am going to try to sew two of them together to make one super-long shawl that will be even more perfect for drapey Regency goodness.
DSC07812

DSC07768When I was younger, I didn't care for Regency fashions at all, and I swore that I would never wear this sort of dress. I'm not sure what happened, but I've turned into a complete convert and I feel so elegant wearing these styles now. Maybe I just needed to get over my obsession with tiny waistlines first, but I guess pregnancy will do that for you.

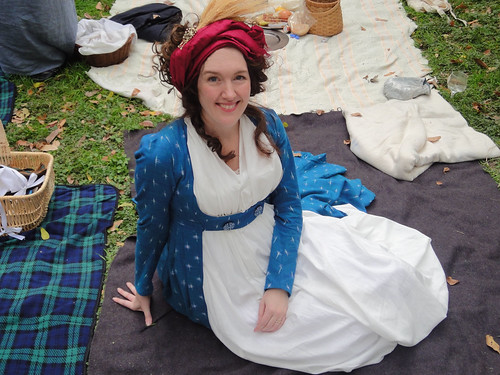
Even though I'm making a bit of a funny face in this last picture, it's actually my favorite one of all. I think I look like a meddling, match-making aunt from a Jane Austen novel in this shot.  I need a little speech bubble that says "oh, ree-aaally?" LOL!

You can see the full set of pictures from this wonderfully fun event on my Flickr page.
Saturday, December 24, 2011

1910's corset pattern and instructions


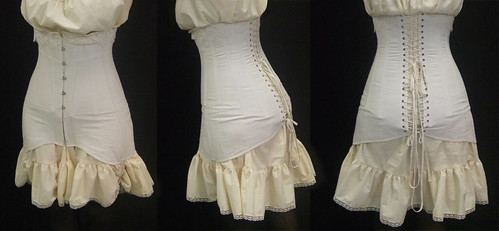
In 2010, I wrote 2 articles for the online magazine Foundations Revealed about how I created a recreation of an antique corset from the mid-1910's. After a year on that site, I regained the rights to republish that article for free on my own website, so I thought I would share that with you all as a little holiday present from me! The original articles had more information about the research, pattern cloning techniques, and comparisons with the original garment, but I figured that people would be the most interested in the pattern and construction instructions, so this is a condensed version. This corset is a very easy garment to make up, and I hope this helps some of you with your 100 year Titanic anniversary and Downton Abbey costumes in 2012. Merry Christmas to you all!  :)


finished

Tuesday, December 20, 2011

a Sherlockian disguise

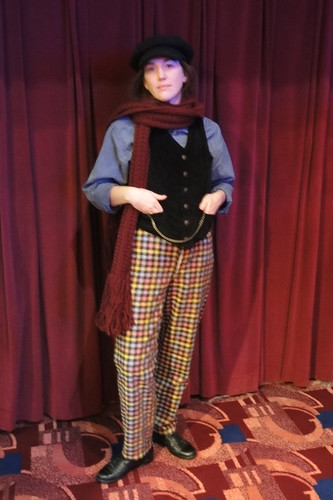
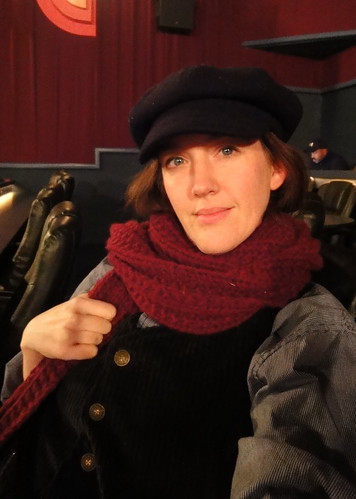
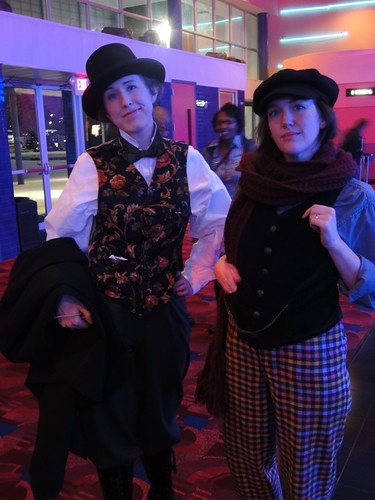
This past weekend, the DFWCG took a costumed outing to the newest Sherlock Holmes movie.  Most of our members opted for Steampunk attire, but I was drawn toward something even more out of the ordinary for me.  I had no desire to sit through a movie in a corset and bustle, so I decided to go as Irene Addler in disguise as a man.  Although I don't think she would be very successful blending into a crowd if she wore pants like these!

DSC07289

I actually made the pants last year for an Alice in Wonderland party, but I was excited to get an excuse to wear them again.  I have a mad love for obnoxious plaids, so in my very warped opinion, these are probably the most fabulous pants of all time!  LOL!  I made them with the discontinued Martha McCain Civil War pants pattern - Simplicity 5023.  I thought they made up wonderfully, and I would definitely use that pattern again for the boys in my life if they ever need Victorian pants.

The vest was a bit of a train-wreck, and it fought me to the bitter end.  Nothing fit together right, so I ended up ditching the collar and faced lining and turned it into a very dumbed-down version vs. something with authentic construction.  I also accidentally cut off the underlap for the buttons, so it barely fit me when it was done.  But luckily, it is made out of wide wale corduroy with a long pile, so black velvet-like fabric combined with a poorly lit theater hides a ton of flaws.

DSC07273


The shirt was just a cheap men's shirt from Walmart with the collar flap cut off to make it more of a band-collar style.  The wool scarf is something that I wear all the time, and the newsy cap is something that I had from a previous Halloween costume.

It was such a fun costume to make and wear, and I love having an excuse to play with menswear for a change.  And even better was that my friend Ginger dressed up as Irene Addler in disguise too, so I had some company with my cross-dressing shenanigans!  The only problem is that it is hard to manage a "tough guy" face when you really want to smile and giggle and act silly with your friends!  We'll have to work on that a bit!  :)

DSC07276

Saturday, November 26, 2011

Georgian period toys

DSC06805

I LOVE making silly props to go with my silly costumes, and our Georgian picnic gives me the perfect opportunity to research and recreate 18th and early 19th c. toys and games every year.

The first new toy that we tried this year was the Chinese yo-yo, or diabolo (diable in French), which has proven a bit hard to research, but several online articles mention that it was called "devil on two sticks" in England, although they don't mention a source for that tidbit.  But illustrations of adults and occasionally children playing with diabolos show up from time to time during this period, and I love how beautiful the people look while playing this game.

I first tried using a wooden diabolo that I ordered online from a English historical toy site.  But even though the wooden diabolo looked like the illustrations, it was so lightweight and hard to work that even my friends who are jugglers and quite good at the diabolo had a hard time working with it.
DSC06694

So we switched over to a modern diabolo, and that worked much better.  Cynthia, our resident diabolo expert, was able to give us lessons, and several people were able to able to get it going pretty well and even catch a few tosses after a bit of practice.  But nobody did it with the same elegance and grace as Cynthia!  Clearly, I need to buy a modern diabolo and spend the next 12 months practicing so I can do this next year.  :)

DSC06726

DSC06720

I also brought a variety of small wooden toys, such as a top, cup and ball, and a yo-yo.  The top and cup helped entertain the kids, but I really brought the yo-yo for the adults.  I've always been charmed by this 1790's illustration of a woman playing with a yo-yo, which was known as a bandalore, l'emigrette, or quiz in the period.  If internet articles are to believed, the yo-yo was a very popular toy for both adults and children in the late 18th c., especially among the nobility, and the action of the toy was equated with French nobility and their emigration out, then back in to the country during the French Revolution.

For my yo-yo, I simply bought a bamboo yo-yo from World Market, then painted it with concentric circles, which seems to be the most common form of decoration.  Of course, French revolutionary colors seemed appropriate as well.

DSC06681

But the toy that I was the most excited about was my period kite.  I used the instructions found on the  PBS Ben Franklin website to make my kite, and I made it with handmade paper, linen ties on the tail, and I painted it with a simple triangle border, which was inspired by this 18th c. pear top kite.   I was worried that it would never fly, but it actually worked pretty well!  Although it was a bit unstable and really preferred to crash spectacularly into the ground, we did get it up to a nice cruising altitude one time, as seen in the photo at the top of this post.

I had a blast running back and forth down the clearing with my fellow kite enthusiast, Ginger, and we even drew quite a crowd of onlookers while we were flying it.  It was a blast, and I can't wait to try it again next year!

DSC06793

DSC06768

I'm always looking for new period toy and games to keep us entertained at our events.  We've also played Graces and battledore and shuttlecock in the past, and I'm hoping to try ninepins or lawn bowling next year (if I can find an affordable set).  If you know of any other good Georgian games that can be played outdoors, I'd love to hear about them!  And just for fun, check out this excellent site for other 18th century toys and games in period art.


1790's round gown and open robe

DSC06629

Last weekend, I attended the 3rd Annual Georgian Picnic hosted by the DFWCG.  This event is one the highlights of my year, and was so thrilled to finally be able to make a style that I have lusted after for years now - a 1790's open robe.  I started by assembling a collection of open robe images in Pinterest to help me get a better feel for the variety of open robe styles out there.  Although I knew that I could fake a lot of things with this style and still get a really nice look, I wanted to take the time to try out some new period construction skills and pattern diagrams.  I ended up doing more hand-sewing and draping on this outfit than on anything that I've ever made before, and I really loved the process, which is a bit surprising to me since I usually don't enjoy hand-sewing all that much.

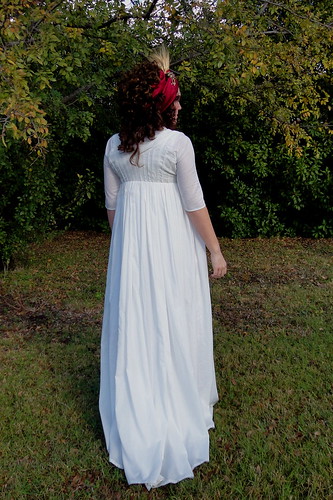
bodiceThe white round-gown worn under the open robe is a copy of this 1797 gown from Tidens Tøj. (the link is sadly broken now, but Aylwen has a screenshot of the pattern and her own beautiful photos of the dress on her blog.  Thanks, Aylwen!) Although I was a bit intimidated by the pattern diagram at first, I was offered some help from dear friends translating the text, and it ended up going together beautifully. The sides and back of the bodice were covered with hand-sewn tucks that were mounted onto a linen foundation, and then the outer fabric was cut down to size.  This was actually a really easy way to work, and I enjoyed having some mindless handy-work to keep me occupied during my lunch breaks.  At times it seemed a bit silly to spend so much effort decorating a part of the dress that wouldn't even be seen, but hopefully, I'll find another occasion to wear the round gown on its own someday.  The round gown is made up from some really lovely heirloom batiste that I got from Fabrique thanks to the gift card that I received from their remnant challenge last spring.  Thanks again, Fabrique!

DSC06976DSC06953

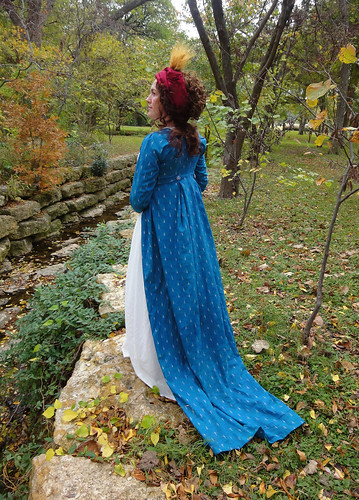
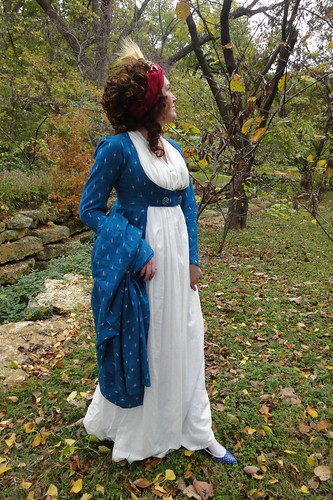
DSC07017The open robe is made from some ikat cotton that I bought fromHeritage Trading Company, which has GORGEOUS block-printed and ikat fabrics that are perfect for dresses from this period.  I used the open robe pattern in Patterns of Fashion for the construction, and although it looked like it would be easy to put together, it actually turned out to be pretty difficult.  My main problem is that I don't have a dress form that is my size, and this type of gown is draped to the body.  I ended up using a dress form that was close, but not a true match, so I had to get dressed up over and over again so I could try it on and make modifications... which was tiresome.  But I finally got it to work, and the way that the pleats are top-stitched to the lining means that it almost holds the shape of the body even when it isn't being worn, which is pretty cool.  The only real modification that I made to the pattern is making the sleeves full length instead of 3/4, and I added some tri-color death's head buttons to the front cross-over as a bit of embellishment.

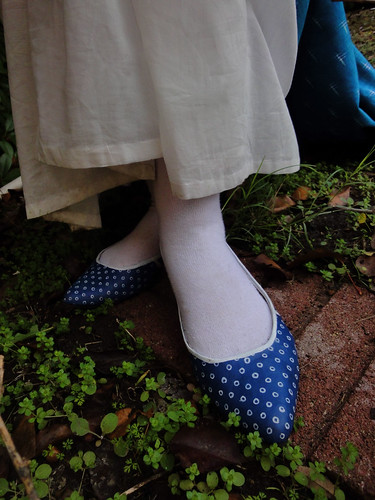
For the finishing touches, I decorated a pair of cheap Target flats with a white paint pen so they would have a pattern similar to these 1790's slippers. The vamp is a little low on these shoes compared to period examples, so I had planned on making some rosettes to cover that part up some more.  Unfortunately, that was one of the only things that I didn't have time to get done, but I think they still work pretty good either way.

DSC07072

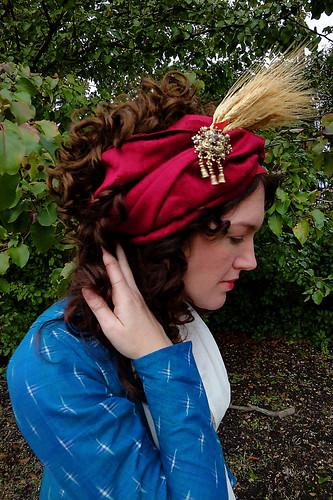
For the headwear, I wore a turban that was made from a silk curtain panel that was cut in half lengthwise.  I just wrapped it around my head and pinned it in a few spots, so it was about as low-tech as you get.   Instead of using feathers to decorate it, I used a spray of wheat, which is a tip that I learned from Lynn McMasters' article about Geogian turbans and the charming illustration seen here.  I tried quite a few colors of fabric before ultimately deciding on red, but I really liked the rich, jewel-like colors, and red/white/blue was a popular color combo in the 1790's thanks to the French Revolution.

DSC07062

Here are a few more of my favorite pictures of my dress from the picnic, and you can see the full set on flickr. I'll be back to tell you about some of the cool 18th c. toys that we played with in my next post.

DSC06631

DSC06632

DSC06873

DSC06744


DSC07022

Sunday, October 30, 2011

Edwardian recap

DSC05460

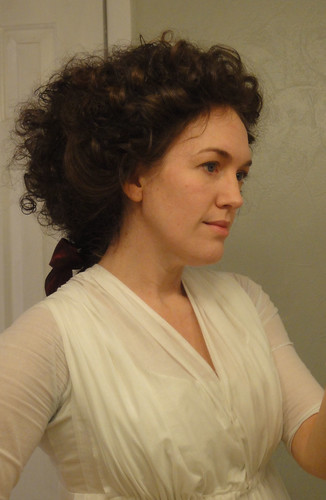
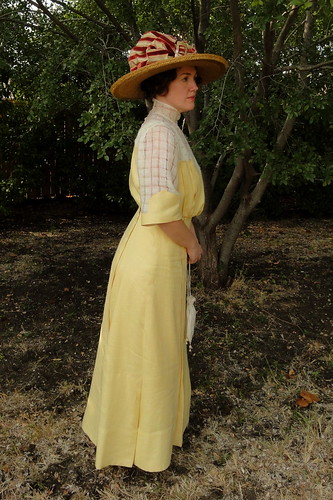
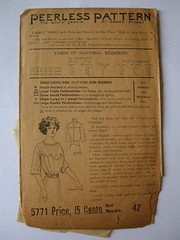
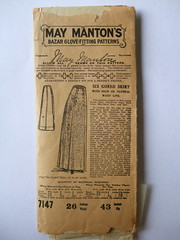
Once again, I am horribly late when it comes to post-event blogging.  *eek*  Where does the time go!?!  But back in mid-September, the costumers from the DFWCG had their semi-annual gathering at the Antique Elegance Show, and I whipped up a sunny linen gown to wear to it.  I used two vintage 1910's patterns from my stash to make the dress, which was a ton of fun.  It practically makes me giddy to use real 100 year old patterns to make something new!  I really like the way this transitional style still has the slightly poochy bodice and A-line skirt of the Edwardian period, but it is combined with the short sleeves and streamlined shapes of the 1910's.  It's a very fun style, and so easy to wear.


1910 - Peerless Pattern 5771 1912 - May Manton's 7174


The body of the gown was made with a dollar's worth of estate sale linen, and the windowpane linen for the top of my bodice was a curtain from World Market that my husband brought home for free since it was damaged.  The hat was also from an estate sale and only cost $2, and the ribbon is made from a decorator sample piece of silk that I also got from free.  I did buy some vintage mother-of-pearl buttons for the back closure for $5, and the buckle on my hat cost around the same, but all together, the whole outfit cost me under $15, which might be a record for me.  I love cheap costumes!

DSC05482
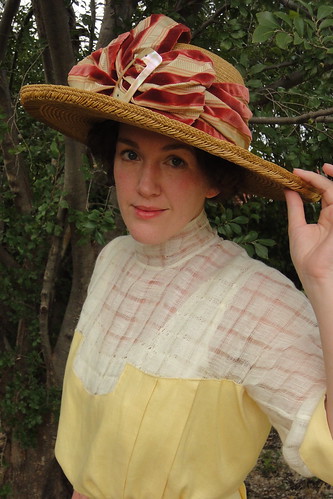
One of my favorite parts of this costume has to be my hat. It was vintage straw hat with a shallow crown that appeared to have come from some Asian country, but I stretched the crown to make it wider, and then cut it off and raised it a few inches to make it deeper. It still doesn't have the massive crown size that true Edwardian hats usually have, but at least it is closer now. I covered the extension in the crown with fabric pieced together to look like wide ribbon. I am proud to say that there is not one drop of hot glue in this hat, which might be a first for me!

The super-sheer fabric at the top of my dress scared the bejeezus out of me at first because I couldn't figure out if should line it or just let my undies show (*gasp!*)  I eventually solved the problem by buying a pretty 1910's brassiere, and I just let it show through the fabric, which is exactly what the Edwardains would have done.  I learned a ton about period brassieres in the process, and I even went on to write a two-part article about them for Foundations Revealed, which will come out in December and February. The first article covers the history of Edwardian/1910's brassieres, and the second one will teach you how to make one yourself based on the vintage brassiere that I am wearing with this outfit.

Other than being neck-deep in writing articles this past month, the other reason why this post is so late is because I really wanted to do some faux-vintage photos with some of the pictures that we took that weekend.  I finally found some time to do that today, and I am really pleased with the results.

Edwardian self-portrait

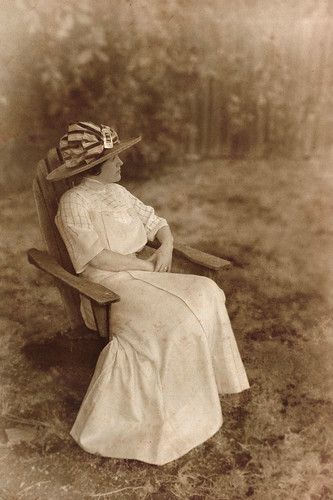
I've been experimenting with faux-vintage photography for years, but I now teach a digital photo class at work, and my Photoshop skills have improved drastically.  I finally have some better skills for making the pictures do what I want.  I figured out that the biggest issue is to try and duplicate the shallow depth of field that you see in old photographs where you have a blurry, light background and foreground.  Modern point-and-shoot cameras try to keep everything in focus, and it's a dead giveaway that the the faux-effect is a fake.  It's amazing what a difference that makes!  I also have some more sophisticated photoshop actions to create the sepia look now, and I overlaid the photo with a scan of paper foxing to give it a slightly speckled look.  Here are a few original pictures that I was looking at for comparison when making my photo.  

christy and me


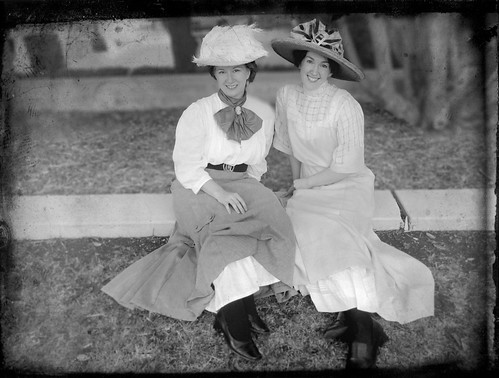
I also tried my hand at copying the look of a different style of period photography, inspired by this fun picture of two Edwardian ladies showing a bit of ankle.  (oh-la-la!)  I didn't have a suitable glass plate frame to use around the picture, so I used one of my scanned tin-types for the border instead.  It gives it a slightly different look, and I don't think this fake is as convincing as the other, but I still like the results.   My friend Christy and I had entirely too much fun posing for this picture!

You can see the rest of my flickr set from this event here.

Sunday, September 11, 2011

Edwardian Collar Stays

Now that I have finally caught up with blogging about my finished costumes from this summer, I can once again turn my attention to current and future projects.  At the moment, I am finishing up an early-1910's dress that I am making to wear to the Antique Elegance show next weekend.  I've really learned a lot with this project, and I've had fun trying out some period techniques that are new to me.


The bodice that I am making has a tall collar, and I knew that it would need some support to keep it from wrinkling or sliding down.  The only problem is that my fabric is a very sheer windowpane linen, so I didn't want to use thick boning channels that would detract from the delicate fabric.  So what did women in the 1910's use to solve this problem?  A quick search on Etsy turned up this lovely card of antique collar stays, so I snatched them up for "research" purposes.  Don't you love shopping for a good cause.  :)

The card of stays was so beautiful and pristine that I wouldn't dream of using the originals for my dress, but at least I could measure them and figure out how they were made.  The wire is stiff, but still bendable, and it is covered with white silk.  It seemed very similar to millinery wire, so I drug out some of my own millinery wire and decided to give it a try.  It was very easy to bend the wire into a serpentine shape, but the thread covering would become frizzy or broken if I bent it with any type of pliers.  The thread didn't break if I bent it with my fingers instead of the pliers, but I couldn't get the curves in the wire as perfect that way.   I wonder if my threads were breaking because my millinery wire is so old (it came from an estate sale) or if it would do the same thing with modern wire.

When I started looking more closely at the antique collar stays, I couldn't see thread wrapped around the wires as I originally assumed.  They feel more solid and smooth - almost like they are wrapped in silk paper instead of thread.  I'm not sure if wire like that even exists anymore, but it made me wonder if you could paint millinery wire with a layer of flexible glue, like Sobo or Elmer's, to seal the threads together before bending them.  I haven't tried this yet, but it might be worth a try if any of you are considering making wire collar stays of your own.

The original collar stays were 3" long, but the card lists other sizes that they came in.  I made mine be 2 1/2" and 2" long to fit my collar better.  Even though my reproduction collar stays are not as pretty as the original ones, they still work wonderfully.  I can't feel them at all when wearing the dress, and they blend in with the sheer fabric very well.