Showing posts with label 1800s. Show all posts

Monday, March 24, 2014

spring break Regency shenanigans


So last fall, my dear friend Elizabeth told me that her family was coming to Dallas to visit relatives, and she asked if anything costume-y was going on that weekend.  I reassured her that if she came, I would plan a party around her visit, so I rounded up a few of our mutual friends from LiveJournal, then a few out-of-state/country friends decided to join us too, and the next thing I knew, we had quite a little spring break costume adventure in the works!

The main attraction for the weekend was going to be a Regency-themed dinner party at a small private room that one of our guests recommended to us, but we also needed something to keep our group of ladies occupied during the day.  There are painfully few Regency-appropriate locations in this part of the country, but we decided to stop by the Log Cabin Village in Ft. Worth as a "close enough" option.  We honestly thought we'd make a quick trip around the grounds and then leave, but it turned out to be an absolute blast.  The cabins were charming, the conversation was lively, and best of all, there was a wonderful band called Buttermilk Junction playing music in the schoolhouse.  Elizabeth is a fabulous dancer, and she managed to get us all up and dancing, which was so much fun I could hardly stand it!  Our little "killing time" outing turned out to be one of the highlights of the whole weekend for me, and I really hope we get a chance to plan another larger event at the Log Cabin Village in the future.


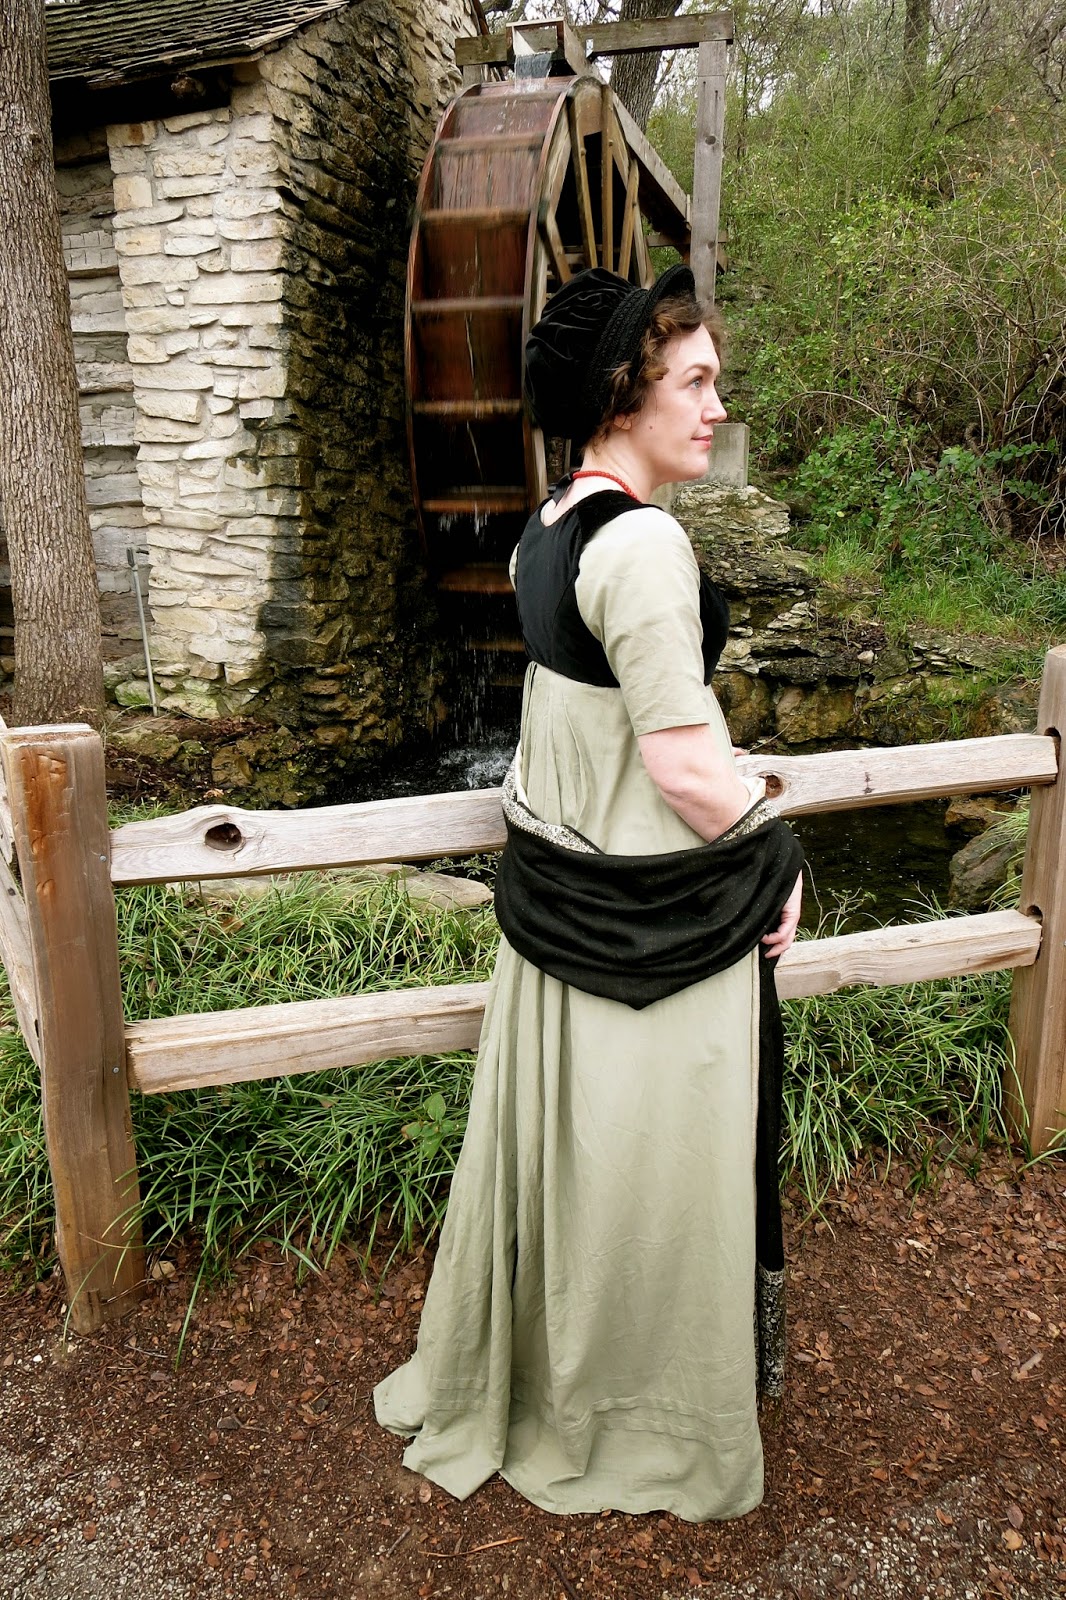
Most of my sewing energy for the past 2 months has gone into making a gown for the dinner party, but I did find a bit of spare time to update my green Regency dress for our afternoon outing.  I whipped up a new velvet sleeveless spencer to wear over the gown, and I paired that with my black capote and shawl that I wore with my pelisse at out last Georgian picnic.  The spencer is made with the same pattern that I used for my Fairy from Lost Hope outfit, so it was a quick and easy last minute project.  I also got to wear my transitional short stays for the first time, and they were SO comfy!  I finished off the outfit with a new beaded necklace to give the outfit a pop of color.  I was really happy to have an excuse to get to mix and match so many of my 2013 projects in a new way.


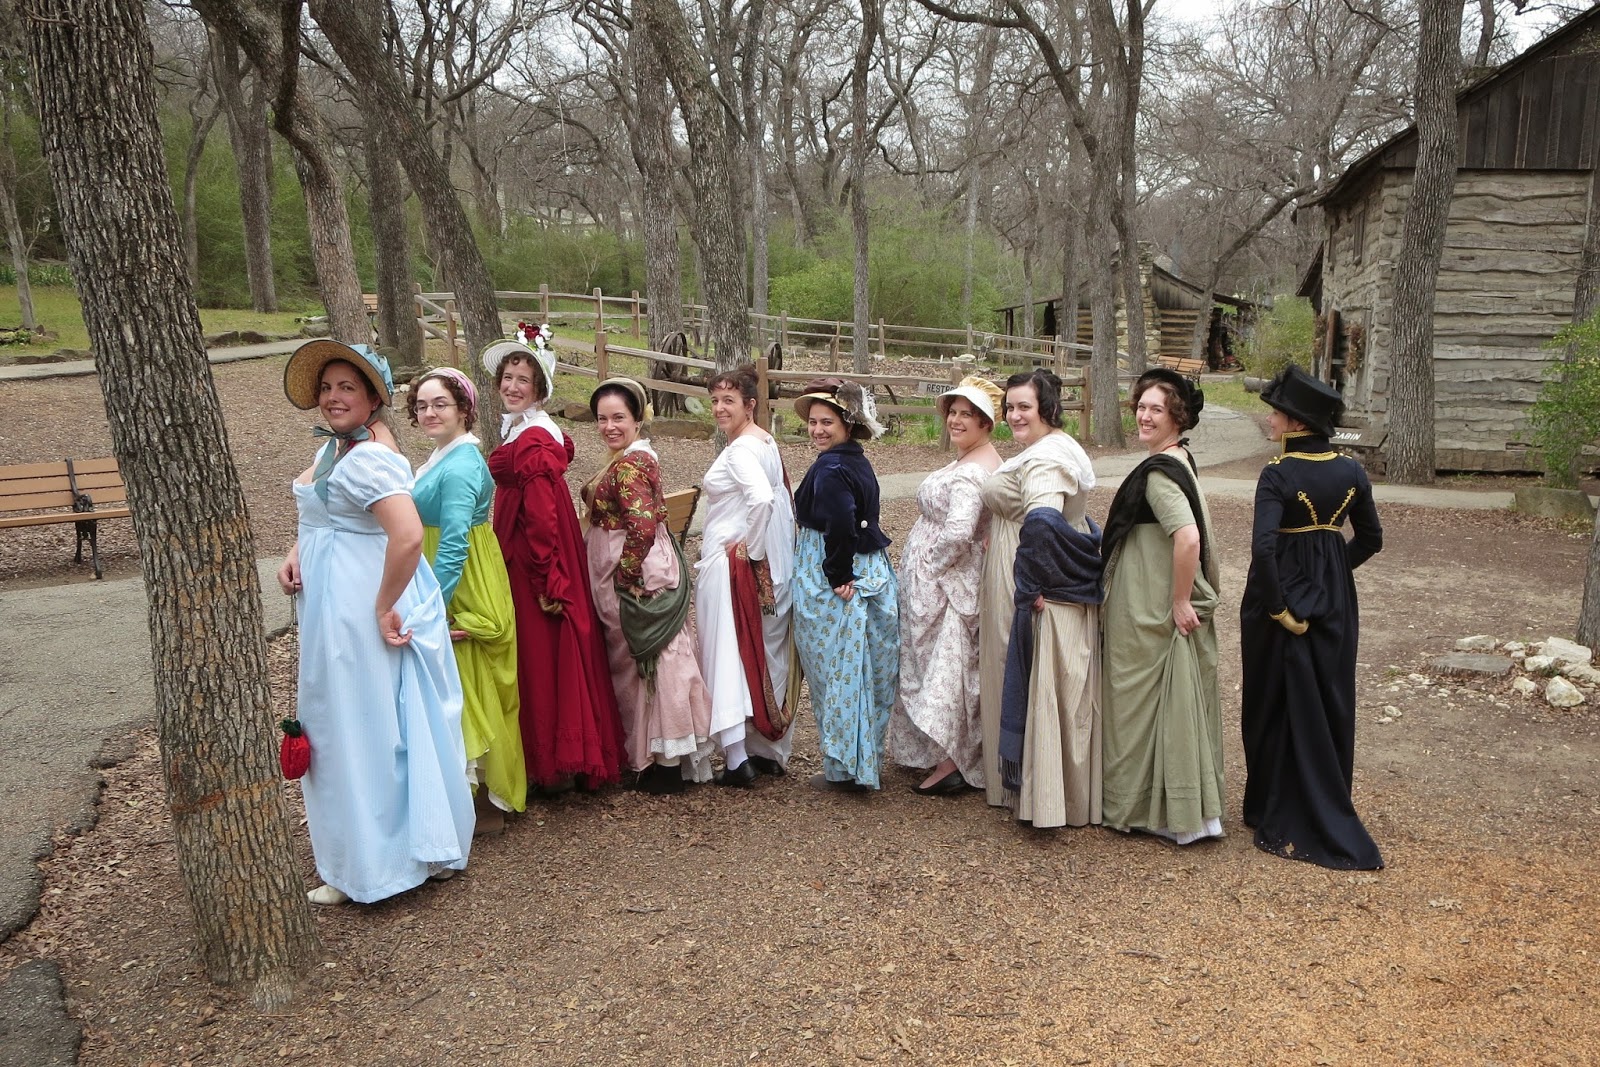
I have been incredibly lucky to find a group of friends who all share my wacky sense of humor, so there was lots of laughter and silly pictures taken that day.  You can see more photos from our visit to the Log Cabin Village on flickr, and I'll sign off with my favorite pic of all - a Regency wedgie-picking group shot! I have to confess that it's my goal in life to start a new costumer photo trend this year. Shoe shots are sooooo 2008. I think wedgie pics should be the new thing. Join us and you too can be a part of the Regency Ladies Wedgie Society!  


Hey look - I even made you all a free badge if you want to join the club!


Tuesday, November 19, 2013

Quickie Capote


To go with my new pelisse, I needed a new hat, so I turned to a few of my favorite sources of Regency images to help me pick out a style.  I can't tell you how many hours I've spent browsing through the incredibly helpful collections put together by Ginger from Scene in the Past, who has a large number of fashion plates webbed on Flickr, and Taylor's Tumblr site Dames a la Mode, which features a wide variety of Georgian fashion plates.  Both of these ladies have made it possible to search for images by year, which is invaluable when you are trying to pinpoint the styles and trends for a particular era.  So I would like to thank them both and dedicate this project to Ginger and Taylor for the Historical Sew Fortnightly "gratitude" challenge.  Taking the time to categorize and share image resources like these takes a ton of dedication and patience, and I am SO thankful to people who make the effort to share this sort of research information with others.  

Although I waffled back and forth between a variety of styles, I finally settled on one of the most popular shapes that seemed to occur between 1805-1810, which I often see referred to as a jockey cap.  Costumes Parisiens in 1806 showcased a variety of "toque et capotes de velours" which inspired my own black velvet cap.  Although I didn't copy one hat exactly, most of the major design elements that I used can be found in the charming collection of hats depicted on this plate.
I have to confess that this hat was a VERY last minute project, and I whipped it up between 11:00 and 2:00 on the night before the picnic.  There are a variety of great regency bonnet tutorials online, but I sort of just "winged it" on my own hat.  I started by cutting down the brim of an old wide-brimmed felt hat and steaming into a bit more of a bonnet shape.   This allowed me to skip any sort of buckram and wire building, which saved me a ton of time.  I covered this felt base with velvet, and because it was such a rush job, that part was mostly attached with hot glue.  (shhh - don't tell!)  The poofy part on top is just a large oval which I gathered down at the top to create nice folds and covered this bit of stitching with a button.  The trim was a lucky find in my stash, and I did take the time to hand-sew that part to cover all the raw edges and ugly bits.  I'm sorry I didn't think to take construction pics, but I was so tired at that point that all I could focus on was finishing it and going to bed.  

So here are two more views of my quickie capote.  It's a pretty simple little hat, but it covered my short hair nicely, was easy to make, and it felt very appropriate for an 1807 gown, so I'm calling it a success!  


Monday, November 18, 2013

The Green Pelisse


This past weekend was the DFW Costumers Guild's 5th Annual Georgian Picnic, and this year, I decided to make a Regency pelisse.  It also tied in perfectly with the Historical Sew Fortnightly "green" challenge since I had a dress-length of spruce green wool in my stash that I set aside to use for a pelisse many years ago. Unfortunately, even though I started working on this project during the challenge, I had to put it on hold for a few weeks so I could make faire and Halloween costumes for my boys during October.  So forgive me for being late with it, but better late than never, right?

There are SO many Regency pelisses that I love, so deciding on a style was actually the hardest part for me. I agonized over it for weeks, but then I finally picked this very simple design from 1807 as the main source of inspiration for my own dress.  I'm really pleased with the way it turned out for the most part, although I do plan on re-doing the collar before I wear it again so that the fur comes all the way down to my waist.  It's not "wrong" as it is, and there are other examples from 1807 with fur collars that end above the waistline, but my slightly short collar was an "oops" more than an intentional design decision, and I didn't have time to change it before the picnic.


To construct my gown, I used the pelisse pattern from The Cut of Women's Clothes as a starting point, and I made a few very minor alterations to make it look more like my chosen fashion plate.  The hardest part was figuring out how to pleat/gather the skirt.  I started out gathering it like pattern instructed, but I found that my wool was too thick and springy, and it looked very hunchback-ish when I was done.  So I ripped the skirt back off the night before the picnic, and I decided to do a very simple inverted box pleat in the back, similar to this 1807 pelisse on the left. This definitely helped keep the dress smooth in the back, although I think it would have looked nicer if I had made the pleat narrower.  But it's not bad as it is, and it was interesting to try out a different treatment for the skirt.


The pelisse is entirely hand-sewn, and I tried to get as close to period construction techniques as possible. There's not a lot of information about the nitty-gritty details of Regency pelisses out there, but I found this pinterest board showing the construction of a pelisse and this article on Your Wardrobe Unlock'd to be very helpful.  My pelisse is fully lined with thin silk, except for the back of the skirt, which uses a cheaper cotton fabric, much like the pelisse from the Pinterest board.  The bodice has a thicker cotton duck interlining to give it more structure, and I padded the front of the shoulder with a layer of cotton batting to help keep the area above the bustline smooth.  The collar and cuffs are made of vintage faux lamb, and they are lined with silk taffeta and pad-stitched to thin cotton batting.

Here are a few more pictures from the picnic, and I'll be back to talk about my new hat tomorrow.