Showing posts with label 1810s. Show all posts

Wednesday, November 4, 2015

Another trip to Lost Hope


For Costume College this past summer, a group of ladies decided to make Lost Hope costumes inspired by the fabulous book and BBC miniseries, Jonathan Strange and Mr. Norrell.  I had already made one Lost Hope costume a few years ago, but after seeing this world brought to life in the new miniseries, I was totally charmed by the silvery gowns seen at the nightly faerie balls, as well the creepiness of the scenes where the not-quite-human moss-oak version of Arabella wandered through the wilderness in a black gown. Confused?  Go watch the miniseries! *cough*youtube*cough* It's SO GOOD!


So instead of re-wearing my old gown, I decided to combine these two influences into one dress by adding some silver sparkle and a few fun accessories to my black Regency mourning gown. I found some silver lamé fabric in the clearance bin with a design that reminded me of gnarled wood. It's pretty gaudy in large doses, but when you just see glimpses of the pattern and sparkle under the sheer black fabric of my mourning gown, it fit my vision perfectly for an oak-y ballgown.  The lamé undergown is a bib-front style dress, and I could also wear this gown on its own... if I ever want a disco-themed Regency costume.


Sleeveless overbodices were a popular way to dress up Regency ballgowns, so I decided to also use the lamé to make a new bodice to wear over my gown.  I ended up cutting it too high in the back at the waistline, so I had to improvise and add a little peplum to cover the gap.  But this turned out to be a happy accident because I think the peplum adds a fun detail to an otherwise simple garment.  I had originally planned on embellishing my bodice with lots of beads and spangles and embroidery, but I ran out time, and honestly, I'm not sure how much that sort of thing would show up anyway since the fabric is already pretty busy.


I also made a faerie tiara by twisting together some plastic sprigs of grain sold with the fall floral supplies.  I wanted my costume to be sort of creepy and earthy, so I added some plastic bugs to my tiara for good measure before spray panting the whole thing silver.  I also loved the look of moss-oak Arabella's wavy, raven-colored hair, so I bought a long, black, 3/4 wig, and I sprayed the front of my own hair with temporary hair color to match. A simple beaded necklace and a pair of silver flats from the resale shop finished off my outfit.


We had a large group of gorgeous Lost Hope characters at Costume College, including a wide variety of fairies, Lady Pole, and the Gentleman with the Thistledown Hair.  We never managed to get everybody who participated in one spot at one time, but we did arrange a few group photos where you can see most of our faerie finery. This was such a fun theme for a group costume project, and I LOVED seeing all of these creative interpretations of magical Regency fashions.  

Unfortunately, sunny California summers don't make the best backdrop for slightly sinister moss-oak gowns, so I've been dragging my feet about posting this write-up in the hopes that I could take some better photos in a more appropriate setting.  I finally had my wish granted this past weekend, and I snuck away on the evening of Halloween to take some pictures in a muddy park after a few days of heavy rain. Then I used Photoshop to make the photos even darker and more blue to match the look of the miniseries.  Much better!   Now I feel like I'm finally ready for an otherworldly faerie ball.


Tuesday, October 27, 2015

Regency mourning


Although the "little white dress" of the Regency period might be the iconic gown that the era is best known for, black dresses during this period were also extremely popular and make equally great wardrobe builders.  This past summer, I decided to make a sheer black dress from around 1810 to wear as a mourning gown, and I've worn it to several events and have enjoyed dressing it up with a variety of accessories to get slightly different looks.

My dress is made of mystery-fiber fabric from the clearance bin of a local fabric store, and I think the whole dress ended up costing me around $10.  I sewed much of the dress on the machine, but because it is so sheer, all of the seams are carefully finished by hand on the inside.  To create the pattern for my dress, I used the very helpful diagrams and photos of a roller printed dress from the 19th US Regiment of Infantry Women's Dress page. I started out with double poof sleeves like you see in the original gown, but after wearing the dress that way a few times, I cut off the bottom poof because I thought the single puff was a little less fussy looking.  The dress closes in the back with a drawstring at the top and a single hook at the waist, and I wear it over over a white bodiced petticoat.


Madame Faber, 1816
The first time I wore this dress, I was attending a concert in a park, so I accessorized it with my black shawl, black boots, a black collet necklace and earrings, and a black Regency-style brass tiara/comb which was made by my amazingly talented friend, Megan of the Mistress of Disguise website.  I often think of tiara as a very formal thing, but when you look at Regency-era portraits, it is fairly common to see women wearing these tiara-like combs with daywear, so it's fun to be able to wear a pretty flashy accessory to a less formal event.


Princess Charlotte of Wales, 1816
On it's next wearing, I was attending a Regency ball, so I wanted to dress the outfit up some more.  I switched out the black jewelry for a rhinestone necklace, earrings, and tiara, and I also added a rhinestone clasp at the waistline under my bust. There are quite a few paintings of Regency ladies in black dresses with white satin slippers, so I picked up a pair of white Touch Ups ballet flats and added some silk ribbon ties to create a similar look.  To finish off the outfit, I wore a pair of long white vintage gloves, which really did a lot to make the outfit look more dressy.

Modes et Manières du Jour no. 27

The next time I wore this dress was to the Breakfast with the Bennetts event at Costume College, so I wanted to go for a more casual "at home" look.  I took inspiration from this fashion plate from Modes et Manières du Jour and added a splash of color with a yellow silk turban and a yellow reticule.  I made the turban using a similar method to the tutorial I posted last year, and I also sewed some fake curls to the front edge of the hat so that it would be even easier to get dressed early in the morning.  I also decided to dye my beloved pair of American Duchess nankeen boots with yellow Rit dye, which was a bit scary, but I really like the results.


I also played around with wearing this dress with an antique black lace shawl, black gloves, and my black bonnet with a lace veil over it to create more of a full-mourning look.  I doubt I'll wear it like this to many outings because the veil and shawl are pretty delicate and are prone to getting snagged on things, but it was fun to at least take a nice picture or two.

I do have one additional way that I've worn this dress, but I'll save that for its own post since it is much less orthodox.  So, I'll just end this post with a few more pictures and a "to be continued..."


As usual, more pics can be found on Flickr.

Tuesday, March 3, 2015

Regency Chemise


This year, I'm thrilled to be participating in a group project that will recreate the costumes illustrated in Vernet’s Merveilleuses and Incroyables from 1814.  (for more info, check out the Facebook page) We are supposed to keep the dress that we are making a secret until the grand reveal in December, so I decided to focus my blog entries on undergarments and accessories for most of the year and save my dress for the very end.  I’m really excited to have an excuse to make myself some new and improved Regency undies, and I am looking forward to hand-sewing everything from the skin out.  I know, I know… that probably sounds like madness to many of you, but I’ve grown to love hand-sewing over the years, so it seems like a fun challenge to me. 

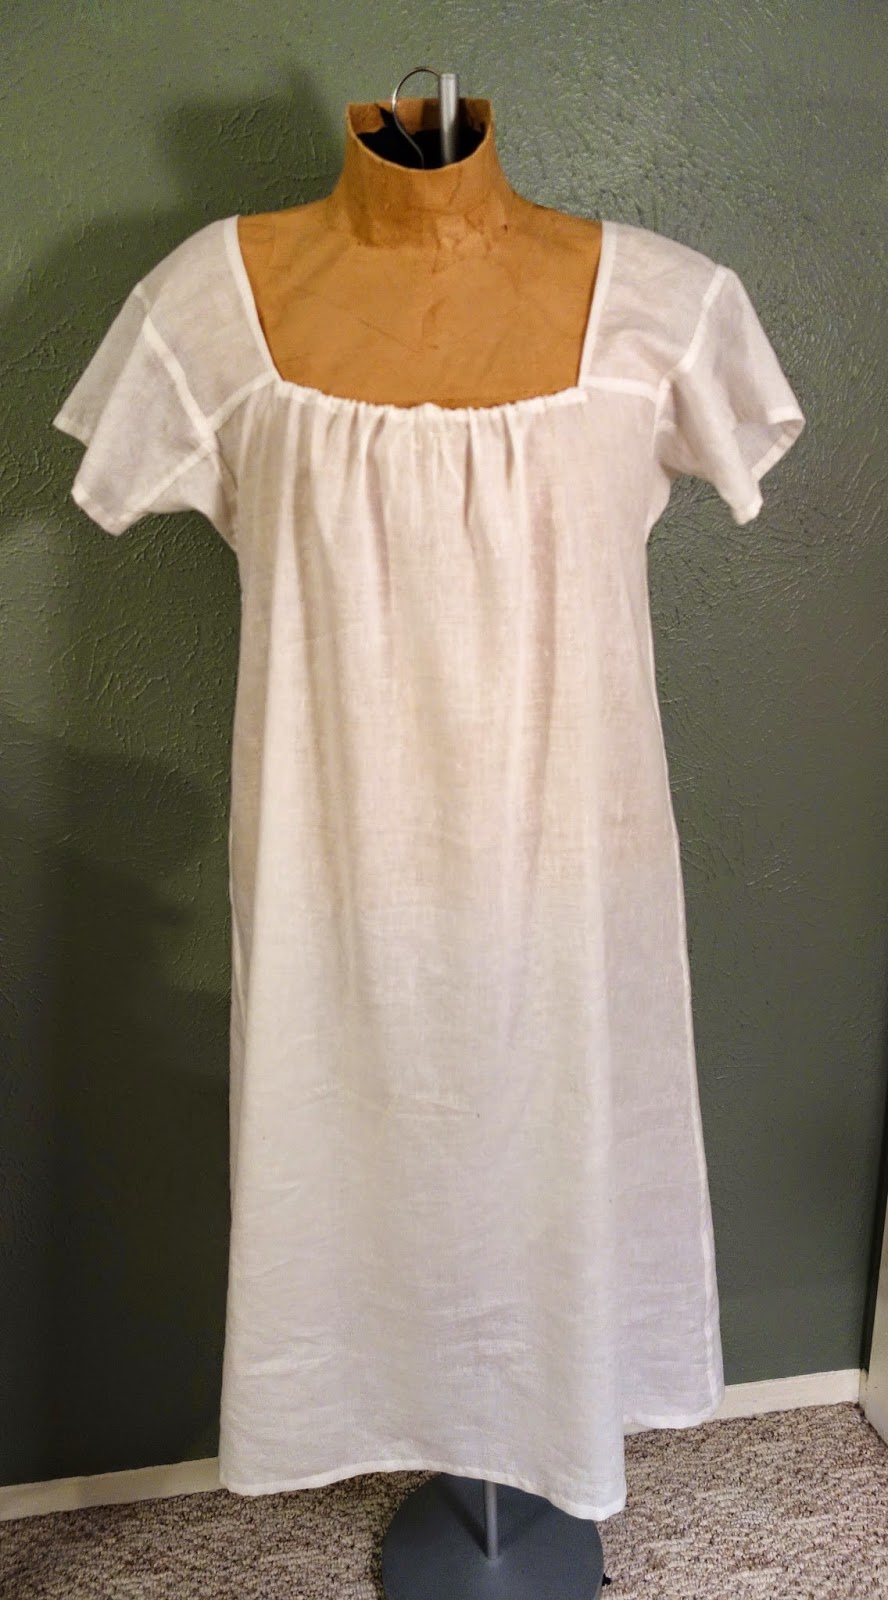
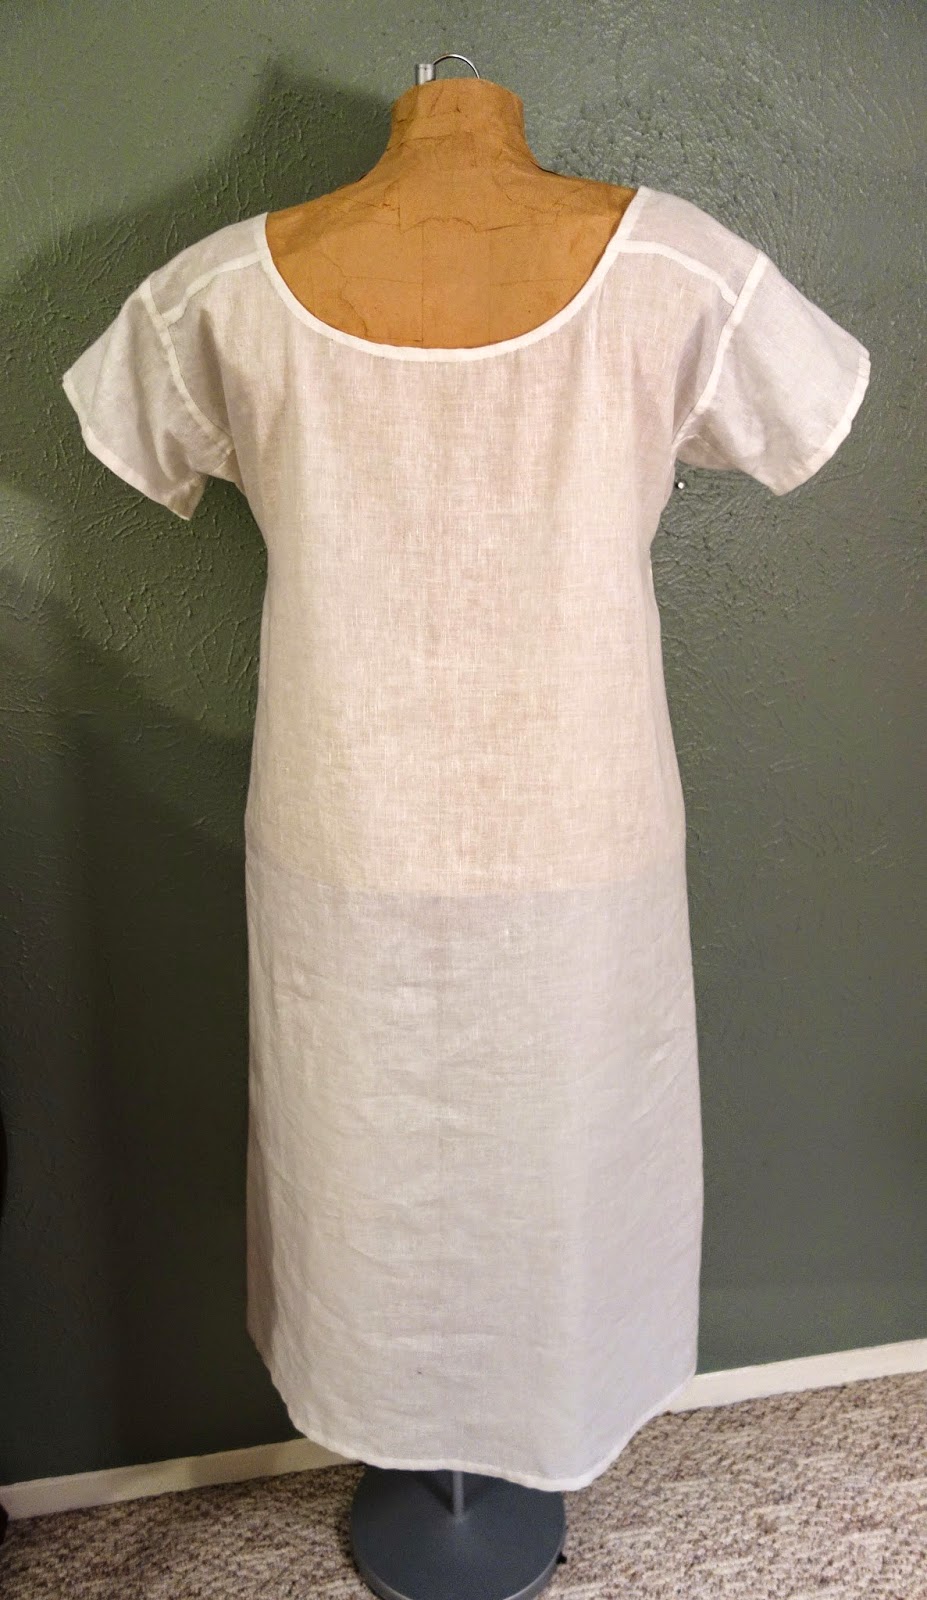
The first garment on my list was a new chemise.  There isn’t much to blog about with a simple shift or chemise, but I’ll share my progress here anyway.  My chemise is made from a lightweight linen/cotton blend fabric, and it is stitched with linen thread.  The seams are all sewn by hand with a small backstitch, then I flat felled the seams. 

I decided to use Laughing Moon #115 for this garment, and the pattern is based on a surviving chemise in the designer’s collection.  The sizing worked well, and it saved me a good bit of time and effort vs. drafting my own pattern from scratch. It would have been nice if the instructions had been more detailed about inserting the underarm gussets – those were tricky with the felled seams – but I worked it out eventually.  I’m sure there are some wonderful tutorials online somewhere, but I was too lazy (or maybe too stubborn) to go searching for them.

The only thing that I didn't like about this chemise pattern is that it has a very high neckline in back, so I cut it into a more rounded shape after it was assembled to lower the back edge.  Both square and round necklines were common in Regency chemises, although I'm not sure if they were ever combined into one garment.  I actually like the rounded back better than the square front, so I think if I made this pattern up again, I would choose the high neckline option for the front and then round off the shape of both the front and the back of the chemise.


I also wish that I had cut the selvage down to something narrower than 5/8" before felling the seams. Period undergarments usually have tiny seams, and mine look pretty ham-fisted in comparison.  But this was my first time to hand-sew a chemise, and I learned a lot from the process, so I'm still pretty happy with the end results.

My biggest discovery was that chemises don't take nearly as long to sew by hand as I had feared.  It always seemed like too much effort to hand-sew something that would rarely be seen by anybody other than myself, but this chemise made up so quickly that it was really no trouble at all.  I only worked on it for a couple of hours over 3 evenings, and it was a soothing and mindless project while watching movies and TV.  

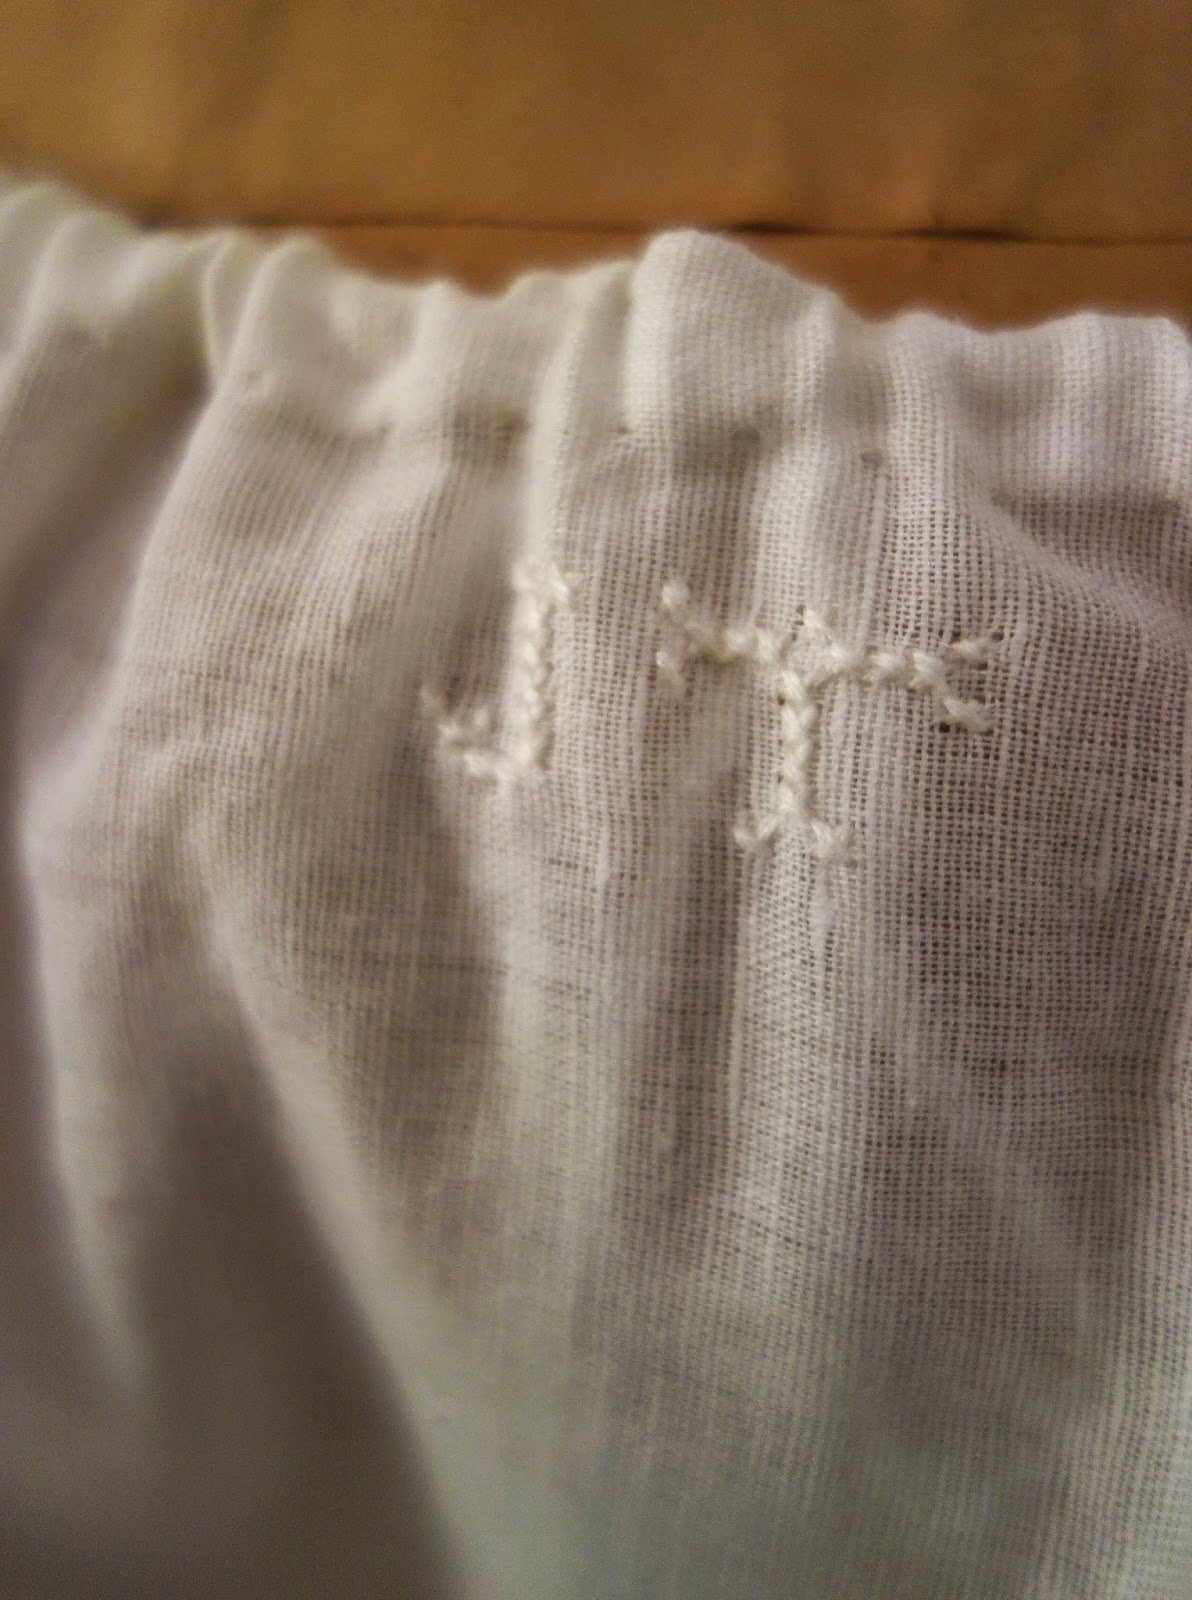
As one last finishing touch, I thought it would be a fun to embroider my initials on the front under the neckline.  Embroidered initial are commonly found on period chemises, and I can imagine that if you lived in a Regency household filled with women, it would be quite necessary to monogram your garments so that you didn’t end up wearing your mother’s or your sister’s underwear.  I'm afraid that if I was one Jane Austen’s heroines, I definitely wouldn’t win any praise for my needlework skills… but I guess this is good enough for a modern Janeite.  ;)    


Tuesday, June 24, 2014

Regency turban cap tutorial


M5053MA_214X01X00028_L_2
1810 fashion plate
from Scene in the Past on flickr
I have written in the past about how to make a wrapped turban, but I thought I'd also share my own technique for making one of the Regency hats that has the look of a draped turban, but is actually a fixed cap.  There are oodles of fashion plates showing turbans and brimless cloth caps during the Regency period, and the huge variety of styles and shapes made me realize that it's hard to go wrong with this sort of headwear.  Instead of trying to copy one specific plate or style, I mostly just let the fabric speak to me and I folded and pinned and stitched until I ended up with something that I liked.  I have a feeling that that's what was done in the period too since many of the turban-ish headwear that that you see in period illustrations seems to have little rhyme or reason in regards to construction (for example, check out wackadoo cap #3 in this illustration!)  I think if you make a pleasing mound of fabric, feathers, ribbons, or tassles to cover you head, then you have achieved a perfectly authentic Regency turban.


For my fixed turban, I started with a straw fedora, then I wet the hat and stretched it over my hatblock to make the crown round again.  It would be even easier to start with a hat with a round crown, but woven straw is so easy to reshape that almost any stye of hat would work.  I then cut off the brim right next to the internal sweatband.  If your hat doesn't have a band sewn on the inside and your base is made from woven straw vs. straw braid, you will probably want to sew around the cut edge to keep the straw from unraveling as you work.  

To cover the base, I used some cotton velvet that I dyed myself.  The velvet was originally black (it's all I had on hand), but I bleached it and then dyed it with pearl grey Rit, which has a slightly purple-y color to it that I really liked.  You can see that the color is a bit mottled because I wasn't being very careful when I dyed it, but you really don't notice that when all of the draping is in place.


I cut a long strip that was about 3" wide to cover the bottom edge of the crown and a large oval that was 17"x19" for the poofy part on top of the crown.  I whip-stitched the long strip to the inside sweatband, then I folded it over the cut edge of straw and used a running stitch to secure it to the outside.  The end of the strip where it overlaps in back is turned under and whipped down as well.  


Next I pleated the oval down to a size that fit the circumference of the crown base.  My pleats are pretty irregular and I didn't measure anything or try to space them evenly.  You can even see in the picture above that there are some sections on the side of the oval that aren't pleated at all.  It really doesn't matter much with this sort of randomly draped cap, and I just pinned and adjusted the pleats until it fit.  

I had originally planned on basting this poofy oval to the straw base and then covering the raw edges with a strip of fabric that wrapped all the way around the hat, but unfortunately, I didn't have a long enough strip of fabric left over to do this.  I solved this problem by sewing the back of the oval to the straw base with the right sides together.  This makes the raw edges of the poof turn under and stay hidden in the back once the oval is flipped up over the top of the hat.   


In this next picture, you can see the front of the hat once the poofy oval is flipped over the crown and stitched down with a running stitch.   I left about 2" un-sewn on the sides between the back with the finished, turned-under edge, and the front with the raw edge.  These open spaces will come in handy for the next step when I add the wrapped band.  

Beside the hat are the two scraps of fabric that I had remaining.  The 7"x20" rectangle is the part that will wrap around the front and cover the raw edge of the poof.  I turned under the long edges of this strip and ironed them, but I didn't bother to finish the edges beyond that.  I thought about using the long triangle as a drapey piece with a tassel on the end, but I decided that I liked the hat better without it.


Here, you can better see what I was talking about with the open section on the sides.  I gathered the ends of the long rectangular wrap piece, tucked an end under the open section of the poofy oval, then stitched the end to the straw base.  Once it was in place, I turned under the edge of the oval and stitched this over the wrap piece.  Then I wrapped the long strip around the front, over the raw edges of the poof, and tucked the other end under the crown and sewed it down as well.  


This is the front view of the hat with the wrap piece in place.  I added a few stitches here and there to secure the wrap across the front so it doesn't shift around, but mostly it is un-sewn except on the sides where it tucks under the poof.  To add a little more interest, I dug around in my stash and found a pretty little piece of vintage trim that coordinated well with the velvet.  I hand-sewed this around the edge, and actually, if my oval poof had been smaller (or I liked the crazy chef hat look), it could have been done at this point.  


To tame my crazy poof a little, I simply pulled extra fabric toward the back of the hat, pinched a few folds into the fabric, turned the extra fabric under, and stitched it down in back.  It's amazing what a difference that made!  


Here you can see the back view a little better.  Once of the best things about working with velvet is that it drapes so nicely and hides your stitches so well.  You can see that my back pleating is really pretty random and casually draped, but it still seems to work just fine. 


With the outside finished, I decided to add a simple lining to the inside to hide my raw edges and basting stitches.  Here is what it looked like before adding the lining.


And here it is with the lining in place.  My favorite hat lining method is to use a long rectangular strip of cotton that is whipped to the edge of the crown.  There is a channel sewn along the top edge of this rectangular strip, and a drawstring pulls the fabric in to gather it up at the top. I also added a comb to the front edge to help keep the cap in place without having to use hatpins.  


As a finishing touch, I tucked a set of 3 short ostrich feathers under the wrap piece and stitched them to the base to make sure the wind didn't knock them loose.  This is when it was really convenient to have the wrap piece mostly un-sewn.  I was able to try the feathers in a variety of positions, and I could easily switch out the feathers for flowers or a cluster or ribbons in the future to give the cap a different look.  


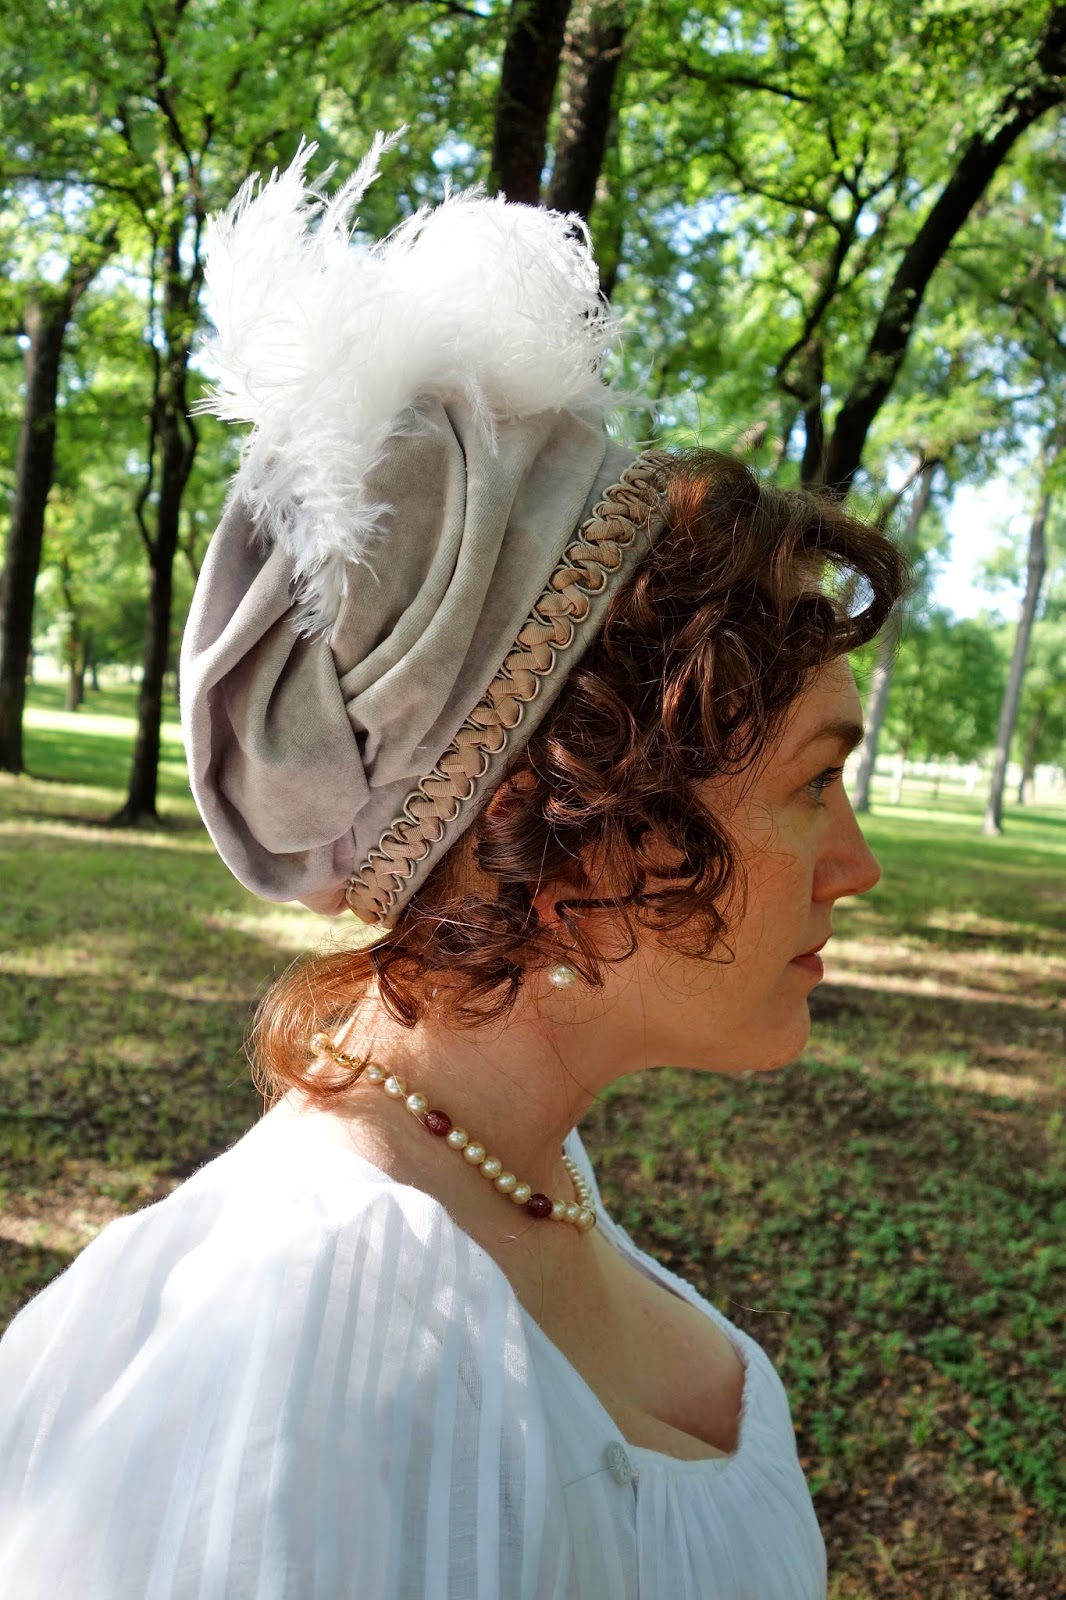
And here is what the turban cap looks like on me.  I chose to wear it set pretty far back on my head, although you could also shift it farther forward and not have to worry about curling your hair as much in front if you liked that look better. 


Here is the back view.  I really had no idea what I was doing with this hat when I started, but I'm so happy with the way the draping worked out in the end!


And here it is from the front.  When I am looking straight ahead, all you can see are the feathers sticking up on top, so it really is a pretty subtle look.  I made my turban cap relatively small, but you could easily pad your crown, leave a larger puff on top, or add thicker wraps to make your turban larger if you wanted something more dramatic.  

I hope this tutorial was helpful and gives you some ideas for making your own fixed turban cap. Don't be afraid to drape and experiment and try your own thing - these hats really are simple and a lot of fun to make!
Regency "little white dress"


M5053MA_214X02X00050_L_3
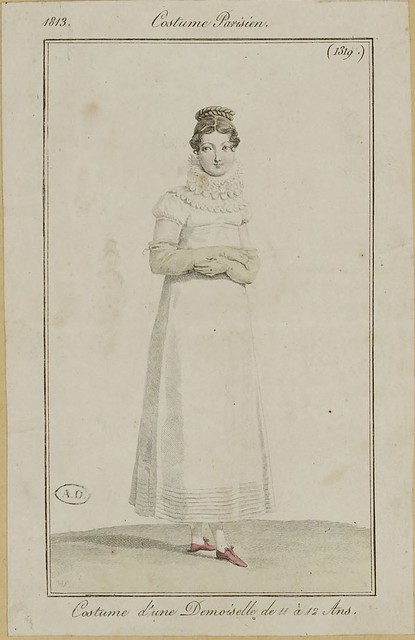
1813 fashion plate from
Scene in the Past on flickr
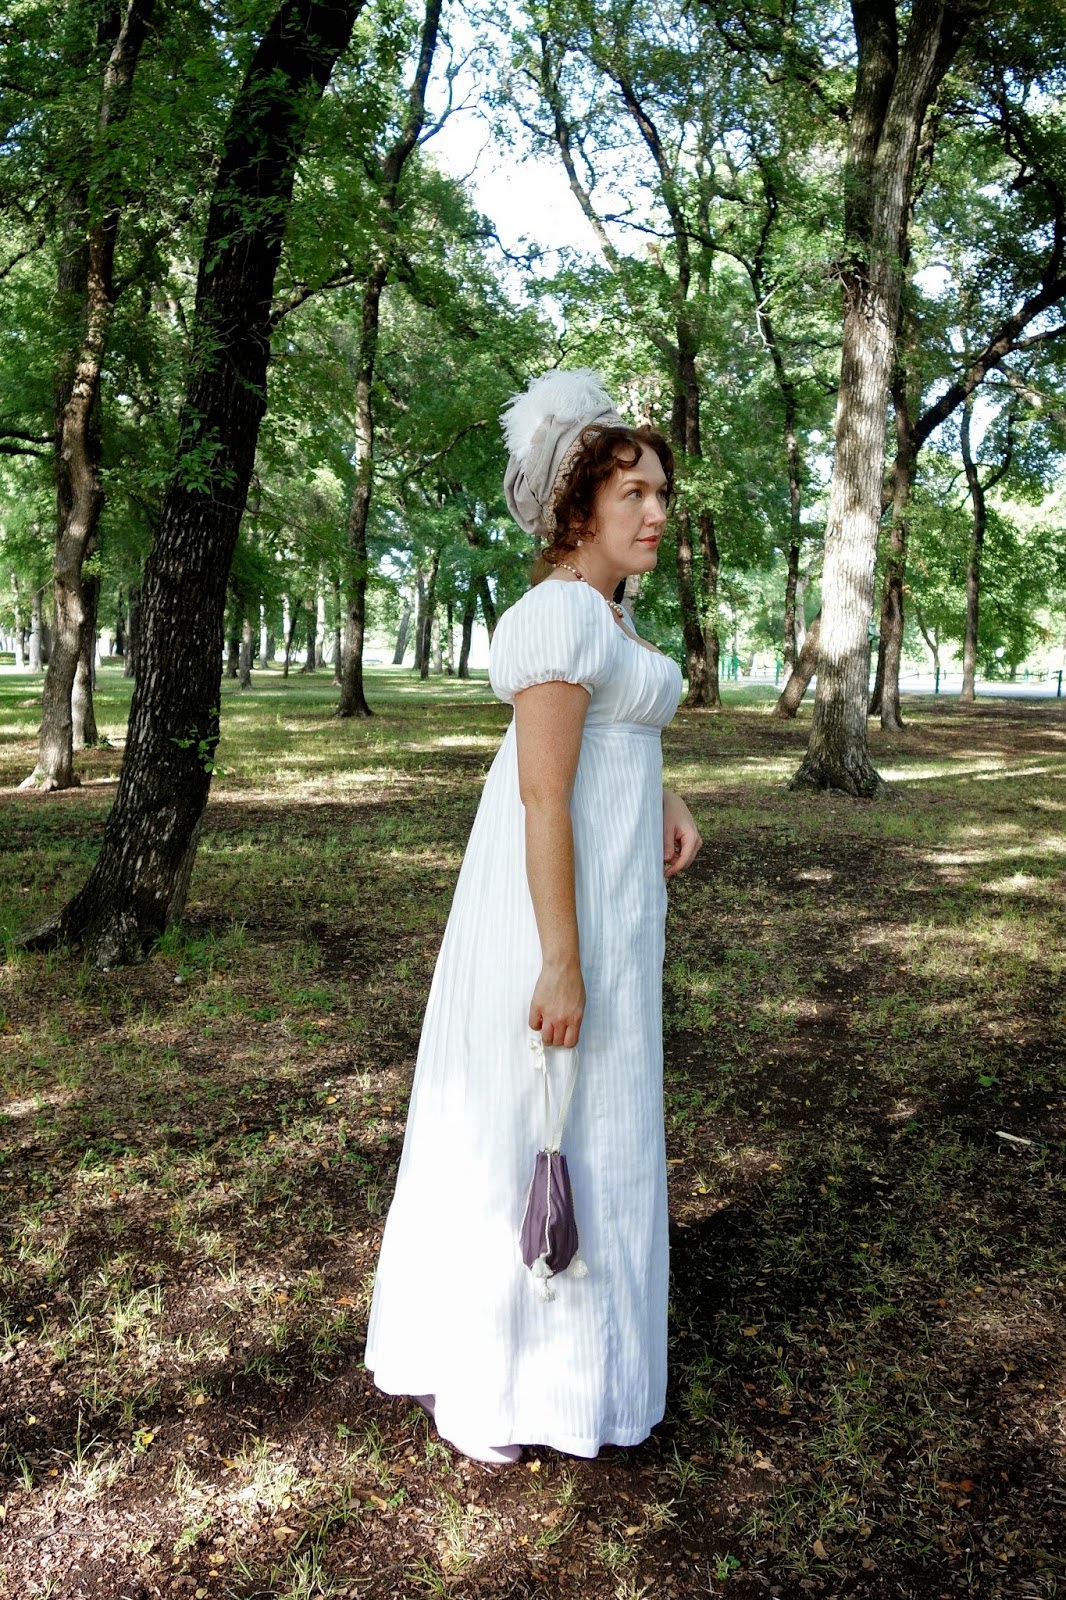
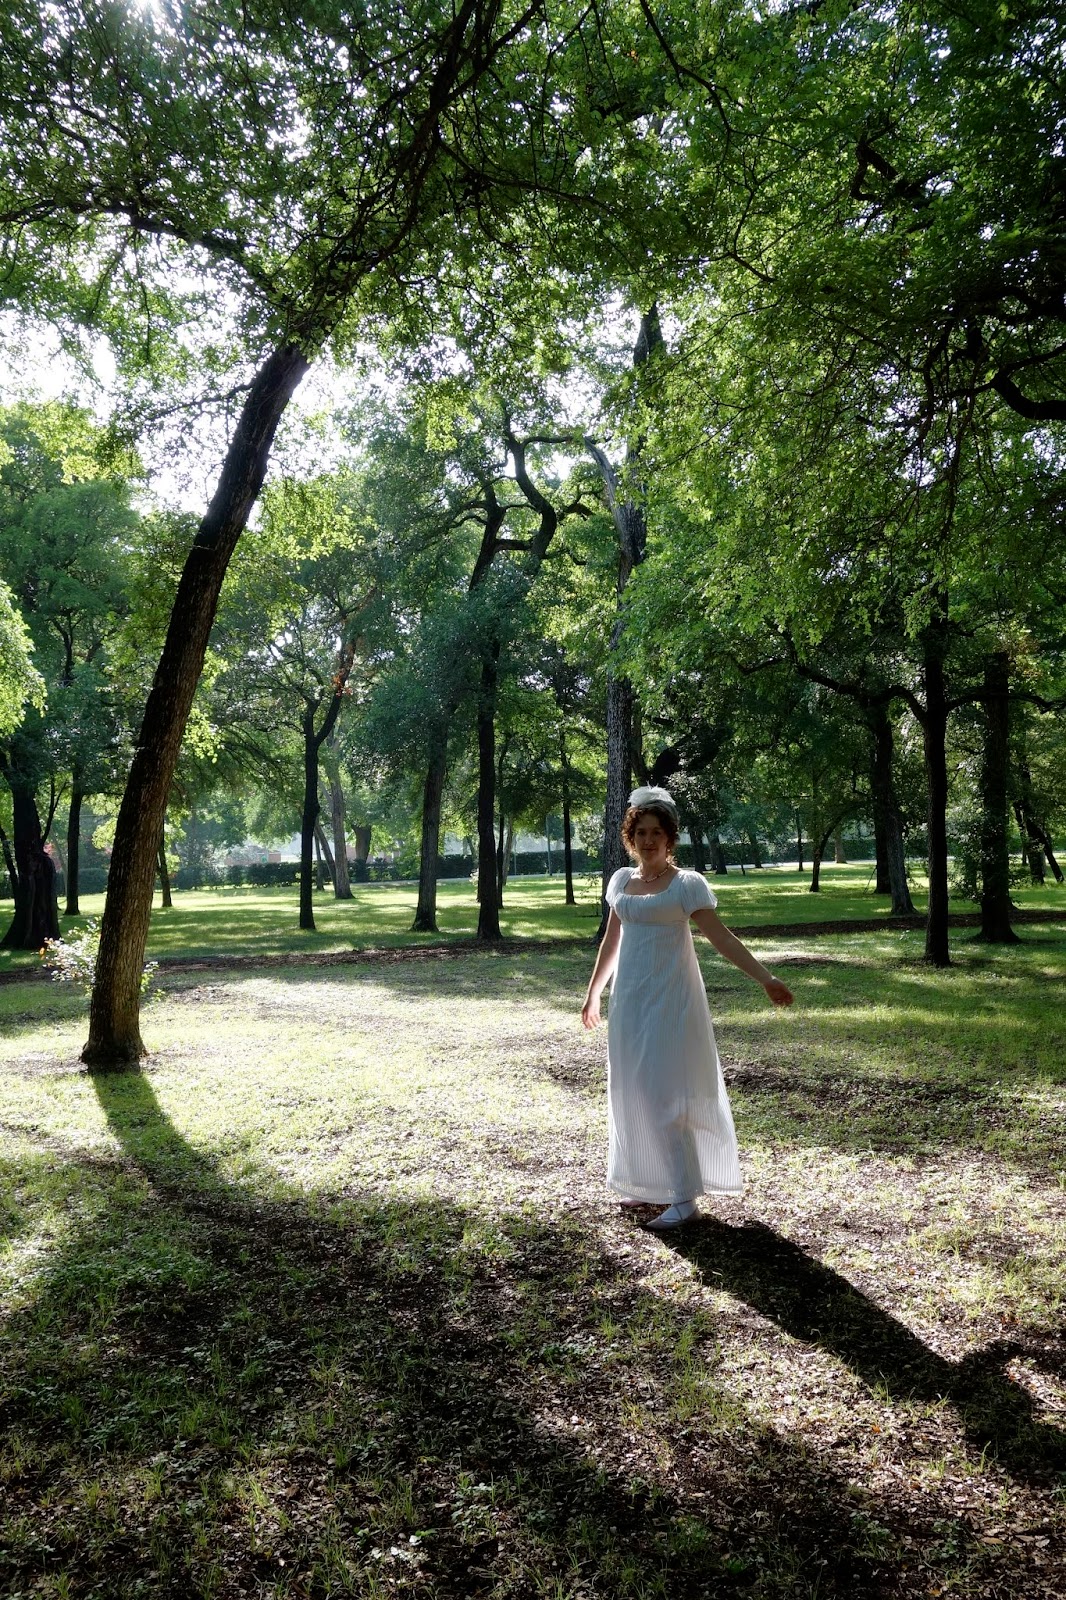
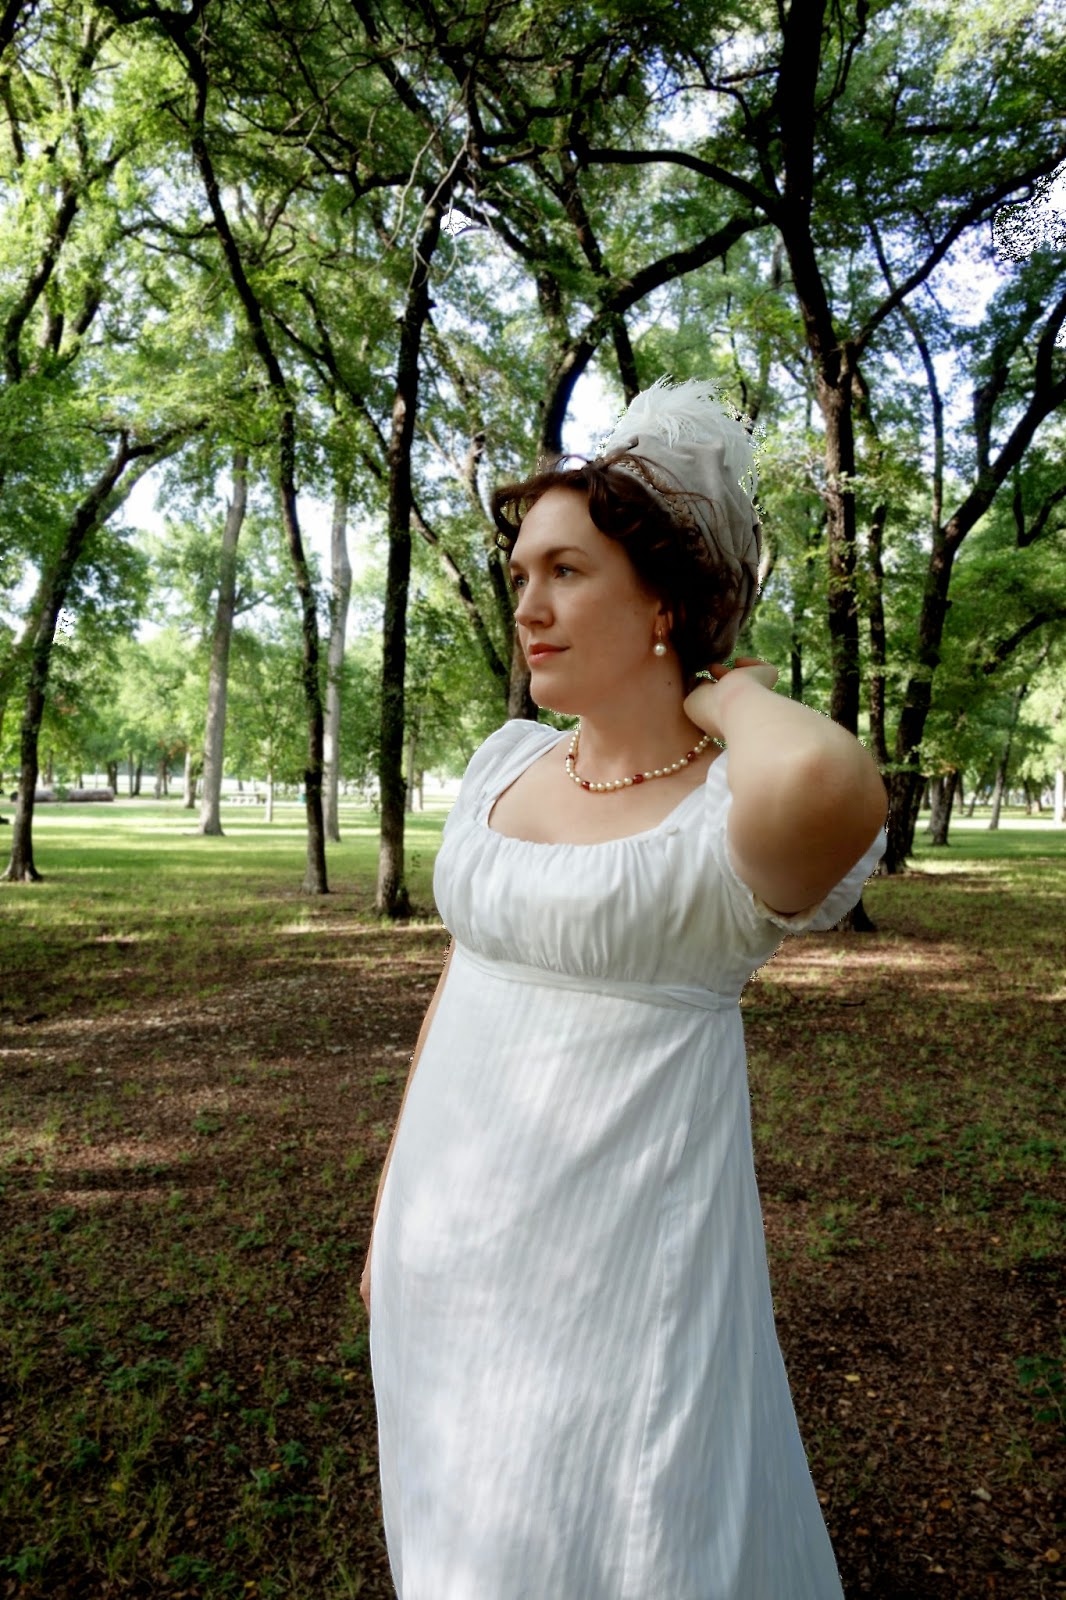
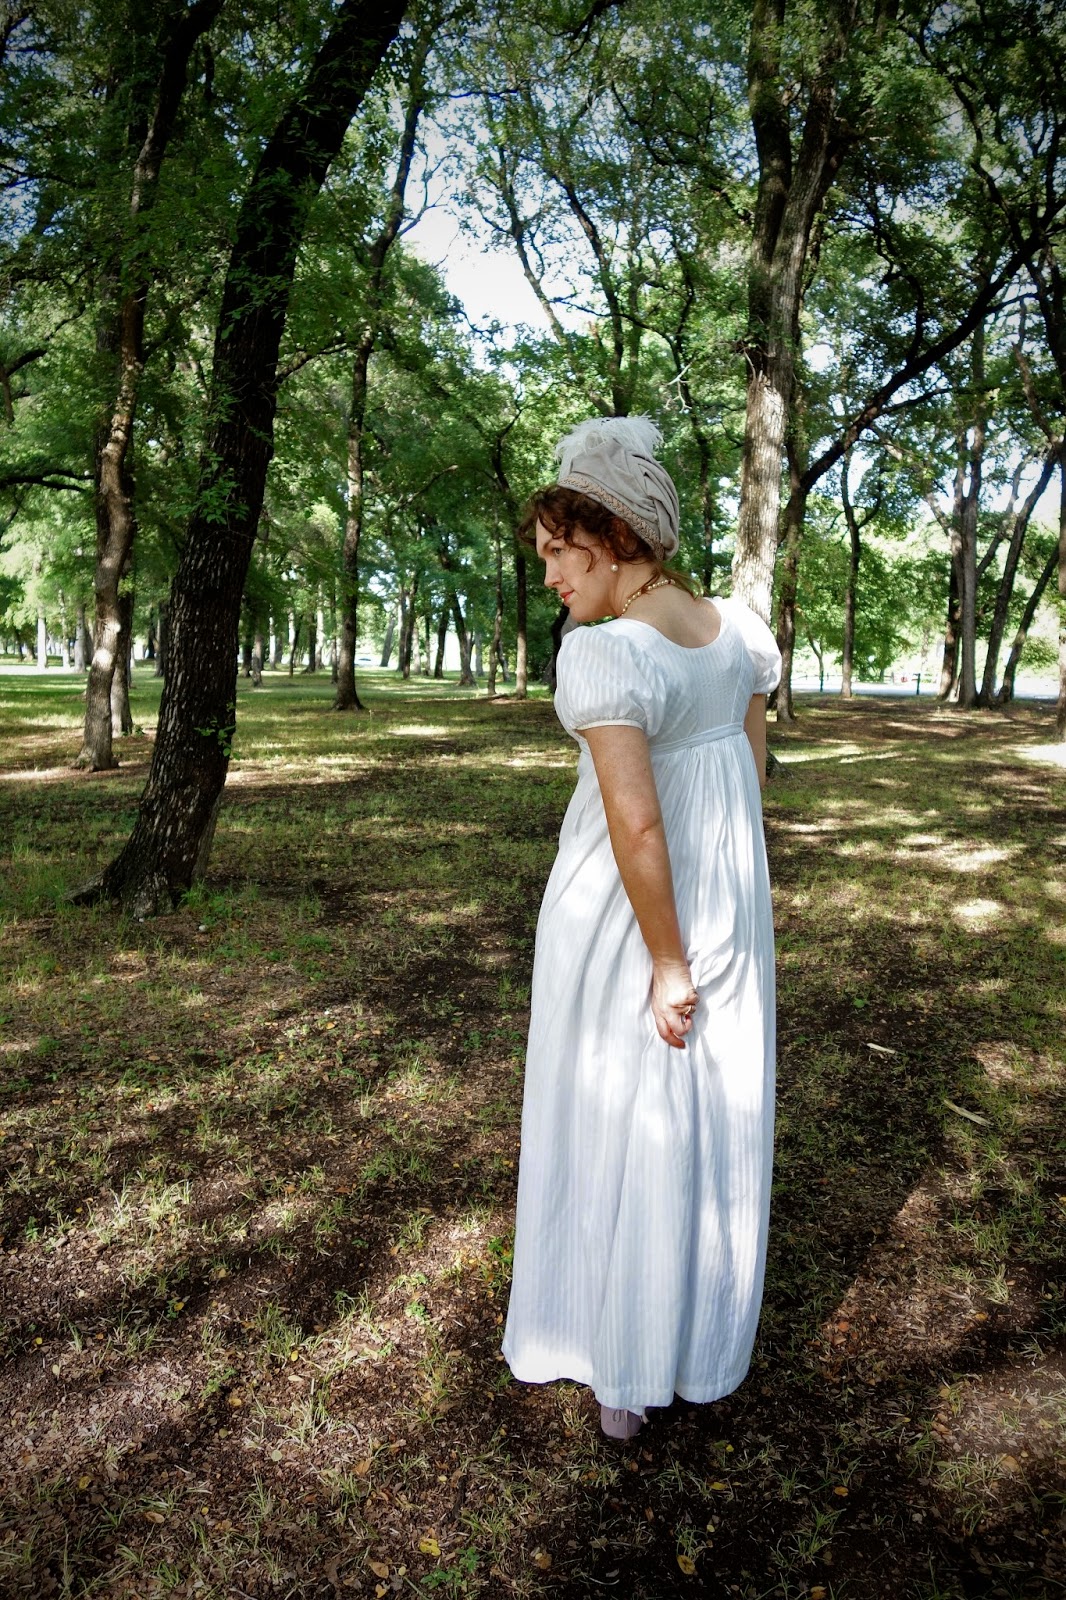
Of course everybody has heard of a LBD - a "little black dress", but I think there needs to be a special spot in the wardrobe of historical costumers for the LWD too - the "little white dress".  Years ago, before my personal aesthetic changed and I grew to love Regency costuming, the LWD stood for everything that I hated about this period of clothing.  I always thought that these dresses looked like little girls' prissy nightgowns, and I have to admit that I still have a preference for colors and patterns and the earlier Empire styles.  But what has changed is that now I appreciate how versatile these basic white dresses are as wardrobe builders.  You can pair a LWD with a spencer or pelisse for outdoor-wear, a sleeveless overdress for daywear, a fancy bodice or robe for evening, or you can always keep it plain and accessorize it with colorful accessories for every type of event in between.  It's such a great building block for a huge variety of looks that I finally gave in and decided to make my own Regency LWD.  I'm hoping that my dress will work for a wide variety of Regency looks, but I designed my dress have several of the hallmarks of early 1810's French fashions, like the flat-front skirt, shorter hemline, super-high waistline, and small puff sleeves.  This dress was made to wear to an 1812 Overture concert, so I wanted my dress to be appropriate for that general time frame.

My gown is a bib-front style with a pattern that I cobbled together from a variety of dress diagrams taken from surviving garments.  Bib-front construction seemed to be going out of style by the 1810's, but it's very important that I can dress and undress myself for events, so I chose this style of gown for convenience more than anything else.  It is made of sheer striped cotton, and the bodice is lined with cotton sateen.  The sleeves and skirt are unlined, so my petticoat and chemise work as the lining layers.  I discovered that it still has a slightly "merveilleuse-ish" transparency when the sunlight shines behind me, which is a fun feature that makes it a little more daring, I think.


The bib is closed with a pair of dorset buttons that I made myself, and a cord that runs through a channel in the top edge of the bib with loops on both ends.  The bottom of the bib is attached to a waistband that wraps around the body and then ties in the front under the bib.  The skirt is left open for the top few inches at both of the side-front seams, and I added some thread belt loops at the sides and back to keep the bib ties from slipping down and making these openings gape or wrinkle.


The back is fitted and pretty simple.  The side back panels tend to wrinkle a little, which I guess is due to the bias cut, but it doesn't bother me too much.  To construct the bodice, I placed the outer fabric and lining together and sewed them as one layer, and then I used a strip of bias tape to finish the neckline.  The sleeves have a thin cord running around the bottom edge that ties in a bow on the inside so that I can adjust the tightness.  They are based on this pattern, but I ended up enlarging the pattern to 120% and I removed the bottom puff after I tried out a variety of sleeve styles.


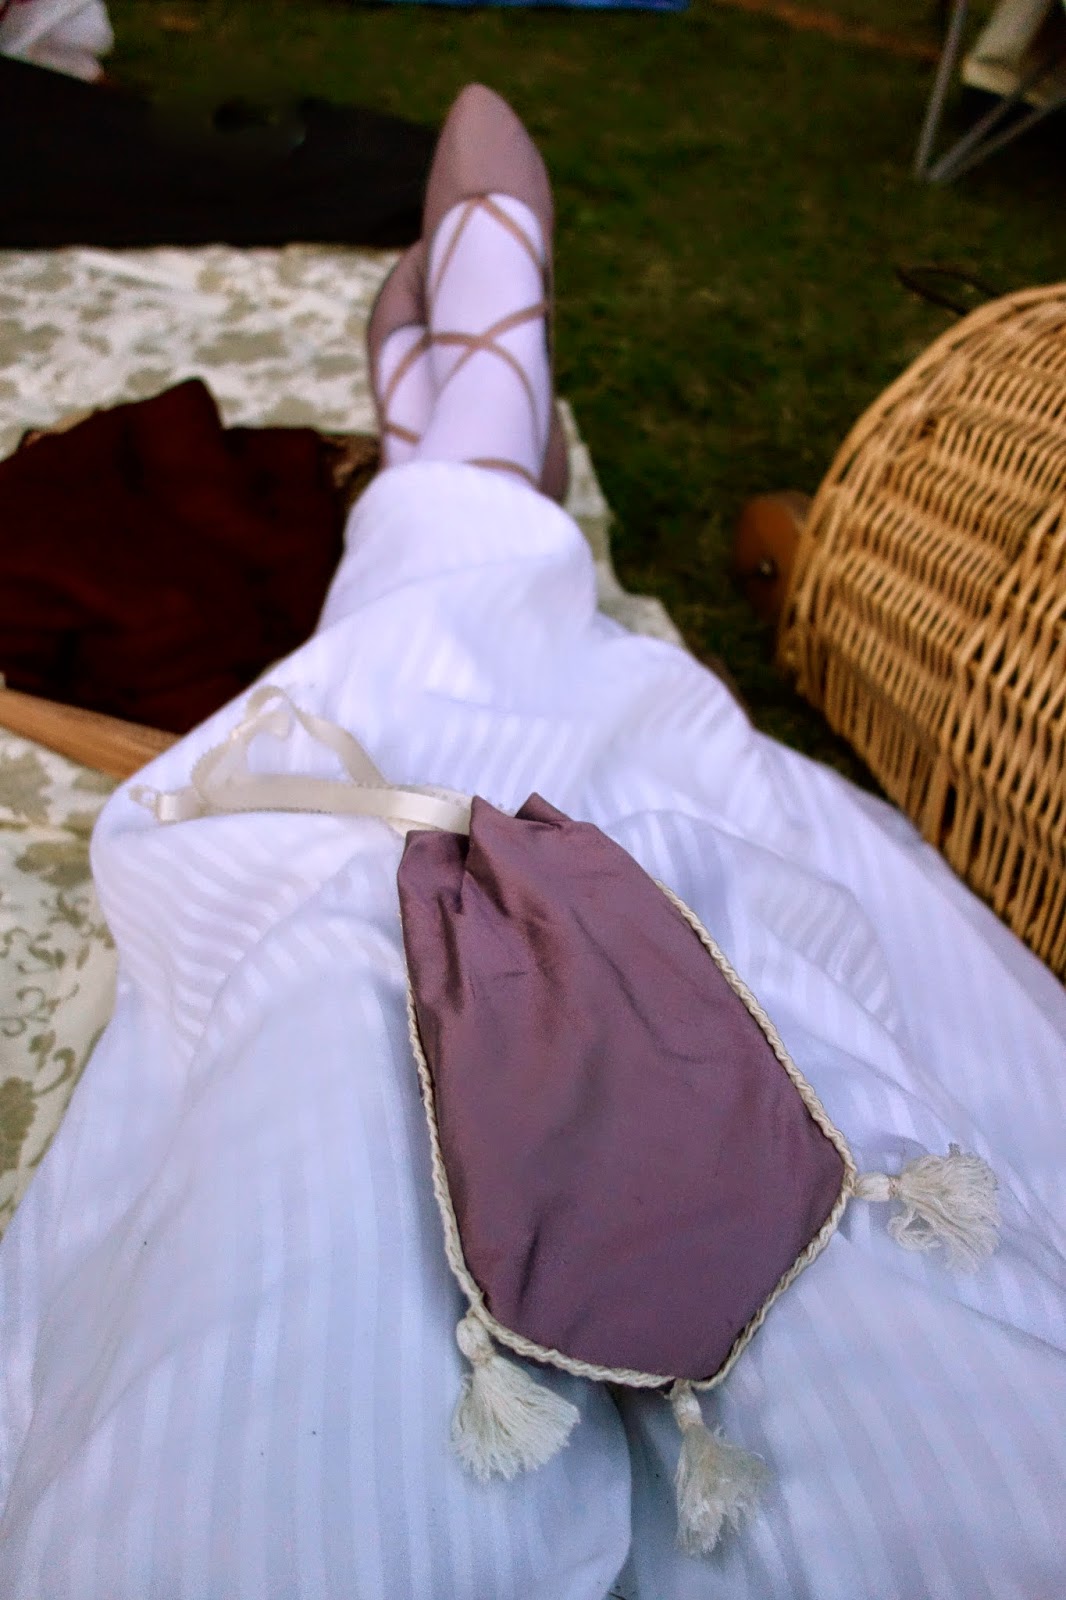
Since the dress itself was so simple, I had a lot of fun digging through my stash and making some accessories to liven it up.  I started with a 3-sided silk reticule made from these instructions.  It was a fun little 2-hour project, and I even made my own silk thread tassels to finish it off.  Now that I know how easy these are, I'm determined to make a new reticule to go with every dress that I ever make.


I also painted a pair of cheap cloth flats to match my reticule and added some criss-cross ribbon ties to dress them up a bit.  I never could find any ribbons that were the right shade of mauve-y purple, so I dyed some plain cotton tape with a little bit of black Rit, which is a very purple-based color, and they turned out perfect.  


And last, but not least, I made a new turban-style cap out of grey velvet with a hint of purple in it.  I'll save the details about that project for the next post since I actually remembered to take step-by-step photos for a change.  :)


I have a few additional photos on flickr if you are interested, and you can find photos from our 1812 Overture outing there too.  We had SO MUCH FUN!  

I'll wrap this up with one more entry for the Regency Ladies Wedgie Society.  It sort of feels like the wedgie pics are a rite of passage for all of my Regency projects now - it's not truly finished until I take a silly wedgie pic.  :)