Tuesday, August 12, 2014

Edwardian corset and pattern review


For my birthday last spring, I splurged and bought myself something that I've been lusting over for years - one of the gorgeous corset patterns made by Atelier Sylphe.  After a lot of waffling over the many beautiful choices, I finally picked corset ref W since it has such an amazingly curvy Edwardian shape, plus it looked like the construction would be relatively simple since it didn't have as many pieces as some of the other patterns from this period.

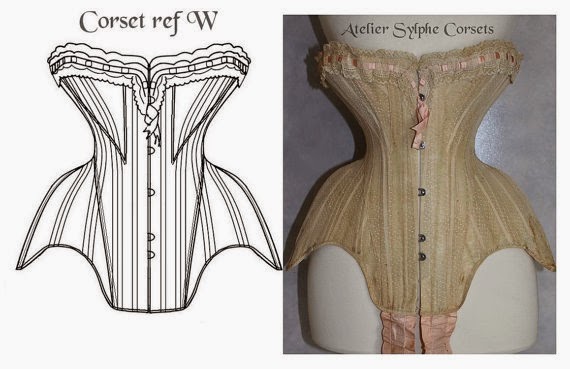
There aren't a lot of instructions included with these patterns - just some notes about the corset materials and measurements, plus a page of diagrams showing the construction method for the seams.  But for me, that was plenty, and I didn't have any trouble with assembly since I have made a number of corsets in the past.  However, if you are new to corsetry, the pattern designer gives you links to several of her incredibly helpful online tutorials, like this one showing you how to set in bust gores.  She also provided about 20 additional photos in an online download showing the original corset from every angle imaginable, both inside and out.  I really loved that!

The pattern itself is beautifully drawn and very accurate when assembled.  My only tiny complaint is that the boning length was not marked on the channels in this pattern, and since it appears that some of the bones in the original were shorter than their channels, it would have been nice to know exactly where they ended.  Another thing that I wanted to point out is that different pieces of the pattern have different seam allowance widths, which I found to be a little confusing at times if I wasn't paying close attention to the pattern after I cut out my fabric pieces.  Personally, I think it would have been easier for me to cut down the paper pattern to the exact measurement of each piece and then draw my own more standard seam allowances, but that is easy enough to do on you own if you aren't used to the specialized seam allowances that are common in corsetry.  I really appreciate how accurate the designer was by including information like this in regards to selvages, but unfortunately, it was a little over my skill level since there were no written instructions specifically telling me how to make each seam for each piece. But I think advanced corsetmakers would love it, and it's simple to change for the rest of us.


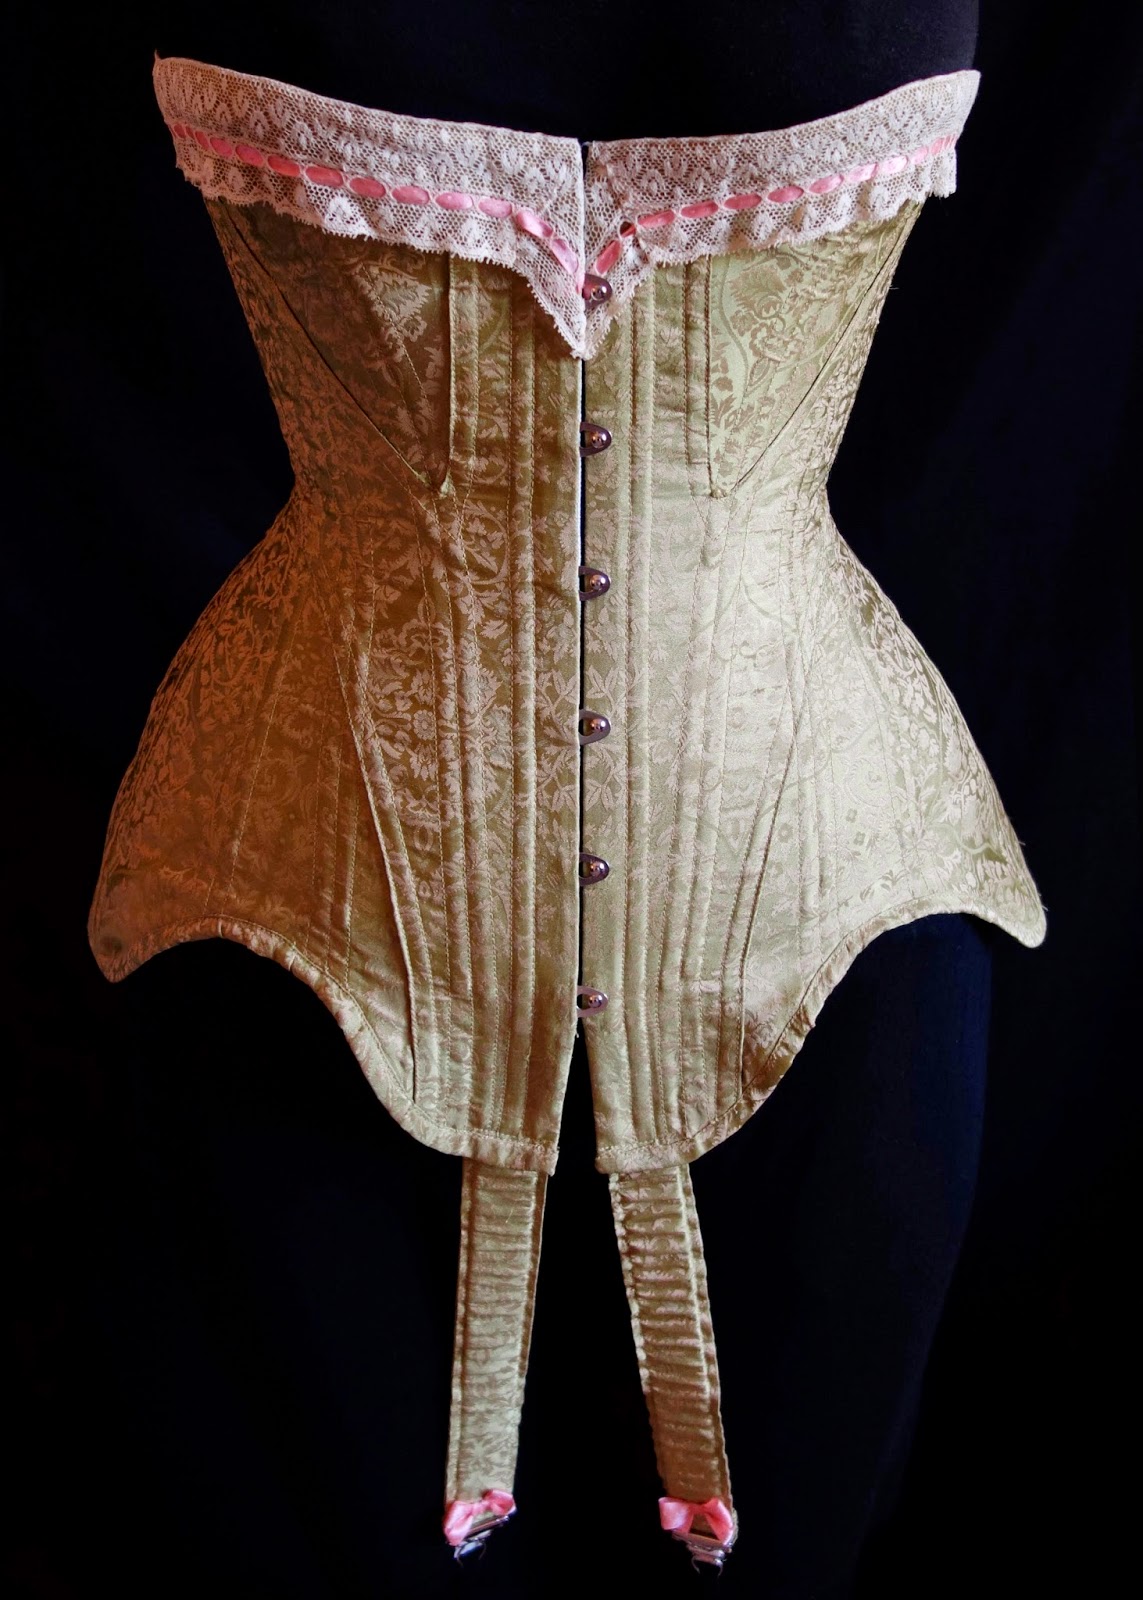
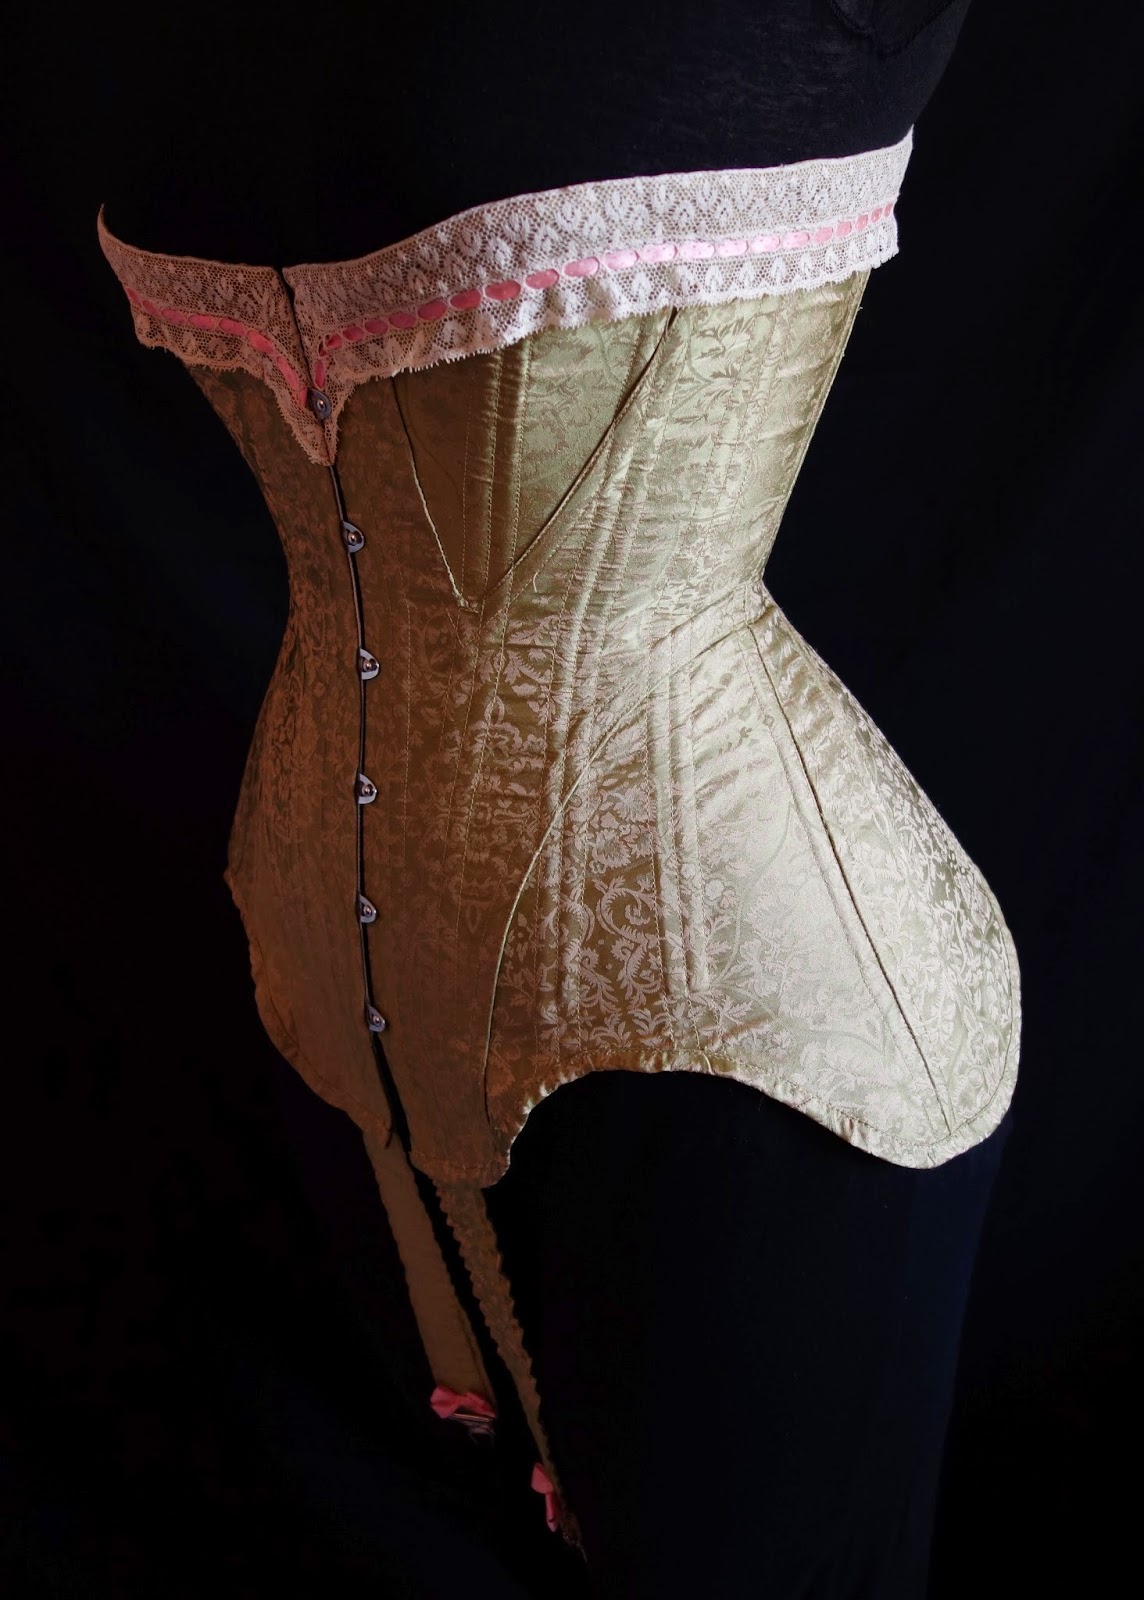
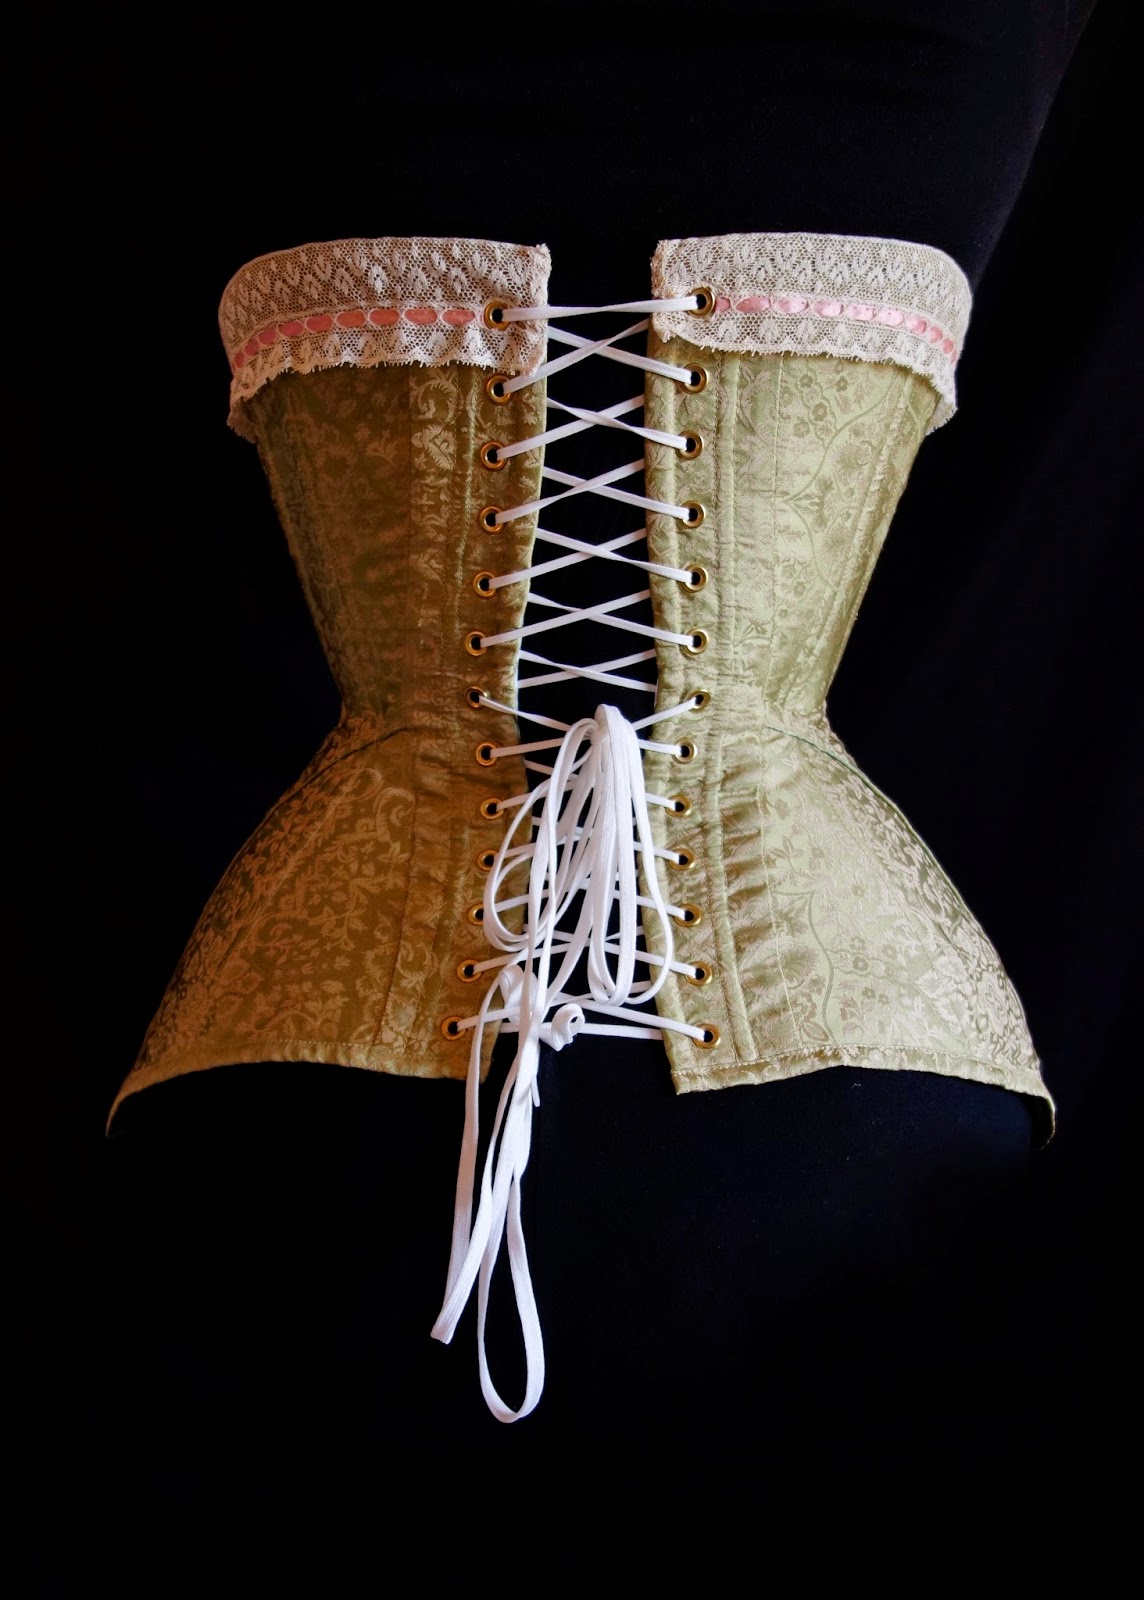
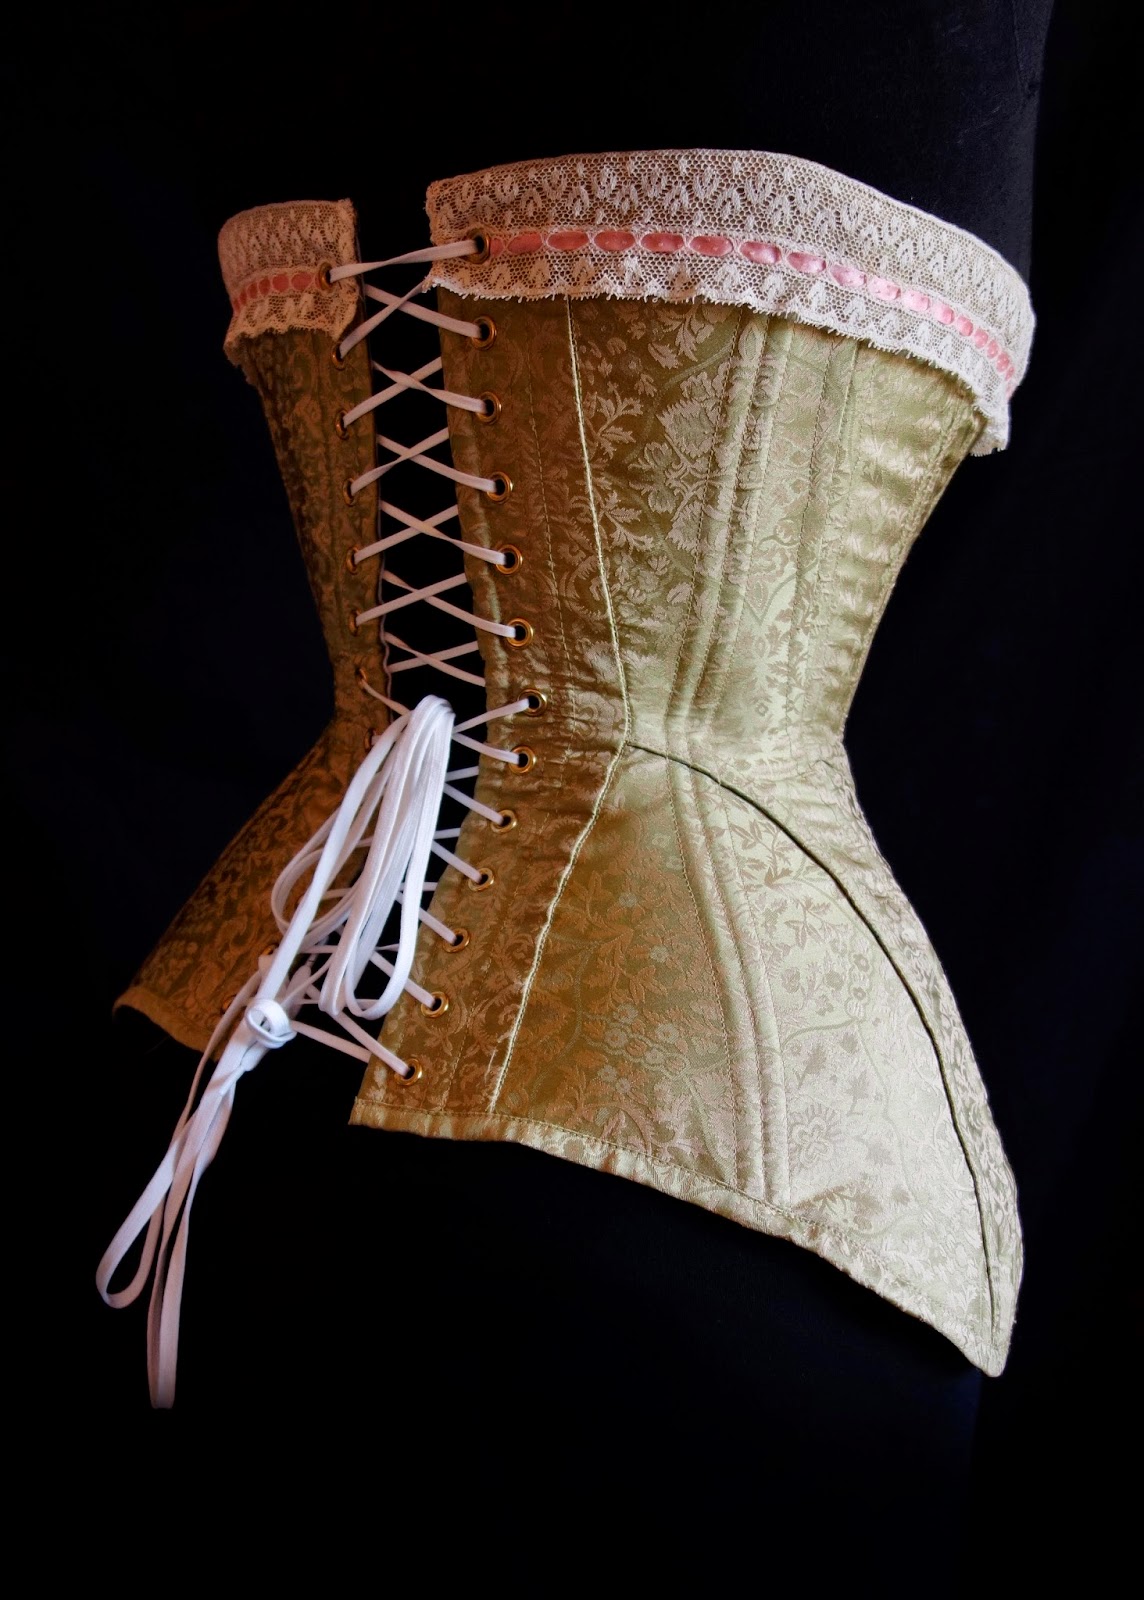
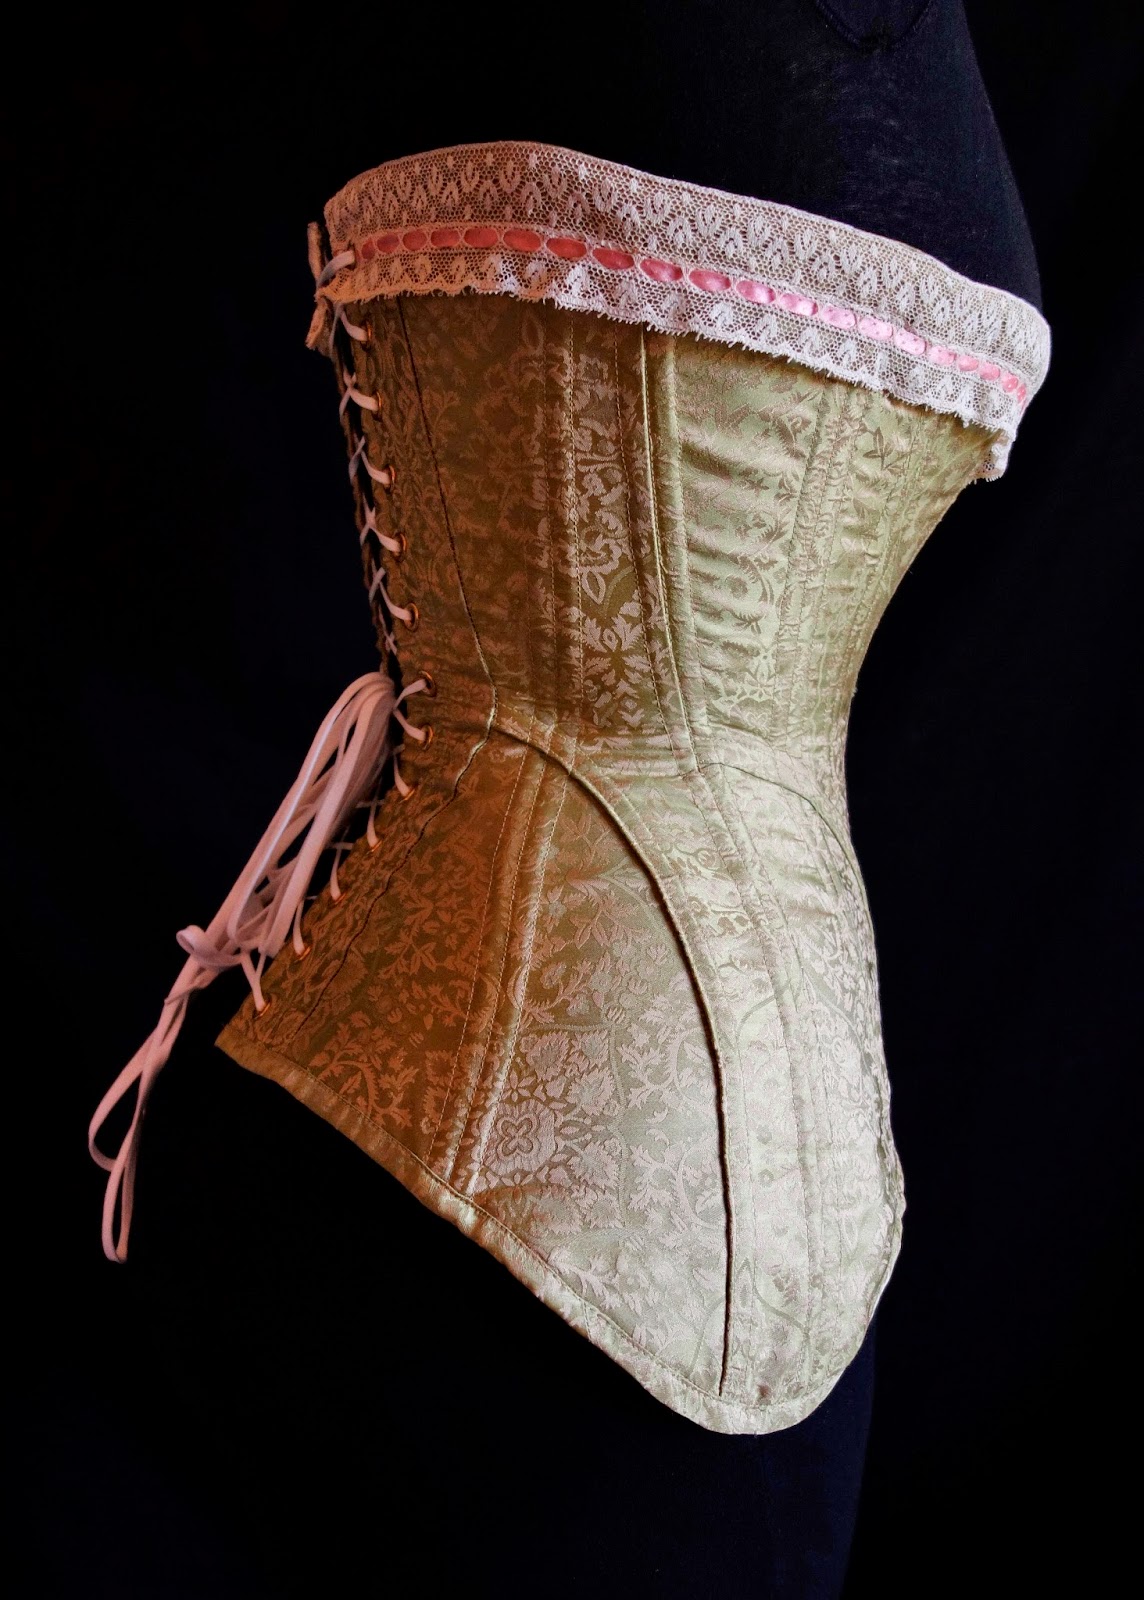
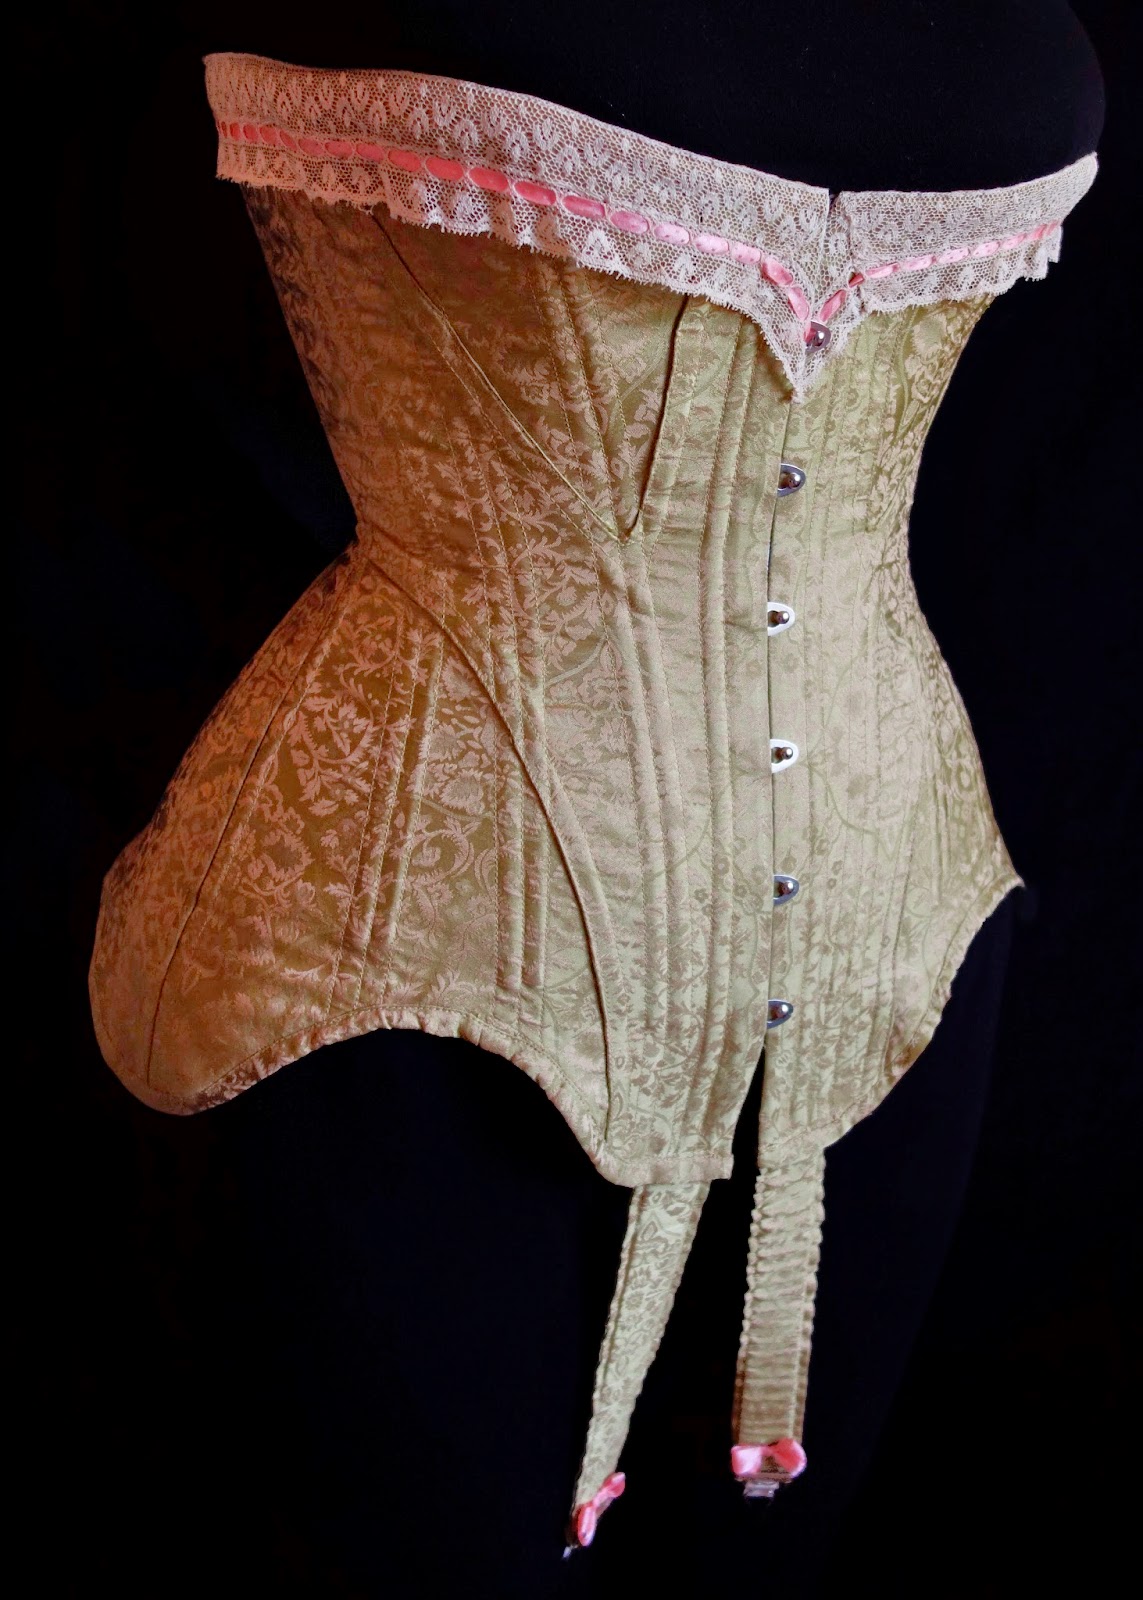
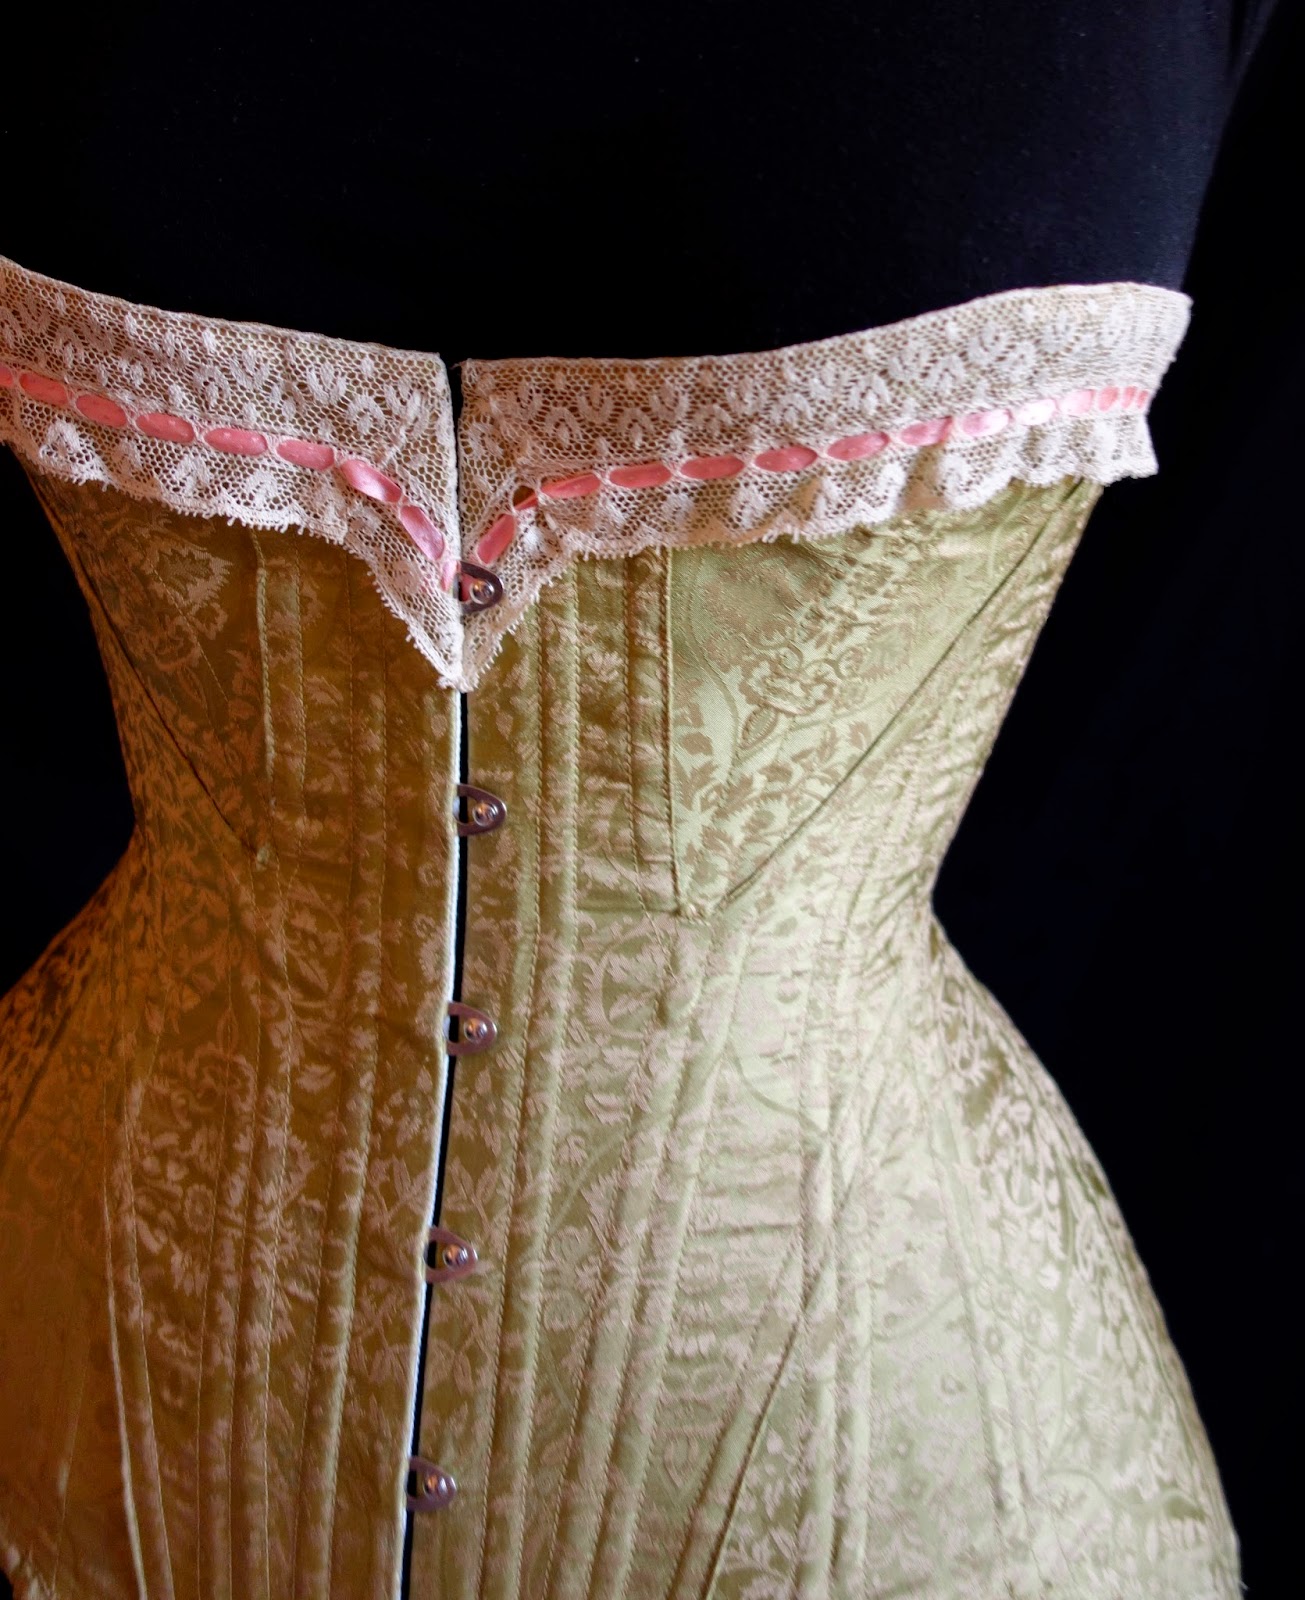
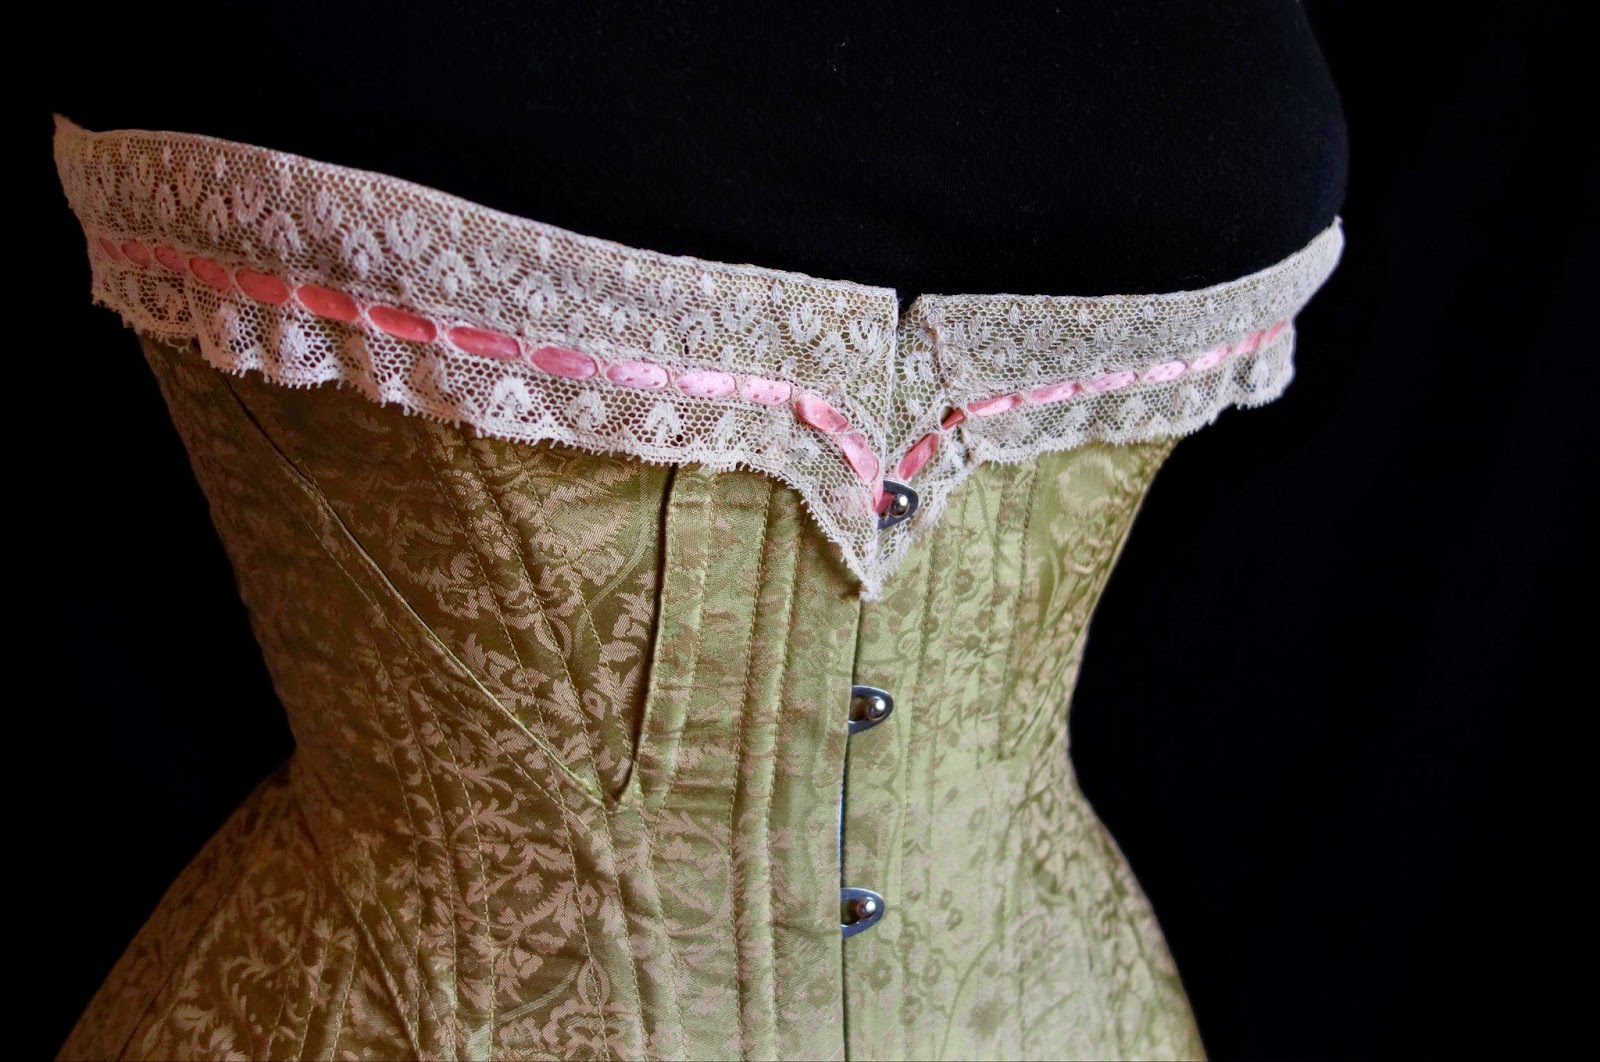
I made my corset with a layer of coutil and a layer of silk brocade treated as one.  There are boning casings on the inside of the corset, and it is boned with spiral steel.  I built my version almost exactly like I made my 1910's corset.  My favorite part of this project was finding some beautiful antique lace with silk ribbon beading for the top of the corset.  Good lace is so hard to find, but such a wonderful treat when you stumble across the perfect piece.  


I did not alter the proportion of the bust/waist/hips on this corset at all, but I did enlarge it by a few inches just by making slightly smaller selvages on a few pieces and adding a bit to the CF and CB edges.  I also added 1" to the length of the torso since I am long waisted and have to use this adjustment on almost everything that I make.  The only other change that I ended up making is to cut down the length of the bones in the front so that they don't go all the way to the bottom edge of the corset.  During the final fitting, I discovered that the bones dug into my legs when a sat down, so it was much more comfortable to raise them a bit, and it didn't change the shape of the corset at all.  

I was a little disappointed at first that my corset didn't create the extreme waspy shape that you see in the original, but I think I have finally accepted that corsets can only do so much. There are some body types that are more naturally suited for that sort of exaggerated hourglass look (I'm looking at you, Beyond the Automobile!), and I'm sure years of waist training would probably help too, but even the best corset pattern in the world can't work a miracle on an average modern body.  But this pattern still creates a gorgeous shape, is comfortable to wear, and I'm thrilled with the final results!  I definitely recommend this corset pattern to experienced corsetmakers or anyone who is ready to "level up" a bit.  I thoroughly enjoyed making it, and I hope I get a chance to try out more of the Atelier Sylphe corset patterns in the future.  


Thank-you!


I just wanted to take a minute to thank everybody for the sweet replies to my Empire gown post... and all my other recent posts too.  I wish Blogger made it easier for me to reply to you all directly, but maybe this is better than nothing.  It's been a tough year for me due to lots of personal issues that I don't usually talk about publicly, but all of your kind words about my dress really boosted my spirits and made me feel wonderful.  I am honored beyond words.

*hugs*  You guys are the best!  I feel so privileged to be a part of such a supportive and amazing online community!

Sunday, August 10, 2014

A Painted Empire Gown


I made this dress for a Regency dinner party with a few of my dearest friends way back in March, but it was dark and rainy and my hair didn't want to cooperate that night, so I didn't get very many blog-worthy pictures of the dress at that time.  I kept thinking that I would get dressed up again and do a photoshoot during the spring, but then life happened and time just slipped away.  Part of the problem is that this outfit seems too fancy for most of my usual photoshoot settings.  Plus, once I add 24 inches of ridiculous feathers sticking straight off the top of my head, I'm well over 7 ft. tall, and that's no fun in a car, as you can see from one of the photos from March!  So I made myself a little backdrop in my sewing room last weekend and took some pics that I am finally happy to share.

The inspiration for this dress came from two major sources.  First, I fell in love with the shape of this 1797 printed gown from the Musée de la Toile de Jouy.  It is almost like an open robe with those flaps under the bust, but it appears to be all one piece like a round gown.  I don't think I ever found another example quite like that, but I love it like crazy so I decided to do something similar with my own dress.

But I also fell in love with the idea of painting a design on my dress.  There are loads of examples of painted dresses from the 18th century, but it seemed to be less popular during the Empire period.  But I did find a several examples of Empire dresses with painted borders in Gallery of Fashion, webbed by the Bunka Gakeun library.  One of my favorites was this dress that is described as a "robe of white tiffany, with a painted border of vines".

Painted textiles during this period were typically made with tempera paints, but I couldn't imagine doing work like this with a paint that is water soluble, so I cheated and used satin finish acrylics instead.  It took quite a bit of trial and error before I came up with a design that I liked, but my final pattern was inspired by the top design this 1815 embroidery pattern sheet from Ackermann's Repository.  EK Duncan has webbed a large number of these embroidery patterns on her website, My Fanciful Muse, and they were an enormous help when I was creating my design.

The painting was a bit long and tedious, but not particularly difficult.  My research found that the fabric "tiffany", which was mentioned in the painted border fashion plate, could be a thin silk similar to taffeta.  I was thrilled to find some semi-sheer silk taffeta at my favorite local fabric store, Fabrique, that seemed like it would be a good modern substitute for tiffany.  It made painting a million times easier because I was able to draw off a few repeats of the design, then create large stretches by splicing copies of that drawing together.  I was able to place this pattern under my fabric while painting so I didn't have to transfer the design to my fabric at all.  I painted each section in stages (leaves, then flowers, then final shading) to streamline the process.  I painted the bodice and sleeves before assembly because I wanted to line those areas and I wouldn't be able to see my pattern once it was assembled, but I painted the skirt after hemming since it was unlined.  My original design idea used a very wide border with lots of different colors, but even though I'm a fast painter, I had to scale it back by a LOT because it took so much longer than I expected.


I drafted my own pattern for this dress by altering the pattern from my 1790s round gown.  The silk on the bodice is flatlined with white cotton so that the color would be consistent compared to the fabric over my chemise sleeves and petticoat, and then the bodice is lined with linen.  The gathered front section and sleeves are lined with white voile since they are so sheer and I don't like seeing too much of my undergarments through the dress.  The bodice closes with lacing on the foundation layer, then the front is gathered down on two ties at the neckline and waist, then the outer bodice flaps hook in the center front.  To conserve fabric the gown is pieced in several places, which you can see here under the arms.  The entire dress is hand-sewn using 18th c. sewing techniques with linen and silk thread.


To finish off the outfit, I am wearing my collet necklace and earrings from Dames a la Mode and a super long paisley shawl.  My turban and feathers are huge and crazy and fun, but I think I liked the simple look even better when I switched out the turban for a brass headband, which is actually a repurposed Victorian papier mache bowl handle.


I realize that this style of dress is a bit of an acquired taste.  The crazy high backs and kooky headwear are pretty odd looking, and the heavily gathered skirts are not the most slimming fashions ever created.  But for some reason, I just can't get enough of these late 1790s dresses!  There is just something about these fashions that feel so elegant and exotic when you wear them.  Here are some of my favorite pics, and there are a few more on flickr.