Showing posts with label 18th c.. Show all posts

Sunday, November 29, 2015

Grandma, the Wolf, and Little Red


The tale of this costume follows a long and meandering path, and to tell its story, I need to go back to the beginning, over a year ago: “Once upon a time, a lowly seamstress heard news of a magical ball in a far off land…”

*ahem* Okay, so maybe that’s a bit too dramatic for a blog post. Let me try that again:   

John Singleton Copley, Portrait of a Lady, 1780
In the summer of 2014, the organizers of Costume College announced that their next theme would be “Plucked from the Pages: Costuming Your Favorite Literary Characters”. I usually have a HORRIBLE time deciding what costumes to make for big events like this one, but I knew almost instantly want I wanted to make for the 2015 Costume College Gala. Out of all the old fairy tales, Little Red Riding Hood is my favorite, so I decided that I would be the Wolf wearing Grandma’s clothing. But I had no intention of being a sweet old grandma wrapped up in blankets with curlers in her hair. I wanted to be an elegant 18th c. grande dame like you see in so many paintings from that age. There is so much subtext and darkness and deeper meaning in old fairy tales, so I started wondering if the real Grandma was meant to be somewhat terrifying and wolf-like on her own, and maybe that’s why Little Red couldn’t tell the two apart. Who knows if that was the original intention, but it’s a fun thought, and one that you could easily imagine being true when you see the countless historical images of stern-looking matriarchs with silver hair and piercing eyes.


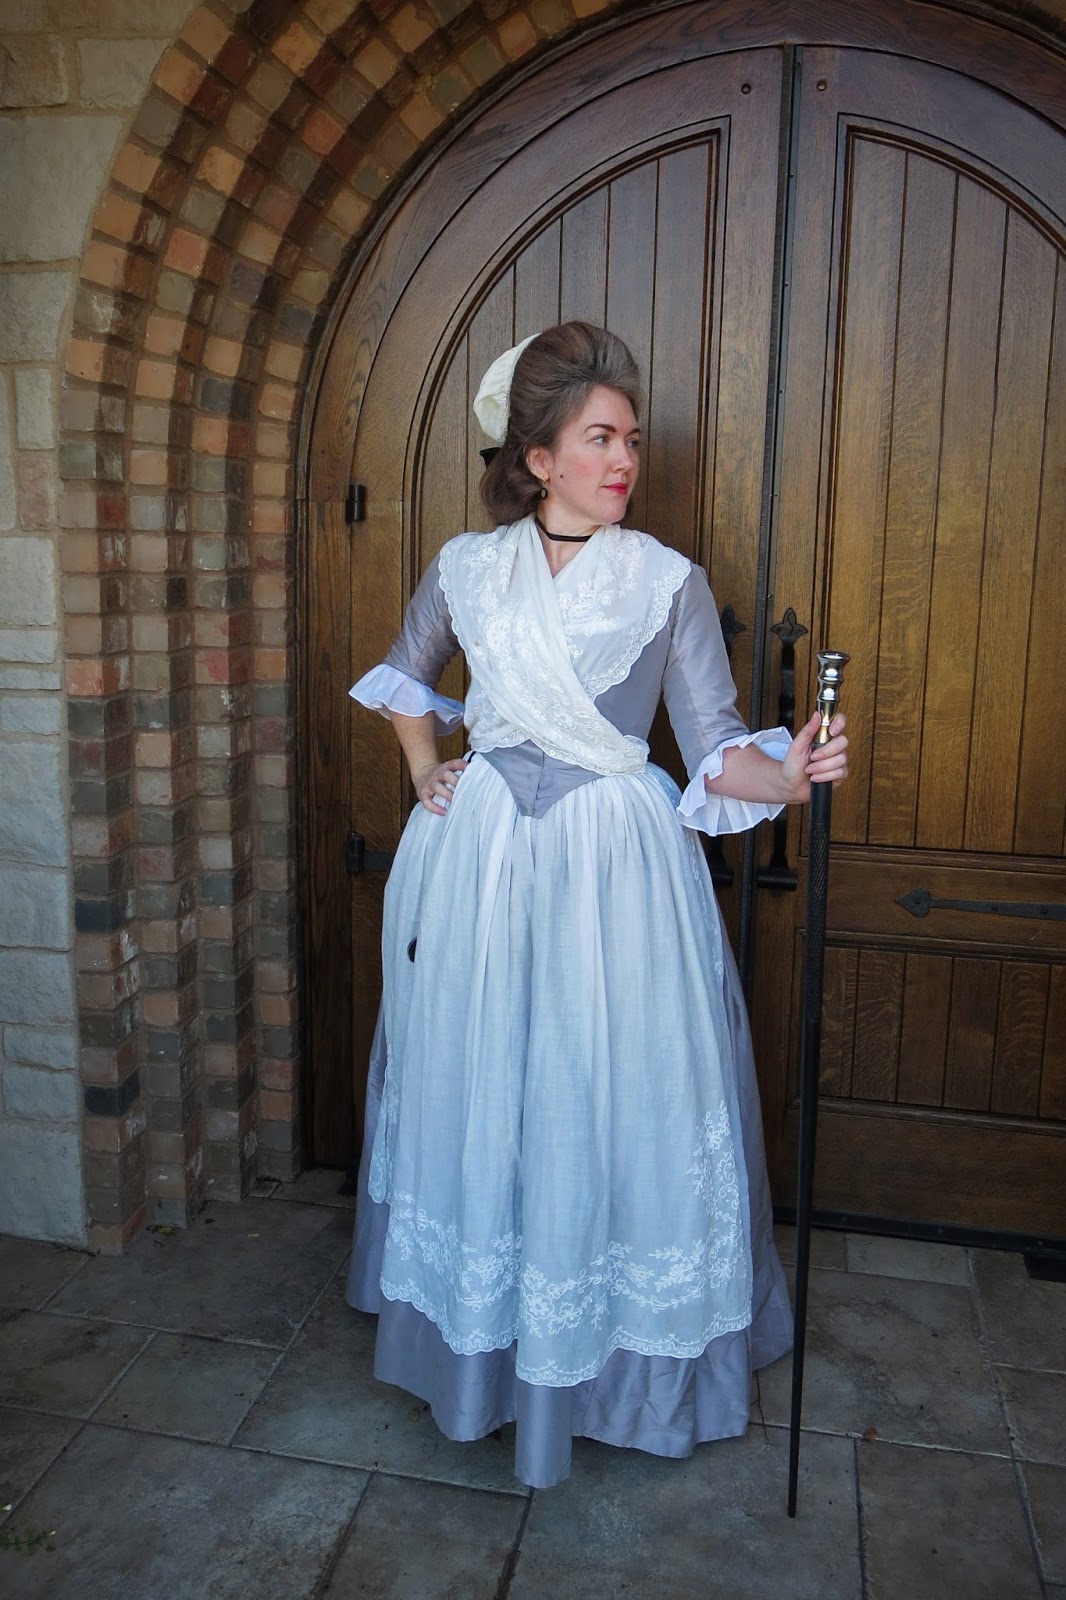
I started by collecting pictures of older women in Georgian paintings (check out my Pinterest board for lots of great Grannies). Many of these ladies are shown in grey or taupe gowns with an abundance of frilly white caps, aprons, and fichus, and this color combo already looked very wolf-like to my eyes. For my costume, I decided to make a simple grey silk taffeta round gown, and I drafted my own pattern by modifying and combining several of the dresses in Patterns of Fashion. Although my dress is quite plain on its own, I was lucky enough to find some gorgeous tambour embroidered curtain panels from the 1930’s at an antique show a few years ago, and they worked perfectly for my apron and fichu. The panels all had some staining and damage in various places, but I was able to cut around the bad spots, and I’m thrilled with the way they turned out. To finish off my gown, I made a pair of organdy sleeve ruffles that I just pinned in place. 


Although my dress was fairly simple, I decided that I wanted my hair to be more dramatic for the gala, so I made a large 18th c. wig based on the instructions in Kendra’s Van Cleave’s wonderful book - 18th Century Hair and Wig Styling. I used the instructions for the Lilac wig to build the wire base, and I used a Lioness wig plus several hanks of loose hair to cover the base and make the buckles. The wig was originally dark brown, but I sprayed it with Jerome Russell B Wild Color Spray in Siberian white to make it grey, and this was definitely the best white hair spray that I’ve tried yet. I’ve never worn a wig this big before, but it was lots of fun and surprisingly comfortable. The only unexpected side effect is that it gave me a bit of a face lift from the weight of it pulling backward on my head, which made me look a less matronly than usual. The funny thing is that even though this wig seemed MASSIVE when I was building it, it didn’t seem big at all once I had the whole outfit on. While I was wearing it, I kept thinking, “eh – I could have gone a lot bigger”, and if period painting can be believed, this ‘do was still quite modest compared to many. 

More than anything, 18th century grandmas seemed to love their ridiculous caps, but I wasn’t sure how huge and silly I really wanted to go with mine. What I ended up with was relatively tame compared to what you often see in period paintings and fashion plates, but that’s mainly because I put the cap off for the last minute and didn’t have time to keep hemming ruffles. My cap is made from organdy, and it is just a much larger version of a typical 18th c. cap. It is made from a large oval in back with a band that is wider at the sides and narrower at top, and I covered the band with several rows of box pleated ruffles and some poofed black ribbon. It also has a hanging tail of fabric in the back, which is a common look, even if it doesn’t seem to serve much purpose.   


While I was sewing my gown, I was also working on a wolf mask, which was quite an adventure as well.  I discovered the work of Joni Good and her book, How to Make Masks!. Joni makes some of the most amazing papier mache masks that I’ve ever seen, and you can find much more of her work on her website, Ultimate Papier Mache. I used her techniques and sculpted a mold for my mask using terra cotta clay, then I covered it with shop towels and the plaster/glue mixture that she describes in her book and instructional videos. I actually ended up making two wolf sculptures and papier mache shells because I forgot to use a release agent on the first one, so the paper mache stuck to the clay and wouldn’t come off. Whoops! But it all turned out for the best because I liked my second version of the wolf much better. 

photo by jennylafleur
While I loved making the wolf mask, I have to admit that I didn’t love wearing it. Very few people knew who I was when I arrived at the gala, and it was almost impossible to hear me when I talked because it was so noisy and the mask muffled my words. I also had a limited range of sight, so I had to be very careful not to step on trains or bump into tables. So it was fun for the grand reveal and a few pictures, but poor Wolfie didn’t last long at the party. But the best part about wearing this costume was that my friend Ginger decided to make an 18th c. Little Red costume to go along with my Grandma Wolf, and she made the most AMAZINGLY gorgeous polonaise à coqueluchon, which is a hooded gown that was popular at the time. Recreating the characters of this story in a more historical way was SO incredibly fun, and I was thrilled every time somebody had an “ah-ha!” moment and realized who we were. I’m so happy and grateful that Ginger decided to play along with me, and doing this theme with her was one of the highlights of my trip.


So that’s the story of Grandma and the Wolf, but this tale had one more twist that surprised even me in the end. Although I wasn’t planning on wearing this outfit again so soon, we had an unexpected cold front move in right before our yearly Georgian Picnic, and I decided that a silk round gown would be a little warmer than my semi-sheer cotton chemise dress that I had originally planned on wearing. I still desperately needed a cloak to block the wind, but when I dug though my stash, the only thing suitable that I found was some coat-weight red wool that I found at an estate sale many years ago. So I used the hooded cloak and mantle patterns in Costume Close-Up as a guide, and I quickly threw together a little red mantle to keep me warm at our picnic. So without even planning it, this costume now has become Grandma, the Wolf, and Little Red Riding Hood all in one!


Maurice Quentin de La Tour, 
portrait de Nicole Ricard, enfant, 1748-1750
I trimmed my mantle with strips of pinked, box pleated wool in a style that is very similar to this charming painting of a young girl. I think most winter cloaks were probably lined in the period, but I didn’t bother to do that on mine since the fabric was felted and quite heavy already. My only complaint is that the hood pattern that I used probably dated from the mid-1700s, so it ended up being a bit small for my later 18th c. hairstyle. I’m tempted to take the hood off and try adding a larger one in the future, but I still love my little red riding hood like crazy, and it kept me quite warm and cozy at the event. 

I also wanted to take a minute to thank several of my friends for giving me some of the gorgeous accessories that you can see in these pictures. My mitts, workbag, pinball, and muff were all gifts made by amazingly talented and generous ladies, and I can't tell you how much that I treasure them! So thank-you Kendra, Angela, Stephanie, and Mary - you are all so dear to me!


And as a final epilogue to this story (which I'm afraid has gotten quite long winded!), I also wanted to mention my new market cap and hair experiments. I had no interest in wearing my large wig to a windy outdoor picnic, so I decided that a more simple style of hair with a market hat would be much more appropriate. I bought a market cap pattern from Maggie at Undressed Lady last summer, and I made it up in a few hours last week from some scraps of black taffeta left over from older projects.

I’ve also been dying to try out the pomade and powder that I bought earlier in the year from Abby at Heirloom Haircare, but I had a huge disaster on the morning of the picnic and discovered that I had misplaced my pomade. So after a failed search and a lot of panic and cursing, I finally resorted to wearing my bushy white wig out of desperation. It’s not the right style of hair for my outfit, and it badly needs restyling, but it was better than nothing, so I sucked it up and just made do with my sad backup wig. Unfortunately, the market hat really needs a tall hairstyle to support it, so I was pretty disappointed with the way it looked at this first wearing (my picnic pictures are here if you are curious).

But then as I was cleaning my sewing room two days later, I found my pomade and decided to give it another try. OMG – I am in love! My hair is mid-back length right now and not overly thick, so I wasn’t sure if I would be able to pull off an 18th c. hairstyle without adding in extra pieces. But the pomade and powder thickens up your hair so beautifully, and I was amazed by how well it stayed in place with no need for teasing or hairspray. I started by pinning a rat of loose synthetic hair that was wrapped up in a hair net on the top of my head, then I combed my own hair over the rat and pinned it down in back. Then I made two large buckles and a loop with my remaining hair that was hanging down (I basically just copied Abby’s look shown on her blog). After it was all in place, I re-powdered it to make it more obviously grey, and I hid the parts in back where it was pinned with a cap and a bow. I don’t think I’ve ever had such good luck styling my own hair before, and I’m absolutely amazed that I managed to pull this look off on my first try! And as an added bonus, my market hat suddenly went from “wah, wah, waaaa…” to “WOW!” once I had the right hairstyle to support it.

Since I had such good luck with my practice hairstyle, I decided to get dressed up one more time and finally take some proper pictures of my dress. I didn’t get many that I was happy with at either Costume College or the picnic due to bad lighting and my failed hair, so it was fun to finally come up with some shots that I’m really happy with. Check out my flickr if you want to see more.


"... and they lived happily ever after.  The end!"

Tuesday, January 14, 2014

for the love of big hair!

So you guys all know Kendra, right?  Kendra, who makes the world's most epically awesome 18th c. costumes and wigs.  Kendra, who has been teaching us ALL how to make fabulous costumes since the dark ages of the internet by sharing her incredible wealth of knowledge on the Demode website.  Kendra, who is one of the most knowledgeable 18th costume historians that I have ever met and is also an amazing researcher, writer, and teacher.

Yeah, THAT Kendra!

Well, my dear friend Kendra has written a book called 18th c. Hair and Wig Styling, am I am absolutely giddy with excitement about it.  I was lucky enough to be able to attend her class on 18th c. hair at Costume College last summer where I got a little preview of the research that is going into the book, and it totally knocked my socks off.  I think we are all familiar with the basic "poof" and the "hedgehog" (which BTW, isn't really what we think it is!), but she goes so much further than that and explores more unique styles, tells us exactly what is happening on the backside of these 'dos (again - blew my mind!), and maps the evolution of hair throughout the century and across the continents in a way that was so clear and easy to understand.  But not only does she share this type of top-notch historical research in her new book, but she also teaches us how to make 25 different hairstyles using modern materials to replicate these looks.  I have been drooling over Kendra's wigs for years now, and I can't wait to learn exactly how they are made so I can try one myself.


Pre-sales for this book are going on this month, and she is doing well, but still has a ways to go to meet her funding goal.  If you love big hair, the 18th century, excellent research, and helpful tutorials, you NEED this book!  Please hurry and buy yourself a copy now so that she has the funds to print a ton of these books and the confidence to write more in the future.  Even if you can't afford the book right now, you can still donate $10 or $20 to help her with printing costs, and then you can pay the remaining price later and still get the book at the discounted price.  Think of it like a layaway plan that benefits both you AND the writer!

Kendra is one of the most generous and amazing costumers that I have ever met, and if there is any way that you can support her project either by buying a book, making a donation, or buying one of her extra fundraising options on Indegogo, please do so.  It is such a worthy cause, and I know that you are going to love what you get in return!

Monday, December 2, 2013

faux fur muff


This week's Historical Sew Fortnightly challenge was "re-do", and although I started a different project for this challenge last week, it sort of crashed and burned at the last minute.  So I quickly switched over and made the easiest thing that I could think of - a faux fur muff with an interchangeable cover.  This one would qualify for several of the HSF challenges, such as "flora and fauna", "accessorize", "squares, rectangles, and triangles", "gratitude", or "outerwear", but I think the theme that is the most appropriate in this situation was the very first challenge - "starting simple"!  The entire project took less than two hours to finish, and now I'm wondering why I didn't make one of these things years ago.

I used the fabulous instructions from The Fashionable Past to make the muff base, and I plan on using this with both 18th century and Victorian costumes since it is a pretty generic size and shape.   My base is made of a scrap of navy cotton twill from my stash and stuffed with polyfill.  It doesn't look like much on it's own, but it is amazing how much rounds out when the cover is on it.  
I added a little patch pocket to the inside that is just big enough to hold my iphone or camera, and I put a strip of velcro at the top of the pocket to hold it closed.  I'm sure I could have come up with a fancier arrangement for the pocket, but this seems to do the trick well enough.  
The cover is just a bit of left-over faux fur from another project that I made years ago.  Again, I used Katherine's instructions in pt. 2 of the muff tutorial to finish it up.  The only thing that I did different was to stitch a cord to the cover so I could carry it by a handle if I didn't want to wear it on my hands.  This is something that I've seen in a lot of antique fur muffs, and if I don't need the cord handle, I can easily tuck it back inside of the cover.  


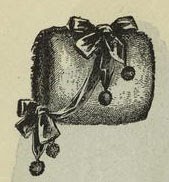
I've seen lots of great muffs in Victorian fashion plates that have bows or cords or tassels hanging from them, and I will probably go back and add more frippery to this muff eventually - maybe like this one from 1890 featured in Peterson's Magazine.  But this is good enough for now, and I'm just grateful to have a project done for the deadline.  :)


Monday, October 28, 2013

the young pirate


For the All Hallow's Eve weekend of the Texas Renaissance Faire this year, I decided to make my wee boy a pirate costume.  I also thought it would make a great entry for the "masquerade" challenge in the Historical Sew Fortnightly since it is a bit of a fantasy version of 18th c. boys' clothing.   Luckily, he already had a shirt which I had made for the HSF "white" challenge, so all I needed to do was make a waistcoat, breeches, and a few piratey accessories.

The waistcoat is a modified version of the Mill Farm boys waistcoat pattern.  I extended the bottom edge in the front and back to make longer flaps, rounded the neckline, and enlarged the pockets a little more.  I am not very knowledgeable about 18th c. men's waistcoats, so I don't know if it is historically correct to make the back flaps as long as the front (I usually see them cut off shorter than the front), and I couldn't find many back-views of waistcoats from this period.  But I've always thought the cut-off backs were a little odd looking when worn without a jacket, so I decided to make it long all the way around.  The front of the waistcoat is made with blue-grey wool with a very small check, and the back is recycled from a man's linen shirt that I dyed to match.  The whole thing is lined with tan cotton duck to give it a little more body. Although I wanted his outfit to be more of a "real" looking pirate instead of the bright and flashy Halloween pirates that you usually see, I think the silver buttons definitely add a bit of pirate panache as a finishing touch.


His breeches are made from a vintage Halloween pattern from the late 1960's, which made them really fun for me because I love working with vintage patterns.  They ended up fitting him great, and the construction is worlds better than most modern Halloween patterns.  The original pattern does use a zippered fly instead of a buttoned fall-front, but I thought the buttons at the knees were a really nice historical touch.  The pattern actually calls for a buckle on the knee strap too, but I used mother-of-pearl buttons for all of it because I didn't have the right sized buckles in my stash.  The pants are made out of striped linen that was recycled from a pair of my old capris, and I used some checked cotton for the waist and leg facings, which makes me happy even though nobody will ever see it.  All of the materials and buttons for his costume came from my stash and from recycled clothes.


For his accessories, I bought him a pair of cheap girls' boots from Target and added a flap of faux leather at the top to make them look like the bucket-boots that you always see in pirate movies.  His shoes are probably the least historically accurate part of his costume, but they are cute and he has a lot of fun wearing them, so what the heck.

I also took a large-brimmed wool hat blank and wired and bound the edge, then I tacked the brim up into a tricorn shape.  My son's one request was that he have a skull and crossbones on his hat, so I made a rosette out of the selvage edge of some black corduroy (I love how the selvage has a fringed look to it), and then I tacked on a pressed-brass skull that I found on etsy.


We finished it all off with a paisley scarf for his sash, an old belt, and a variety of toy pirate weapons and bags-o-loot.  I'm really happy with the way it all turned out, and I had a wonderful time playing pirates with my boy at faire.  


Tuesday, July 16, 2013

18th c. boy's shirt and Indienne waistcoat


I took a little break from Costume College sewing last week to whip up some new clothes for my boy to wear to a Bastille Day brunch.  First, I made him a little Indienne print waistcoat that would work for  both my Curtain-Along project and the Historical Sew Fortnightly "Eastern Influence" challenge.   I used a Mill Farm Pattern for his waistcoat, and I thought the pattern made up quite nicely and was definitely worth the very reasonable price that I paid for it.  My biggest complaint was that you have to pick one size for the patterns, and since I bought this one 2 years ago, I had to size it up on my own to fit him now.  Multi-sized patterns are definitely a plus when working with kids clothes!  


My inspiration for this garment came from this adorable boy's waistcoat from the Winterthur Museum.  The front is made from a scrap of my Waverly curtains, and the front lining and the back are made from tan cotton duck.  I also used a bit of striped light-weight linen for the lining in the back because I like the idea of using mix-and-match scraps for period linings.   I was incredibly lazy and machine sewed and bag-lined the waistcoat instead of using period construction techniques, but it still looks pretty much the same and it saved me a good bit of time.

I also needed to make him an 18th c. shirt, which I am going to count for the HSF "White" challenge.  I used the instructions in that same Mill Farm pattern to get me started, although I think I messed something up because the neckline and sleeves are less gathered than I expected them to be.  I also had some trouble figuring out how to do the gussets and finish the seams.  I am very much a visual learner, and unfortunately, the Mill Farm patterns are quite sparing with their illustrations.   I referenced several other sites online to help me wrap my head around it, and I think it all came together okay in the end.  I really liked this article by the Northwest Territory Alliance and found their instructions very helpful, even though I didn't follow them exactly.


I made the shirt out of a lightweight linen/cotton blend, and while I used my machine on some parts, I finished everything by hand.  I was also excited to be able to use some of my tiny 1920's mother-of-peal shirt buttons from the collar and cuffs.  As a finishing touch, I hemmed a triangle of gingham fabric and made a neckerchief to tie around his collar.  All of the materials for the waistcoat, neckerchief, and shirt came from my stash.

This outfit is still a work-in-progress, and I hope to make him some drop-front trousers and a jacket sometime this fall.  I also made his shirt and waistcoat bigger than necessary, so maybe they will last for a few wearings.


Sunday, January 27, 2013

Pirate UFO


For this week's Historical Sew Fortnightly challenge, we were supposed to complete a "unfinished object".  I have a number of UFO's in my sewing bin, but the project that I most wanted to finish was a pirate costume that I started six years ago.  I was originally making this to wear to the a Pirates of the Caribbean premiere, and I was SO in love with my design concept, but then I got pregnant and this project was placed on hold due to my growing belly.  But every year or two, I start thinking about how much fun it would be to wear a pirate costume to faire.  I've dragged it out several times over the years and made attempts to work on it some more, but unfortunately, I never can seem to make much headway.

And once again, life has thrown up roadblocks on this project, and I didn't get as far as I had hoped.  But I did finish the petticoat, so that's better than nothing.  I keep reminding myself that this is an unfinished OBJECT challenge, not an unfinished OUTFIT challenge, so I'm counting this as a minor victory anyway.


The petticoat is made out of some machine embroidered voile that I bought on clearance for next to nothing.  It's not authentic, but I thought it was reminiscent of the beautiful embroidered petticoats from the 18th c.  The construction is based on petticoats like the ones covered in this tutorial.  The only thing creative about this whole project is that I spent a lot of time distressing it so that it looks worn and old.  I dyed and splattered the hem with a mixture of brown and dark green dye.  Then I ripped holes all along the bottom and tried to fray the bottom edge.  I also stitched up some of the rips with some hand-spun yarn, and I added a few patches here and there with scraps of striped fabric.


I'm going to continue working on the jacket over the next few weeks, and I hope to have the whole outfit done in time  for the embellish challenge.  I've changed up the jacket design quite a bit from my original sketch - the big frockcoat looked great in the drawing, but when it started coming together, I discovered it was much less flattering in real life.  I'm still not 100% sure what the jacket will look like when I'm done, but hopefully I'll figure something out this month.


Saturday, November 26, 2011

Georgian period toys

DSC06805

I LOVE making silly props to go with my silly costumes, and our Georgian picnic gives me the perfect opportunity to research and recreate 18th and early 19th c. toys and games every year.

The first new toy that we tried this year was the Chinese yo-yo, or diabolo (diable in French), which has proven a bit hard to research, but several online articles mention that it was called "devil on two sticks" in England, although they don't mention a source for that tidbit.  But illustrations of adults and occasionally children playing with diabolos show up from time to time during this period, and I love how beautiful the people look while playing this game.


I first tried using a wooden diabolo that I ordered online from a English historical toy site.  But even though the wooden diabolo looked like the illustrations, it was so lightweight and hard to work that even my friends who are jugglers and quite good at the diabolo had a hard time working with it.
DSC06694

So we switched over to a modern diabolo, and that worked much better.  Cynthia, our resident diabolo expert, was able to give us lessons, and several people were able to able to get it going pretty well and even catch a few tosses after a bit of practice.  But nobody did it with the same elegance and grace as Cynthia!  Clearly, I need to buy a modern diabolo and spend the next 12 months practicing so I can do this next year.  :)

DSC06726

DSC06720

I also brought a variety of small wooden toys, such as a top, cup and ball, and a yo-yo.  The top and cup helped entertain the kids, but I really brought the yo-yo for the adults.  I've always been charmed by this 1790's illustration of a woman playing with a yo-yo, which was known as a bandalore, l'emigrette, or quiz in the period.  If internet articles are to believed, the yo-yo was a very popular toy for both adults and children in the late 18th c., especially among the nobility, and the action of the toy was equated with French nobility and their emigration out, then back in to the country during the French Revolution.

For my yo-yo, I simply bought a bamboo yo-yo from World Market, then painted it with concentric circles, which seems to be the most common form of decoration.  Of course, French revolutionary colors seemed appropriate as well.

DSC06681

But the toy that I was the most excited about was my period kite.  I used the instructions found on the  PBS Ben Franklin website to make my kite, and I made it with handmade paper, linen ties on the tail, and I painted it with a simple triangle border, which was inspired by this 18th c. pear top kite.   I was worried that it would never fly, but it actually worked pretty well!  Although it was a bit unstable and really preferred to crash spectacularly into the ground, we did get it up to a nice cruising altitude one time, as seen in the photo at the top of this post.

I had a blast running back and forth down the clearing with my fellow kite enthusiast, Ginger, and we even drew quite a crowd of onlookers while we were flying it.  It was a blast, and I can't wait to try it again next year!

DSC06793

DSC06768

I'm always looking for new period toy and games to keep us entertained at our events.  We've also played Graces and battledore and shuttlecock in the past, and I'm hoping to try ninepins or lawn bowling next year (if I can find an affordable set).  If you know of any other good Georgian games that can be played outdoors, I'd love to hear about them!  And just for fun, check out this excellent site for other 18th century toys and games in period art.