Showing posts with label vintage patterns. Show all posts

Sunday, February 22, 2015

The Mojo Dress


2015 has not been very kind to me so far with sewing projects.  I had a string of sewing/shopping disasters, so I finally got fed up and took a break from anything costume-related for most of February.  But inspiration comes from the strangest places, and for me, it was seeing the horribly tacky 60's/70's clothes in the new Mad Men promo pics.  I know most people would run screaming from all that pastel, plaid, and big hair, but I love it like crazy!  It's hideous and glorious and it made me want to sew something RIGHT NOW, so yesterday I whipped up my own pastel plaid monstrosity to wear to a retro-themed bowling event today.  It felt great work on a no-stress dress for a change, and hopefully it will help me get my sewing mojo back on track again.

To make my dress, I used a very simple mail order jumper pattern from the late 60's or early 70's.  The fabric is vintage wool plaid that I found at an estate sale many years ago.  This is actually my second garment that uses this fabric - it also made an appearance in a pair of Victorian pants.  What can I say?  I LOVE crazy plaids!  The dress is finished off with a few vintage buttons that were given to me by my mother-in-law, but unfortunately, I wasn't paying attention and make the dress button on the wrong side.  Whoops!

I also used today's outing as an excuse to wear my Vintage Coat of Awesomeness.  That was another amazing estate sale discovery.  God, I love that coat!


So that's about it.  It was fun to make, fun to get dressed up, fun to do something different, and fun to indulge in my Mad Men obsession.  A perfect palate-cleanser project.


Sunday, December 14, 2014

1869 dress for Candlelight


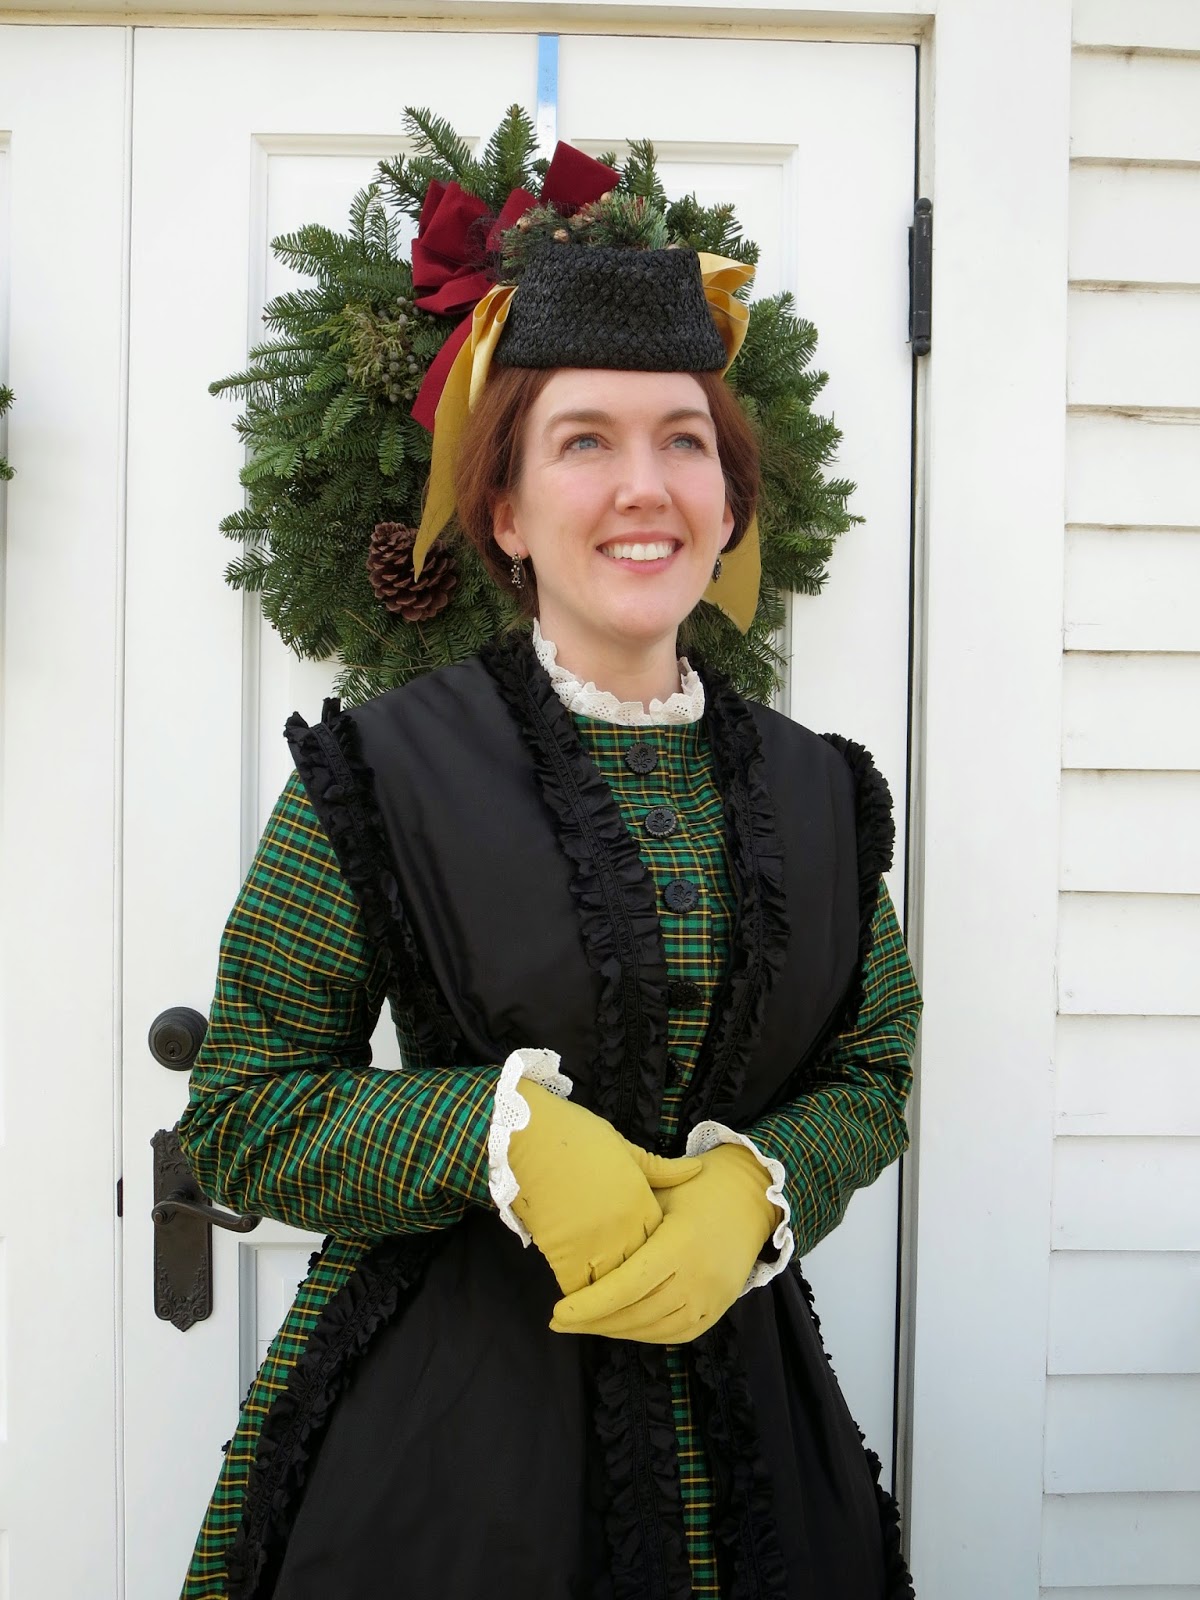
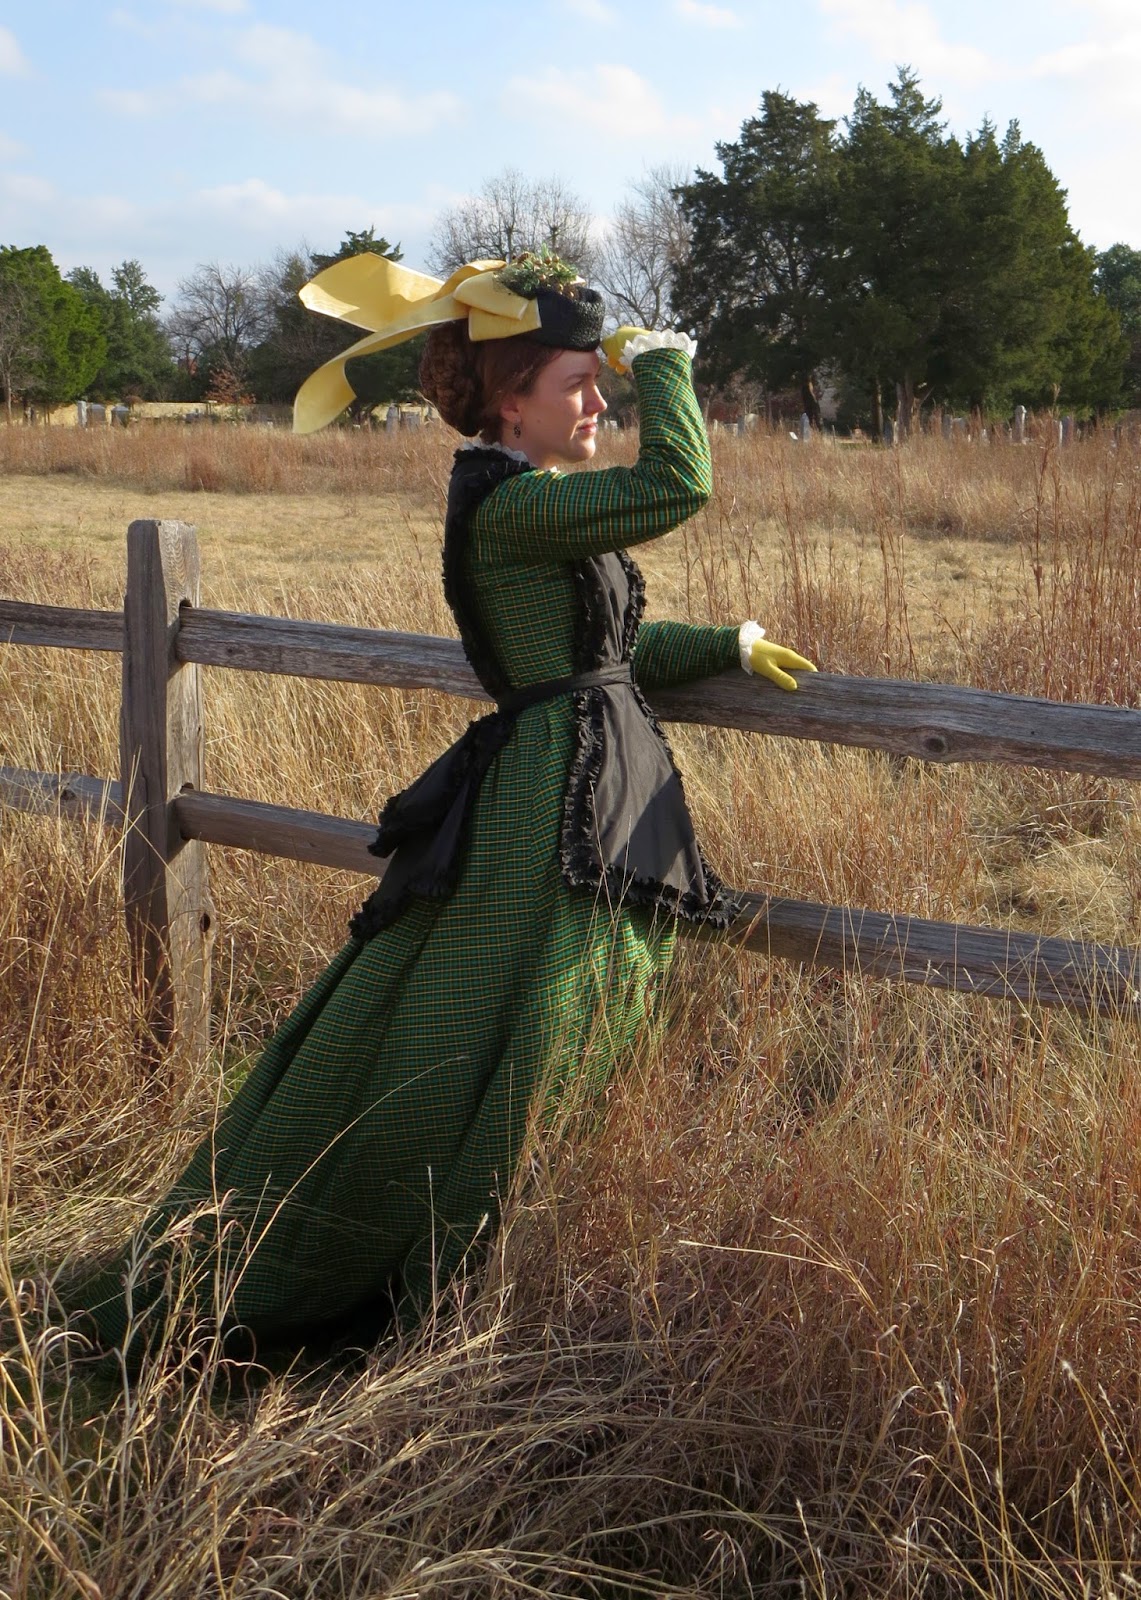
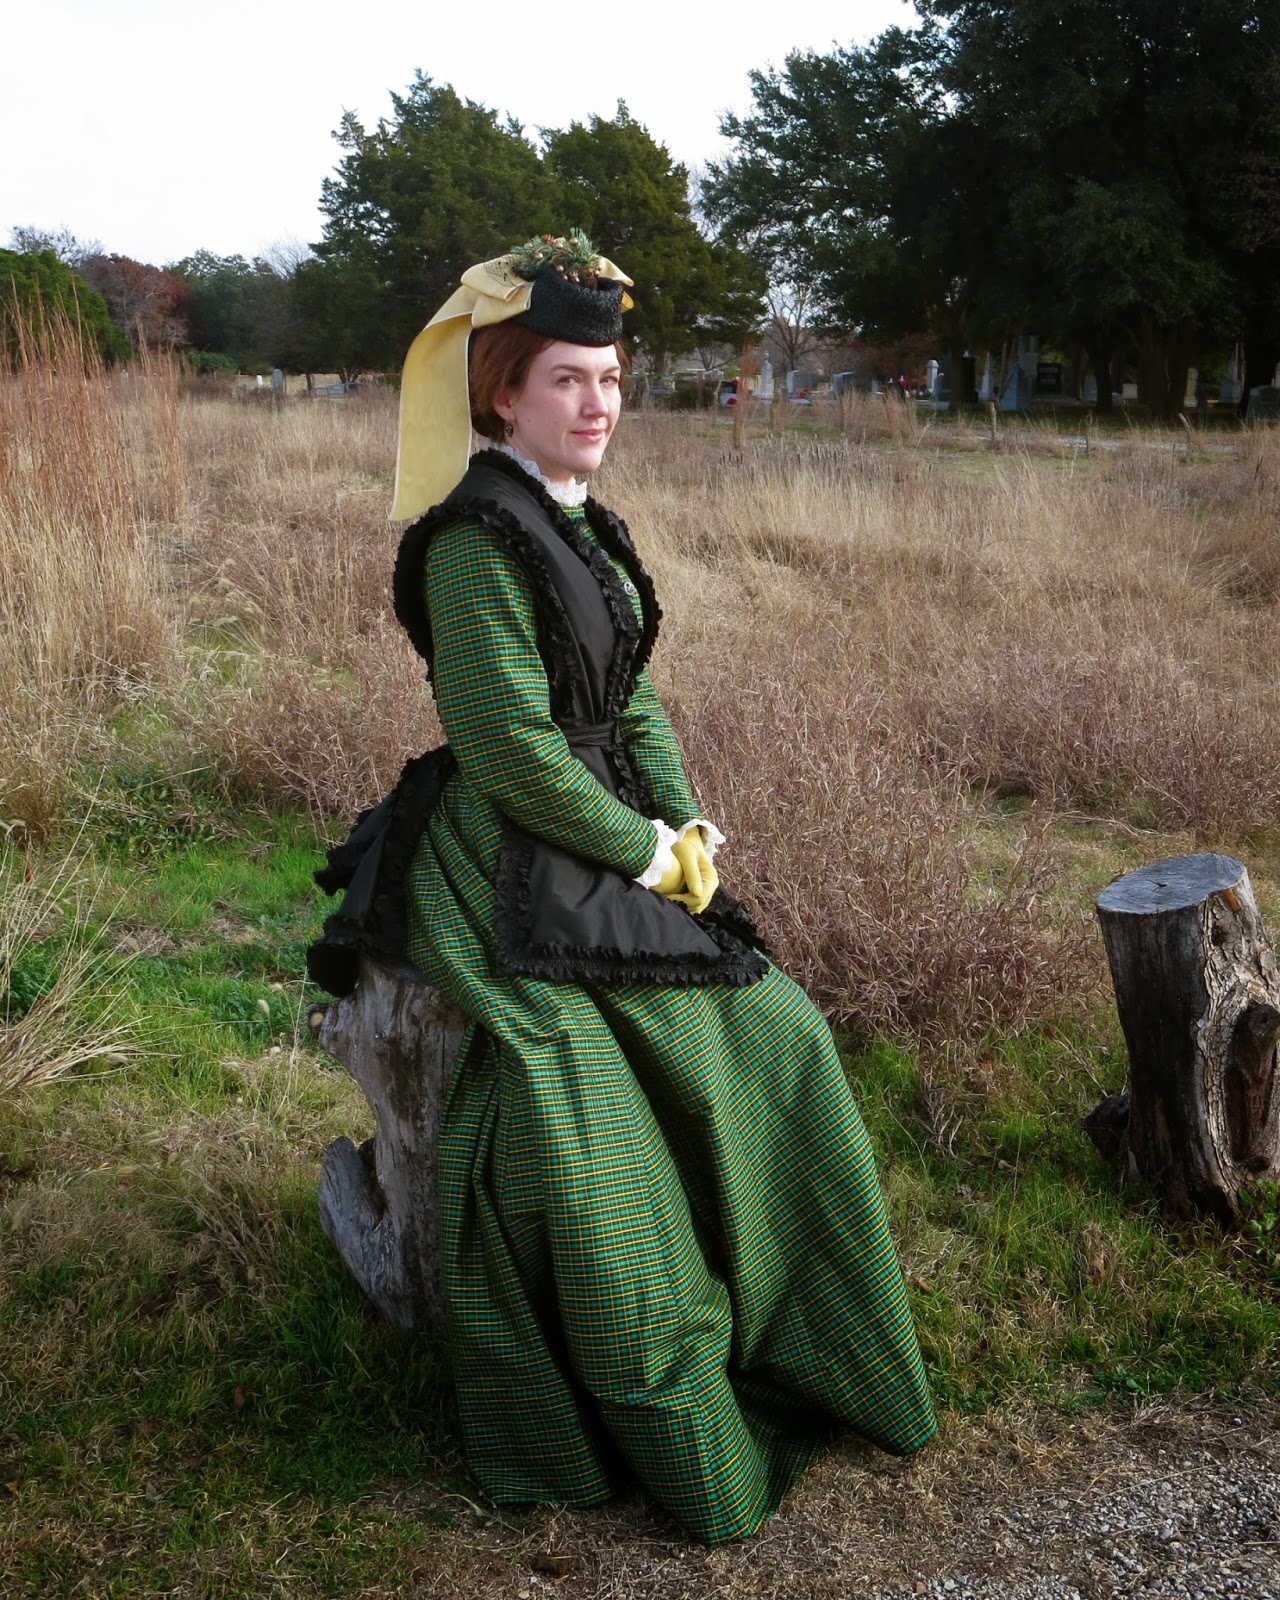
I got a bee in my bonnet last weekend and decided that I couldn't bear to wear my same old bustle dress to Candlelight two years in a row, so I made a new 1869 outfit for the occasion. Luckily, this style of dress goes together quite easily, and I was able to pull all the supplies that I needed from my stash. All I had to buy this week was a $1 sprig of greenery for my hat. Now that's my kind of Christmas miracle!

The gown is made with green plaid silk that I picked up at a 
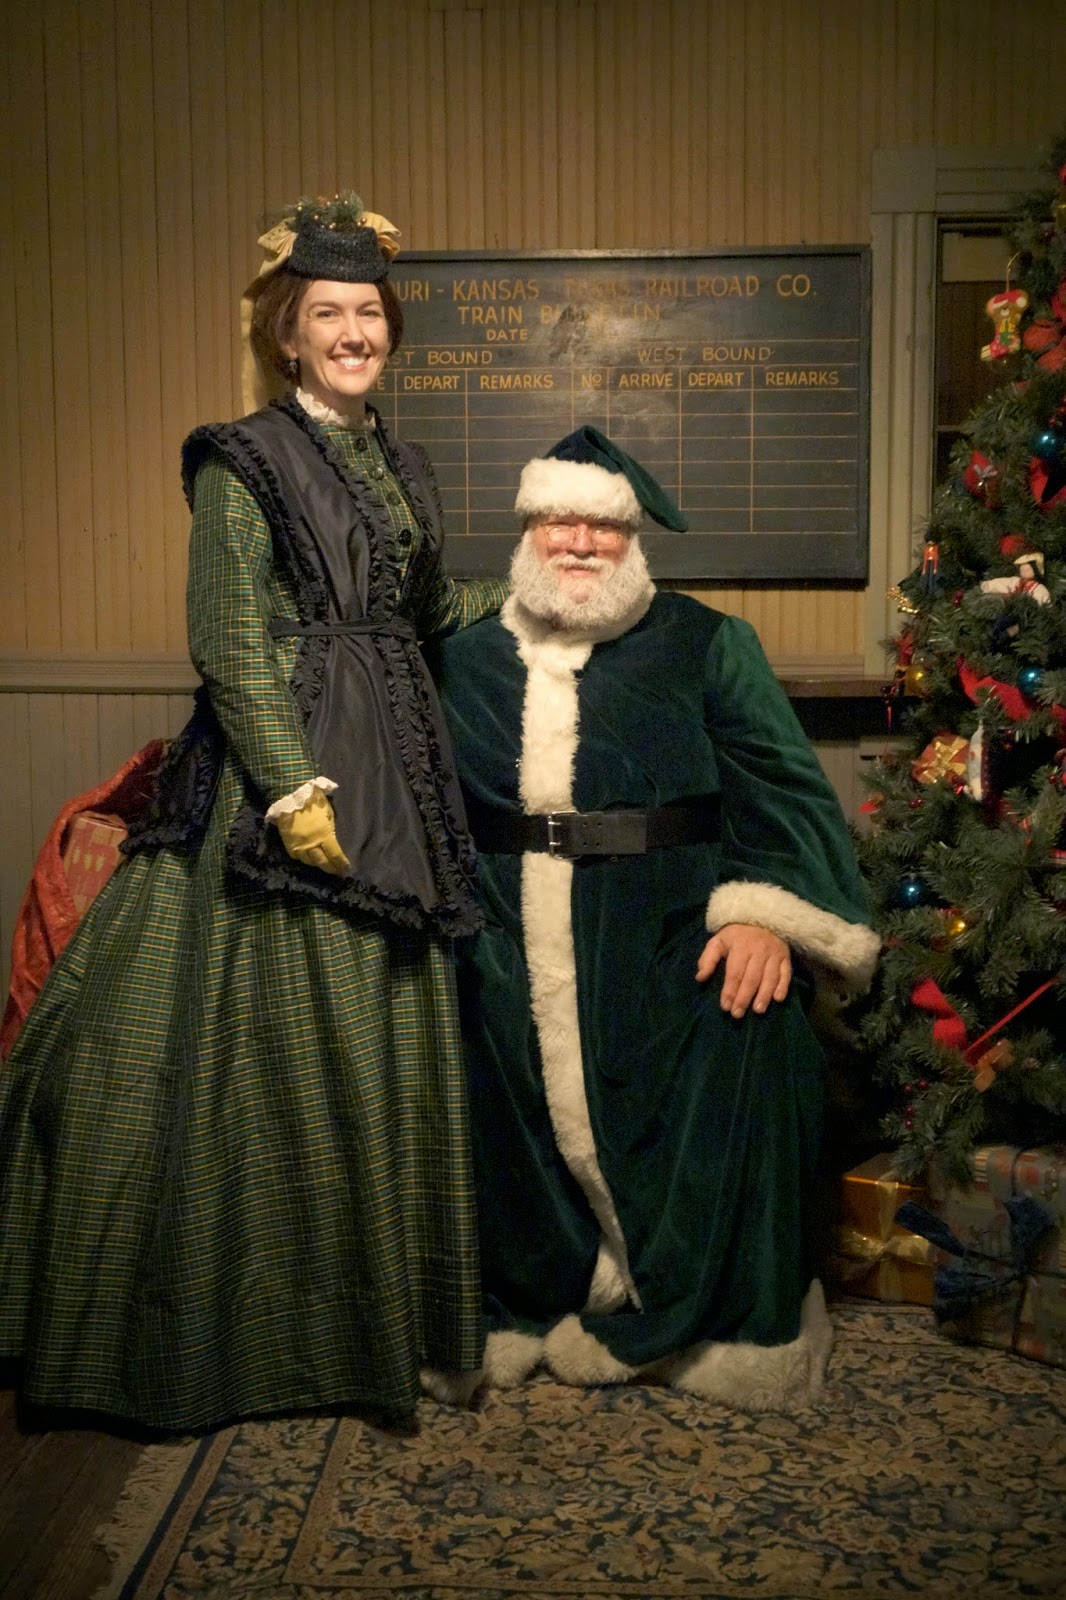
Fabrique sale earlier in the year for $16. No, not $16 per yard - but $16 for the dress length. Best. Deal. Ever! I had no idea what I would make with it, and I usually try to avoid adding things to my stash without a plan, but this was just too good of a deal to pass up. My students pointed out that the fabric looks like a roll of Scotch Tape, and wow - yeah it does! Maybe I can convince Scotch to sponsor my dress if I sew a big product patch on my back like a race car driver. But even though I do look a bit tape-ish, I thought the green was quite festive, and I matched the event's Victorian Santa so well.


To make the dress, I used a combination of patterns from Patterns of Fashion and 
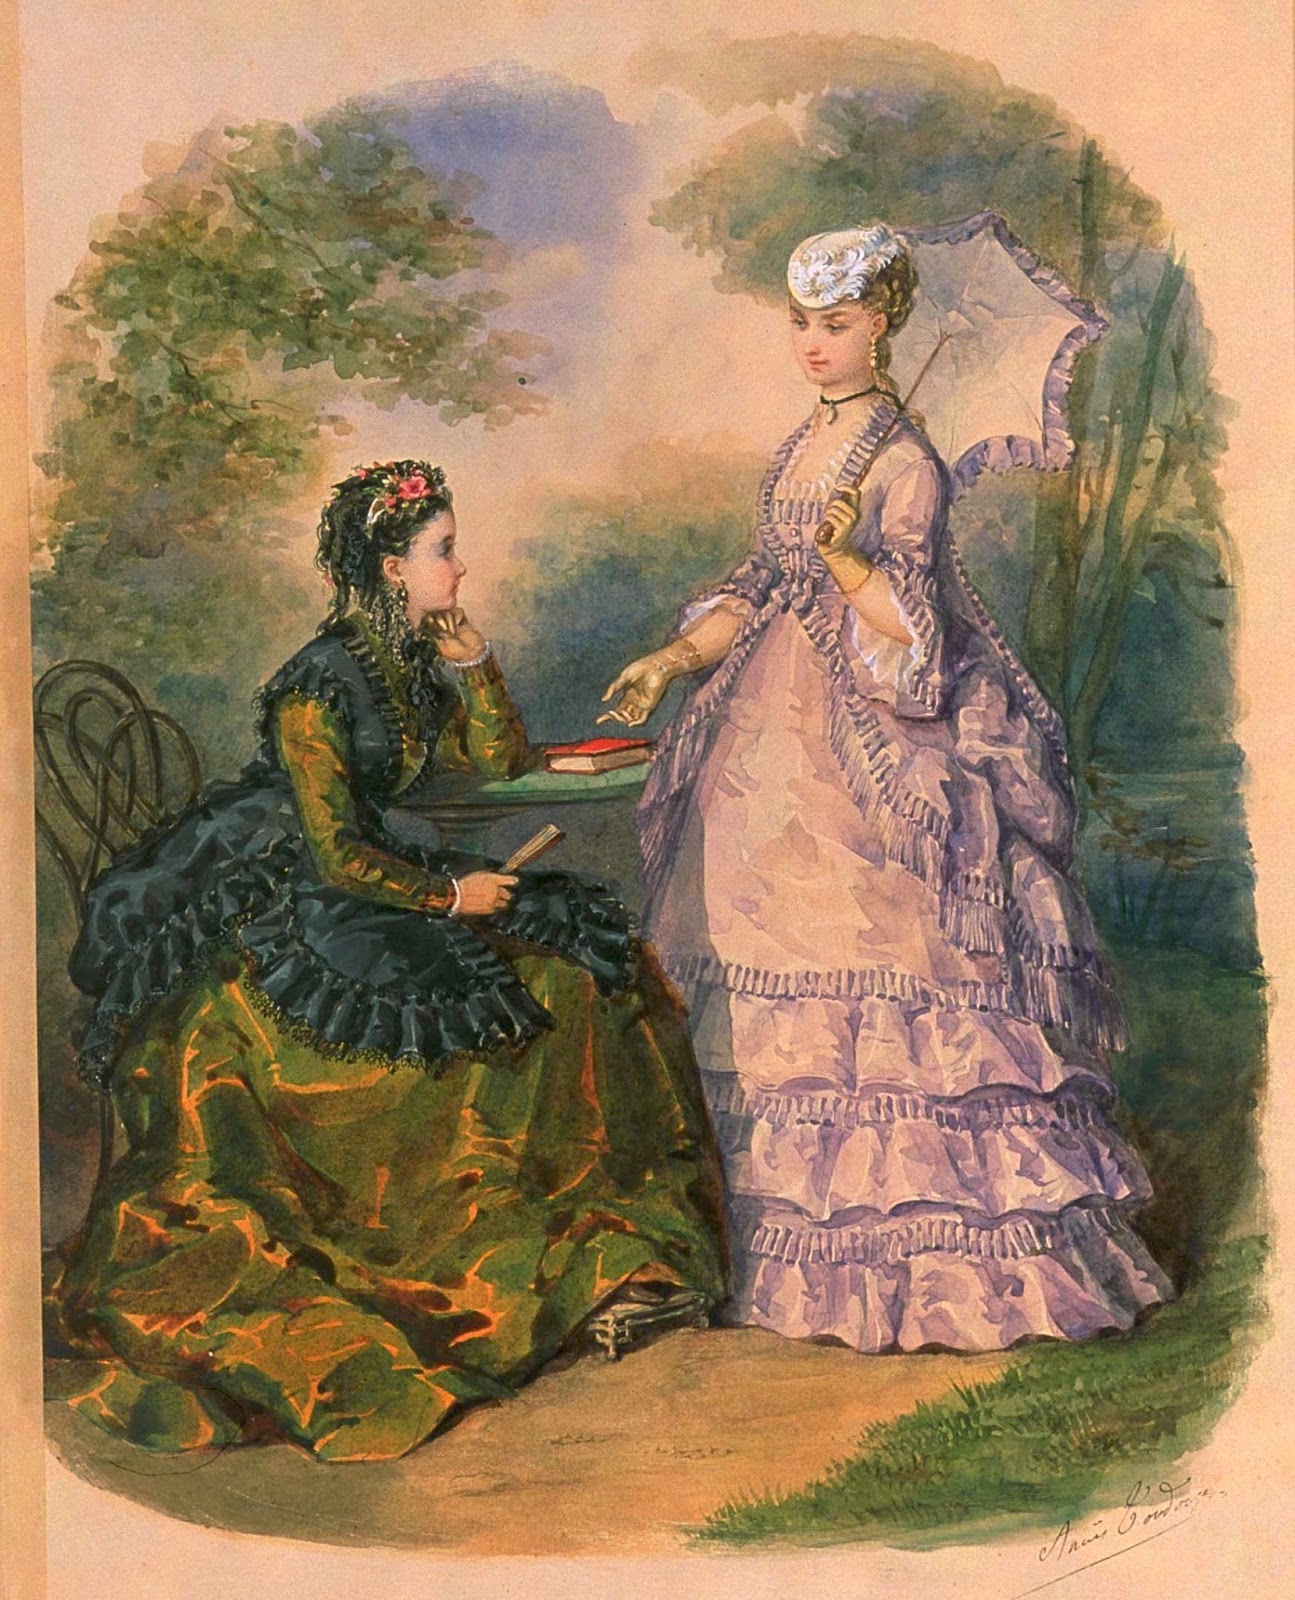
Theatrical Costumes for Stage and Screen. It's a pretty simple dress on its own, and the only embellishment is a set of antique glass buttons with flowers cut into them. At first, I thought about adding fringe or rows of trim on the dress, but then I fell in love with a 1869 fashion plate from La Mode IllustrĂ©e showing a similarly austere gown worn with a black tunic over it. I poked around and found several period patterns for this type of garment, including one in the book 60 Civil War-Era Fashion Patterns that is referred to as a "pannier mantilla". I loved the description, which states: "a more useful article of dress is not likely to appear this season, and will more than repay for the slight trouble of making it." How charming!


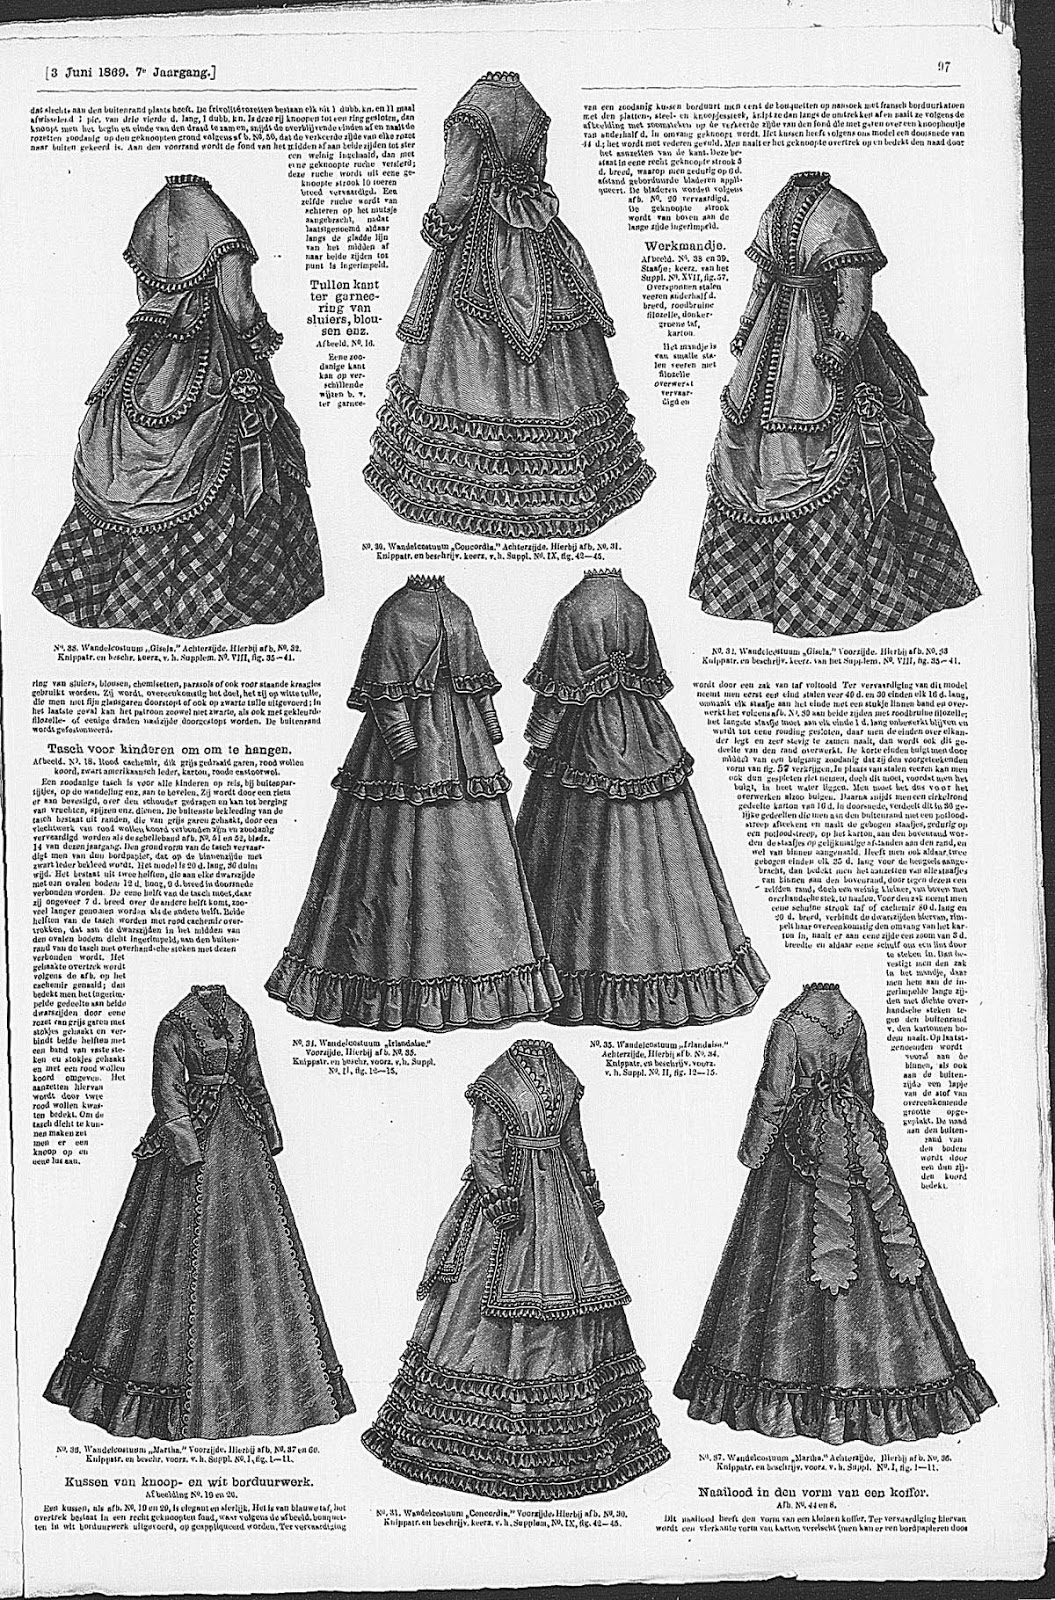
I also found a similar garment and pattern in an 1869 copy of de Gracieusse that is archived on the 
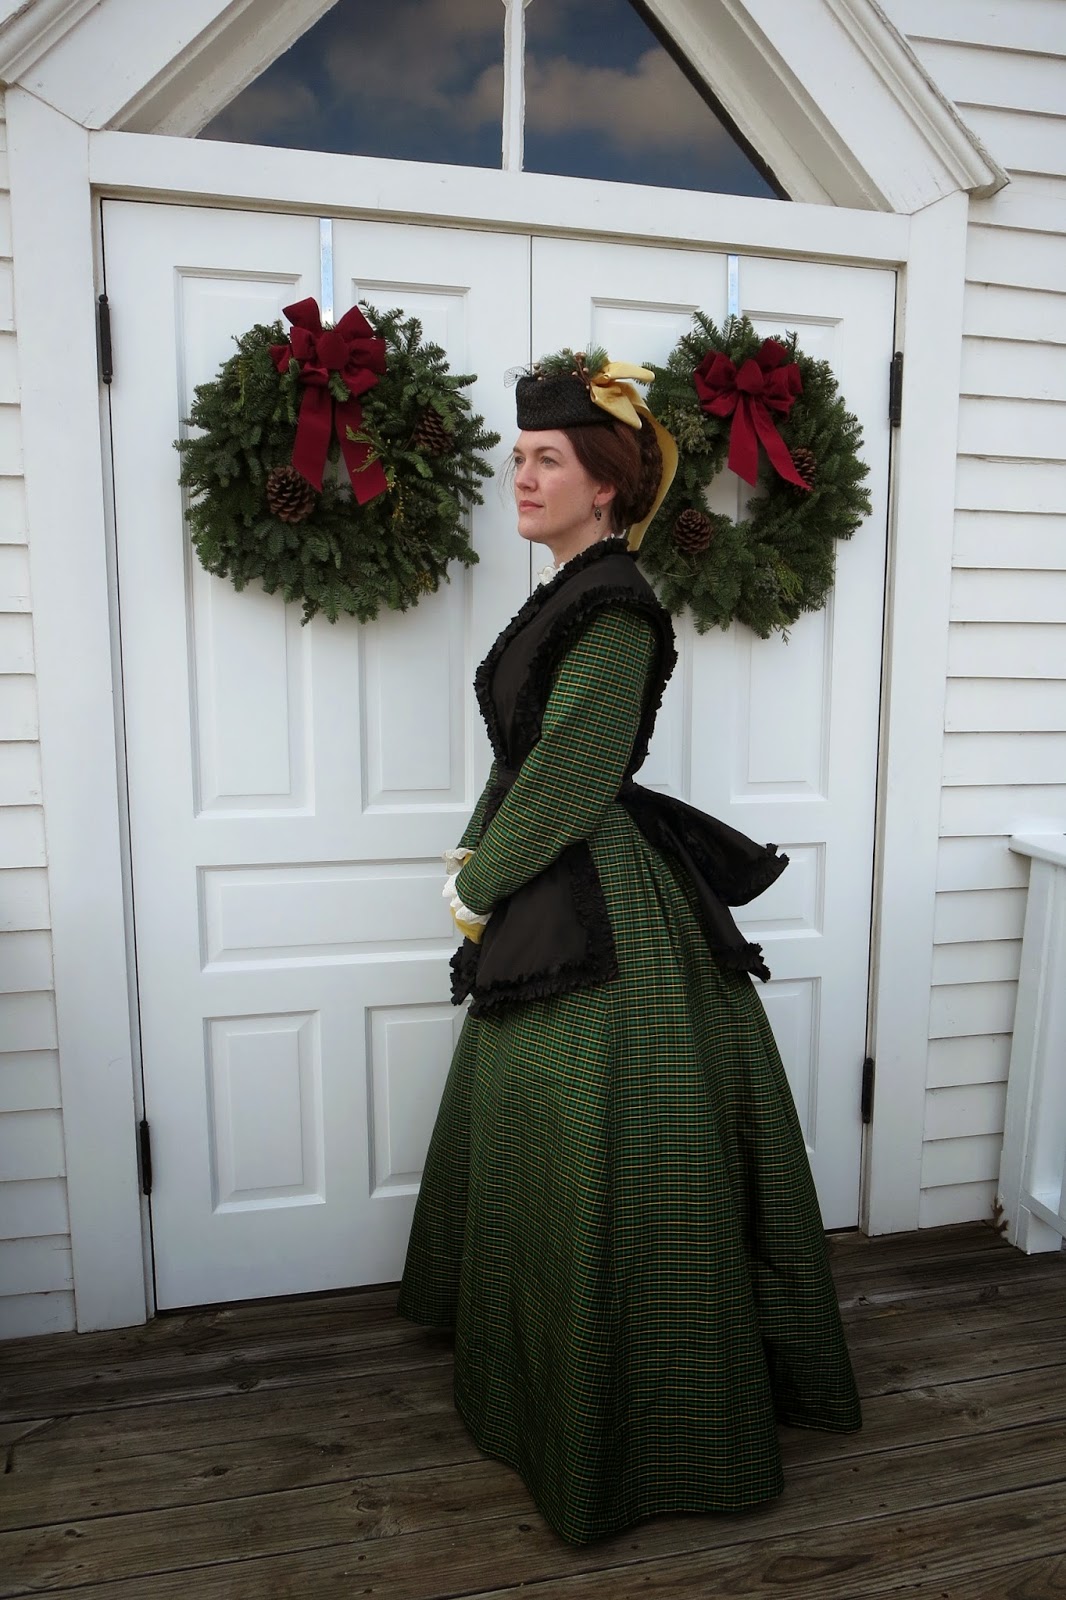
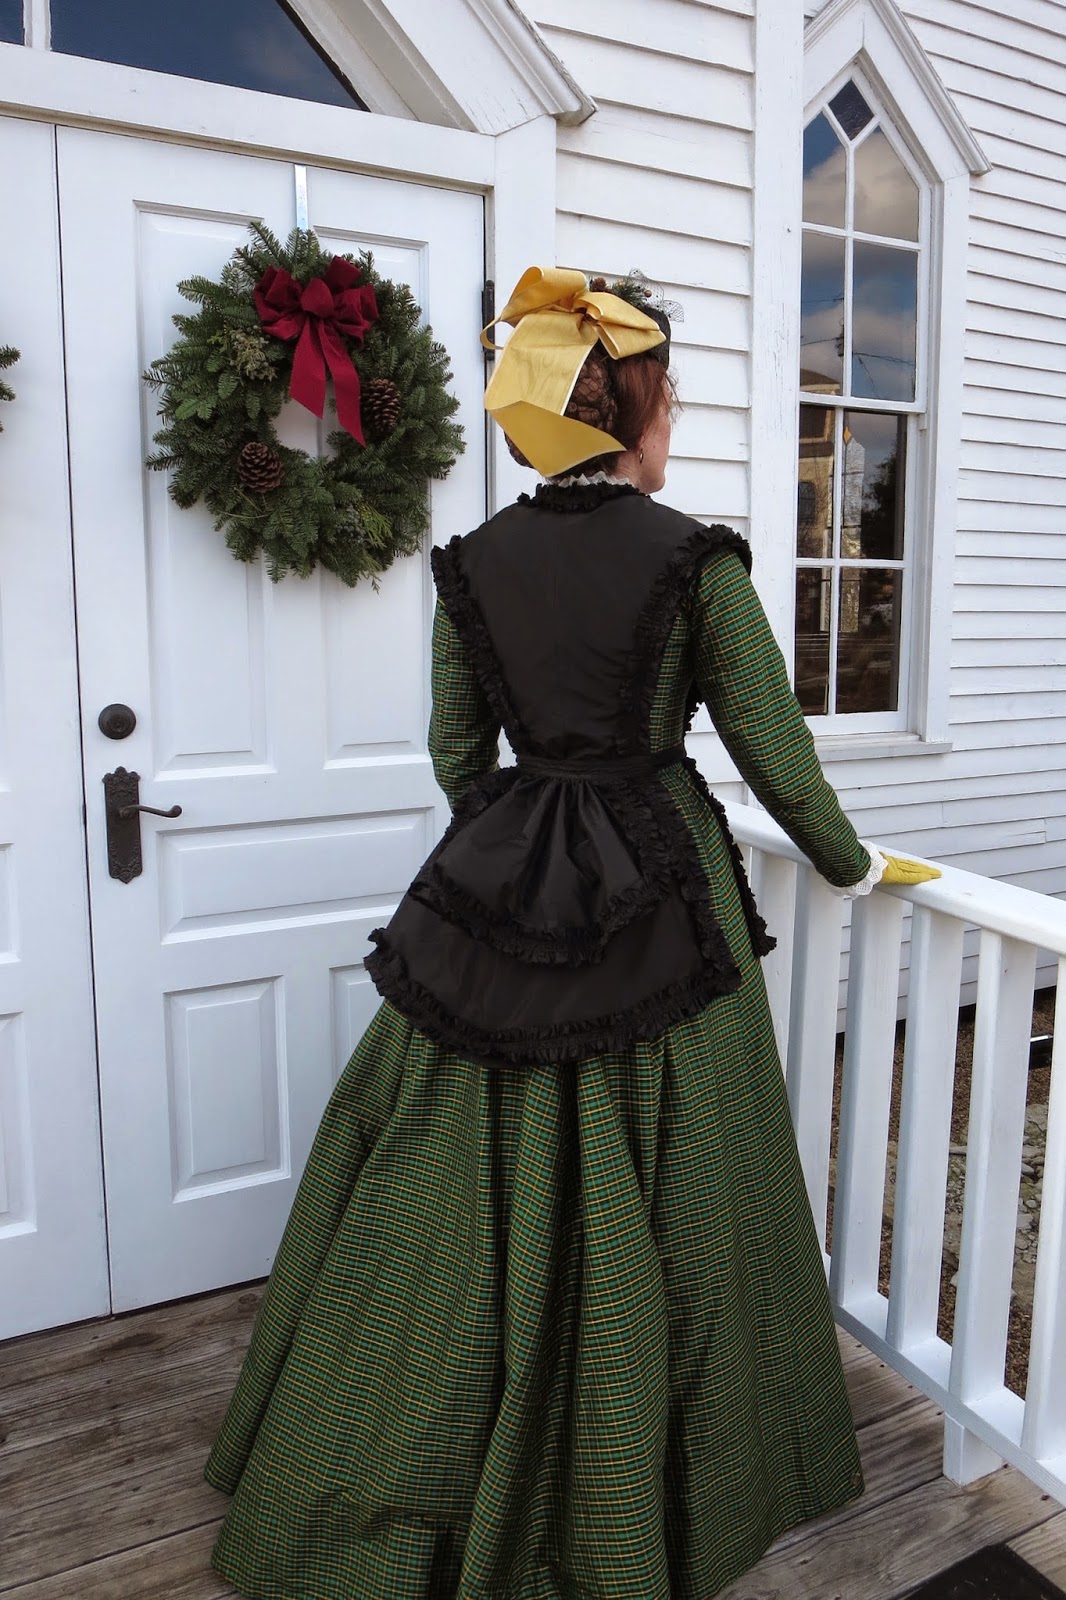
Het Geheugen van Nederland archive (search for "gracieuse" plus the year that you want to find the magazines). This mantilla, which you can see in the middle of the top and bottom row of the illustration above, is a little more fitted and has an open V-neckline, so I used the body from this pattern, and the pannier flounce from the other. I always love detangling the pattern sheets in these old magazines, and somewhere hidden in this jumble you can find the pieces for my mantilla.


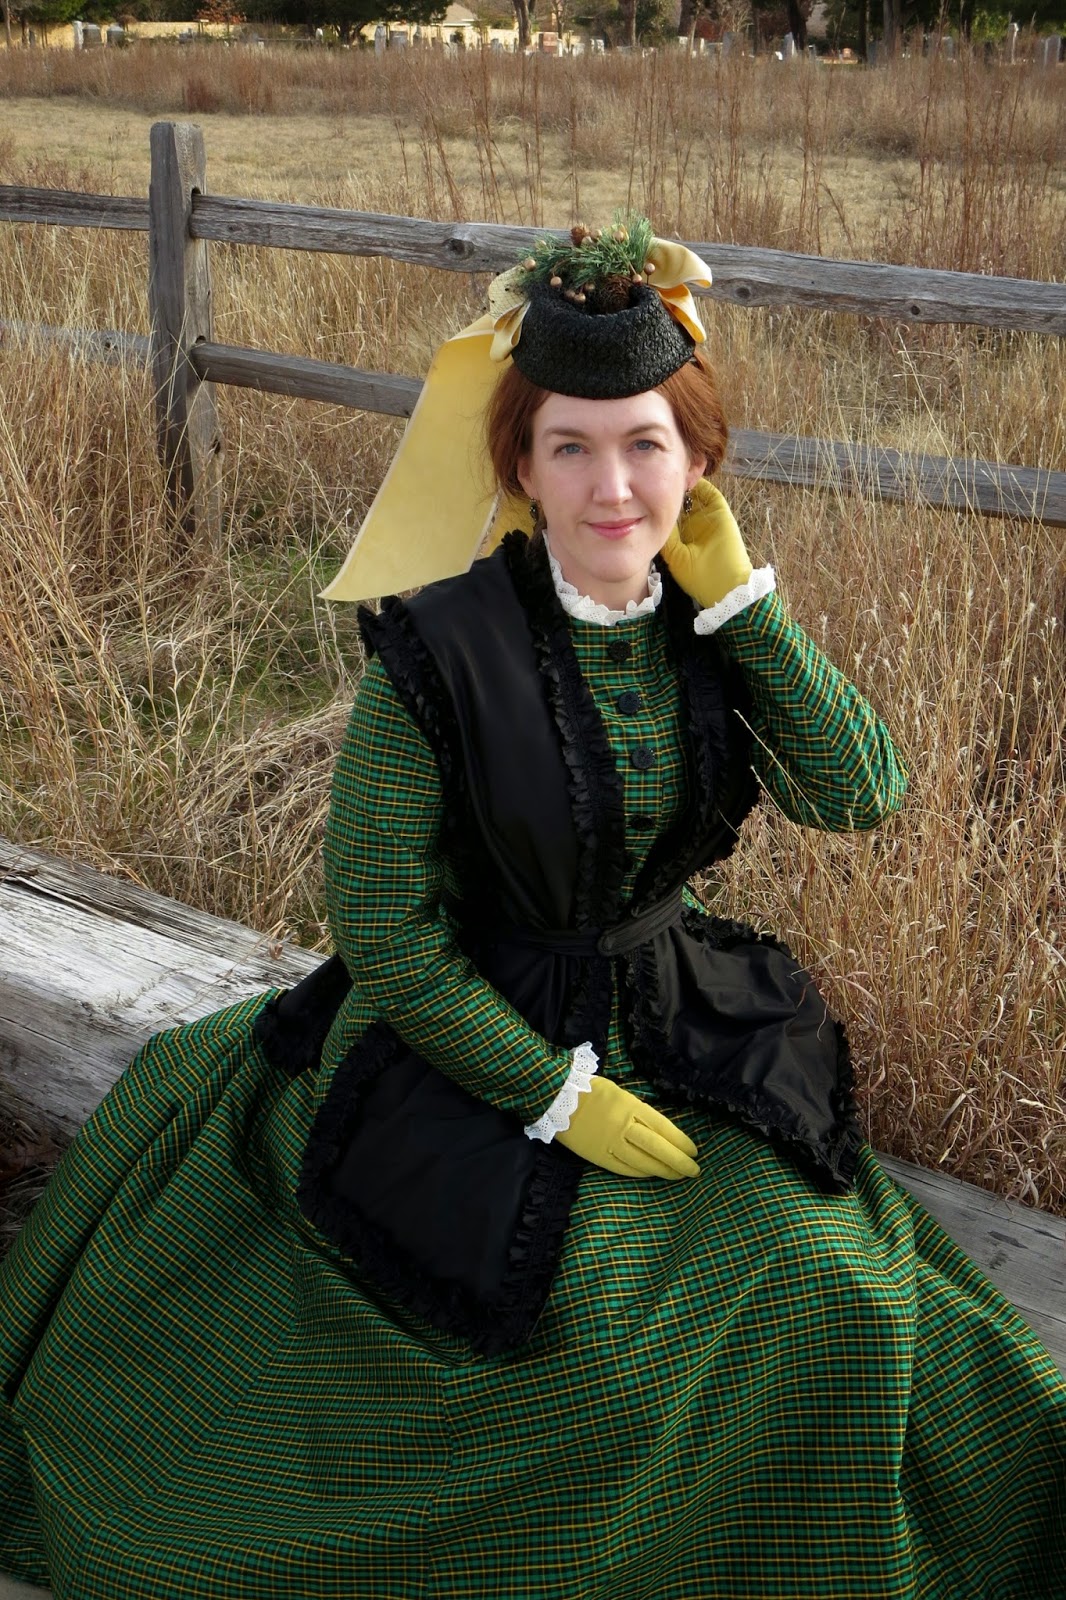
To finish the outfit, I dyed another pair of vintage gloves with Rit to match the yellow in my dress. I also took a straw pillbox hat from the 1960's and tacked the sides of the top together to make it look more like an early bustle tilt hat. I added a vintage moire ribbon to the back and a bit of Christmas greenery to the top, and that's it. The ribbons liked to flap around in the wind and stand straight up or wrap around my face and look ridiculous most of the time. I probably should have gone with narrower ribbon like the hat shown in this 1869 fashion plate, but the color matched my dress so well that I couldn't resist. Oh well. Go big or go home, right?  :)

On the way to the event, I stopped by my favorite Victorian chapel and took a few pictures. Here are some of my favorites, and as usual, there are more on flickr, plus a few others of our group at the Candlelight event.


Tuesday, October 28, 2014

Edwardian jacket for half-mourning


For the next installment of my Edwardian half-mourning dress series, I thought I'd show you some of the construction details that went into my jacket. The jacket was the part of the inspiration fashion plate that really captured my imagination and made me want to recreate this outfit. I love the quirky transitional styles from the end of the Edwardian period, and this jacket has such a cool combination of crisp tailoring at the waist contrasted by soft volume at the bust. It definitely wasn't easy, and I can see some things now that I wish I had done differently, but was such a fun challenge and I learned a lot along the way.

To get started on this project, I searched through everything that I could think of to see if I could find a period pattern diagram for a garment with a similar shape. I couldn't believe my luck when I discovered that one of the La Mode Pratique magazines in my collection had a full sized tissue pattern for a blouse with a similar fitted bottom and blousy top. This pattern dated from 1914, so it was 6 years later than my Edwardian inspiration, but I loved that they are both from the same magazine, and if nothing else, it gave me a place to start. (BTW, I'm dying to make up a version of this 1914 blouse at some point in the future too!)


The next step was make a mock-up and then use draping techniques to alter the 1914 pattern into something that was closer to my goal. The Edwardian jacket has a different style of collar, pleating on the shoulders, a strange point up the center-back, and a bell-shaped sleeves instead of tapered ones, so the pattern ended up looking a LOT different by the time it was done. You can see my final pattern pieces laid out flat in the picture below. What a weird shape!


I made this jacket out of fairly lightweight wool, so I decided to interline the entire bottom section with hair canvas to give it more structure.  I attached the hair canvas to the wool with lots of rows of tiny prick stitches at first, and although you couldn't see them on the wool side, I ended up chickening out and removing a lot of them in the end because it caused some slight puckering when the jacket curved across the dip in my waist. I also pad stitched my lapels, which helped them roll a little better. You can see one finished lapel at the bottom of this picture with a strong roll line compared to the un-stitched collar in the background, which still lays flat. All of these tailoring techniques are covered in Gertie's Lady Grey Sew-Along, which is a wonderful place to learn about tailoring techniques.


Once the hair canvas was attached, I assembled the bottom section of the jacket and whipped down the seam allowances. It was finally starting to look like something now, but still so odd!
For the top of the bodice, I made a fitted lining from checked cotton, then I pleated and gathered the wool shoulder pieces and basted them to the lining to keep everything stable. Then I top-stitched the bottom half of the jacket on top of the gathered section. Unfortunately, this is where my photo narrative fell apart. I was too frazzled and tired to remember to take pics on the night it finally all came together, so you'll just have to use your imagination for the last few steps. But I do have a pic of the inside of the finished jacket, which shows the fitted lining  and the inside facings that hide all the raw edges.  

The final step was to add 36 small cord buttons to the pleats on the shoulders, and one large button to the waist. After seeing some really cool antique cord buttons online, I decided to try making one myself.  I took a fabric covered button and wrapped it with soutache with a simple basket-weave pattern in the middle.  It was was a quick and easy project compared to the more complicated Dorset and death's head buttons that I've made in the past, but the techniques are all very similar. I also covered the bound buttonhole with some more soutache just to give it a little extra embellishment. You don't notice it very much in all that sea of black, but it still makes me happy that it's there.  


Here are a few more very over-exposed shots so you can see the details of the jacket, and check back later this week for info about my Merry Widow Hat of Awesomeness(!!!) and some pictures of all the pieces together for the final look.


Monday, December 9, 2013

knickerbockers


The project that I made for the Historical Sew Fortnightly "one meter" challenge is a pair of 1910's knickerbockers for my son.  I only needed 3/4 of a yard of wide wale corduroy from my stash to construct them, and I was happy to have an excuse to try out another one of my Edwardian patterns.  As usual, it was both a delight to get to work with a pattern that is around 100 years old, but also a source of much befuddlement trying to figure out how to put them together!


I started these last month and intended to use them for the previous HSF challenge, but I ended up having to make them three times before I got it right so they got bumped back a little.  The first time they were clownishly big, even though the size should have been perfect for him.  Next I tried a different Edwardian pattern for knickerbockers that also should have fit him, but they were a little too tight and way too short.  So then I switched back to the first pattern, but I removed about 4 inches of width while keeping the length the same.  So I guess issues with too much ease isn't just a modern problem!

The pattern has "instructions" - and yes, Edwardian instructions definitely deserve air quotes around them! - for a version with a fly and a version with side buttons.  I tried the fly first, but I had no clue what I was doing and it looked pretty wonky, so I switched back to the side opening, but this caused even more confusion when I tried to insert the pockets.  They didn't bother to include a pattern piece for the pocket, and here are all the instructions that were included:

Seems easy enough, but I had no clue what to do with the top of the pocket since it needed to be left open somehow to make the side closure work.  It was probably totally obvious to Edwardian seamstresses, but I'm pretty sure I did it in the most convoluted way humanly possible.  I finally ended up with something wearable in the end, so I guess that's all that matters.

Ironically, the event that I made these for was canceled due to a nasty ice-storm, so I'm not sure if he'll have a chance to wear them before he grows and changes size again.   But it was still fun to try the pattern if nothing else, and hopefully it'll go much more smoothly if he ever needs knickers again in the future.


Wednesday, March 13, 2013

30s Beach Pajamas


For this week's Sew Historical Fortnightly challenge, we were supposed to make something that fit the theme "peasants and pioneers".  I decided to take a slightly less literal approach with this one and use it for a project that I've been dying to make for a few years now - a set of 1930's beach pajamas.

The "peasant" part of this challenge comes from the blouse, which I made out of a printed feedsack that I picked up in an antiques shop years ago.  The feedsack was only 46" long, so it took some very careful planning and piecing to make it work from just one bag.  Printed feedsacks like this one were a popular money-saving choice for home seamstresses during the Great Depression and WWII, so it seemed like a great choice for this challenge.  I'm no expert on dating feedsacks, but I'm guessing that this print with its happy little cherries is actually from the 40's instead of the 30's, but shhhh... let's keep that secret between ourselves!  ;)

I used a New York pattern with the blue eagle NRA stamp on it, which means that it was sold between 1933 and 1935 under the umbrella of Roosevelt's New Deal recovery programs.  I love finding little clues like this to help date patterns, and I thought that using an authentic depression-era pattern would also fit the peasant challenge perfectly.  The only change that I made to the pattern was to make the collar open instead of closed with a bow, which seemed a little prissy for beach-wear.


For the "pioneer" part of this project, I decided to honor the fashion pioneers of the 30's who finally began breaking the gender barriers that had always been associated with women's pants.  A few brave women had been experimenting with various forms of trousers since the bloomer era, but it was really the 1930's that marked a turning point for this article of clothing.  Although I like playing dress-up in pretty frocks for my costuming work, my real-life wardrobe is made up of slacks, capris, and jeans about 99.9% of the time, so this is my little tribute to those amazing fashion-forward women of the 30s who paved the way for a trouser-loving girl like me.

I have always adored the super-wide legged look of the 30's.  I think they are so glamorous and fun, and I've been dying to make a pair for myself.  I used an Anne Adams pajamas pattern from the mid-1930s for my pants, and luckily, they fit me perfectly with no alterations needed except for the length.  Some modern costumers seem to be a bit freaked out by the fit of 30's pants, but I really love the way these look on me.  I admit that the crotch is crazy low and the waist is crazy high, but somehow it all works.  I made these out of linen canvas from my stash, and I used vintage mother-of-peal buttons for the sides.

The only problem is that it is hard for me to decide whether to wear the blouse tucked in or out.  I think it looks a little more leisure pajama-ish with the shirt out, and more beach pajama-ish with it tucked in.   I have to admit that I'm more comfortable and less self-conscious with the shirt out (did I mention how crazy high those pants are?), but I miss seeing the buttons on the pants when I wear it that way.  But I'm sure I'll wear it both ways from time to time just depending on my mood.  It's good to have variety.

For more beach pajama inspiration, check out two of my favorite photo blogs - Giant Pants of the 30s and La Mode Pyjama.  I also have a few additional photos of this outfit on my flickr.