Showing posts with label pattern drafting. Show all posts

Tuesday, October 28, 2014

Edwardian jacket for half-mourning


For the next installment of my Edwardian half-mourning dress series, I thought I'd show you some of the construction details that went into my jacket. The jacket was the part of the inspiration fashion plate that really captured my imagination and made me want to recreate this outfit. I love the quirky transitional styles from the end of the Edwardian period, and this jacket has such a cool combination of crisp tailoring at the waist contrasted by soft volume at the bust. It definitely wasn't easy, and I can see some things now that I wish I had done differently, but was such a fun challenge and I learned a lot along the way.

To get started on this project, I searched through everything that I could think of to see if I could find a period pattern diagram for a garment with a similar shape. I couldn't believe my luck when I discovered that one of the La Mode Pratique magazines in my collection had a full sized tissue pattern for a blouse with a similar fitted bottom and blousy top. This pattern dated from 1914, so it was 6 years later than my Edwardian inspiration, but I loved that they are both from the same magazine, and if nothing else, it gave me a place to start. (BTW, I'm dying to make up a version of this 1914 blouse at some point in the future too!)


The next step was make a mock-up and then use draping techniques to alter the 1914 pattern into something that was closer to my goal. The Edwardian jacket has a different style of collar, pleating on the shoulders, a strange point up the center-back, and a bell-shaped sleeves instead of tapered ones, so the pattern ended up looking a LOT different by the time it was done. You can see my final pattern pieces laid out flat in the picture below. What a weird shape!


I made this jacket out of fairly lightweight wool, so I decided to interline the entire bottom section with hair canvas to give it more structure.  I attached the hair canvas to the wool with lots of rows of tiny prick stitches at first, and although you couldn't see them on the wool side, I ended up chickening out and removing a lot of them in the end because it caused some slight puckering when the jacket curved across the dip in my waist. I also pad stitched my lapels, which helped them roll a little better. You can see one finished lapel at the bottom of this picture with a strong roll line compared to the un-stitched collar in the background, which still lays flat. All of these tailoring techniques are covered in Gertie's Lady Grey Sew-Along, which is a wonderful place to learn about tailoring techniques.


Once the hair canvas was attached, I assembled the bottom section of the jacket and whipped down the seam allowances. It was finally starting to look like something now, but still so odd!
For the top of the bodice, I made a fitted lining from checked cotton, then I pleated and gathered the wool shoulder pieces and basted them to the lining to keep everything stable. Then I top-stitched the bottom half of the jacket on top of the gathered section. Unfortunately, this is where my photo narrative fell apart. I was too frazzled and tired to remember to take pics on the night it finally all came together, so you'll just have to use your imagination for the last few steps. But I do have a pic of the inside of the finished jacket, which shows the fitted lining  and the inside facings that hide all the raw edges.  

The final step was to add 36 small cord buttons to the pleats on the shoulders, and one large button to the waist. After seeing some really cool antique cord buttons online, I decided to try making one myself.  I took a fabric covered button and wrapped it with soutache with a simple basket-weave pattern in the middle.  It was was a quick and easy project compared to the more complicated Dorset and death's head buttons that I've made in the past, but the techniques are all very similar. I also covered the bound buttonhole with some more soutache just to give it a little extra embellishment. You don't notice it very much in all that sea of black, but it still makes me happy that it's there.  


Here are a few more very over-exposed shots so you can see the details of the jacket, and check back later this week for info about my Merry Widow Hat of Awesomeness(!!!) and some pictures of all the pieces together for the final look.


Monday, May 5, 2014

1-hour dress, lawn party edition


I've been so busy sewing and attending events this spring that I am falling WAY behind on blogging about my projects.  But before too much time passes, I wanted to share a few notes about a new 1-hour 1920's dress that I made for the Jazz Age Sunday Social at the end of March.

For this dress, I started with my Dowonton Abby 1-hour dress pattern but made a few modifications so the two dresses wouldn't look exactly alike.  I shortened the waist to remove the side gathers in the torso, slightly shortened the skirt, and created pleats at the hips instead of gathered swags.  I also shortened the sleeves a little and added a rounded neckline.  I created a pattern of this new dress so you can better see how small modifications to the basic 1-hour dress pattern can give you lots of variation in styles.

The other major difference is that I used some soft cotton plaid  to create a casual day-dress version instead of the slinky silk velvet that I picked for the Downton Abby dress.  You can see that the cotton dress is much less body hugging, and that combined with a slightly wider skirt means that the dress has a bit of a flare thanks to the stiffer drape of the fabric.  I don't mind that since I wanted something more casual for the picnic, plus a lot of these early 20's dresses had more fabric in the skirts than you would expect. But I thought it was fun to see the difference that fabric can make.


I think the hardest part about this whole project was deciding how to decorate it, and I spent more hours looking through fashion plates for design ideas than I spent sewing the dress.  In the end, I started running short on time so I finished it very simply with a contrast binding around the neck, a narrow belt, and a pair of long bows all made out of bias strips of scrap fabric.  This isn't a direct copy of one dress or fashion plate, but I had seen enough similar elements in various 1920's illustrations - like the ones seen on the fabulous What I Found blog - that I felt like it would be a plausible choice.


The best part about 1920's fashions are the hats, so I was thrilled to have an excuse to steal one of my husband's old straw garden hats and reblock it into a wide-brimmed cloche.  To do this, I removed the sweatband inside of the crown, completely wet the straw, then stretched it over a wooden hat block.  If you don't have a hat block, you could also reshape a hat like this on a styrofoam head that is used for holding wigs, and you can wrap thick towels over any type of head form to make the crown wider, which is very used for 20's styles.  After I left the re-blocked hat to dry overnight, I then cut down the brim so it was much shorter in the back and widest on the sides.  Finally, I stiffened the edge of the brim with thick jewelry wire (I ran out of millinery wire, but this works nearly as good) and covered the wire with a strip of straw braid that I removed from the edge of the original hat.  The decorations are made with bias strips of silk and a vintage mother-of-pearl buckle that a friend gave me.

So that's pretty much it.  It's nothing fancy, but it was quick and easy and all of the materials came from my stash, and that's always a good thing.  And once again, I bet you are wondering if it really took one hour to make, right?  Well... it was more like three hours this time because I didn't want to top-stitch all of the binding, and figuring out the pleat size in the skirt slowed me down a bit.  But that's still not half bad!  If you are interested, more photos can be found from my event album on flickr.


Sunday, January 19, 2014

Downton-esque 1-hour dress


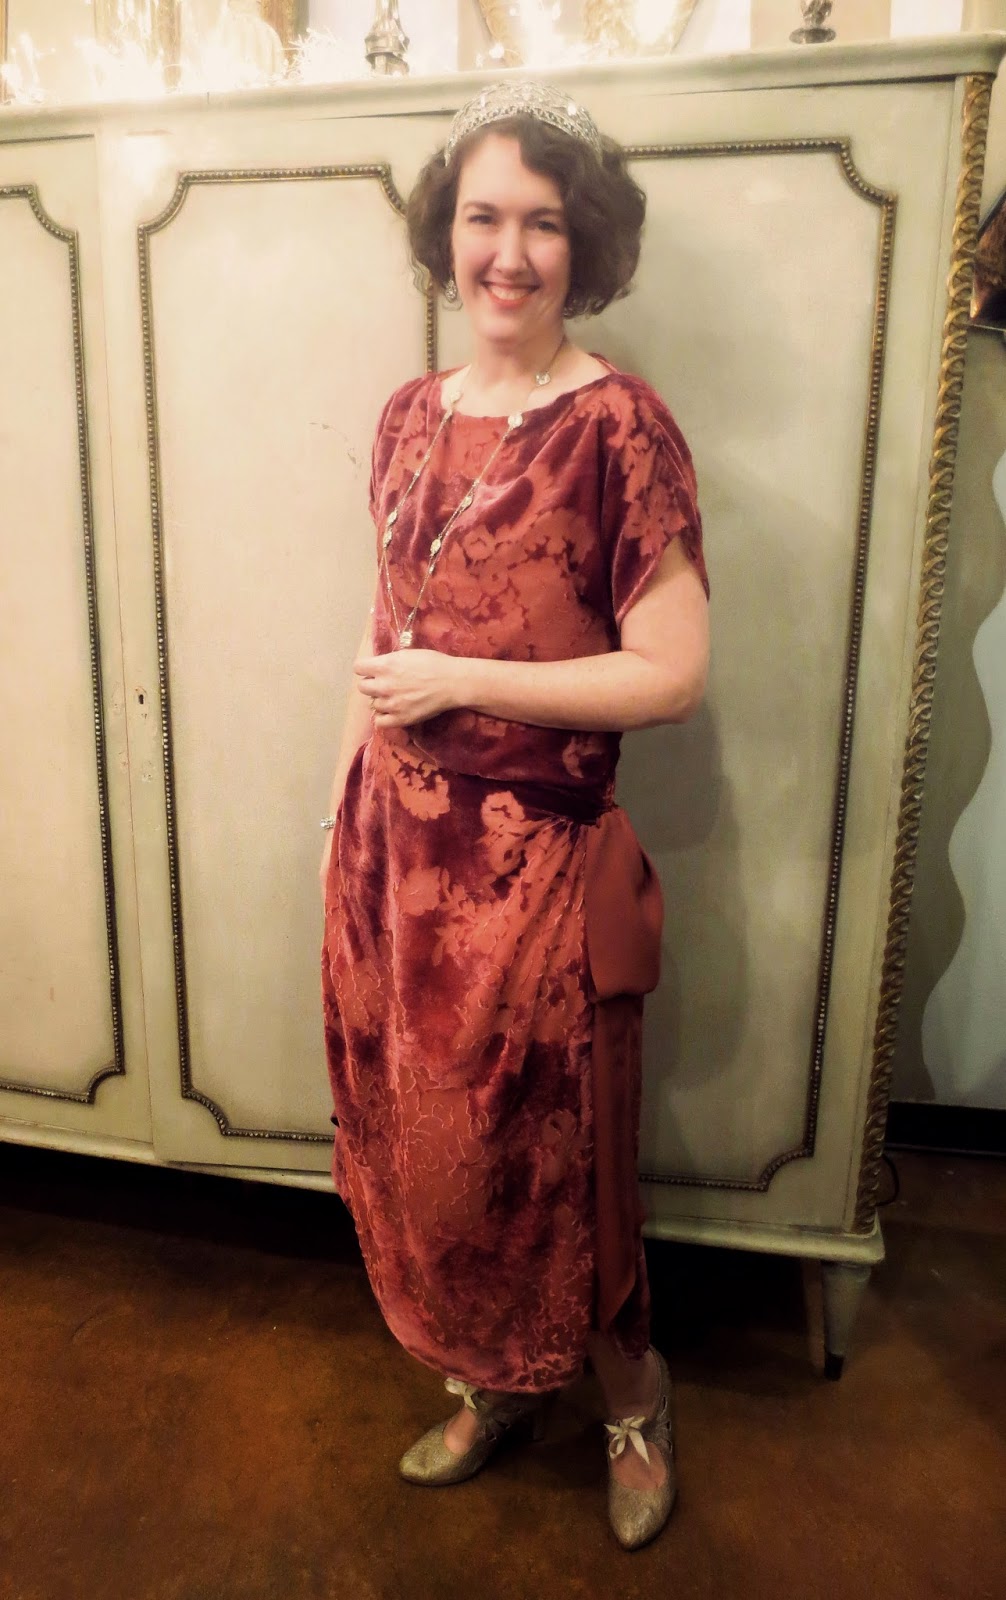
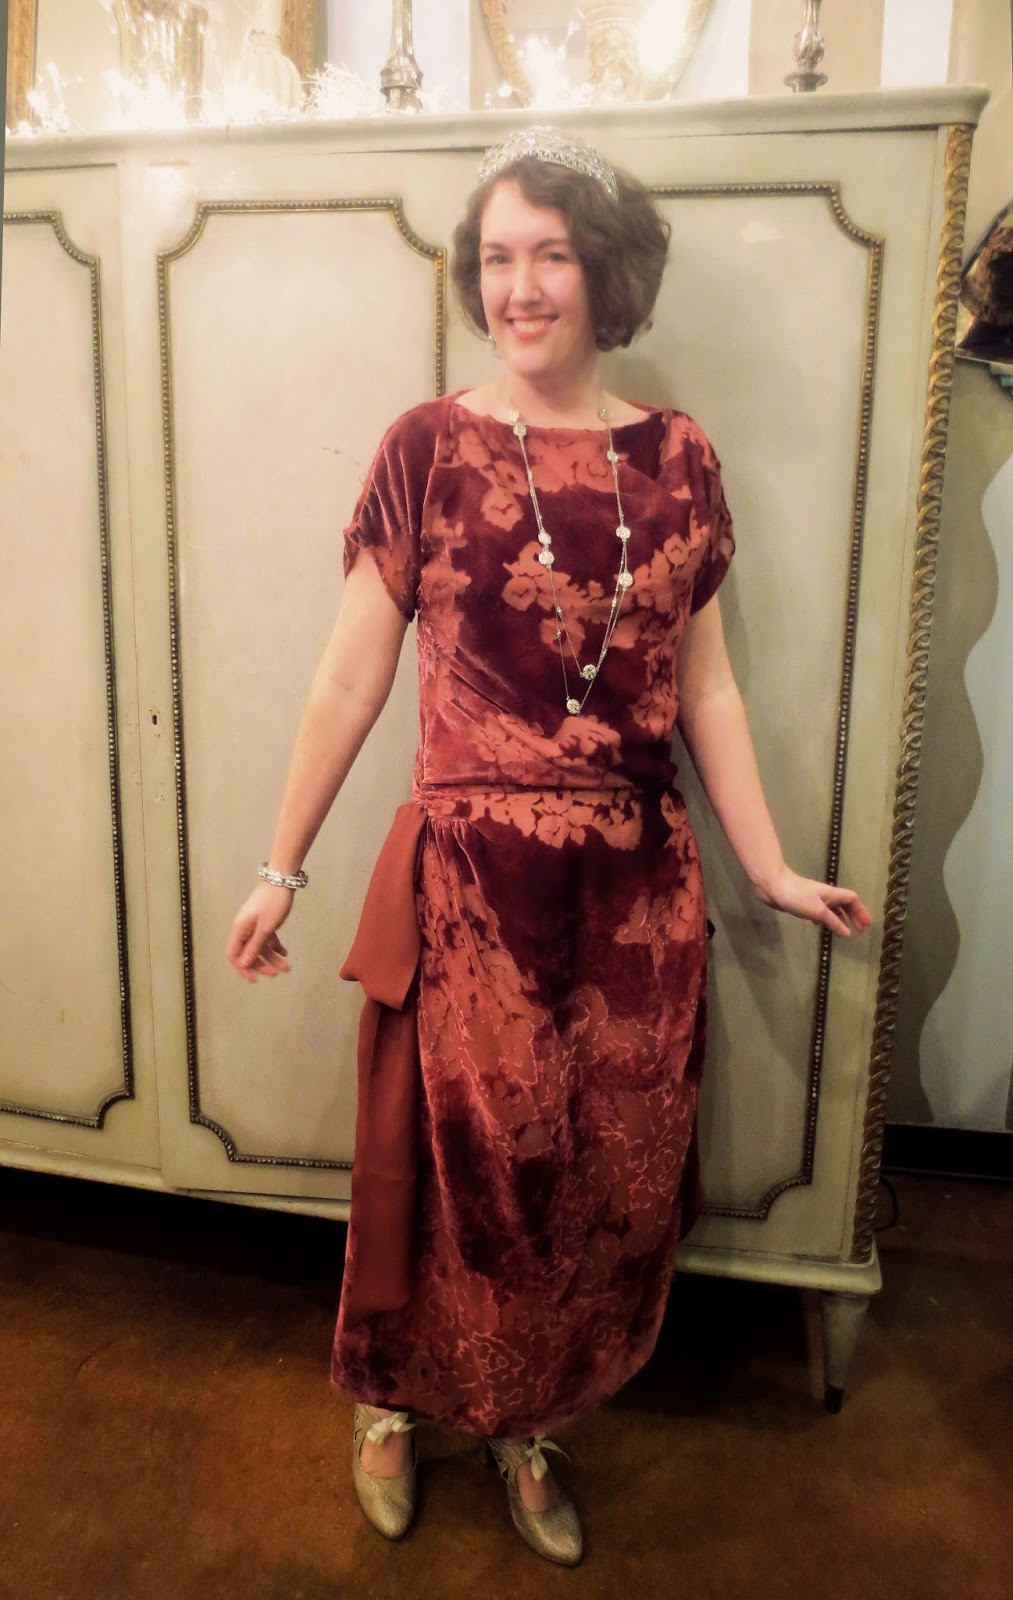
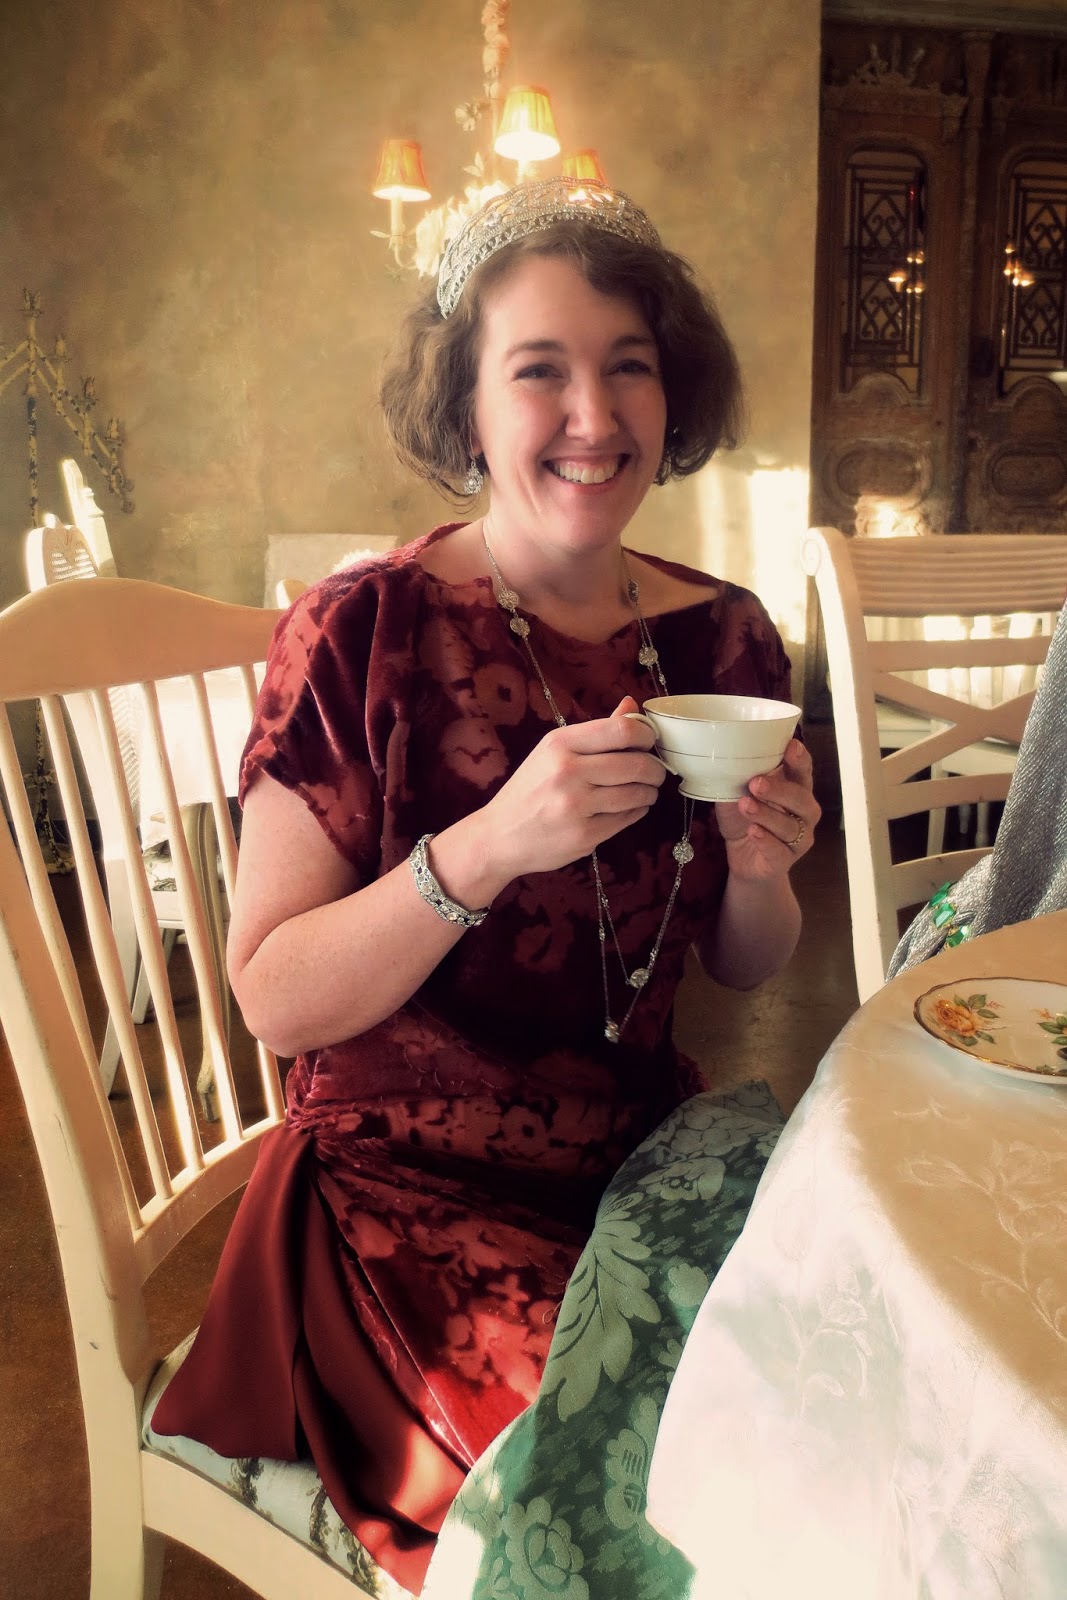
Last weekend, the Dallas / Ft. Worth Costumers Guild held a Tiaras and Top Hats Tea Party, and since I am a complete Downton Abbey addict, I decided to make an early 20's dress and indulge my inner Countess for the day.  

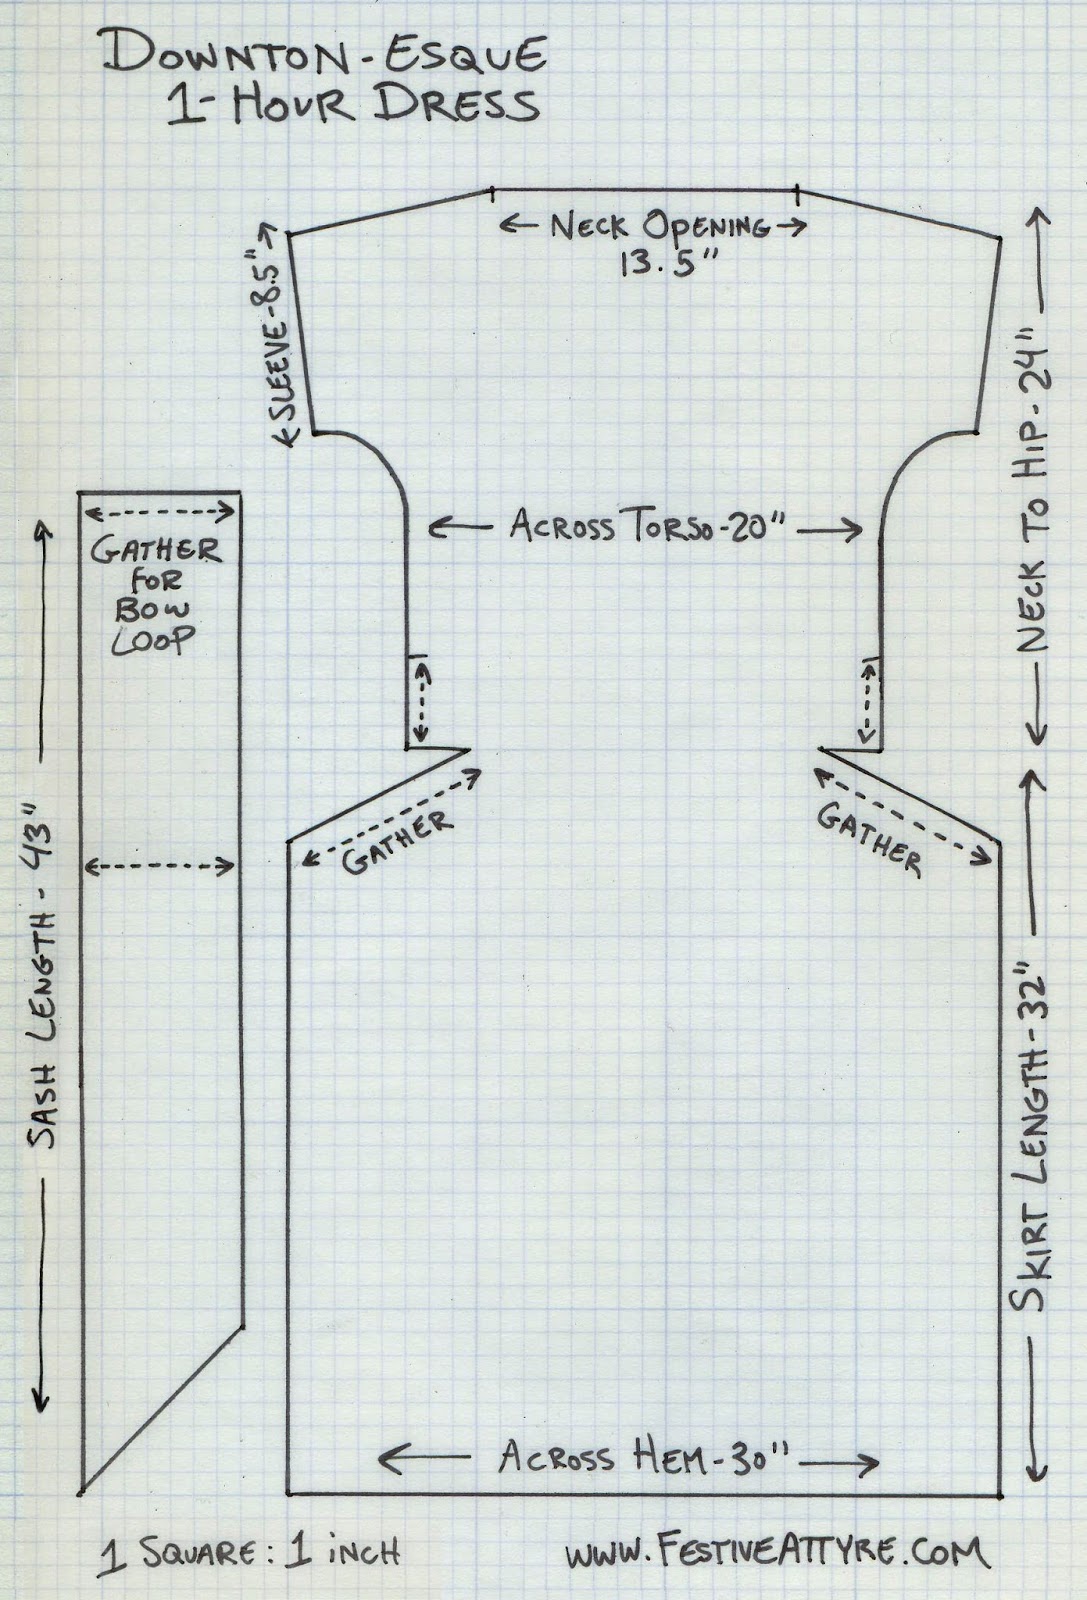
I had a little less than 2 yards of voided silk velvet that I bought from Fabrique's remnant bin earlier in the year, and this was just enough fabric to make a simple sheath dress.  I played around with some more complicated pattern options at first, but the fabric was so pretty on its own that I decided to keep it really simple and experiment with the infamous 1-hour dress concept that was so popular during this decade.  There are a couple of fun books from 1924-1925 that talk about making these dresses and give lots of variations on how they can be put together, so if you are interested in learning more, I've included links to those books at the bottom of my blog post.  But since the shapes are really simple, I thought I'd also give you my own freebie pattern so you can see exactly how my dress was made.  (here is the full-sized version if you need it)


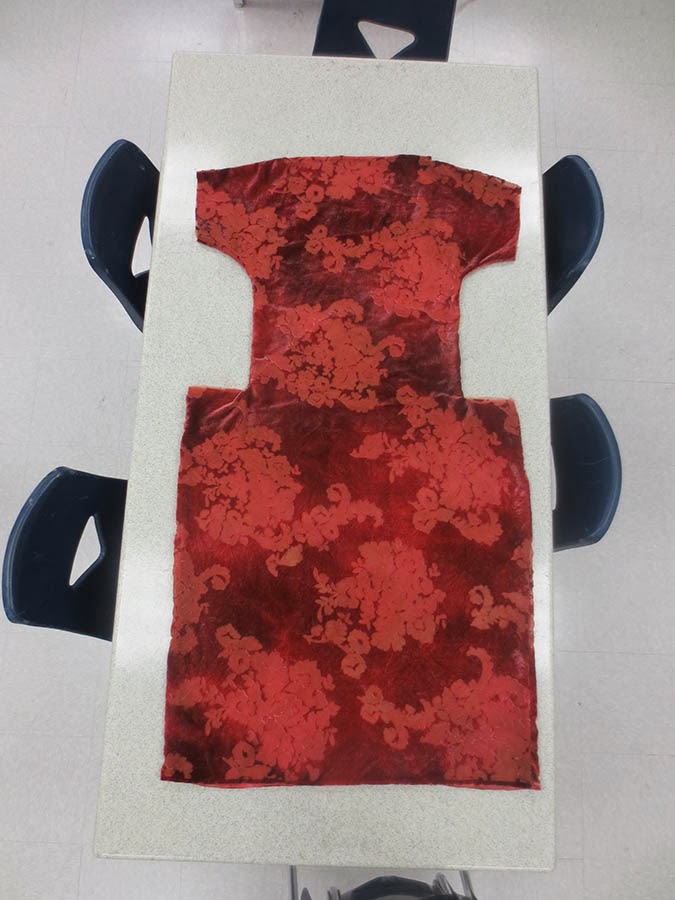
The cool thing about the 1-hour dress is that it is made out of mostly rectangular pieces and just pinned on the body to fit, so it is incredibly easy to draft and make.  The front and back pieces are exactly the same, and I went one step further by using a boat neck on my gown which also eliminated any need for a curved neckline.  These dresses don't look like much when they are laid out flat, but it's amazing how they come to life once they are on the body.  On the right you can see my dress before I cut the angle at the hips, which I did last because I wanted to check the draping before I cut.  
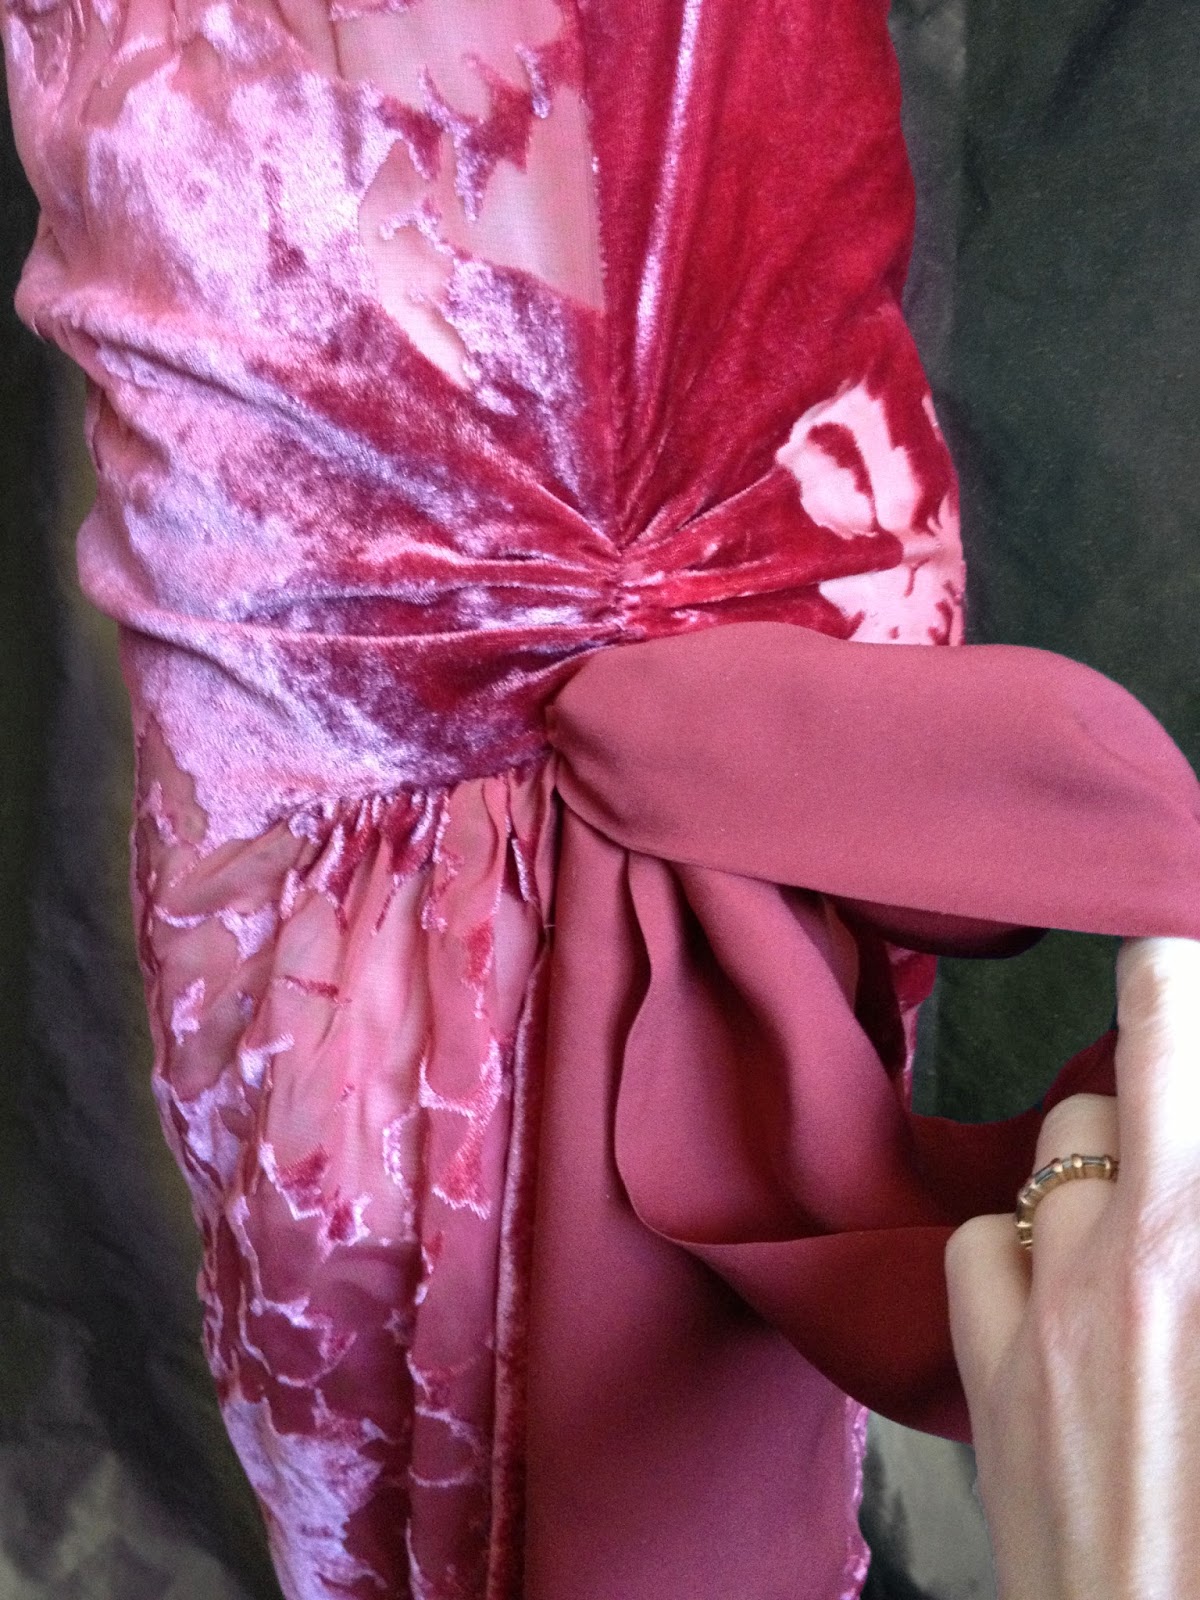
The only real shaping in the dress comes at the hip, which is gathered a little on the torso seam to make some soft folds at the waistline, and then it is gathered at the side extensions to give some fullness over the hips.  I made the hip extensions on my dress slant down, which draws up the sides and gives it a slightly curved hemline and some diagonal draping across the skirt.  I also made two looped sashes out of silk georgette and tacked these onto the hips to jazz it up a little more.   


I'm not going to do a full step-by-step tutorial because I think the books cover that well enough if you need more instructions.  But here are a few more of my own impression after making one of these dresses myself:

- I think one of the main reasons why my dress was successful was because of my fabric choice.  You definitely want a fabric that is very fluid and not stiff for this style - something like silk velvet, crepe, soft lawn, etc.  Drapey is definitely good!
- I made my dress quite narrow through the body, which keeps it from looking like a big shapeless sack.  It only has 2" of ease across the bust, and it is just big enough to fit over my shoulders, but just barely.  This narrow width also means that the waistline naturally falls at my high hip (around where I wear my jeans) since it can't go down any farther than that.  This is perfect for an early 20's look, and to my eyes, it is a lot more attractive than the later 20's dresses.  Many of those have a waistline that hits lower on the hips, which results in the whole body needing to be cut wider for us curvy gals.  
- The one part about this dress that I wasn't crazy about is that the neckline likes to shift around a lot because the fabric is so slippery.  I tried to combat that by sewing snaps into the shoulders and snapping it to my chemise, but it still moved more than I wanted, so I'll probably try snapping it to a firmly fitted 1920's brassiere next time.  
- So did the dress really only take one hour to make?  Uhhh... no.  But that's mainly because the silk velvet forced me to baste everything before sewing, and I took the time to hand-finish all the hems and bind the internal seams.  I probably spent about 4-5 hours on it total.  But if I was making this sort of dress in cotton and machine sewed all the finishing work, I think I could get pretty close to that 1-hour timeframe. 
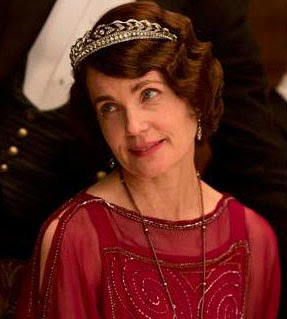
- And just because I am totally in love with my new tiara, I thought I'd let you know that I bought it from Venus Jewelry on ebay.  I think it is a pretty great match for the type of tiara that Cora wears in the latest season of Downton Abbey.  One of the best parts about 20's fashions is all the fabulous jewelry from that era, and I had a ton of fun picking out sparkly things to finish off my outfit!  I wish I had a better non-blurry picture, but maybe you can get the basic idea here.  

So that's pretty much it!  We had a wonderful time at the tea party, and I am even more in love with 20's fashions than I was before. If you ever need a quick and easy frock for your own Downton Abby adventures, I definitely recommend that you give the 1-hour dress a try!   


Tuesday, July 2, 2013

Remnant challenge wiggle dress


I've really enjoyed participating in the Historical Sew Fortnightly this year, but I hate that it limits my time for retro sewing.  I'm trying to sneak in a few quick and easy retro projects every once in a while to give myself a break and a dash of something different.  It might mean that a HSF challenge doesn't get finished on time (like my Pretty Pretty Princess dress, which I'm horribly behind on), but giving myself some time away from the HSF stuff is helping me keep my sanity, and that's a good thing too.  :)

So when one of my favorite local fabric stores, Fabrique, recently announced that they were going to do another remnant challenge, I snatched up a small piece of midnight blue linen and decided to make myself a 50's wiggle dress.  The whole dress was made with less that 1 and 1/8 yard of fabric, which I am really proud of.  Laying out the pieces to make the best use of the fabric was almost like doing a big jigsaw puzzle, and it was SO satisfying when I finally figured out that I could make it work.

The pattern is cloned from a vintage dress that I bought a few years ago for a few bucks.  The sewing thread was completely rotted on the dress, so it literally fell apart on my body when I tried it on.  I took the whole thing apart and thought I would re-sew it, but when I noticed that there were a lot of moth-holes and stains on it too,  I decided to just use the pieces to create a copy of the original.  And as a fun bonus, I was able to wear this dress as a visual aide for a class that I taught this past weekend about cloning historical garments.

The original dress has some really cool seam-lines, including a shelf bust and an odd little panel over the belly that connects to the skirt.  I wanted to bring these elements out as a more obvious design feature, so I added a lighter blue wool piping to all the seams.  I think it ended up looking really modern and almost futuristic because of the unusual construction.  I mean seriously - horizontal pleats across the ribcage?  Where the heck did that come from?  But even though this dress is a bit strange, I think it's a fun combination of retro without looking old-fashioned.


Wednesday, February 8, 2012

Cycling costume, take 2

So after letting the mid-1890's jacket sit in the naughty pile for a few weeks, I finally decided to put it on indefinite hold and focus on something easier for our upcoming Steampunk event.  This is an incredibly busy time of year for me, and while I think the jacket could still be amazing if done right, I don't think I have the time or patience for all that tailoring right now.

I'm still going to make an 1890's cycling costume though - but this time it will be a blouse and skirt.  Once again, I made a Pinterest board of inspiration pics to get me started.  There are some amazing outfits there, but I was most attracted to the look of a calf-length skirt and a plaid or striped blouse:


Source: oldbike.eu via Jennifer on Pinterest


Source: oldbike.eu via Jennifer on Pinterest


So now that I have a plan, the next step is to come up with a pattern.  I pulled out my two Kristina Harris books on 1890's patterns, and I found a blouse from 1894 that I liked.  I used my trusty apportioning scales from the Edwardian Modiste book to enlarge the pattern (technique previously blogged about here), and once again, it fit great with just a few tiny alterations.  But I wasn't crazy about the huge sleeves in this pattern, so I decided to exchange them with a different style.  Seven sleeves later, and I think we have a winner!   LOL!  But honestly, I was having a blast drawing up these patterns and testing them out, and I thought it would be useful for both me and others to see a variety of sleeve styles from these books in the flesh.  By the way, I'm abbreviating the book titles to AVFP for Authentic Victorian Fashion Patterns and 59ATCFP for for 59 Authentic Turn-of-the-Century Fashion Patterns.  So here are my options:

1. Small sleeve puff, 1893, AVFP p. 32
Before I started making these patterns, I thought this would be my favorite.  I still think the sleeve is cute, but it is smaller than I thought it would be, and I think it works better as a double puff like you see in the illustration.  The puff could easily be altered to be larger if I wanted to do that, but I think I would prefer to stick closely to the original patterns for this project.  In this picture, I'm wearing the puff part with a tight fitting sleeve lining that comes with a lot of the leg-o-mutton patterns.

2. Medium sleeve puff, 1893, AVFP p. 92
After seeing that the first puff was too small, I thought that this one would be a perfect fit, but I was pretty unhappy with the way it made up.  The sleeve puff seemed much more rounded in the illustration, and mine is annoyingly long and flat.  Again, I could add more width on my own, but I thought I'd try the next size up and see how I liked that.

3. LARGE sleeve puff, 1894, AVFP p. 99
OMG what a difference a year makes!  These Belle Epoque ladies were not messing around when it came to sleeves!  This is the pattern that I am using for my bodice, so I figured that I might as well try the larger sized puff while I was at it, but now I feel like I'm being eaten alive by my sleeve.  And this is a little limp too - imagine what it would be like with stuffing and that extra ruffle on top.  Madness! 

Unfortunately, there is no in-between size to bridge the gap between the too-small medium puff and the gargantuan large puff in these books.  There is one sleeve style with a double puff that might be less ostentatious, but I really didn't want a double puff for this particular outfit, so I didn't bother to make that one up.

4. Sleeve for a stout woman, 1893, 59ATCFP p. 79
So now that I exhausted my straight-from-the-pattern puff sleeve options, I decide to try some leg-o-mutton styles.  This one was disappointingly small compared to the illustration.  It was slightly wider that the sleeve lining that I had been using with the puff sleeves, but there wasn't a lot of fullness at the top.  It looked like a sleeve from the early 90's vs. the mid 90's, which probably makes sense since a lot of the stout patterns are intended for older women who are less likely to follow the latest trends.  And BTW, this sleeve pattern was designed for women with a 36" bust or larger, so their definition of "stout" should be taken with a grain of salt. 

5. Wrinkled muttonleg, 1893, 59ATCFP p. 66
The illustration for this one looked like a hot mess, but I was pleasantly surprised by the way that it turned out in the flesh.  The sleeve-head has obvious fullness without being ridiculously huge, and there is some gathering down the length of the arm which gives it some interesting horizontal wrinkles in addition to the fullness at the top.  I really liked this one, but while I was on a roll, I thought that I would try two more mutton styles to see how they compare.

6. Balloon sleeve, 1893, 59ATCFP p. 54
The illustration for this sleeve looked like it wasn't much bigger than the wrinkled muttonleg, but the real sleeve is actually quite large.  It is just as wide as the mutton leg sleeve shown below, but it's even taller so it drapes more.  This is a perfect example of how deceptive the fashion drawings can be.  I don't hate this one, but it is so floppy that I'm afraid that I'd be constantly fussing with all that extra fabric to get it to flop in an attractive manner.

7. Mutton leg sleeve, 1894, AVFP p. 57
I wasn't planning on making this one up since the illustration makes it look MASSIVE, but after I realized that it was smaller than the balloon sleeve, I thought I'd give it a try.  There's nothing wrong with this sleeve, and I think if I tightened up the forearm a little it would be pretty cute.  Even though I don't think I'll use it for my blouse, I'm glad I tried it.  I've never been a big fan of the huge 1890's sleeves, but this actually wasn't as bad as I thought it would be.  

So now after seeing my 7 options, I think I like #5, the wrinkled muttonleg, the best, which was totally a surprise for me.  But I think it strikes a nice balance between being too big and too small, and the unusual method of gathering gives it some nice visual interest.  And as a bonus, I think it looks very similar to the charming blouse seen in this illustration.  Now on to the real sewing!

Source: oldbike.eu via Jennifer on Pinterest


Friday, January 20, 2012

pattern drafting with apportioning scales

A lot of people seem to be intimidated by the pattern diagrams in the Frances Grimble books that use apportioning scales to help you enlarge the patterns.  This technique uses special rulers that allow you to draw out the pattern in your own unique size for a custom fit.  Once you get the gist of how it works, this technique requires almost no math and very little thinking.   I *LOVE* using this type of pattern, and I've had really great results with the dresses that I have tried in the past, so I thought I would make some video tutorials to show you all how easy they really are to use. Please excuse my choppy endings. My video editor refused to work with these files, so they are pretty rough around the edges.

The first video talks about how to select the correct apportioning rulers based on your own personal measurements.


The next video walks you through the process of drawing a pattern piece with your custom rulers.


Important things to note:

1.  The apportioning rulers in the Edwardian Modiste book can also be used for Kristina Harris's books of 1890's dress patterns (links to all below).  Harris doesn't include the apportioning rulers in her books, so this is a huge help if you want to use her patterns!
2. The Grimble and Harris books that use pattern systems from the 1880's and 1890's only use the bust measurement ruler for everything that you draw, including the sleeves.  But the system used in the Edwardian Modiste is slightly different, and there is a somewhat complicated way that you are supposed to measure your arm length.  Finding this sleeve length measurement is probably the most difficult step of the entire pattern drafting process, but there is a description of how to measure your arm length on pages 7-8 of the Edwardian Modiste.  You then use your arm length for the vertical measurements in the sleeve pieces (just like we used the waist length for the bodice), while the bust measurement ruler is still used for the width of the sleeve pieces.  Grimble advises that you can also use the modern technique for measuring your sleeve length (simply measuring from shoulder to wrist), and this will get you close enough.  I haven't tried either of these methods with the Edwardian Modiste patterns, but I'll let you know when I do.
3. As I mentioned in the video, skirts are drafted with a different set of rulers from the bodice.  You use your waist measurement for all the horizontal lines (i.e. the 28" ruler if you have a 28" waist). For the main vertical line, you measure from the waist to the floor to determine the length of your skirt, and then select the ruler with that measurement for the vertical baseline on your pattern (i.e. use the 41" ruler if you want your skirt to be 41" long).
4. For dresses with the bodice and skirt all in one, you will use your waist length ruler for the vertical line on the bodice section, and the skirt length ruler for the vertical line on the skirt.
5.  Be warned that the hips on these patterns will probably be too large for most modern figures, but you can always take them in if you need to on the muslin.
6. Even when seam allowances are not marked on the pattern pieces, they sometimes ARE included on the patterns.  The armscye is a good example of this - you might not need to add selvage to the armscye and sleeve-head on some patterns.  But you won't know for sure if you need the extra fabric or not until you make the pattern up, so it is better to add seam allowances just in case.  You can always cut them back off if you find that you don't need them.
7. The type of corset that you are wearing is very important when selecting the proper rulers.  The waist position on my Edwardian corset is much higher than it is on my Victorian corset.  If I am wearing the wrong corset (or none at all) when I measure my back length from my neck to my waist, it will completely throw off the fit of your garment - especially on these late Edwardian patterns where the waistline is intended to be relatively high.

Well, I hope this was helpful!  Let me know if you have any questions on any of this.  I am actually more familiar with using the apportioning systems in the Fashions of the Gilded Age and the Harris books, but I know that the Edwardian stuff is the most popular right now.  But all of the systems are very similar, so once you get one under your belt, the rest are much easier.  Now go forth and draft fabulous patterns! :)

(P.S. - if you would like to buy one of these books that uses apportioning rulers to draft patterns, feel free to use one of these links and I will get a little bitty contribution to my book fund. Thanks!)