Sunday, December 14, 2014

1869 dress for Candlelight


I got a bee in my bonnet last weekend and decided that I couldn't bear to wear my same old bustle dress to Candlelight two years in a row, so I made a new 1869 outfit for the occasion. Luckily, this style of dress goes together quite easily, and I was able to pull all the supplies that I needed from my stash. All I had to buy this week was a $1 sprig of greenery for my hat. Now that's my kind of Christmas miracle!

The gown is made with green plaid silk that I picked up at a Fabrique sale earlier in the year for $16. No, not $16 per yard - but $16 for the dress length. Best. Deal. Ever! I had no idea what I would make with it, and I usually try to avoid adding things to my stash without a plan, but this was just too good of a deal to pass up. My students pointed out that the fabric looks like a roll of Scotch Tape, and wow - yeah it does! Maybe I can convince Scotch to sponsor my dress if I sew a big product patch on my back like a race car driver. But even though I do look a bit tape-ish, I thought the green was quite festive, and I matched the event's Victorian Santa so well.


To make the dress, I used a combination of patterns from Patterns of Fashion and Theatrical Costumes for Stage and Screen. It's a pretty simple dress on its own, and the only embellishment is a set of antique glass buttons with flowers cut into them. At first, I thought about adding fringe or rows of trim on the dress, but then I fell in love with a 1869 fashion plate from La Mode IllustrĂ©e showing a similarly austere gown worn with a black tunic over it. I poked around and found several period patterns for this type of garment, including one in the book 60 Civil War-Era Fashion Patterns that is referred to as a "pannier mantilla". I loved the description, which states: "a more useful article of dress is not likely to appear this season, and will more than repay for the slight trouble of making it." How charming!


I also found a similar garment and pattern in an 1869 copy of de Gracieusse that is archived on the Het Geheugen van Nederland archive (search for "gracieuse" plus the year that you want to find the magazines). This mantilla, which you can see in the middle of the top and bottom row of the illustration above, is a little more fitted and has an open V-neckline, so I used the body from this pattern, and the pannier flounce from the other. I always love detangling the pattern sheets in these old magazines, and somewhere hidden in this jumble you can find the pieces for my mantilla.


To finish the outfit, I dyed another pair of vintage gloves with Rit to match the yellow in my dress. I also took a straw pillbox hat from the 1960's and tacked the sides of the top together to make it look more like an early bustle tilt hat. I added a vintage moire ribbon to the back and a bit of Christmas greenery to the top, and that's it. The ribbons liked to flap around in the wind and stand straight up or wrap around my face and look ridiculous most of the time. I probably should have gone with narrower ribbon like the hat shown in this 1869 fashion plate, but the color matched my dress so well that I couldn't resist. Oh well. Go big or go home, right?  :)

On the way to the event, I stopped by my favorite Victorian chapel and took a few pictures. Here are some of my favorites, and as usual, there are more on flickr, plus a few others of our group at the Candlelight event.


Sunday, November 30, 2014

1790s Autumn accessories

Gallery of Fashion, 1796

A few weekends ago, the DFWCG had its annual Georgian Picnic, and I decided to make some new cold-weather accessories to dress up my old 1790's spencer and round gown. Unfortunately, I ran short on time and had all sorts of unforeseen drama that weekend, so my fancy new accessories did not get finished and I ended up with a very boring outfit for the picnic. *blah* But I was so excited about what I was working on that I decided to give it another try and finish everything so I could at least do a photo shoot and share my projects here. I spent lots of time pouring through Gallery of Fashion illustrations when coming up with ideas for my new accessories, and all of those plates can be found on the Bunka Gakuen archive, which is an invaluable resource for studying costume of this era.


First on the list was a new fixed turban. The construction was very similar to the turban I made last summer, but this one has a 3-yard strip of velvet wrapped around the crown, which made it much rounder and taller than my first version. I didn't get a chance to decorate it before the picnic, so it was painfully plain during its first wearing. To add a bit more excitement, I added strips of fur to the twists and a drape in the back, and I like it a million times better now. It just goes to show how important those finishing touches are when making hats from this era. I used a straw hat as the base for this turban, and everything is tacked into place by hand, so it would be easy to change again in the future if I wanted to try something else.

Gallery of Fashion, 1801
I also had a massive hair fail on the morning of the picnic and didn't have time to work out a plan B, so I decided to invest in a new wig to make sure that never happens again. I bought the Aneesa wig by Mona Lisa (you can sometimes find cheaper prices for this wig on Ebay), and I think it's a nice match for the short cropped curls that you see in some of the fashion plates from this era. I took sections of hair and brushed them out, then I wrapped them around my finger to make distinct ringlets. It's sort of a silly look, but it seemed very Gallery of Fashion-esque, which is exactly what I was going for.


reticule from the MFA Boston - 1800
Next, I decorated a silk reticule with brass spangles. I made the reticule earlier this year, but it wasn't anything exciting, so I decorated it with a pattern similar to the bag shown on the left. My version is fairly subtle since the color of the spangles matches the silk so well, but I'm quite pleased with the way it turned out, and I discovered how fun it is to add spangles to things.  I don't think I'll ever have a plain reticule again!

The gloves were another quick project that helped to add some more color to my outfit. They are vintage gloves that I found at an estate sale, and they were originally orange. I over-dyed them with purple Rit to make them a burgundy color that would match my turban. The color is a little spotty in a few areas, so the next time I dye gloves, I'll be sure to wash them first to make sure any old grease or oil is removed, which can cause the dye to be absorbed differently in those areas. But it's nice to know that I can take boring old gloves and dye them any color that I want. I never even though about doing that before.


Gallery of Fashion, 1795
In the past, I wore my paisley shawl with this outfit, but paisley shawls don't typically show up in fashion plates until after 1800, so they aren't the most historically correct style to use with this period. So I decided to make myself a fur tippet, which is an accessory that you do see often in 1790's illustrations.  I had a small remnant of faux fur left over from another project, so I pieced it together and sewed it into a long tube.  Honestly, it doesn't provide much warmth unless you wrap it tightly around your neck, but they do look pretty glamorous, so I guess that's the main point.

Finally, I made myself a high-necked chemisette to fill in the neckline of my round gown and make it more appropriate for winter. I made it out of a vintage baby gown that had been badly stained and torn and was headed for the scrap bin. But I managed to salvage enough of the plain cotton to make the chest piece and collar, and then I used the lace edging to create some long ties that I could arrange like a cravat. I think more than anything, the chemisette helped to keep me warm by covering one of the few exposed areas on my body, and I love the smart and sporty look that it creates - perfect for a hike through the woods on a November day.

So I might have missed my goal of having these new accessories finished for the picnic, but I still had fun wearing them for my photoshoot, and I hope I get another chance to wear them to a real event in the future. You can see the full set of photos on Flickr, and here are a few more of my faves.


Tuesday, November 4, 2014

Edwardian half-mourning dress pics


I knew I would be incredibly busy at the DFWCG's Mourning Tea, so I stopped by a beautifully restored Victorian chapel and cemetery near my home so I could take a few pictures of my new half-mourning dress before the party. I was running short on time and never made it down to the cemetery itself, but I did get some pretty shots outside of the chapel. Here are some of my favorites, and there are a more on flickr.  I'm also having fun turning these into faux-autochromes and Longchamps-style photos, so I'll probably keep coming back and replacing these as I have time.

I'll start by reposting my original inspiration from a 1908 edition of La Mode Pratique, followed by two photo where I tried to copy the poses shown in the illustration. I didn't intend to copy every last detail of this dress, but I think I managed to capture the over-all feel of the fashion plate pretty well, which was my main goal for this project.  Out of all the things that I create, nothing beats the satisfaction of recreating an outfit from a work of art.  There's just something magical about seeing an artist's depiction of fashion once again turn into a living, breathing, moving thing.  


Thanks for following along with my little mini-diary about this dress, and if you missed the earlier entries, you can go back to read about the corsetskirt/blousejacket, and hat.  


Monday, November 3, 2014

Merry Widow hat and Gibson Girl hair

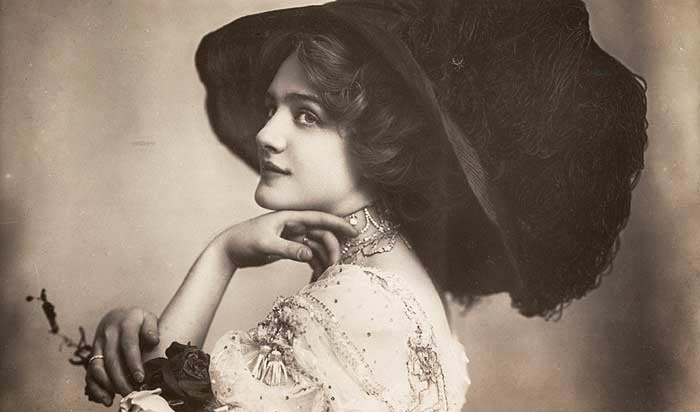
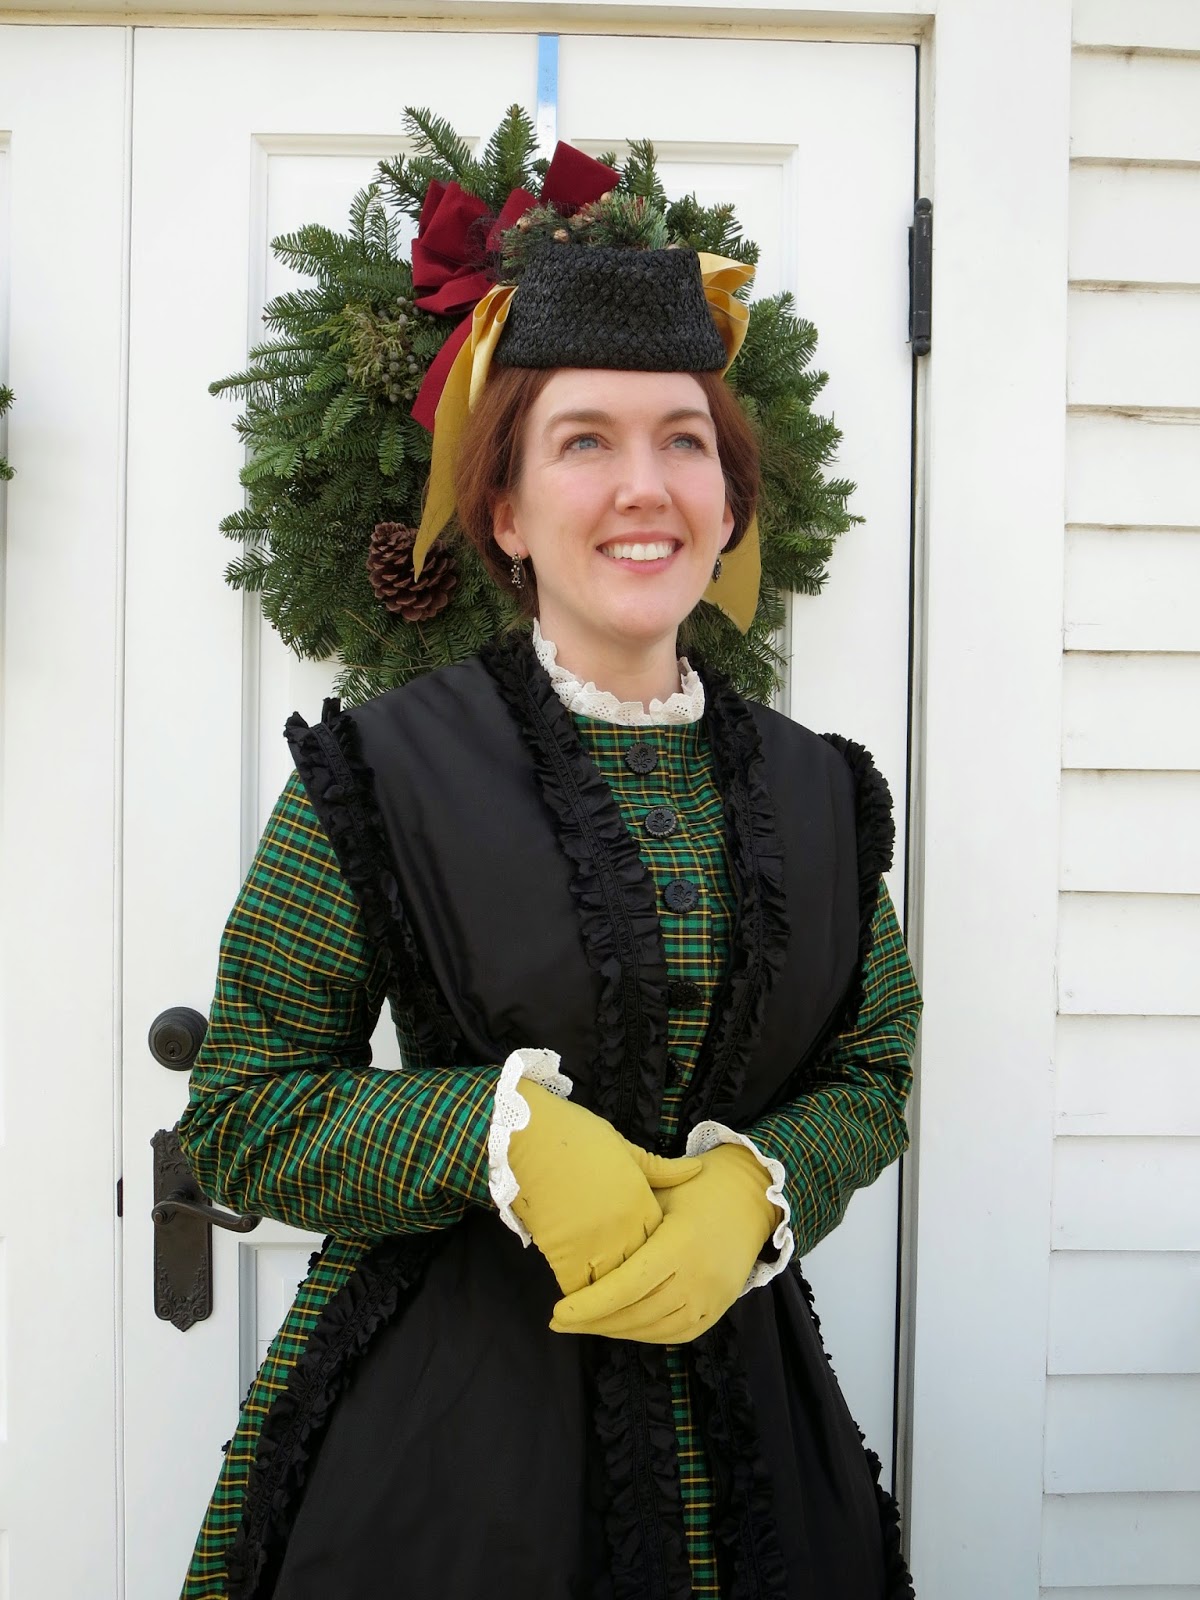
Lily Elsie from The Merry Widow
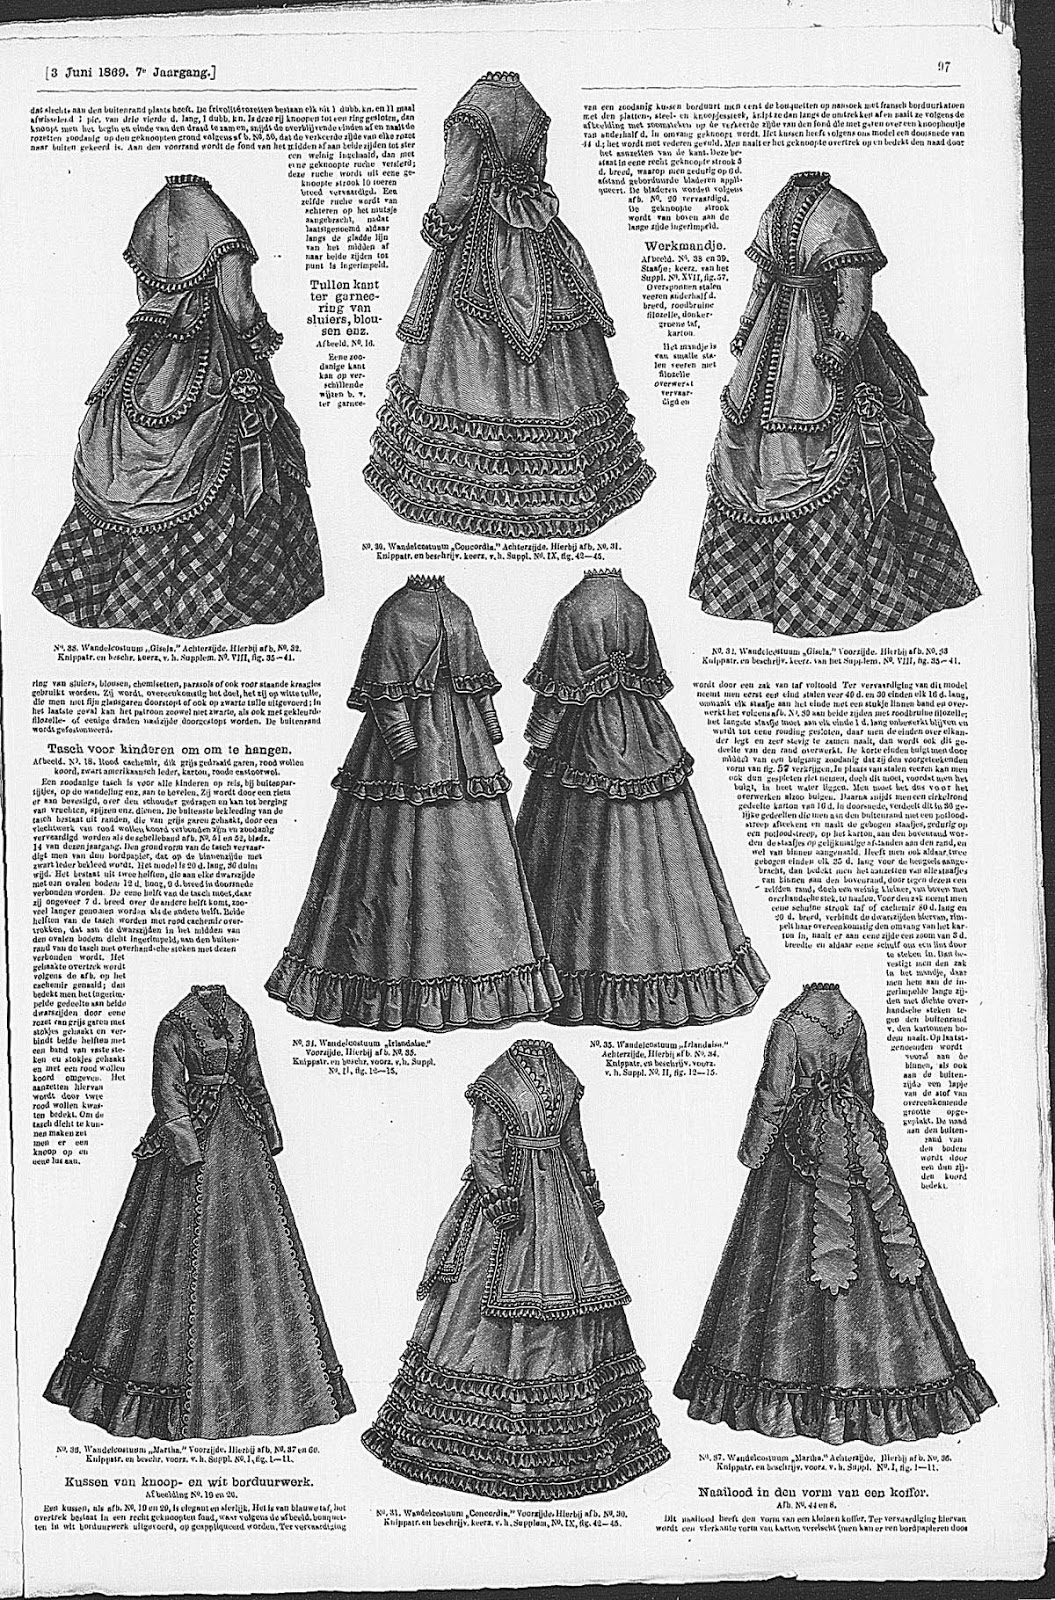
One of the main reasons that I wanted to make an Edwardian outfit for the DFWCG's Mourning Tea Party was because I've always wanted a proper "Merry Widow" hat, and a mourning party seemed like the perfect place to wear one. These fabulously oversized confections were inspired by the operetta The Merry Widow, which took London by storm in 1907 and sparked a huge craze for the large hats worn by the leading actress, Lily Elsie. Judging by the the frequent mentions of Merry Widow hats in magazines from from this period, it seems that men found them annoying, cartoonists thought they were ridiculous, moralists saw them as sinful, and women just couldn't get enough of them! They continued to grow in size throughout the end of the Edwardian years, ultimately reaching the largest expanses ever seen in the history of fashion before finally shrinking back to a more manageable size by the mid-1910's. Since I also happen to be a huge fan of ridiculous headwear, I decided to make my own Merry Widow hat with proportions epic enough to make my Edwardian ancestors proud.
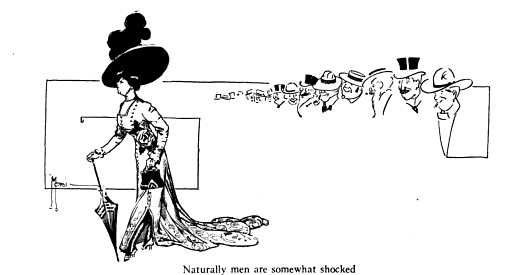
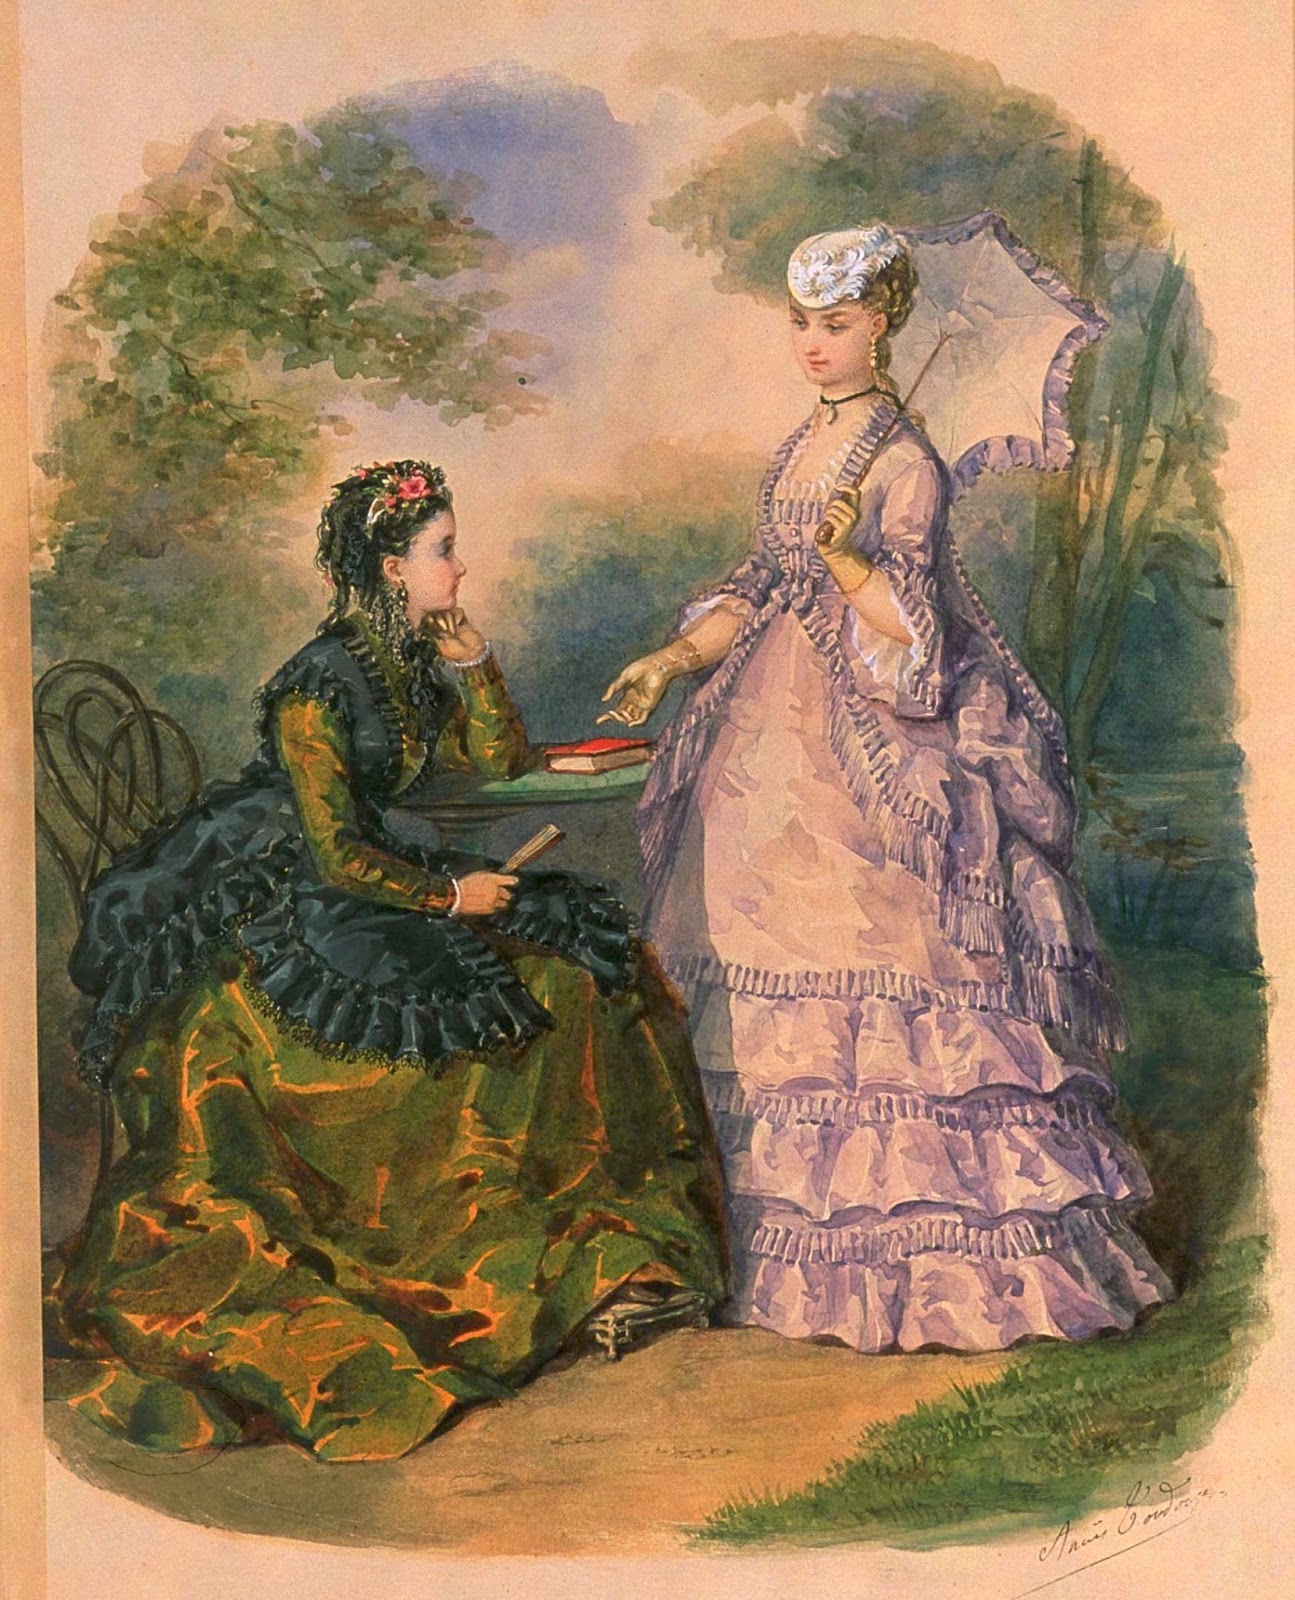
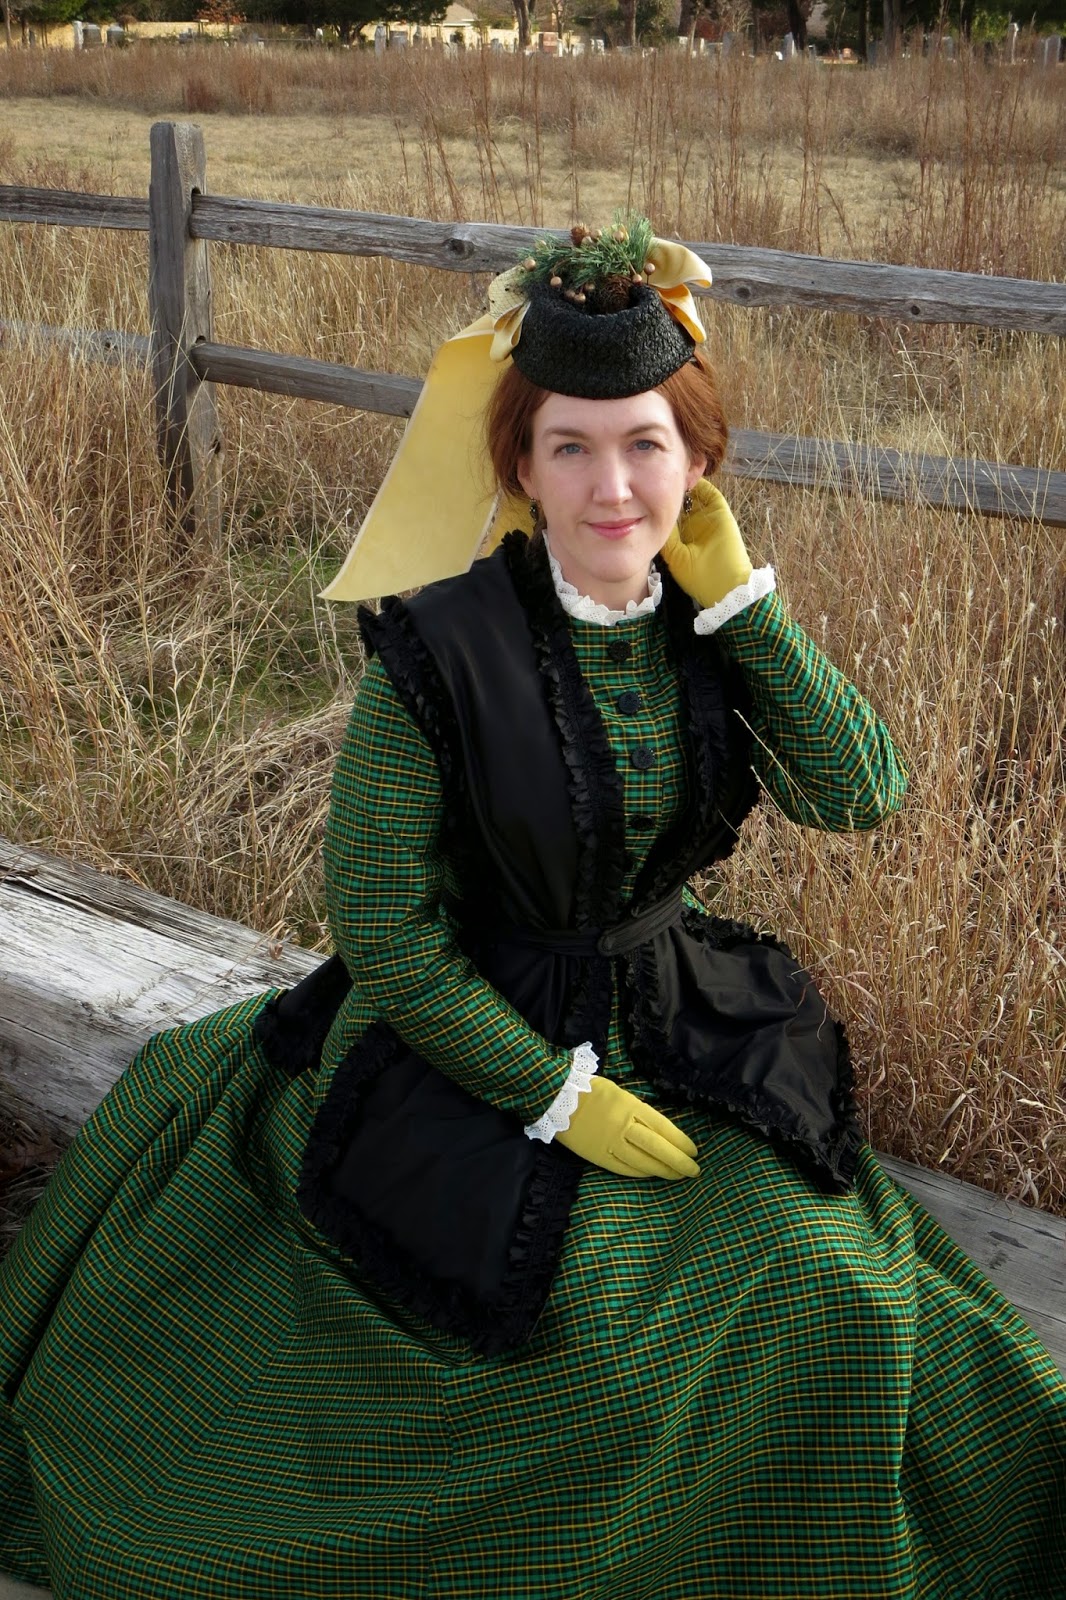
Bohemian Magazine, 1908

I've noticed from handling some wide-brimmed antique Edwardian hats that they are often hard as a rock, so I suspected that they used cardboard as a base instead of buckram and wire. Modern sombreros also use cardboard bases, and they are the only hats that I know of that are still as large as Edwardian Merry Widows, so I decided to experiment with converting a sombrero into a historical style. Although sombreros often show up on Ebay or Etsy, the cheapest one that I could find was this hat from the Mariachi Connection (as a bonus, they seem to have frequent sales too).  The sombrero is plain enough that you might could replace the crown only and skip recovering it, but it is covered with a a velvet-like synthetic material that I wasn't crazy about, so I decided to deconstruct the entire thing and see if I could cover the base with my own fabric for a more sophisticated look.

My first step was to remove the edge binding and decorative cords and then pull the fabric off the cardboard base. The cords and binding are sewn all the way though the cardboard, which is impressive considering how hard the base is. The fabric came off easily though, and it seemed to be glued down with something similar to rubber cement. The fabric on the entire top side of the brim was glued down, but the bottom and crown were only glued around the edges. It looked like the cardboard was shaped over some sort of block that formed the rolled edges of the brim, and the larger upturned side had several places where the cardboard was cut and overlapped to make it curl up more smoothly. Once the fabric was removed, I cut off the crown and enlarged the opening for the head to a larger size, although I did not worry about the exact size of the opening until the crown was attached.

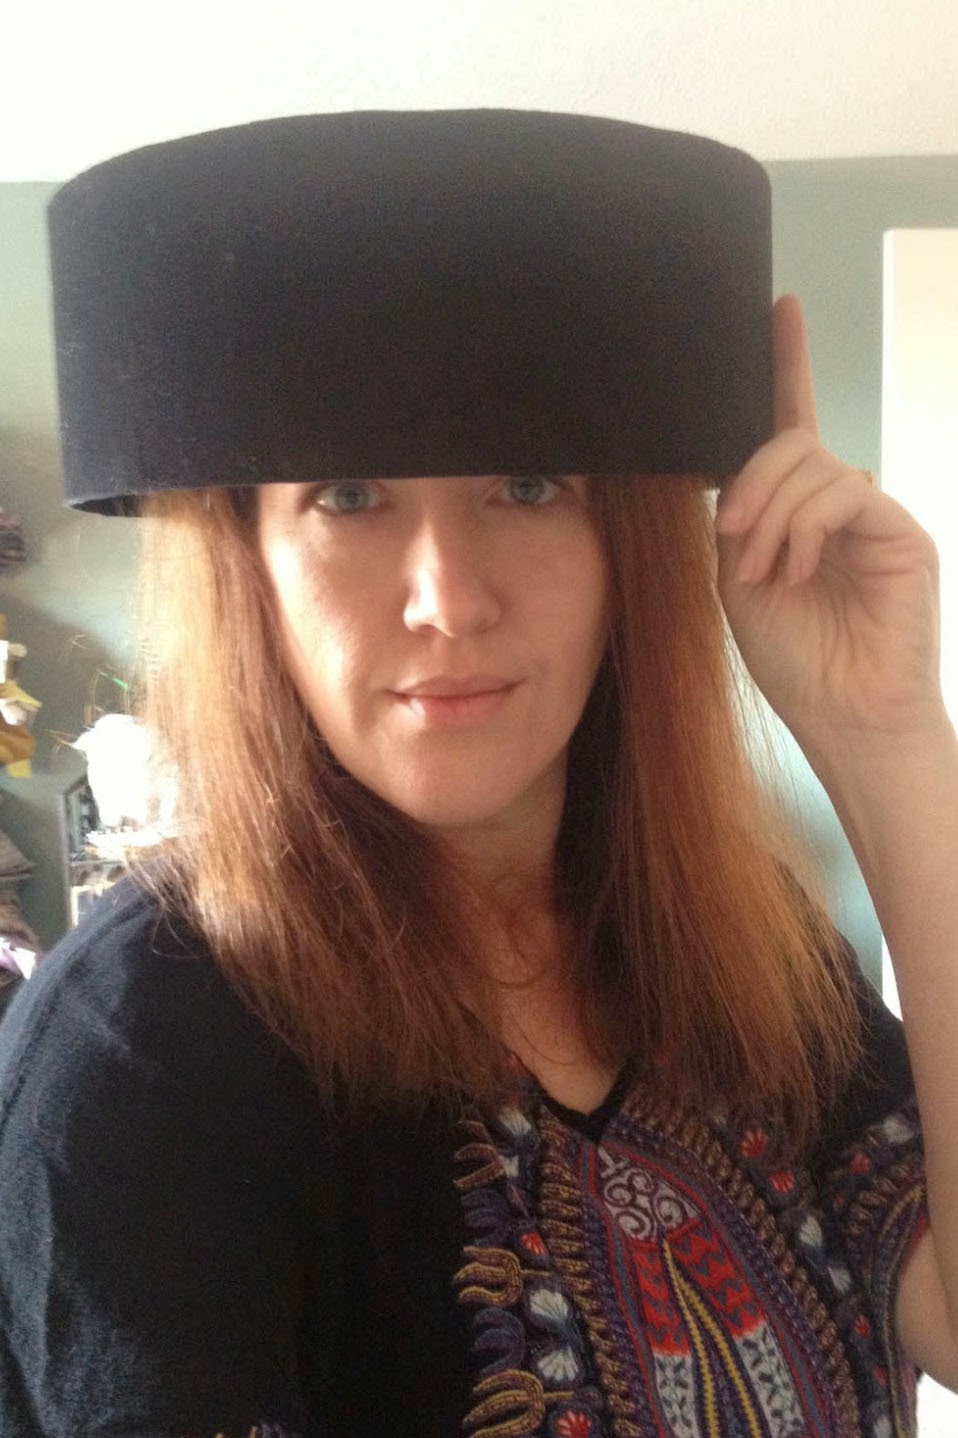
The next step was to construct a new crown for the hat.  I found an article in a 1909 edition of  La Mode IllustrĂ©e that gives a pattern and instructions for making a similar style of hat, so I used those dimensions for building my new crown. The article called for a crown that was was 10.5" in diameter, 33.5" in circumference, and 4" tall. I built my crown using a double layer of buckram with wire around the top and bottom edge, and then I covered it with cotton velveteen. It is a bit silly looking on its own, but I had fun modeling it to show you exactly how huge the crowns of Edwardian hats are supposed to be. It felt like I'm wearing a lampshade on my head at this point, but you really do need to make the crowns this large or else they don't sit correctly over the large hairstyles of the period.

After the crown was finished, I then covered the brim with my velveteen. I decided to use spray adhesive to attach the fabric to the cardboard base, and I used Scotch brand Super 77 for this project, which worked quite well. Just be sure to spray the adhesive outdoors, and do it on the grass or on newspapers because the spray glue is incredibly sticky, and it is very hard to remove if you get it on something by accident. It took me two tries to attach the fabric to the cardboard base smoothly, and there are a few tricks that I learned that made my second attempt much more successful. Please forgive my quickie hand-drawn diagrams, but hopefully they will help to illustrate the concepts.

First of all, be sure to cut your circle of fabric a good bit larger than the actual size of the hat, and don't cut out the center hole until after it is completely stuck down. It is hard to line everything up exactly when applying the fabric, and you really only have one shot at getting it on there right with the spray glue. The first time I tried it I was a little off center, and I didn't have enough fabric on one side to completely cover the edge. The second time I tried, I cut wider selvages, and I also marked the middle of the brim and the middle of the fabric with chalk so I could stick the center down first and then work my way out to the edges instead of working from one side to the other. I did this to the top side of the brim first, and then I repeated the same process on the bottom. Once it is all stuck down, then you can trim off the excess fabric and cut the opening for the crown.

The other tip that I learned is that the direction of the bias is incredibly important when trying to get the fabric to lay down smoothly over the curves in the brim. The first time I glued down the fabric, there were small wrinkles around the edges of the hat, but on the second try, I managed to smooth out all of the wrinkles by stretching the fabric on the bias in specific areas. I discovered that the straight grain needs to run up to the highest point of the upturned edge of the brim, and you will do the most stretching and smoothing along the sides of the upturn. The spray adhesive actually stays tacky and the fabric is repositionable if you don't press it down hard, so I started by sticking down the edges of the hat where the straight grain runs, then I would stretch and smooth the bias sections until all the wrinkles were gone. After stretching, then you can firmly press everything down to get a permanent bond.

The brim was finished by sewing a bias strip of the velveteen around the outside edge. This step needs to be done by hand with a curved needle, and it was a pretty long and tedious process considering how large the brims is. You probably could glue some trim around the edge instead, but I think the hand-sewn edging looked really nice, so I'm glad I took the time to do it that way.

Once the brim and crown were both covered with fabric, I attached the crown to the fabric on the top side of the hat brim - again by hand-stitching it with a curved needle. After the two parts were sewn together, I then went back and cut the round opening in the brim larger so that it fit the position and shape of the crown. The last step was to hand sew a strip of cotton around the edge of the opening for the lining of the crown. I made a casing on the top of this strip and ran a drawstring though it so that I could gather it up and adjust how high or low the hat sits on my head.

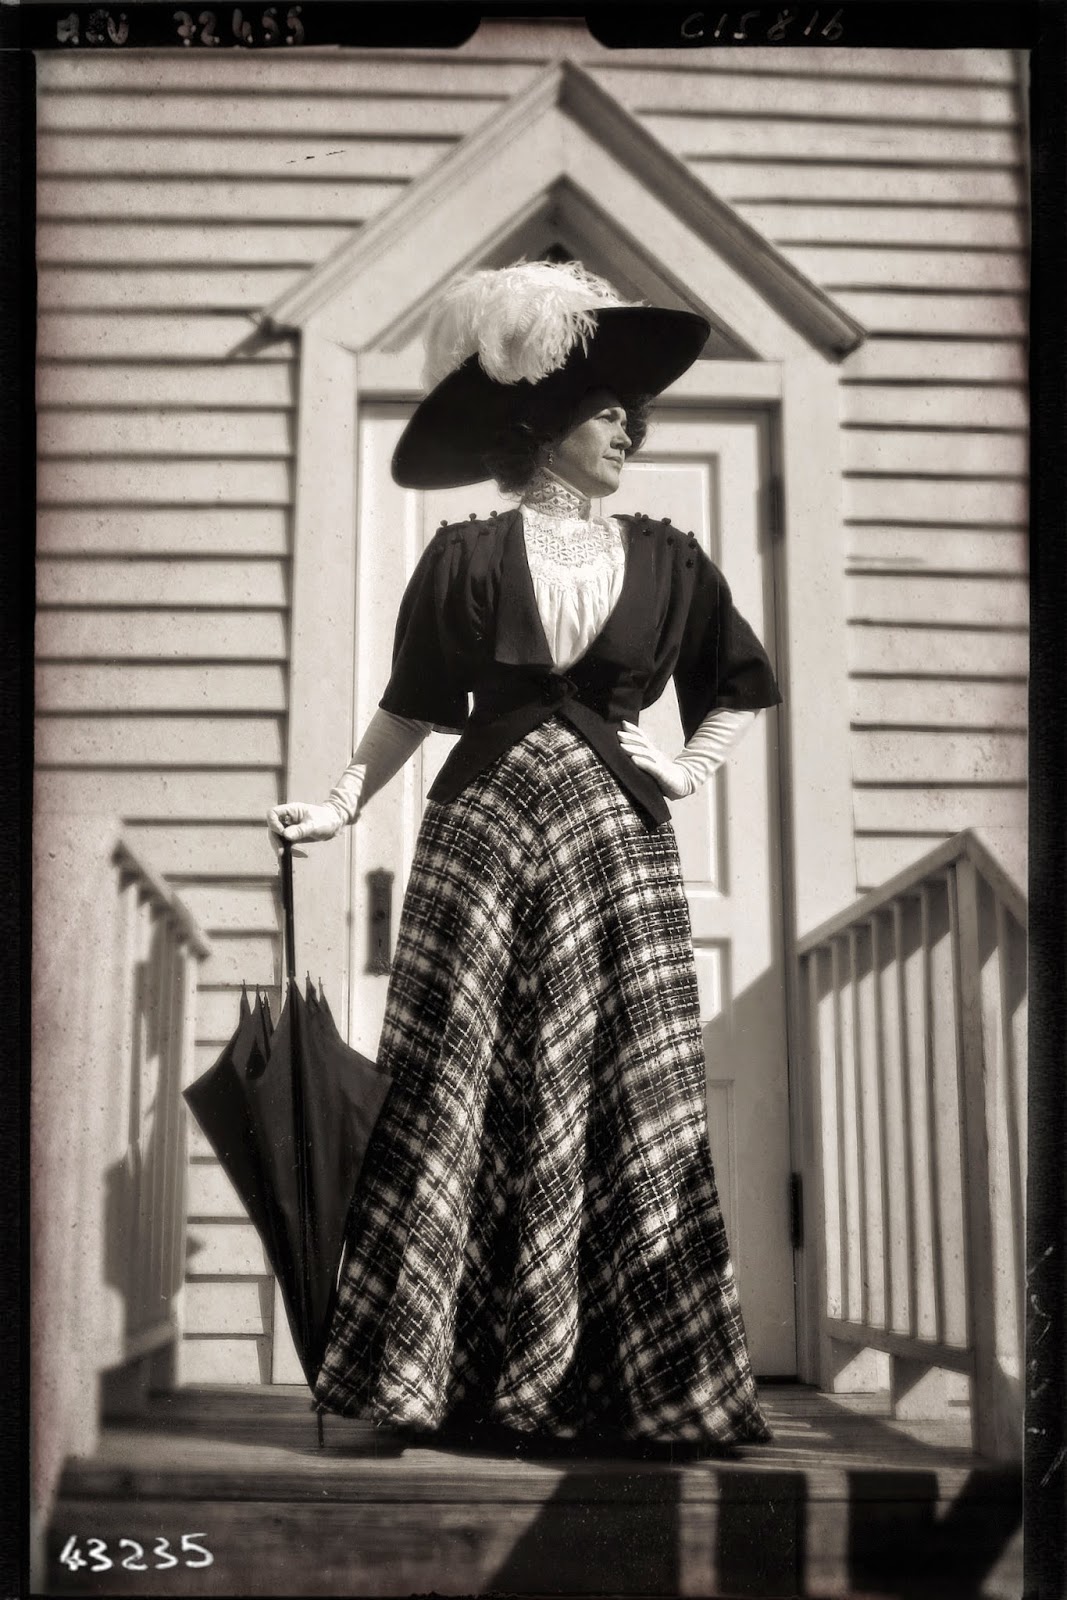
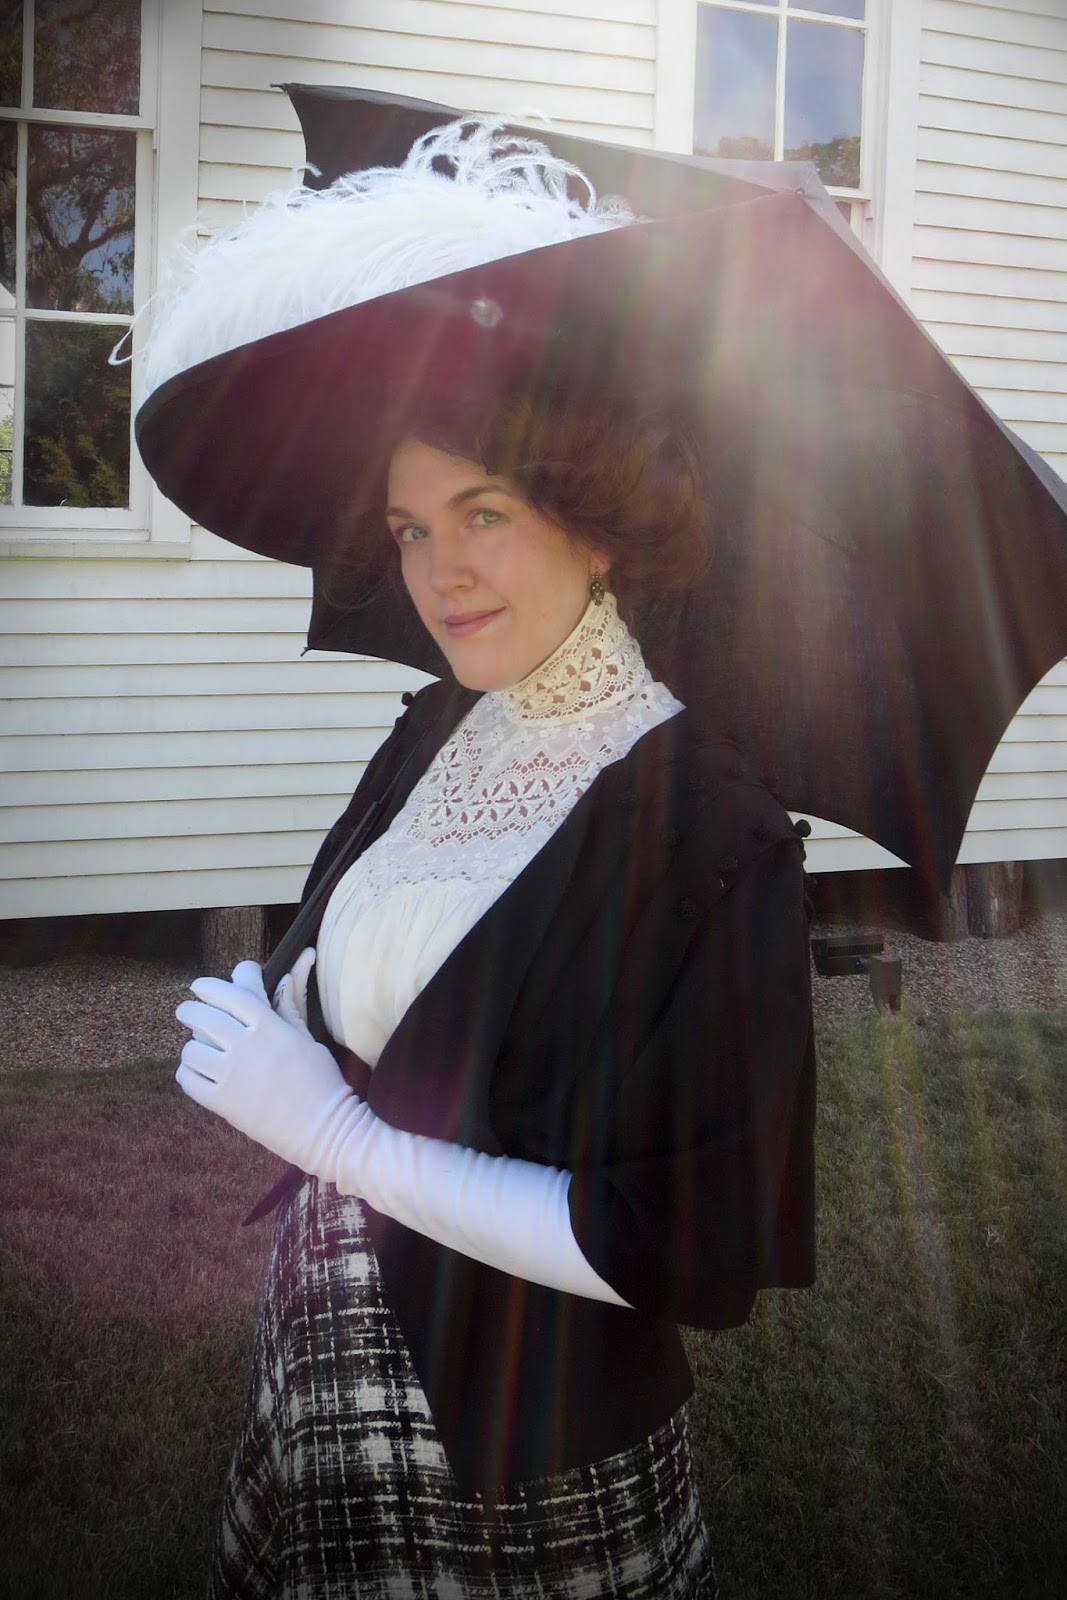
So at this point, it was finally a real hat, although quite an awkward looking one without the decorations. But never fear, because hats like these are all about the feathers and flowers and fluff. In the photo series below, you can see the hat as it looked bare, then with a super-wide vintage moire ribbon tacked around it, and then in the final shot, you can see the finished look with 5 extra long ostrich tacked across the front. Much better!


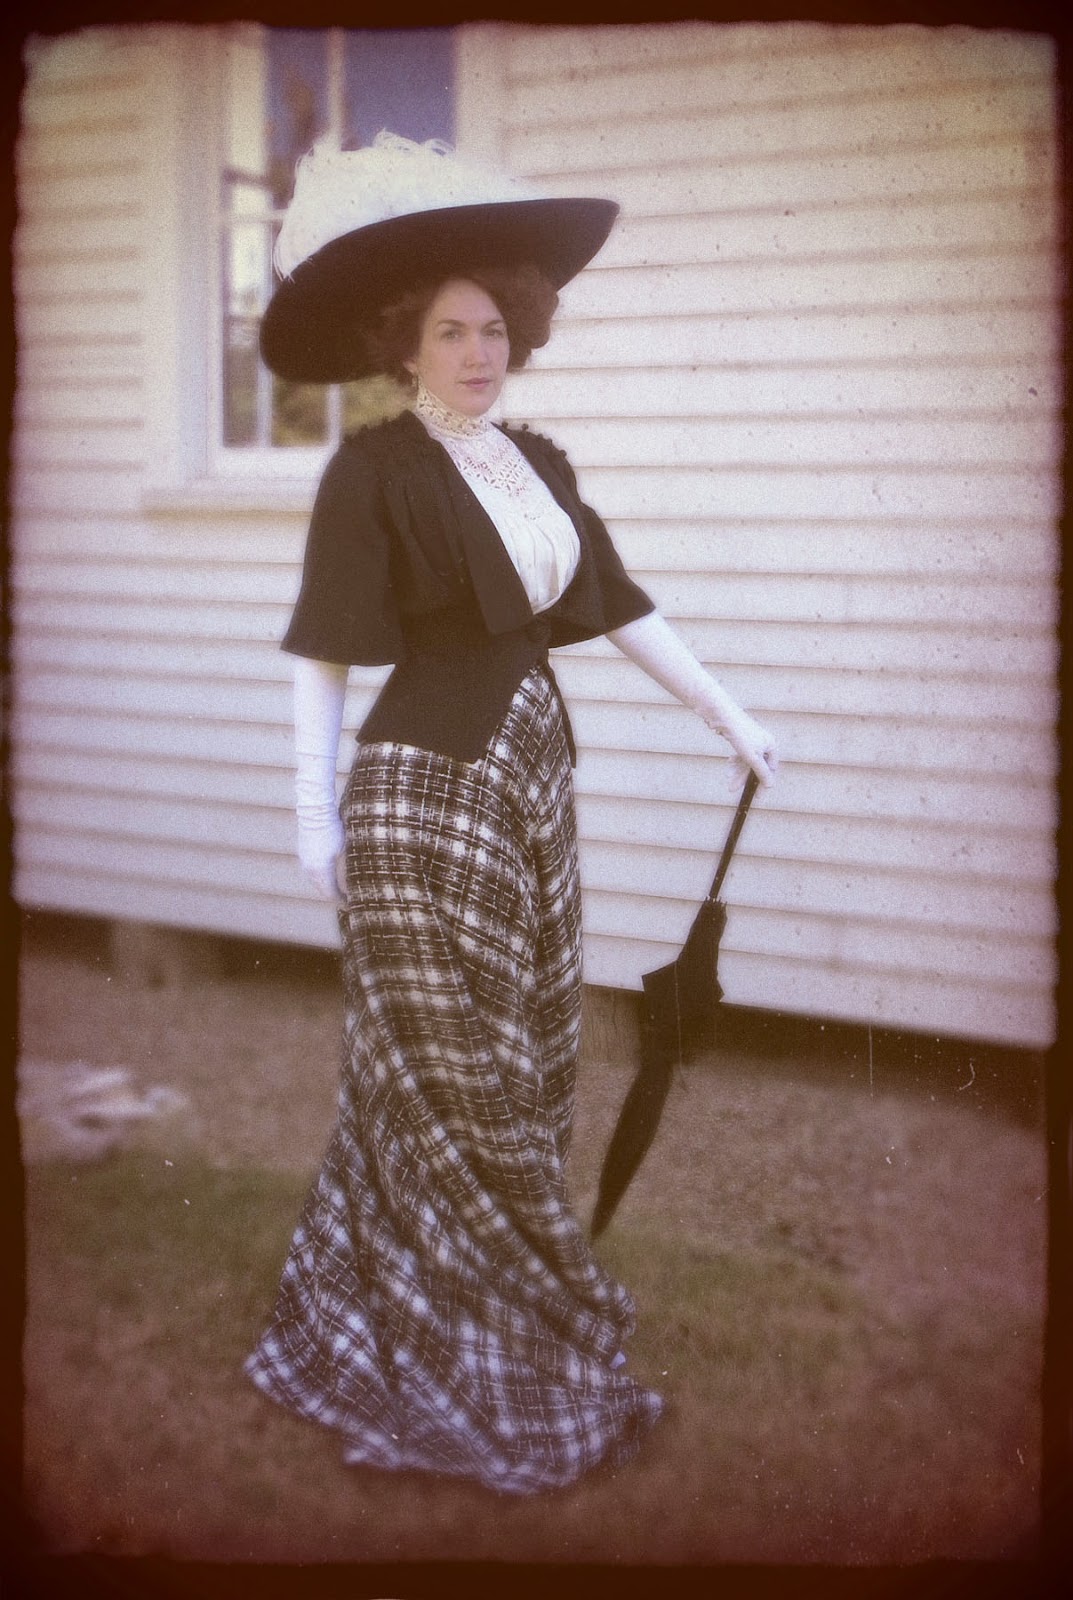
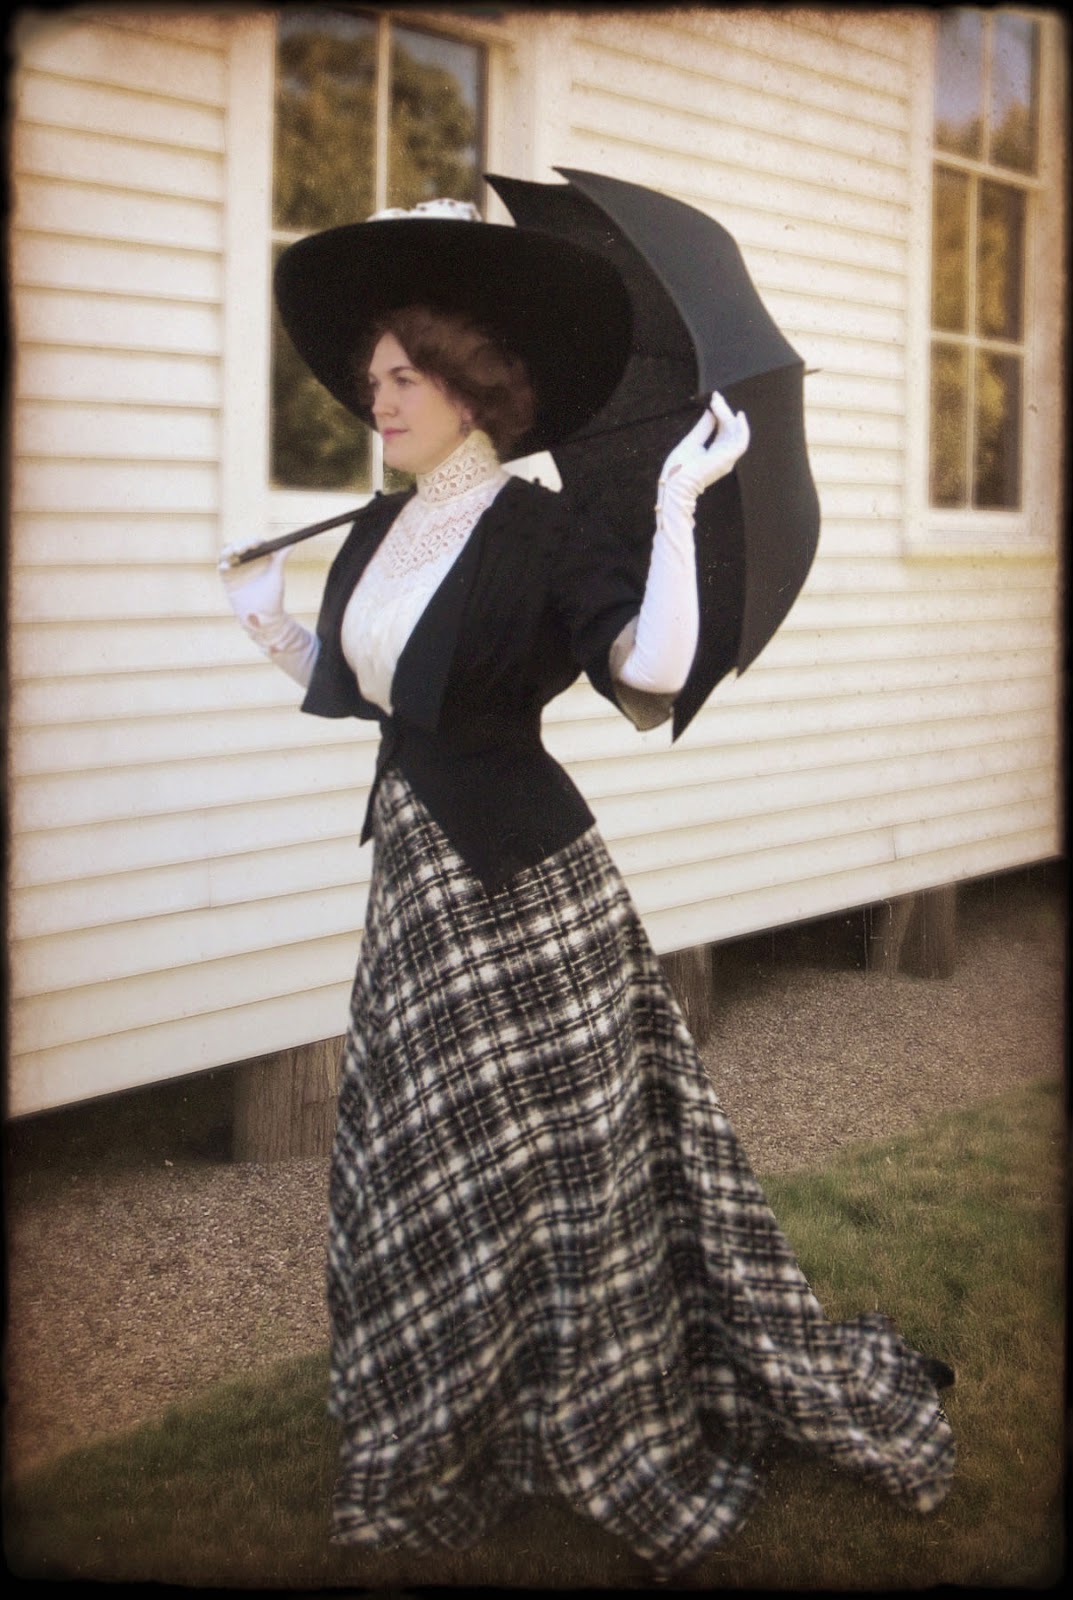
The last secret to making a Merry Widow hat look authentic is creating a large enough "Gibson girl" hairstyle to support a monster-sized hat. I taught a class on Edwardian hairstyles a few years ago, so I already had a variety of rats and hairpieces that I could use, plus a collections of images on Pinterest to give me inspiration. My hair is just past shoulder length right now, so I wore a long wavy wig to give me some more length to work with. I used the Stephanie wig by Wig America, and I hid the edges by combing some of my own hair over it.

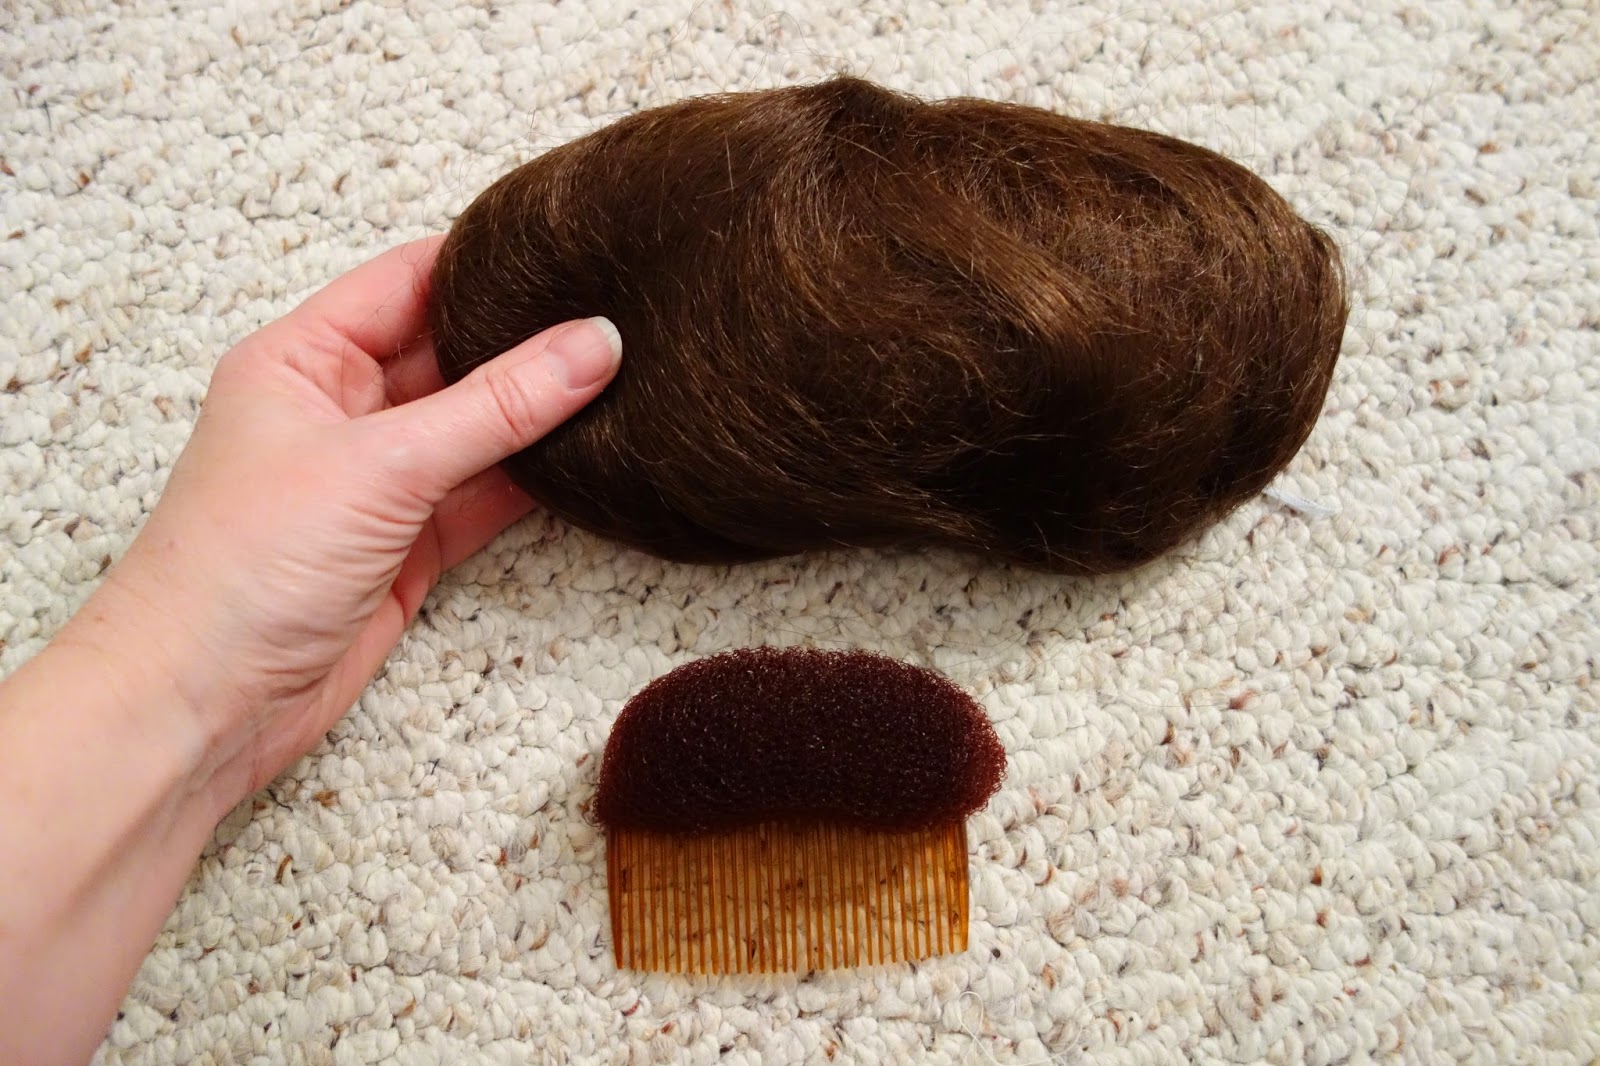
The poofy sections along the front and sides of my head are made by combing the wig hair over a large rat on one side and a foam pad attached to a comb on the other. I made the rat by stuffing a stocking with wool, then I wrapped some lose braiding hair around it, then I covered it with a hair net to keep it tidy. On the back side of the rat, I have two toupee clips stitched to the stocking to hold it in place on my head. The smaller foam pad is something that I bought at a beauty supply store recently. It worked okay once I wadded some of the extra length of wig hair over it, but it was harder to secure, and I plan on replacing it with another home-made rat in the future.

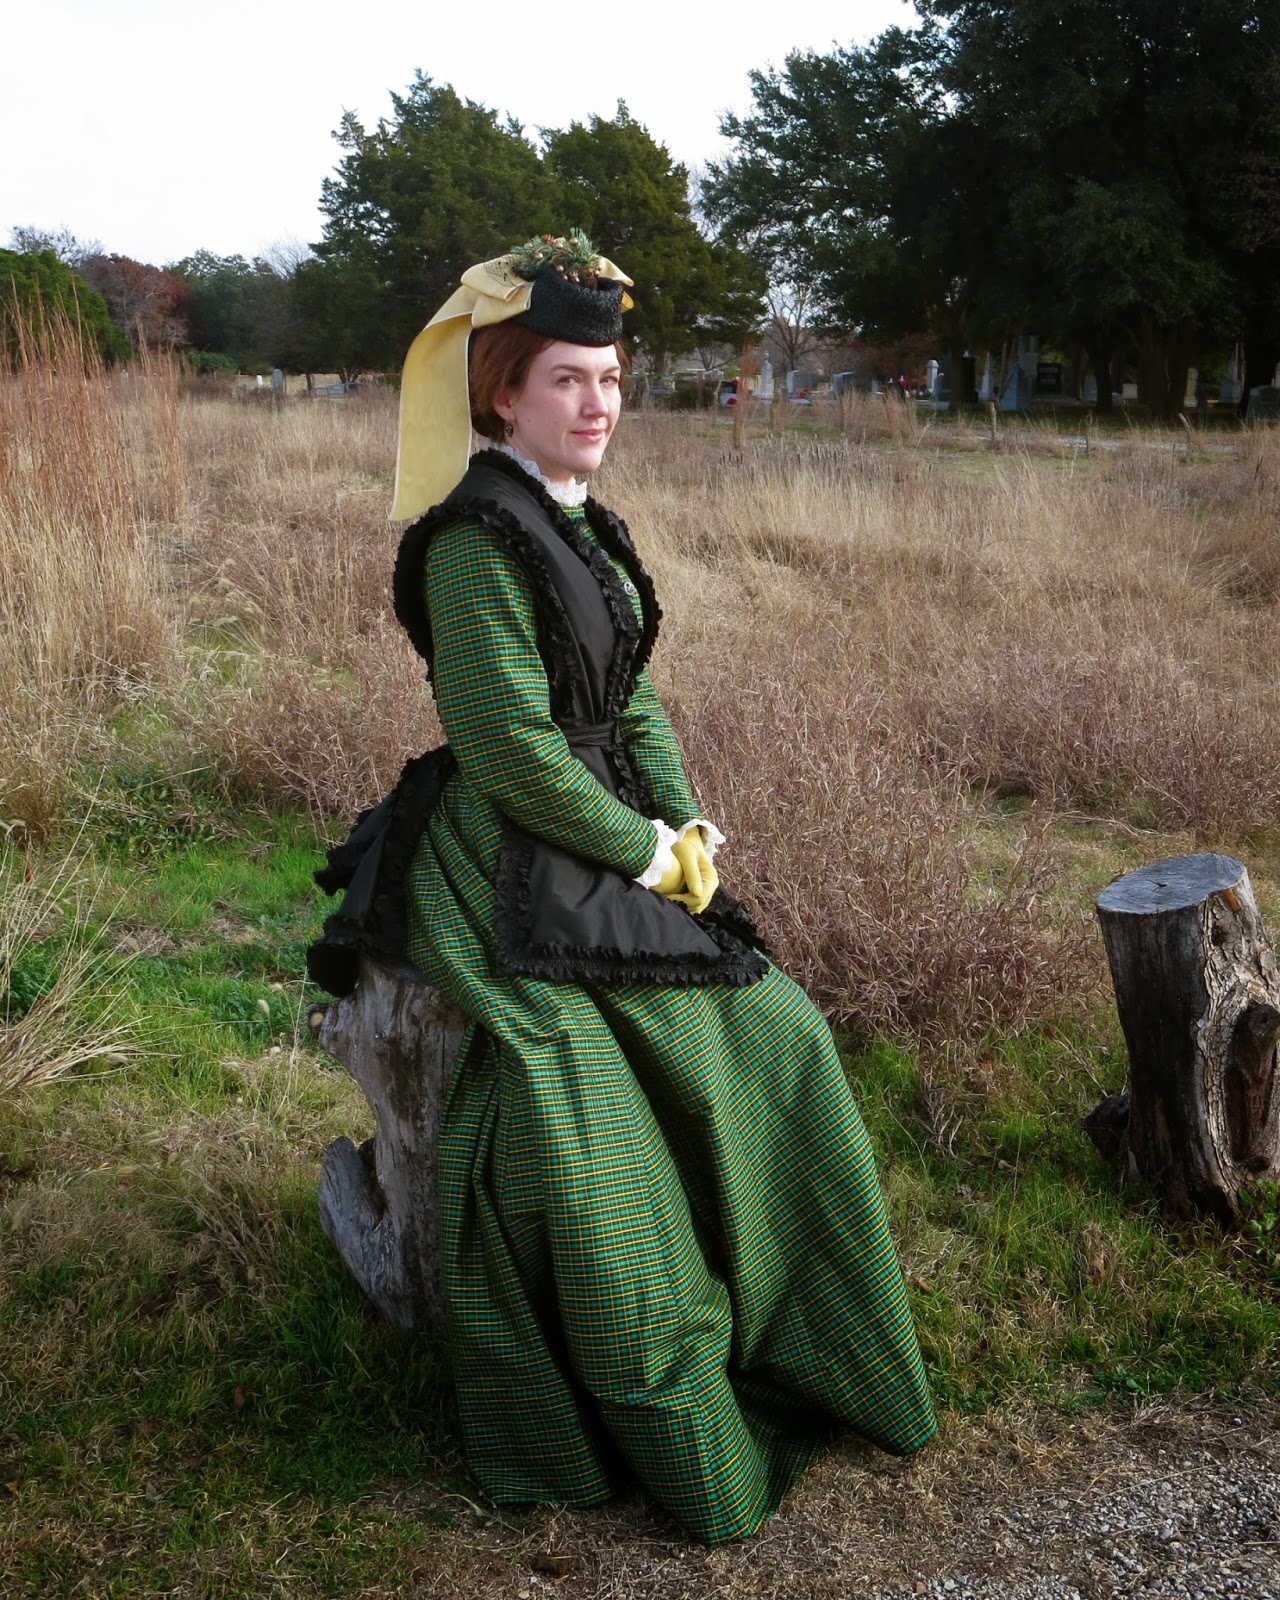
Although 1910's hair-styles concentrated the fullness at the back of the head, 
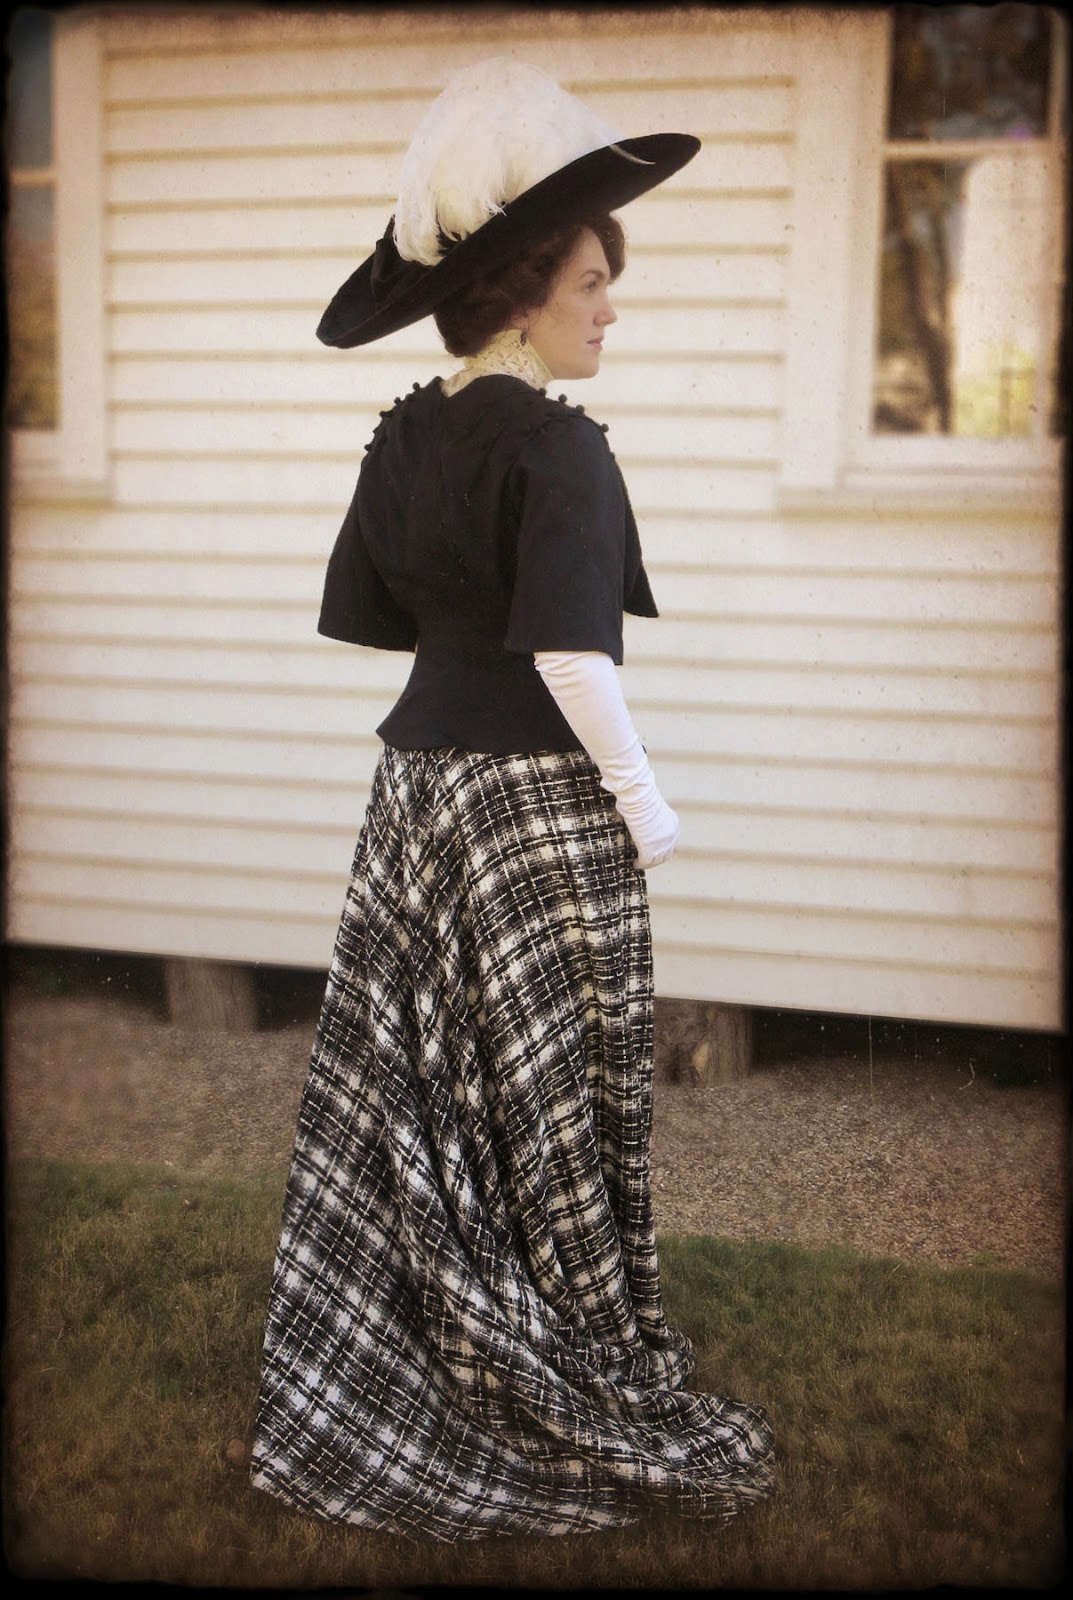
earlier Edwardian styles were more like a pompadour with the bulk of hair hanging over the forehead and fullness at the top and sides. To create a similar look, I did not pad the back of my hair at all, and I just twisted the back length up and pinned it into to loose curls at the crown of my head. I was in a rush on the day of the party, so my hair is a bit messier than I intended, and I could have done a better job of covering the rat and arranging the back, but it still worked out okay, and I'm sure I'll do better next time. The large size of these Gibson girl 'dos are a bit of an adjustment if you are not used to wearing big hair with your costumes, but you really do need this sort of bulk to fill out the bottom of the crown and support the wide expanse of brim.


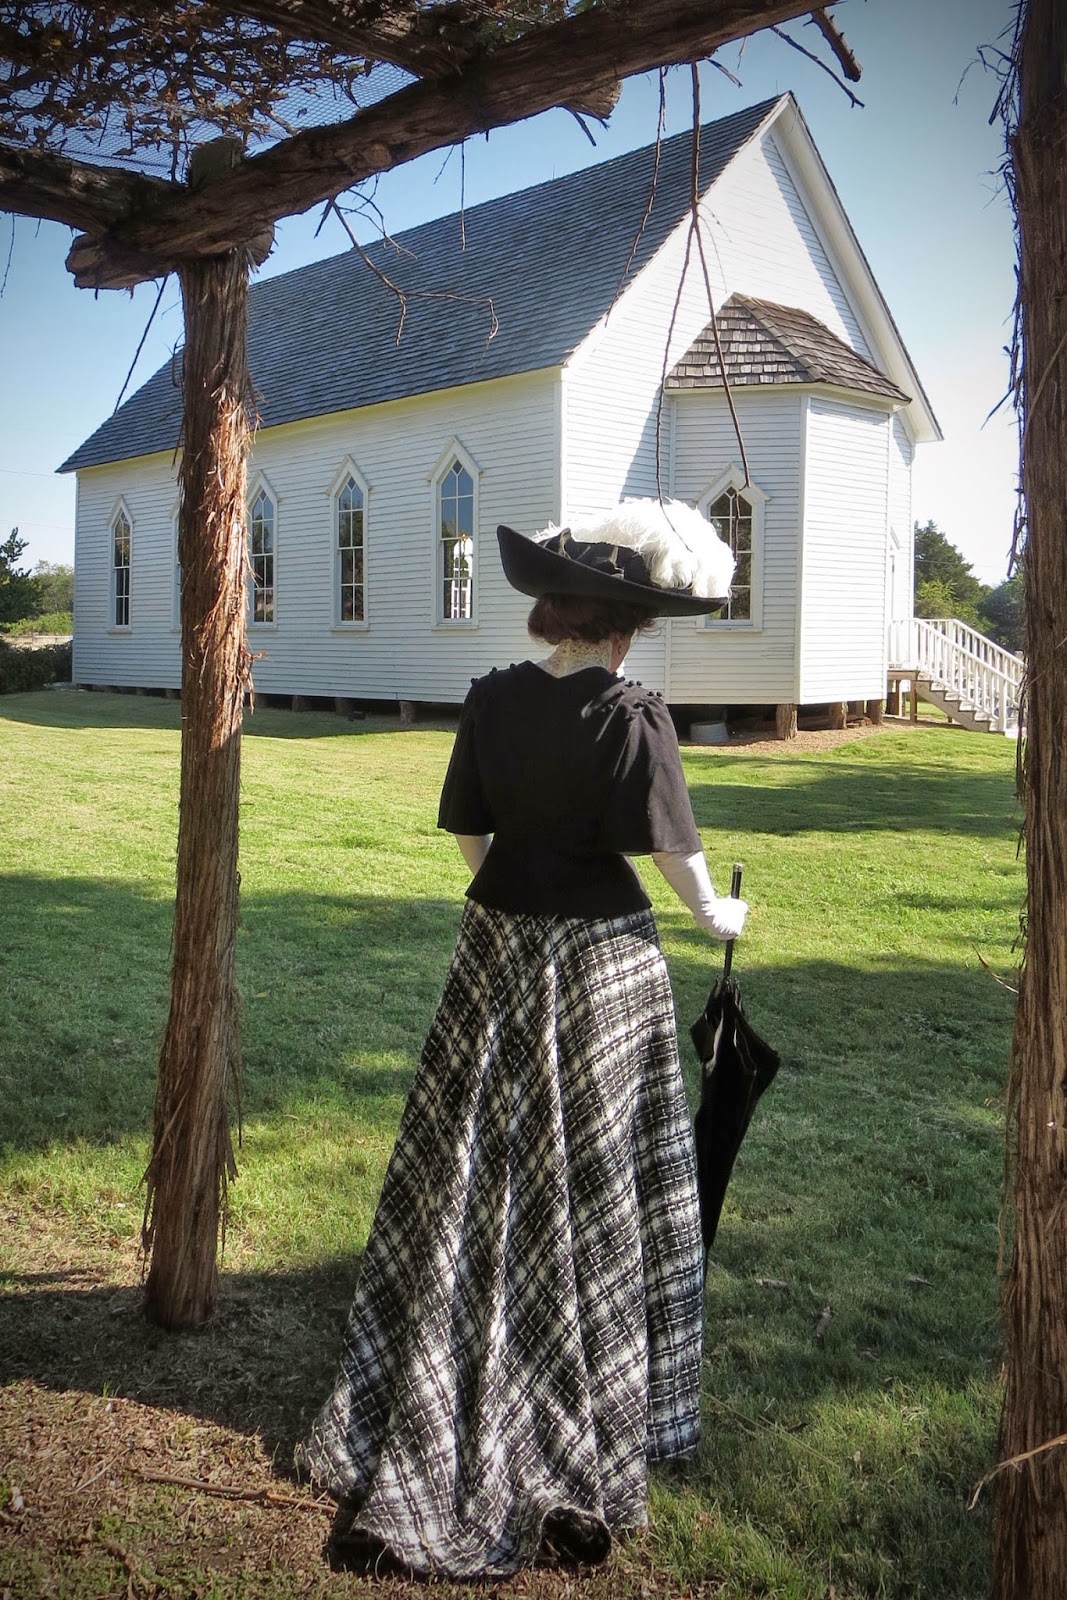
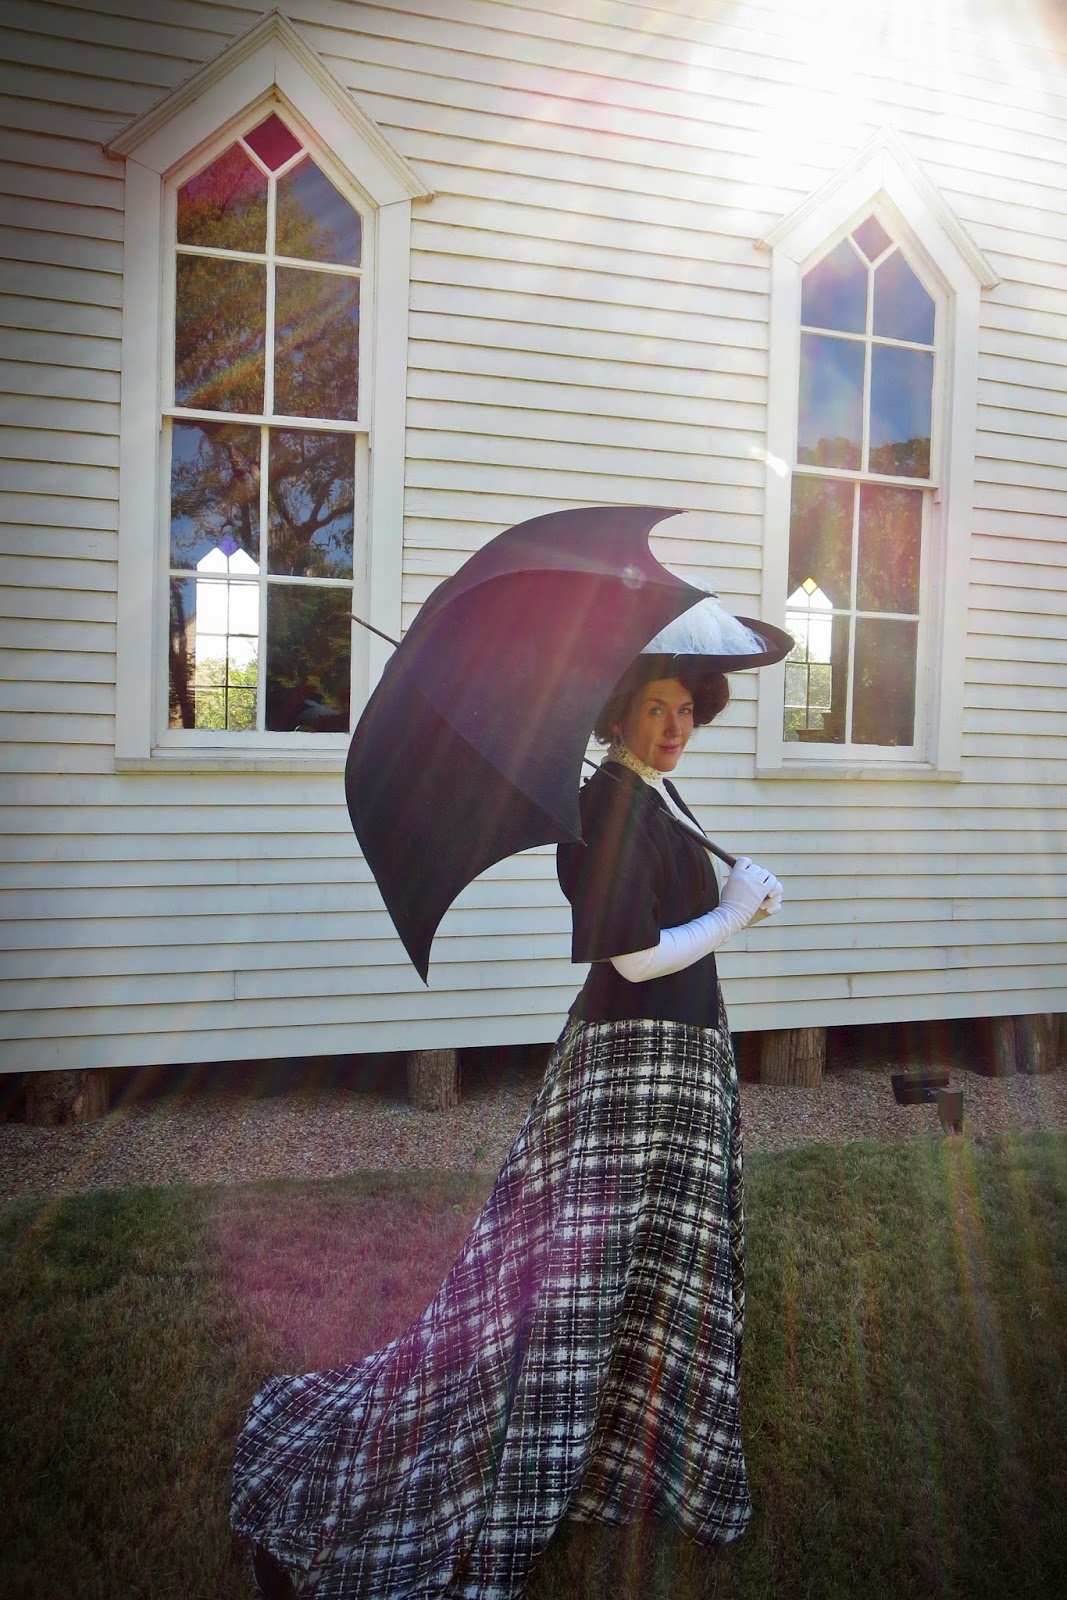
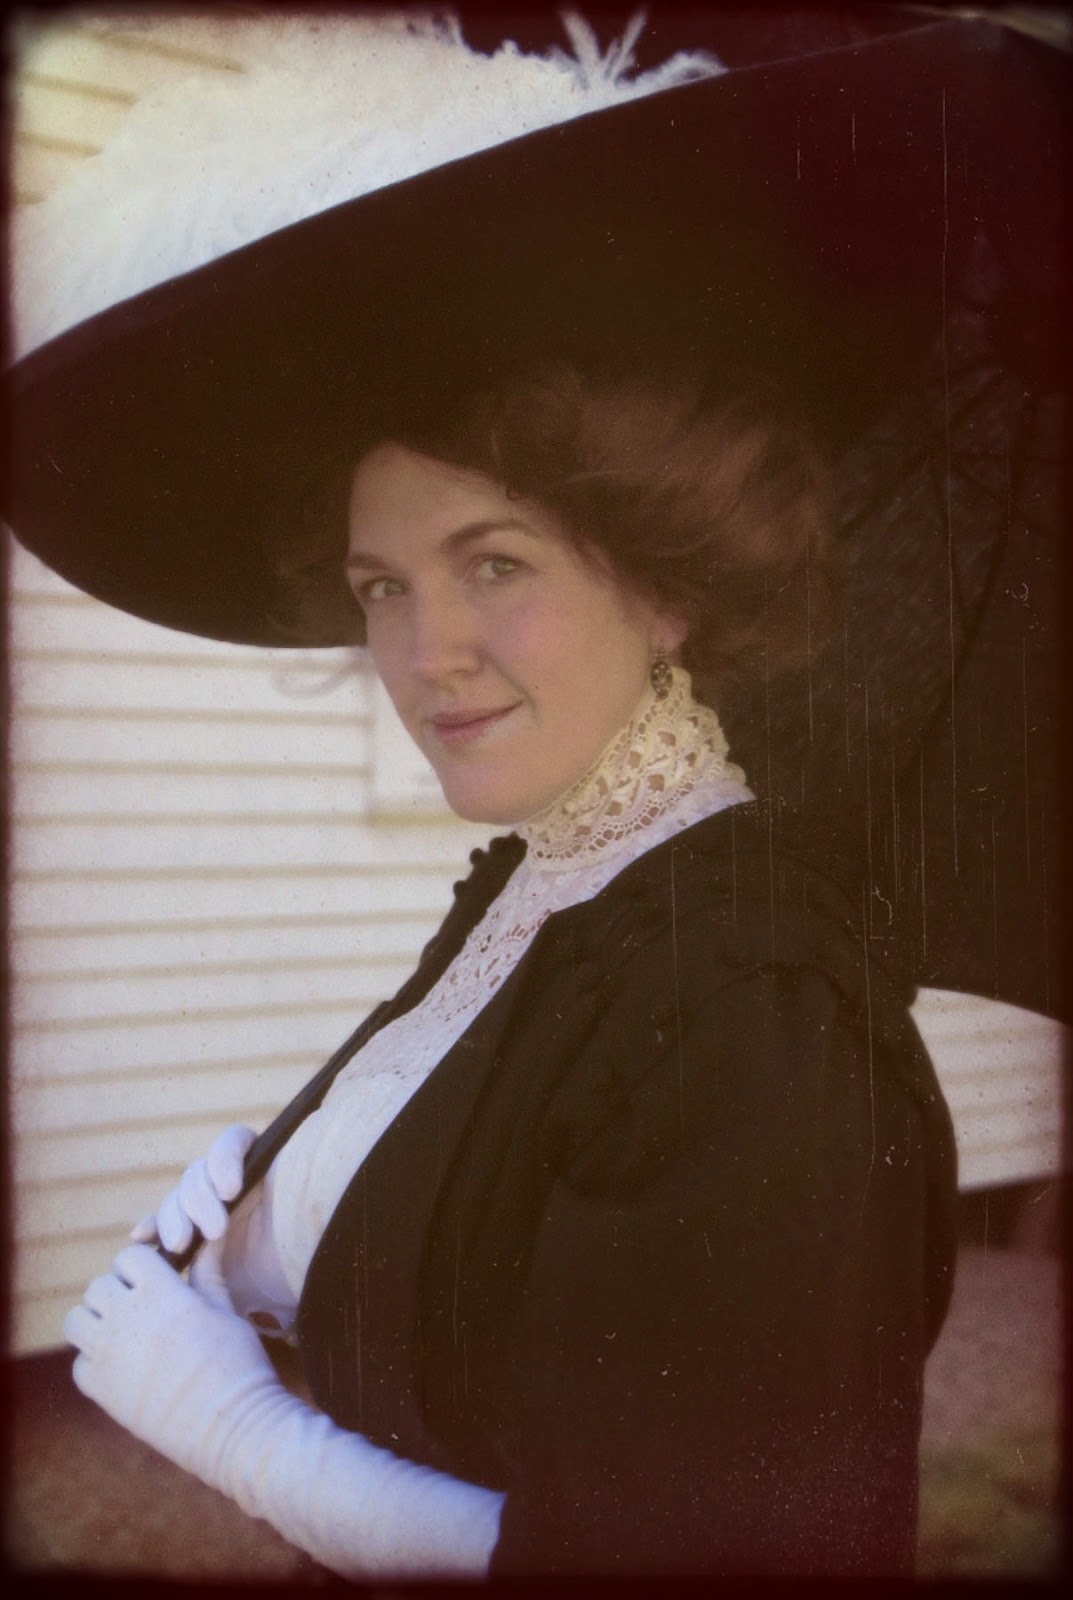
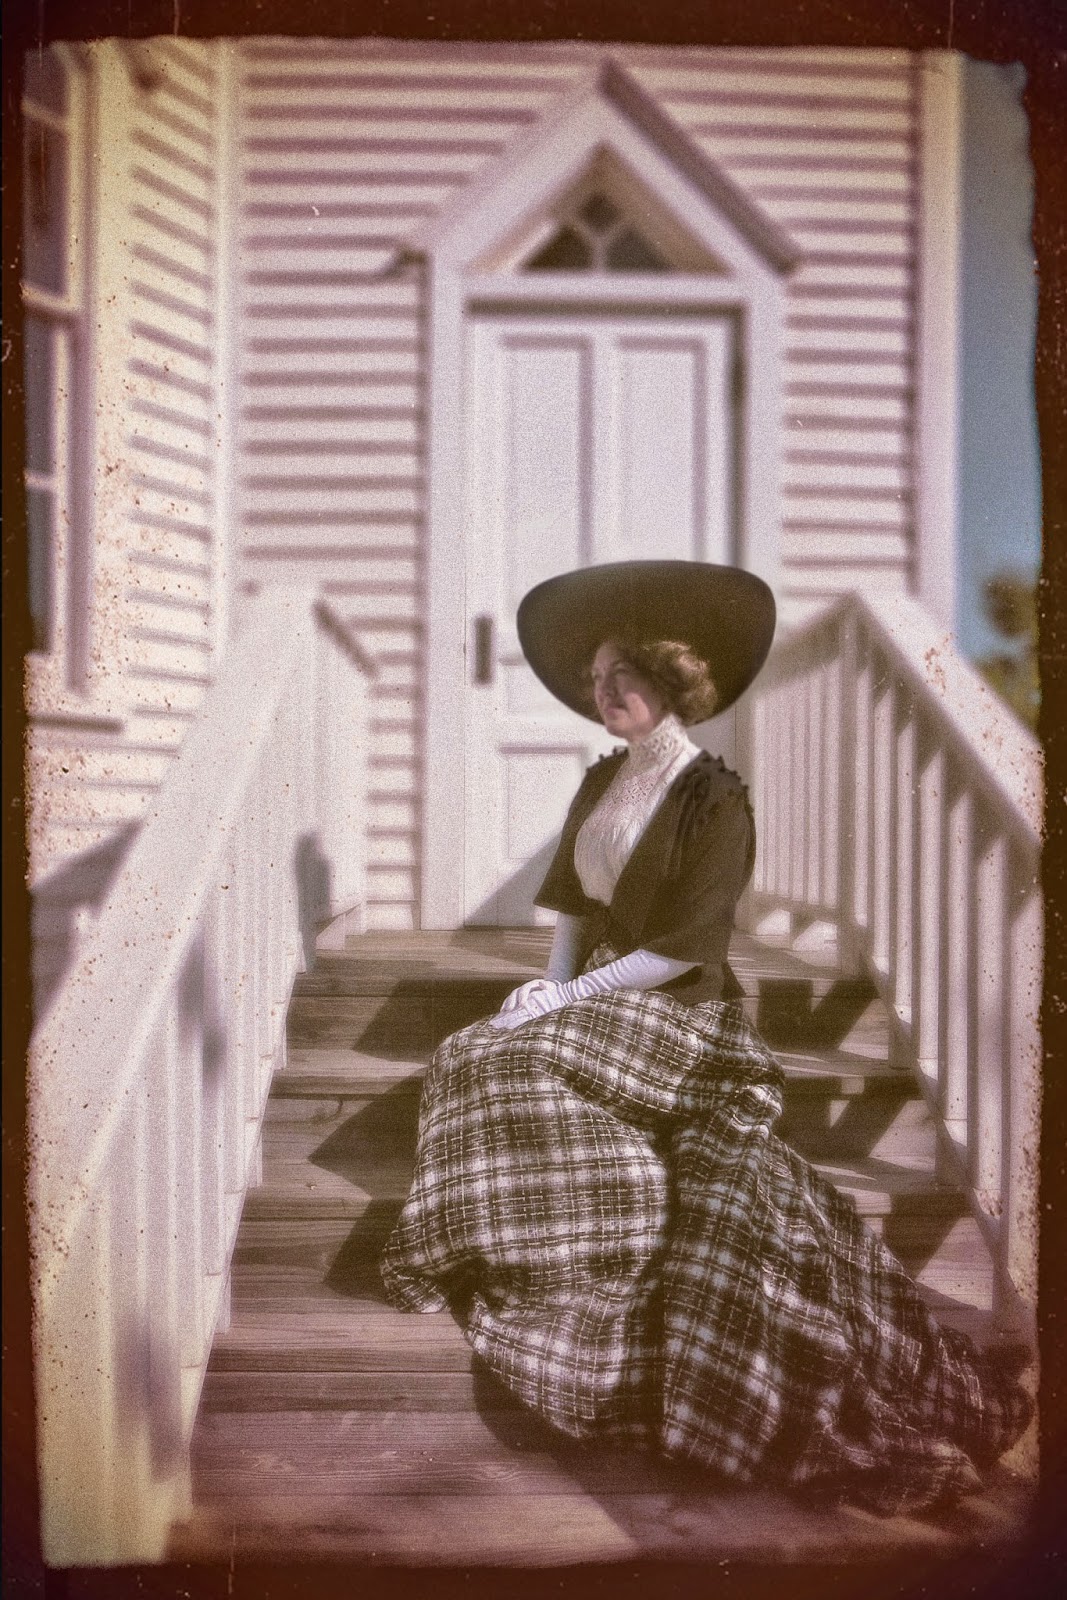
Be sure to check back later this week for more pictures of my new Merry Widow hat and the final reveal of how the whole outfit looks together!

Tuesday, October 28, 2014

Edwardian jacket for half-mourning


For the next installment of my Edwardian half-mourning dress series, I thought I'd show you some of the construction details that went into my jacket. The jacket was the part of the inspiration fashion plate that really captured my imagination and made me want to recreate this outfit. I love the quirky transitional styles from the end of the Edwardian period, and this jacket has such a cool combination of crisp tailoring at the waist contrasted by soft volume at the bust. It definitely wasn't easy, and I can see some things now that I wish I had done differently, but was such a fun challenge and I learned a lot along the way.

To get started on this project, I searched through everything that I could think of to see if I could find a period pattern diagram for a garment with a similar shape. I couldn't believe my luck when I discovered that one of the La Mode Pratique magazines in my collection had a full sized tissue pattern for a blouse with a similar fitted bottom and blousy top. This pattern dated from 1914, so it was 6 years later than my Edwardian inspiration, but I loved that they are both from the same magazine, and if nothing else, it gave me a place to start. (BTW, I'm dying to make up a version of this 1914 blouse at some point in the future too!)


The next step was make a mock-up and then use draping techniques to alter the 1914 pattern into something that was closer to my goal. The Edwardian jacket has a different style of collar, pleating on the shoulders, a strange point up the center-back, and a bell-shaped sleeves instead of tapered ones, so the pattern ended up looking a LOT different by the time it was done. You can see my final pattern pieces laid out flat in the picture below. What a weird shape!


I made this jacket out of fairly lightweight wool, so I decided to interline the entire bottom section with hair canvas to give it more structure.  I attached the hair canvas to the wool with lots of rows of tiny prick stitches at first, and although you couldn't see them on the wool side, I ended up chickening out and removing a lot of them in the end because it caused some slight puckering when the jacket curved across the dip in my waist. I also pad stitched my lapels, which helped them roll a little better. You can see one finished lapel at the bottom of this picture with a strong roll line compared to the un-stitched collar in the background, which still lays flat. All of these tailoring techniques are covered in Gertie's Lady Grey Sew-Along, which is a wonderful place to learn about tailoring techniques.


Once the hair canvas was attached, I assembled the bottom section of the jacket and whipped down the seam allowances. It was finally starting to look like something now, but still so odd!
For the top of the bodice, I made a fitted lining from checked cotton, then I pleated and gathered the wool shoulder pieces and basted them to the lining to keep everything stable. Then I top-stitched the bottom half of the jacket on top of the gathered section. Unfortunately, this is where my photo narrative fell apart. I was too frazzled and tired to remember to take pics on the night it finally all came together, so you'll just have to use your imagination for the last few steps. But I do have a pic of the inside of the finished jacket, which shows the fitted lining  and the inside facings that hide all the raw edges.  

The final step was to add 36 small cord buttons to the pleats on the shoulders, and one large button to the waist. After seeing some really cool antique cord buttons online, I decided to try making one myself.  I took a fabric covered button and wrapped it with soutache with a simple basket-weave pattern in the middle.  It was was a quick and easy project compared to the more complicated Dorset and death's head buttons that I've made in the past, but the techniques are all very similar. I also covered the bound buttonhole with some more soutache just to give it a little extra embellishment. You don't notice it very much in all that sea of black, but it still makes me happy that it's there.  


Here are a few more very over-exposed shots so you can see the details of the jacket, and check back later this week for info about my Merry Widow Hat of Awesomeness(!!!) and some pictures of all the pieces together for the final look.