Tuesday, May 15, 2012

1890's cycling costume

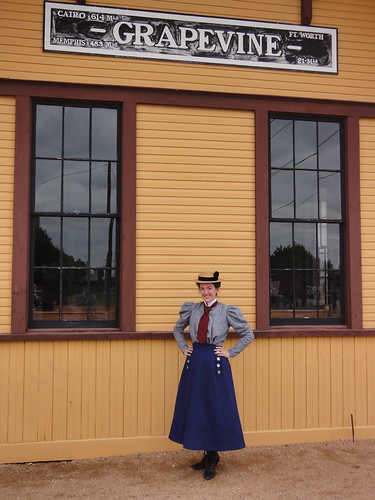
This past weekend was Frontier Forts Days at the Ft. Worth Stockyards, so a group from the DFWCG took a train ride on the vintage railroad and then attended the event at the Stockyards in our best Victorian duds.  It was a truly delightful outing, and you can read more about our day on our guild blog.

DSC09684

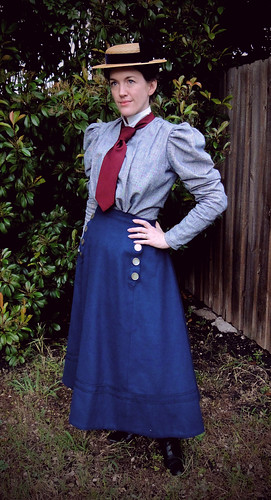
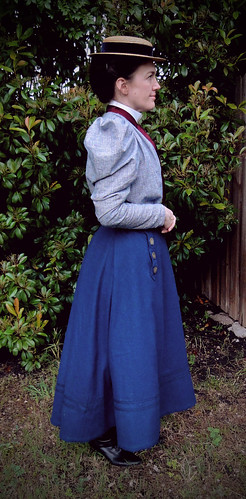
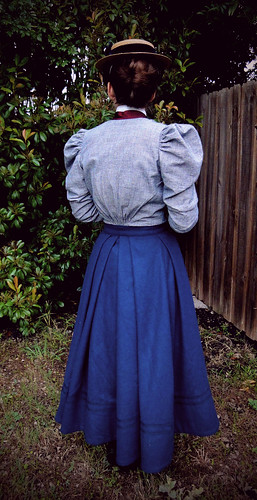
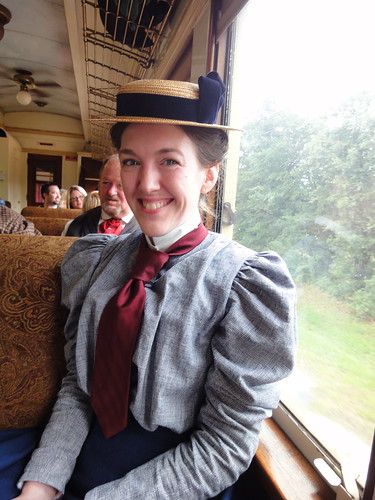
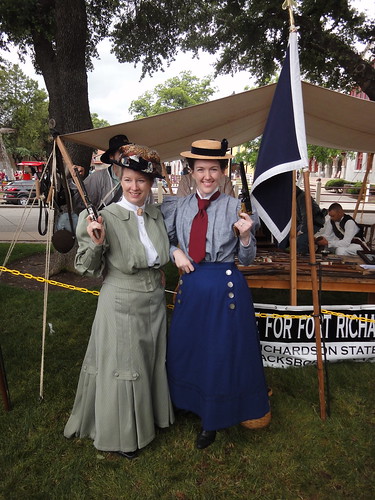
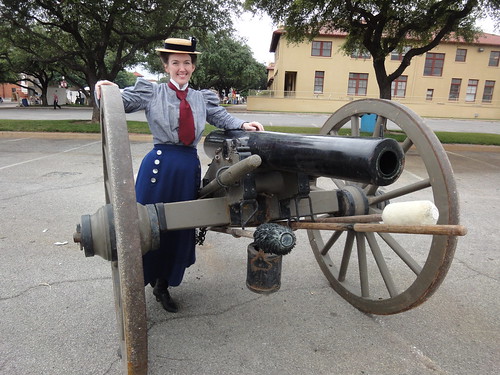
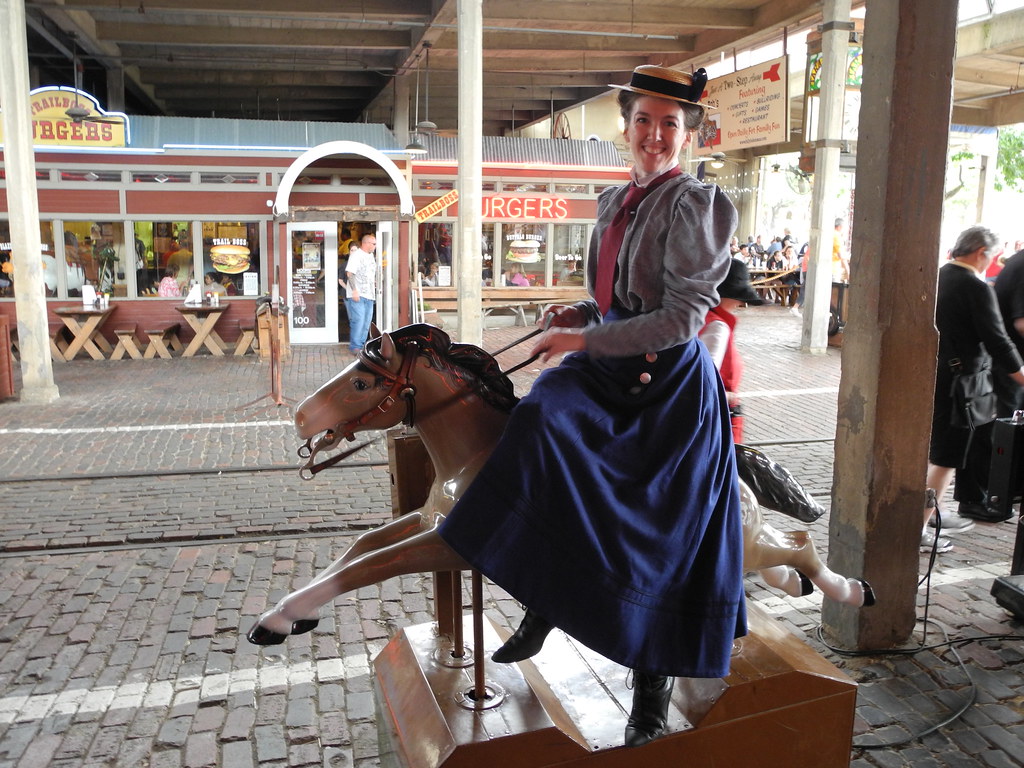
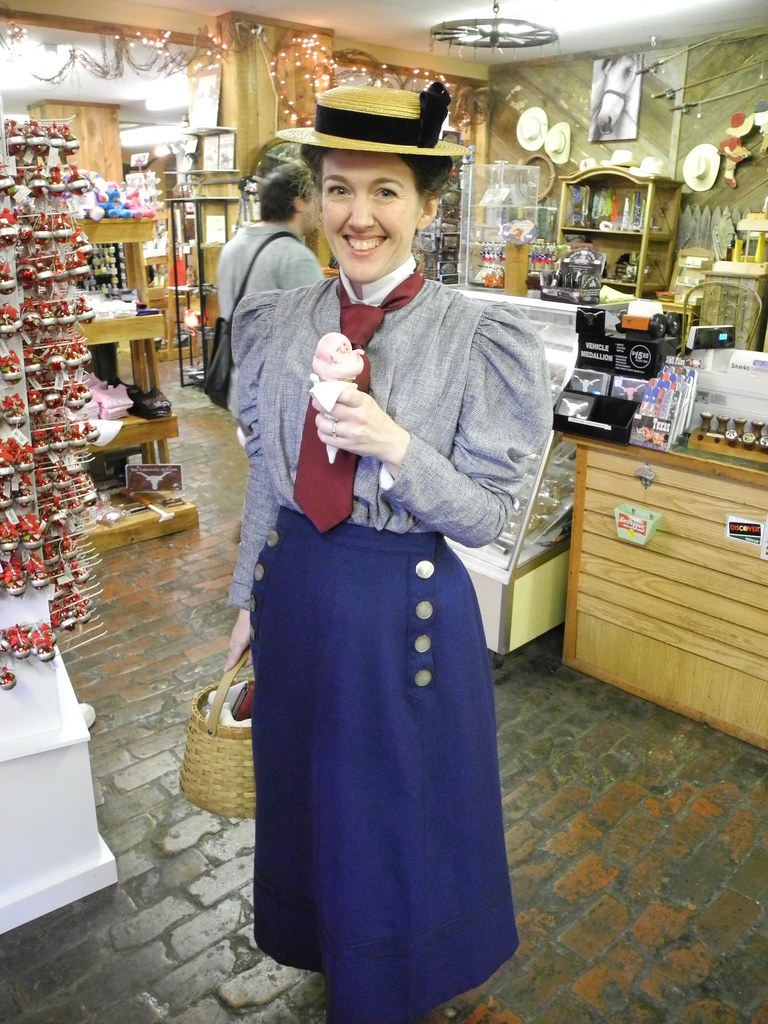
I finally finished my cycling outfit that I've been angsting over since January.  Jeesh!  It really doesn't look that hard, does it?  But the silly thing gave me fits to make - it was one of those projects where nothing goes right.  But with that being said, I LOVE the way it turned out, and I had more fun wearing this outfit than anything that I've made in a long time.  I felt so liberated and progressive in my short skirt and dapper hat and tie - I can totally see why women of the 1890's were so crazy about cycling.

So here are a few of the nitty-gritty details about my outfit if you are curious:

DSC09710 DSC09707 DSC09712

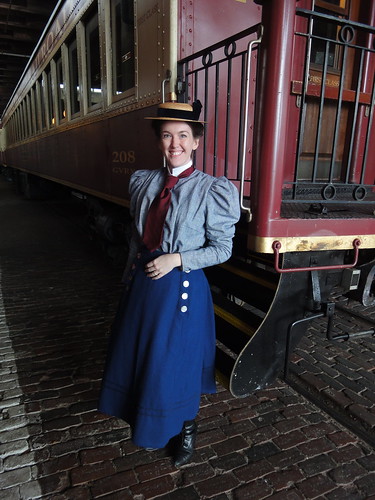
I based the design of my skirt on numerous photos on female cyclists in ankle-lenght skirts with button placket, like the one shown on the right (and check out my Pinterest board for many more).  I used the 1894 skirt pattern from page 99 of Authentic Victorian Fashion Patterns, and the only change I made to it was shortening the hem a little and pleating the back instead of gathering it.  The skirt is made of soft wool with a felted finish - somewhat like melton but much lighter.  I stiffened the hem with a wide facing of duck, and that did wonders for getting it to flare out in a 90's-style bell shape.  I used vintage shell buttons for the placket, and I had to hand sew all the buttonholes because my sewing machine rebelled and refused to sew though this much thick wool (and in the process, I decided that b*ttonh*les deserves to be a curseword!)
I based the design of my skirt on numerous photos on female cyclists in ankle-lenght skirts with button placket, like the one shown on the right (and check out my

DSC09515

My blouse was a hodge-podge of of patterns from Authentic Victorian Fashion Patterns and 59 Authentic Turn-of-the-Century Fashion Patterns, which are both by Kristina Harris.  The body of the blouse came from the fashion plate on page 99, but I used the wrinkled mutton leg sleeve pattern from another fashion plate and removed the gathering at the back of the neck.  It has a fitted lining in the body and sleeves, and all the gathered bits are tacked to the lining to keep it neat and tidy.  It was a real challenge to get this pattern to fit correctly, and I had to change the shape of the shoulder and neck seams quite a bit to get it to fit my freakishly square shoulders.  I also decided to remove some of the extra fabric from the body so it wouldn't be overly puffy.   The fabric is silk noil woven in a tiny navy and white houndstooth pattern, and it was probably a bit thicker than this pattern was intended for.  

The outfit was finished off with a vintage straw boater hat, and some 1990's lace-up granny boots.  I had meant to make spats, but I ran out of time and they didn't get done - but maybe I'll try again the next time I wear this outfit.  I actually wanted to wear a bow tie instead of a long tie, but there was some unfortunate gaping between my hooks in front, so thankfully, the long tie hid the ugly spots.  

I love taking silly pictures while dressed up in my costumes, and this outfit seemed to inspire even more silliness than usual.  Here are some of my favorites from the event.

DSC09531
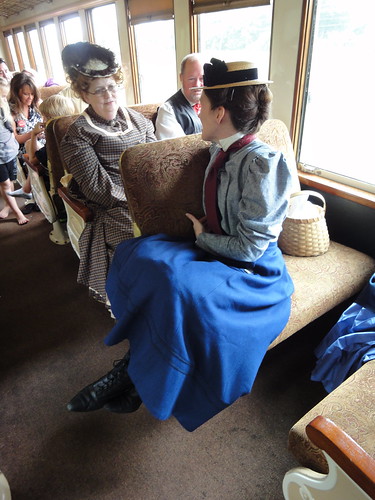
 Making myself comfy on the train.  Tisk, tisk - so un-ladylike!

  DSC09551 
Posing with the back of the train at the stockyards station.

DSCN0491 DSC09607 
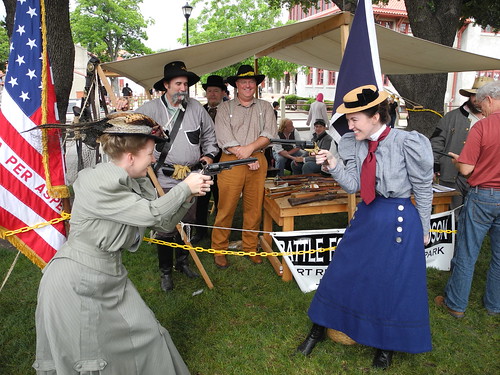
My friend Christy and I had way too much fun playing with the period guns.  

DSC09626
Time to move on to the BIG guns next!

Christy and I are quite the rabble-rousers!

I couldn't find a bicycle to ride, so this poor horse had to make do.

All this goofing around makes a gal hungry!

cycle
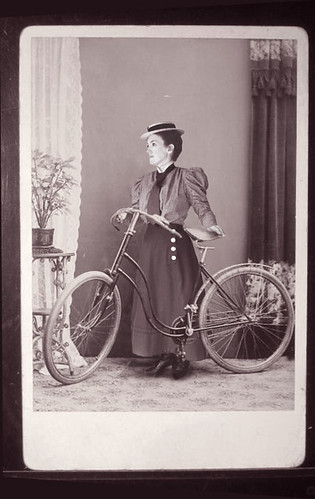
And last, but not least... I was DYING to take a picture with a bicycle, but I never could find one, so I decided to just photoshop myself into an old photo.  Eh... it's better than nothing.  :)


The rest of my photos can be found on my flickr album, and special thanks to Cynthia and Christopher for letting me use some of their photos as well.


Friday, April 6, 2012

steam-n-tea

DSC08990
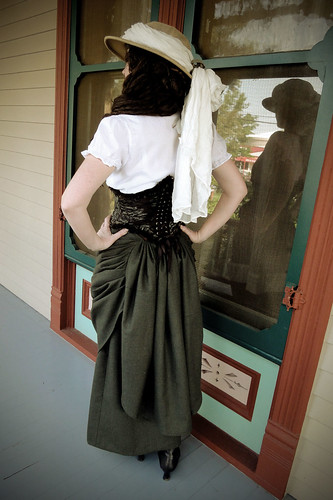
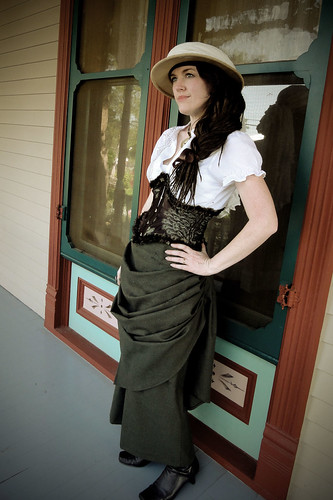
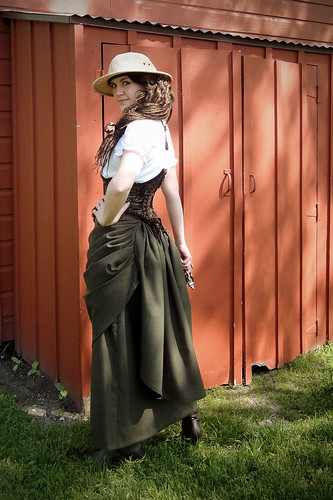
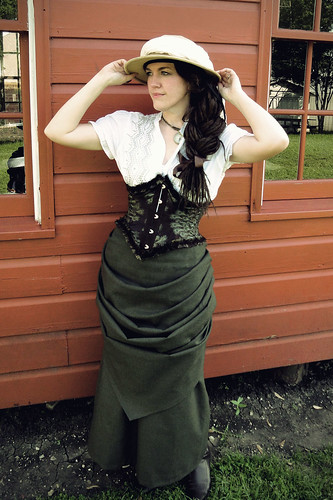
So last month I told you all that I was working on an 1890's cycling costume for our DFWCG Steampunk Tea Party.  Well... life got in the way, and that outfit didn't get finished in time, so I've put it on hold until our train ride outing in May.  I ended up digging though my closet and settling for a hodgepodge, thrown-together, last minute costume.  It's a very typical steampunk look, but it was fun and easy, and really, isn't that what steampunk is all about?

The whole outfit was really designed around my 1904 ribbon corset that I made 2 years ago, but I never got to wear because it was too small for me until recently.  I'm thrilled to finally find a use for it.  Next I dug out some olive green wool from my stash, and I whipped up a long straight skirt from a vintage 1930's pattern.  Then I draped a natural-form style overskirt from the small pieces of fabric remaining.  This skirt is a total hack job, and I didn't even bother to finish the waistband or add permanent closures since I was running so sort on time.  The blouse, scarf, and boots are staples in my modern wardrobe, and the hat and  hairpiece are from other costumes.  Easy peasey!  I actually like the way it all came together, and I had a blast at the tea party.  Our hostess really outdid herself with the beautiful table setting and food, and then we all went outside and shot our modded nerf weapons and water guns.  It was silly and fun and truly lovely afternoon.

Here are a few pictures of my costume, and more pictures from the event can be found on flickr if you'd like to see the rest of our steamy tea.

DSC09017
DSC09014

DSC08938DSC08980

Friday, March 30, 2012

the Joanie remodel

So like everybody else on We Sew Retro, I have been bitten by Mad Men fever this month. I didn't even realize that there was a sew-along going on for Mad Men dresses until this past week, but as soon as I caught on to what was going on, I decided that I had to join in on the fun too. So thank-you Julia Bobbin for the inspiration!

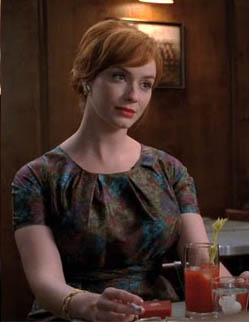
Instead of making a copy of a specific Mad Men dress, I was more inspired by specific fabrics.  One of the $15 estate sale dresses that I picked up a few weeks ago was this mid-century monstrosity.  Although the shape seems like something Betty might wear, the fabric reminded me of a dress that Joan wears in Season 4.  Both fabrics are a mottled mess of turquoise, olive, terracotta brown, and magenta.  It's so wrong, but oh so mid-century modern right!

In its original state, this dress was definitely wearing me more than I was wearing it.  And when I got it home and started looking at it in good light, I realized that all of the magenta and terracotta colored areas of the fabric had discolored to bright purple and blackish-brown on the bodice.  I'm not sure if that was from heat or perspiration or who knows what, but once I realized that, it drove me crazy and I couldn't look at anything else.  Then I discovered that the sewing thread was rotted and the whole dress was splitting at the seams as I was wearing it.  I started wondering why on earth I had bought this silly thing, so I decided that it was safe to put this dress out of its misery and reuse the undamaged skirt fabric for something new and improved. 

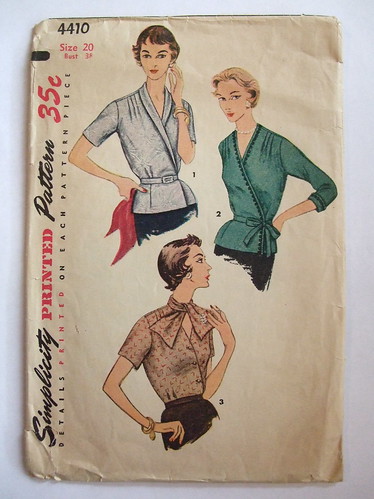
1953 - Simplicity 4410So the skirt of the original dress has now been reincarnated into a wrap blouse using this pattern from 1953.  Although the pattern dates from a decade earlier than the show, Joan wears a wrap blouse in Season 1 so I decided to go with it.  Plus it seemed like a very timeless blouse shape, so I might get away with wearing it in my modern wardrobe from time to time too.


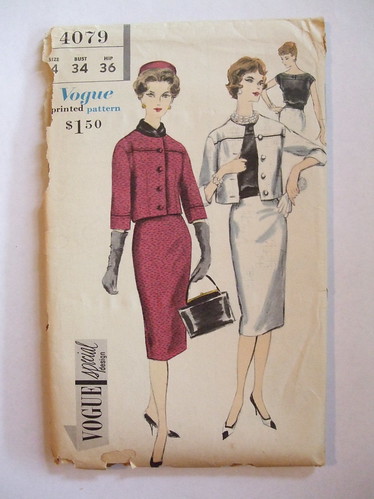
1959 - Vogue 4079The skirt is a very basic pencil skirt made with this Vogue pattern from 1959.  I used some vintage estate sale wool from my stash for the skirt, and I picked this fabric because this type of warm brown is a color that Joan wears often on the show, including in the scene with the wrap blouse.  Although it was a snap to put together, I had to re-sew it 3 times before I could get it tight enough, and I'm still not wearing it anywhere as tight as how Joan wears her clothes!  The skirt pattern also had gathers in the front which made the fabric pooch out in an unattractive way, so I sewed darts in the front where the gathers were.  I really love the way this skirt turned out, and I can't wait to make more blouses to wear with it.

So that's pretty much it!  It was a really fun little diversion, and once again I was amazed by how fast vintage dresses are to make after working on older historical costumes the majority of the time.  This stuff is quite addictive. 


Saturday, March 17, 2012

vintage shopping

DSC08614Two weeks ago, I ran down to a "going out of business" sale for a Dallas vintage clothing shop.  I could have spent days looking through all their clothes, but I only had an hour or so to spare, so I sped-shopped and came away with with 5 fabulous new vintage dresses... for $60 total!  Woohoo!

This weekend, there was a new Vintage Clothing and Jewelry Show that I was very interested in checking out, so I picked one of my new vintage dressed and headed out for more shopping.  There were a ton of amazing clothes there, but I didn't buy anything this time.  It seemed silly to buy even more dresses when I'm not even sure when I'll get a chance to wear the ones that I just bought.  But I still had a blast at the show and I saw a lot of other ladies wearing fabulous vintage attire, which was a lot of fun.  I'm going to cross my fingers and hope that it comes back again next year!

 And I really enjoyed wearing my new dress. I think it has a very classic shape that doesn't look too terribly "costumey", so I think that this dress this will get a good bit of regular use in my modern wardrobe.  I don't wear dressy outfits very often, but when I do, I LOVE wearing vintage!

DSC08616


DSC08602


DSC08622

Wednesday, March 7, 2012

shews

Okay... I'll admit it. I'm a sucker for a giveaway, and I think I would die of bliss if I won a pair of the new American Duchess shoes... so here I am blogging about it so I can enter the contest.  I plan on buying the ivory version of this shoe when it is released at a later date, but I sure wouldn't mind a pair of the red ones too just for fun.
*le sigh*

Sunday, February 19, 2012

Winter of the White Dress

DSC08179

This weekend was the Antique Elegance Show, and I ended up wearing my white 1790's round gown for the 3rd time in 4 months.  I think that's a new record for me since I usually hate to repeat costumes.  But each time I've worn it in a slightly different way, which is one of the most wonderful things about Regency dresses - they are so versatile!


This time, I wore the dress alone with just a silk sash wrapped around my waist and shoulders in a way that is similar to these illustrations.  I've read that this revolutionary fad was known as croisures à la victime, making a symbolic "x-marks the spot" on a woman's back.

 I'm not sure if this is true or just a fashion myth, but here's an interesting webpage about it.

I also wore my new-and-improved paisley shawl.  After I wore it last month, I decided to buy a second shawl that was the same as the first and sew them together to make one super-long shawl, which is much more appropriate for this era. I'm so much happier with it now, and it might be my new favorite accessory ever.  I also wore my turban from the first wearing of this dress, but I left off the wheat spray so I wouldn't be as likely to knock things over with my crazy headwear in the booths while shopping.

I didn't buy very much this time at the show, but I had fun hanging out with some friends, lusting over the gorgeous fur muffs and seeing all the antique dresses. And as always, it was wonderful to have an excuse to dress up.  Here are a few more pictures of my dress just for the heck of it.

DSC08185


DSC08196

Saturday, February 11, 2012

DIY spats pattern


The 1890's cycling costume that I'm working on right now shows off a bit of leg, so I need to pay more attention to my footwear than normal.  I usually just wear a pair of black pumps and black stockings with my Victorian costumes, but I decided to make myself a pair or tall spats, also known as gaiters, for this costume.  I actually have a period pattern for knee-high gaiters taken from a Victorian fashion magazine, but I've discovered from previous attempts to make them that my ankles and feet are way too big to fit the pattern very well.  So instead of making a lot of alterations to that pattern, I thought it might be fun to show you haw to make your very own spats pattern.  These work great with steampunk and neo-Victorian outfits too if you are not into the historical costuming thing.
Step 1: Figure out what shoes you are going to wear with you spats or gaiters.  Basic pumps with a high vamp work the best, but spats cover a world of shoe flaws, so you could make these to go with a lot of different styles.  Bonus points if you can find some pumps with spool heels.  Put on one shoe, then find a sacrificial pair of stockings and cut it off at the thigh.  Put the stocking on OVER your shoe.


Step 2: Get some duct tape and start wrapping it around your leg.  Start at the ankle first, then work your way up.  DO NOT pull the tape too tight so that it squeezes the flesh in your leg.  You just want it to be snug and fit smoothly - not reshape anything.  I prefer to use smaller cuts of tape that don't even reach all the way around my leg because there is less wrinkling that way.  Since most of your leg is shaped like a cone vs. a tube, it helps to angle your tape diagonally instead of trying to wrap it in perfectly horizontal rings.  Switch directions with the tape and layer the pieces until you cover the entire surface of your calf (or however high you want your spats/gaiters to go).

Step 3: Next, you will start covering the foot with tape, but leave the ankle alone for now.  Start by creating an anchoring strip that wraps around the entire foot at the instep. This keeps the stocking from shifting around on your foot while you work.  Continue covering the top and sides of the foot with smaller pieces of tape going whichever direction will give you the flattest surface.  You don't need a ton of layers, but try to make sure that your foot is covered with 2 layers in most areas to make sure the tape doesn't stretch or slide.  You don't have to worry about covering the toes or the sole since these areas are not included in the spats.


Step 4:  Start filling in the area between the ankle and the leg.  Try to use an X pattern with the tape to cover the larger spaces, then fill in the gaps with smaller cuts of tape.  Don't be afraid to cut narrower strips if that helps - especially for the front or back of the ankle where the curve of the foot is the most extreme.   Make sure you are standing or at least have your leg at a right angle to the floor for this step or else your finished spats won't fit right.  Once you get the ankle covered, try not to walk around anymore since it will cause wrinkling in the tape if you bend your foot too much, and that makes it more difficult to trace an accurate pattern.


Step 5:  The heel is one of the trickiest parts to cover since it is so round.  I wrapped a single piece of tape around the back then snipped the tape every inch or so and overlapped the cut edges to make it lay flat over the curve.   You could also cut narrower pieces of tape to cover the heel since the smaller the tape is, the less it will wrinkle.  It doesn't have to be PERFECTLY flat, but you just don't want large wrinkles or places where the tape gapes away from your foot.


Step 6: You now have a fully wrapped leg. Hooray! Take a sharpie and draw a line down the middle of your leg in the center-front and center-back. If you have somebody who can do this for you, it is a huge help. If you don't have anybody there, all you really need is the center-front line, and then you can draw in the rest once it is off your foot.


Step 7: With a pair of sharp scissors, cut the tape and stocking down the center front line. Once you get past your ankle, you should be able to slip the entire thing off, and then you can put you hand inside of the taped form so that you can better guide your scissors to make sure you don't cut your shoe. I also recommend marking the opening of your shoe on the tape before you cut it off so that you are sure that you spat or gaiter is big enough to cover the edges of your shoe. I couldn't feel the edge of my shoe through the tape while it was one me, so I had to wait until I could remove my foot and then I could feel the edge and trace it.

If you didn't do this while the form was still on your body, draw a line down the outside of the leg for the button opening. I started drawing this opening like Victorian button boots where the edge curves to the front of the foot, but then I looked up some pictures of tall spats, and I realized that this line should be straight and end between the heel and the buckle that holds the spat on your foot. I corrected this before I cut it out. You will also need to draw the shape that you want the bottom and top edges to be. Some period spats had a little dip where the strap that goes under your foot attaches, but others are smooth all the way around the bottom.

Step 8: Cut your tape pattern along the center back and side button lines and lay the pieces out on paper. The tape pieces will probably not lay completely flat, but smooth them out as much as you can and trace around the pieces. You will need to add an underlap on the side opening for the buttons, and a seam allowance to the center front and center back seams. If you are making your spats out of a fabric that frays, you will also need to add seam allowance to the top and bottom edges unless you are going to use some type of binding for the edges.

BTW, I ended up with a curve in my pattern when I cut the button opening line down the side of the leg.  I haven't noticed this shape in period spats - it is usually very straight.  I'm not sure if I am going to keep it curvy or try to straighten the edge out some more.

Step 9: Make a mockup and try on your gaiters or spats.  I made my mockup out of craft felt, but anything sturdy like thick denim or upholstery fabric would also work great.  Pin them closed on the side, then mark any areas that need adjustments.  On my gaiters, I had to take out some of the curve over the calf, and I also tweaked the shape of the flap over the foot a bit.  Transfer your adjustments back to the paper pattern, and if necessary, make a 2nd mockup to test your changes.


Congratulations!  You now have a custom pattern for Victorian or Edwardian spats!

Traditionally, spats and gaiters were made out of wool felt, leather, or canvas, but you could also make them out of other types of fabric.  And if you didn't want them to button up the sides, lacing or buckles would do the trick nicely as well.  At this point, I need to go buy some fabric and buttons, but then I hope to come back with Part 2 of this tutorial to tell you how to construct your fabulous footwear.

Wednesday, February 8, 2012

Cycling costume, take 2

So after letting the mid-1890's jacket sit in the naughty pile for a few weeks, I finally decided to put it on indefinite hold and focus on something easier for our upcoming Steampunk event.  This is an incredibly busy time of year for me, and while I think the jacket could still be amazing if done right, I don't think I have the time or patience for all that tailoring right now.

I'm still going to make an 1890's cycling costume though - but this time it will be a blouse and skirt.  Once again, I made a Pinterest board of inspiration pics to get me started.  There are some amazing outfits there, but I was most attracted to the look of a calf-length skirt and a plaid or striped blouse:


Source: oldbike.eu via Jennifer on Pinterest


Source: oldbike.eu via Jennifer on Pinterest


So now that I have a plan, the next step is to come up with a pattern.  I pulled out my two Kristina Harris books on 1890's patterns, and I found a blouse from 1894 that I liked.  I used my trusty apportioning scales from the Edwardian Modiste book to enlarge the pattern (technique previously blogged about here), and once again, it fit great with just a few tiny alterations.  But I wasn't crazy about the huge sleeves in this pattern, so I decided to exchange them with a different style.  Seven sleeves later, and I think we have a winner!   LOL!  But honestly, I was having a blast drawing up these patterns and testing them out, and I thought it would be useful for both me and others to see a variety of sleeve styles from these books in the flesh.  By the way, I'm abbreviating the book titles to AVFP for Authentic Victorian Fashion Patterns and 59ATCFP for for 59 Authentic Turn-of-the-Century Fashion Patterns.  So here are my options:

1. Small sleeve puff, 1893, AVFP p. 32
Before I started making these patterns, I thought this would be my favorite.  I still think the sleeve is cute, but it is smaller than I thought it would be, and I think it works better as a double puff like you see in the illustration.  The puff could easily be altered to be larger if I wanted to do that, but I think I would prefer to stick closely to the original patterns for this project.  In this picture, I'm wearing the puff part with a tight fitting sleeve lining that comes with a lot of the leg-o-mutton patterns.

2. Medium sleeve puff, 1893, AVFP p. 92
After seeing that the first puff was too small, I thought that this one would be a perfect fit, but I was pretty unhappy with the way it made up.  The sleeve puff seemed much more rounded in the illustration, and mine is annoyingly long and flat.  Again, I could add more width on my own, but I thought I'd try the next size up and see how I liked that.

3. LARGE sleeve puff, 1894, AVFP p. 99
OMG what a difference a year makes!  These Belle Epoque ladies were not messing around when it came to sleeves!  This is the pattern that I am using for my bodice, so I figured that I might as well try the larger sized puff while I was at it, but now I feel like I'm being eaten alive by my sleeve.  And this is a little limp too - imagine what it would be like with stuffing and that extra ruffle on top.  Madness! 

Unfortunately, there is no in-between size to bridge the gap between the too-small medium puff and the gargantuan large puff in these books.  There is one sleeve style with a double puff that might be less ostentatious, but I really didn't want a double puff for this particular outfit, so I didn't bother to make that one up.

4. Sleeve for a stout woman, 1893, 59ATCFP p. 79
So now that I exhausted my straight-from-the-pattern puff sleeve options, I decide to try some leg-o-mutton styles.  This one was disappointingly small compared to the illustration.  It was slightly wider that the sleeve lining that I had been using with the puff sleeves, but there wasn't a lot of fullness at the top.  It looked like a sleeve from the early 90's vs. the mid 90's, which probably makes sense since a lot of the stout patterns are intended for older women who are less likely to follow the latest trends.  And BTW, this sleeve pattern was designed for women with a 36" bust or larger, so their definition of "stout" should be taken with a grain of salt. 

5. Wrinkled muttonleg, 1893, 59ATCFP p. 66
The illustration for this one looked like a hot mess, but I was pleasantly surprised by the way that it turned out in the flesh.  The sleeve-head has obvious fullness without being ridiculously huge, and there is some gathering down the length of the arm which gives it some interesting horizontal wrinkles in addition to the fullness at the top.  I really liked this one, but while I was on a roll, I thought that I would try two more mutton styles to see how they compare.

6. Balloon sleeve, 1893, 59ATCFP p. 54
The illustration for this sleeve looked like it wasn't much bigger than the wrinkled muttonleg, but the real sleeve is actually quite large.  It is just as wide as the mutton leg sleeve shown below, but it's even taller so it drapes more.  This is a perfect example of how deceptive the fashion drawings can be.  I don't hate this one, but it is so floppy that I'm afraid that I'd be constantly fussing with all that extra fabric to get it to flop in an attractive manner.

7. Mutton leg sleeve, 1894, AVFP p. 57
I wasn't planning on making this one up since the illustration makes it look MASSIVE, but after I realized that it was smaller than the balloon sleeve, I thought I'd give it a try.  There's nothing wrong with this sleeve, and I think if I tightened up the forearm a little it would be pretty cute.  Even though I don't think I'll use it for my blouse, I'm glad I tried it.  I've never been a big fan of the huge 1890's sleeves, but this actually wasn't as bad as I thought it would be.  

So now after seeing my 7 options, I think I like #5, the wrinkled muttonleg, the best, which was totally a surprise for me.  But I think it strikes a nice balance between being too big and too small, and the unusual method of gathering gives it some nice visual interest.  And as a bonus, I think it looks very similar to the charming blouse seen in this illustration.  Now on to the real sewing!
Source: oldbike.eu via Jennifer on Pinterest