

 |
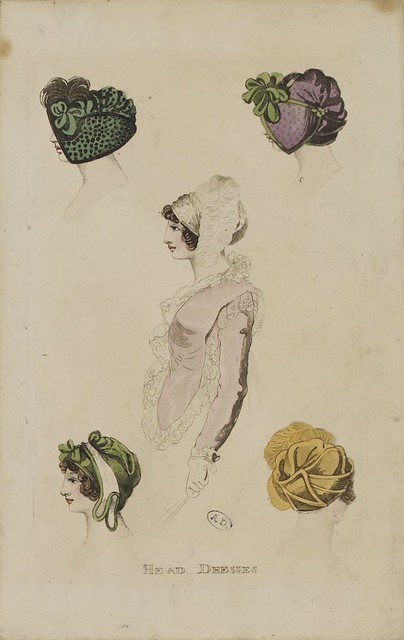
| 1810 fashion plate from Scene in the Past on flickr |

For my fixed turban, I started with a straw fedora, then I wet the hat and stretched it over my hatblock to make the crown round again. It would be even easier to start with a hat with a round crown, but woven straw is so easy to reshape that almost any stye of hat would work. I then cut off the brim right next to the internal sweatband. If your hat doesn't have a band sewn on the inside and your base is made from woven straw vs. straw braid, you will probably want to sew around the cut edge to keep the straw from unraveling as you work.
To cover the base, I used some cotton velvet that I dyed myself. The velvet was originally black (it's all I had on hand), but I bleached it and then dyed it with pearl grey Rit, which has a slightly purple-y color to it that I really liked. You can see that the color is a bit mottled because I wasn't being very careful when I dyed it, but you really don't notice that when all of the draping is in place.

I cut a long strip that was about 3" wide to cover the bottom edge of the crown and a large oval that was 17"x19" for the poofy part on top of the crown. I whip-stitched the long strip to the inside sweatband, then I folded it over the cut edge of straw and used a running stitch to secure it to the outside. The end of the strip where it overlaps in back is turned under and whipped down as well.

Next I pleated the oval down to a size that fit the circumference of the crown base. My pleats are pretty irregular and I didn't measure anything or try to space them evenly. You can even see in the picture above that there are some sections on the side of the oval that aren't pleated at all. It really doesn't matter much with this sort of randomly draped cap, and I just pinned and adjusted the pleats until it fit.
I had originally planned on basting this poofy oval to the straw base and then covering the raw edges with a strip of fabric that wrapped all the way around the hat, but unfortunately, I didn't have a long enough strip of fabric left over to do this. I solved this problem by sewing the back of the oval to the straw base with the right sides together. This makes the raw edges of the poof turn under and stay hidden in the back once the oval is flipped up over the top of the hat.

In this next picture, you can see the front of the hat once the poofy oval is flipped over the crown and stitched down with a running stitch. I left about 2" un-sewn on the sides between the back with the finished, turned-under edge, and the front with the raw edge. These open spaces will come in handy for the next step when I add the wrapped band.
Beside the hat are the two scraps of fabric that I had remaining. The 7"x20" rectangle is the part that will wrap around the front and cover the raw edge of the poof. I turned under the long edges of this strip and ironed them, but I didn't bother to finish the edges beyond that. I thought about using the long triangle as a drapey piece with a tassel on the end, but I decided that I liked the hat better without it.

Here, you can better see what I was talking about with the open section on the sides. I gathered the ends of the long rectangular wrap piece, tucked an end under the open section of the poofy oval, then stitched the end to the straw base. Once it was in place, I turned under the edge of the oval and stitched this over the wrap piece. Then I wrapped the long strip around the front, over the raw edges of the poof, and tucked the other end under the crown and sewed it down as well.

This is the front view of the hat with the wrap piece in place. I added a few stitches here and there to secure the wrap across the front so it doesn't shift around, but mostly it is un-sewn except on the sides where it tucks under the poof. To add a little more interest, I dug around in my stash and found a pretty little piece of vintage trim that coordinated well with the velvet. I hand-sewed this around the edge, and actually, if my oval poof had been smaller (or I liked the crazy chef hat look), it could have been done at this point.

To tame my crazy poof a little, I simply pulled extra fabric toward the back of the hat, pinched a few folds into the fabric, turned the extra fabric under, and stitched it down in back. It's amazing what a difference that made!

Here you can see the back view a little better. Once of the best things about working with velvet is that it drapes so nicely and hides your stitches so well. You can see that my back pleating is really pretty random and casually draped, but it still seems to work just fine.

With the outside finished, I decided to add a simple lining to the inside to hide my raw edges and basting stitches. Here is what it looked like before adding the lining.

And here it is with the lining in place. My favorite hat lining method is to use a long rectangular strip of cotton that is whipped to the edge of the crown. There is a channel sewn along the top edge of this rectangular strip, and a drawstring pulls the fabric in to gather it up at the top. I also added a comb to the front edge to help keep the cap in place without having to use hatpins.

As a finishing touch, I tucked a set of 3 short ostrich feathers under the wrap piece and stitched them to the base to make sure the wind didn't knock them loose. This is when it was really convenient to have the wrap piece mostly un-sewn. I was able to try the feathers in a variety of positions, and I could easily switch out the feathers for flowers or a cluster or ribbons in the future to give the cap a different look.

And here is what the turban cap looks like on me. I chose to wear it set pretty far back on my head, although you could also shift it farther forward and not have to worry about curling your hair as much in front if you liked that look better.

Here is the back view. I really had no idea what I was doing with this hat when I started, but I'm so happy with the way the draping worked out in the end!

And here it is from the front. When I am looking straight ahead, all you can see are the feathers sticking up on top, so it really is a pretty subtle look. I made my turban cap relatively small, but you could easily pad your crown, leave a larger puff on top, or add thicker wraps to make your turban larger if you wanted something more dramatic.
I hope this tutorial was helpful and gives you some ideas for making your own fixed turban cap. Don't be afraid to drape and experiment and try your own thing - these hats really are simple and a lot of fun to make!


49 comments:
It's lovely! Gonna try this soon. :)
Love it! I'm so going to copy you! ^_~
I have to say, every time you say "wackadoo," I snicker. It has become one of my favorite words, recently.
I love it! So perfectly Regency Fashion Plate-ish. :-) Thanks so much for the detailed tutorial!
I love this! I've been meaning to work more on Regency headwear and this is a perfect thing to try out. So glad there are other options than just the bonnets :)
Fantastic! Thanks for posting this... It's going to come in handy!
Wow. You are so talented. It is perfect and beautiful.
Excellent directions to a beautiful turban.
Val
Oh what a great tutorial! I shall have to remember this if ever I attempt a turban!! Most excellent!
Blessings!
Gina
Oh, gosh, that's so clever!
Thank you for the excellent tutorial!
Best,
Kitty C
Love it Jen, thanks for the this helpful tutorial. The hat base is genious!
I agree...so easy, yet looks so nice. I suppose for evening one could add on pearls and such? I am off to an event and no time to make a really fancy bonnet, but this I can do quickly tonight. Thanks for the idea.
I made a similar turban based on your idea in a couple of hours. I had to use a long hat pin to keep it on my head, as my hair just kept on popping it off. But once secured it was perfect. I got lots of compliments when I attended an outdoor (wind blowing and no loss) 200th anniversary event of the Battle of Lundy's Lane in Niagara Falls last night. Thanks for a great turorial!
Thank you for sharing this. I am off to the Jane Austen Festival in Bath, next month. I will give your instructions a go and will share the results! Thank you! I heart, ya!
Brilliantly done, and photographed. Thanks!
Thanks for the tutorial. The cap is very beautiful!
Thank you for sharing, It is perfect and beautiful.
Thanks! I'm going to give this a try. I'll be pleased if mine turns out half as lovely as this one. :-)
Thank you so much for this tutorial! It solves the problem of at least one hat.... lovely!!
You are so wonderfully talented and creative! Thanks for this. I'm going to attempt a turban to match my dress for a Christmas-time Regency event.
I've just finished a black turban based upon your tutorial ! Thancks a lot^^
http://emmanuellenuncq.com//index.php?post/2017/05/23/Conf%C3%A9rence-sur-Jane-Austen-Sur-robe-noire
Very good job! The final result looks so pretty. Thank you for sharing this with us. For sure one day I will try to make something similar. At the moment I am trying to find a pattern for a regency beret but I could not find any one. I found one tutorial on Youtube but they don't give the measures for the poofy part. So I will use your measures, do a mock-up a see how it looks like.
Thanks for sharing this tutorial on how to make this turban cap. Lanai Screening Riverview FL
letras con estilo can add a creative flair when sharing tutorials. Using styled text makes your tutorial posts more engaging and visually appealing, helping your audience notice and remember your content. It’s a simple way to combine craft tutorials with fun, eye-catching lettering.
While a tutorial on crafting a Regency turban cap highlights the beauty of traditional craftsmanship and intricate detail, maintaining the external appeal of a property requires a similarly dedicated level of skill. For property owners in the city, Hitech Construction NY provides expert concrete sidewalk repair nyc services, drawing on over 20 years of experience in masonry and general contracting. Whether you are focused on historical aesthetics or modern structural integrity, investing in high-quality craftsmanship ensures that every project, from fashion to residential exteriors, is built to last.
Nelonium sounded confusing at first, but this article breaks it down nicely. The flow is good and it doesn’t feel copied or robotic. Easy to read and actually informative. nelonium
tipos de letras bonitas se refiere a diferentes estilos de tipografía que hacen que el texto se vea más atractivo y creativo. Estos tipos de letras incluyen estilos cursivos, decorativos, manuscritos y modernos, que se usan comúnmente en diseños, redes sociales, invitaciones y títulos.
The zh88 register process provides users with a simple and secure way to create an account and start using the platform. During registration, users are typically required to provide basic personal information, choose a username and password, and verify their details to ensure account security. Completing the registration allows access to all the features and services ZH88 offers, including seamless navigation, personalized settings, and a safe user experience.
The https://7brewmenuonline.com/7-brew-coffee-menu/ page is an online guide to the 7 Brew Coffee menu, showing many of the drinks and food items offered at 7 Brew. It highlights popular coffee options like cold brew, lattes, mochas, and signature “7 Originals,” and also includes energy drinks, teas, smoothies, and customizable flavor choices, allowing customers to pick hot, iced, or blended styles.
Local Law 11 Repairs & Façade Restoration NYC | MGR refers to services provided by MGR Restoration to help New York City buildings stay safe and compliant with Local Law 11 regulations. The company focuses on inspecting, repairing, and restoring building façades, including masonry, brickwork, and exterior surfaces. Their work helps prevent hazards, maintain structural integrity, and ensure buildings meet NYC safety standards.
You can easily download videos from Threads using this fast and efficient online downloader. The tool supports public video links and allows instant downloads without watermarks. It’s a convenient way to keep your favorite Threads content offline.
OnStream APK is a smooth and easy-to-use streaming app that offers a wide range of movies and TV shows with HD quality and fast loading speeds. Its clean interface and reliable onstream apk performance make it a great option for enjoying entertainment without constant buffering or complicated setup.
Celebrity brand endorsement impact extends beyond simple promotion, often influencing consumer perception, purchase behavior, and overall brand positioning. When celebrity brand endorsement impact aligned authentically with a celebrity’s image and values, endorsements can enhance credibility, expand market reach, and drive measurable sales growth. However, the effectiveness largely depends on audience trust, strategic brand fit, and consistent messaging across digital and traditional media platforms.
La letra F cursiva mayúscula representa un estilo de escritura fluido y artístico que se utiliza para resaltar palabras importantes y dar un aspecto más refinado al texto. Con herramientas digitales es muy sencillo pasar letra a cursiva y obtener letras cursivas para copiar y pegar en cuestión de segundos, lo que resulta ideal para cursuva perfiles en redes sociales, tarjetas, logotipos o contenido creativo. La cursiva no solo mejora la presentación visual, sino que también transmite elegancia y personalidad, y gracias a un conversor de letras cursivas elegantes para copiar y pegar, cualquier persona puede transformar su texto común en un diseño atractivo y moderno de manera rápida y práctica
Packaging Hippo offers bespoke Packaging Hippo custom boxes that merge quality, creativity, and practicality. Each box is designed to protect your products while reflecting your brand’s unique identity. With options for personalized designs, eco-friendly materials, and premium finishes, Packaging Hippo ensures your packaging leaves a lasting impression and enhances the overall customer experience.
Modern digital tools like a PDF page remover, WAV to MP3 converter, 4K thumbnail downloader, JSON to Excel converter, slowed reverb generator, and image-to-DNG converter make file management and media processing easier than ever. These online solutions allow users to edit documents, convert audio formats, extract high-resolution thumbnails, organize data into Excel sheets, PDF page remover enhance music with creative effects, and convert images into professional-grade formats within seconds. With user-friendly interfaces and fast processing speeds, these tools are ideal for bloggers, developers, marketers, and everyday users looking for efficient and hassle-free productivity solutions.
Smart IPTV är en populär lösning för att streama TV-kanaler och on-demand-innehåll via internet, särskilt för användare som söker IPTV Sverige-tjänster med hög kvalitet och stabil anslutning. Många väljer cheap IPTV för att få tillgång till sport, filmer och internationella kanaler till ett lägre pris, medan alternativ som köpa iptv bästa IPTV i Sverige fokuserar på pålitlig service och bra bildkvalitet. Appar som IPTV Smarters gör det enkelt att hantera kanallistor på olika enheter, och en dedikerad IPTV box kan förbättra streamingupplevelsen på TV:n. För den som vill köpa IPTV är det viktigt att jämföra funktioner, support och kompatibilitet innan man väljer leverantör
pet supplements online make it convenient for pet parents to explore different nutrition options and support their pet’s daily health. Easy access helps in choosing the right balance for long-term care.
Affordable driving lessons in Atherton are a smart choice for anyone looking to learn driving without putting pressure on their budget while still getting proper, high-quality training. Learners benefit from friendly and experienced instructors who guide them step by step, starting from basic car control like steering, clutch handling, and gear changes, then gradually moving towards more complex skills such as roundabouts, junctions, parking, and real traffic driving. The roads around Atherton offer a good mix of quiet areas for beginners and busier routes for advanced practice, which helps build confidence in a natural way. Regular lessons not only improve driving skills but also reduce nervousness and help learners understand real road situations better. With flexible timings and structured lesson plans, students can learn at their affordable driving lessons Atherton own pace, making the whole experience smooth, practical, and effective for passing the driving test and becoming a safe, independent driver.
Ecomrio offers advanced Ecommerce Management services that help businesses streamline online operations Ecommcerce Management and improve overall sales performance. Their expert solutions cover product management, customer engagement, advertising campaigns, and marketplace optimization for platforms like Amazon and Shopify. With effective Ecommerce Management, companies can build a stronger online presence, reduce operational challenges, and deliver a better shopping experience to customers. Ecomrio helps brands grow confidently in the evolving world of digital commerce.
The dips and spreads at CAVA are the heart of the whole experience, bringing bold Mediterranean flavors that instantly elevate every bite. Each scoop of creamy hummus, zesty tzatziki, or spicy cava dips and spreads harissa adds a different layer of taste and texture, making every bowl feel fresh, vibrant, and packed with personality from start to finish.
Amazon reinstatement service is designed to assist online sellers in recovering suspended or restricted Amazon reinstatement service Amazon accounts through detailed account analysis, appeal writing, and compliance guidance. Amazon reinstate refers to the account recovery process that allows sellers to regain selling access after correcting policy issues and submitting proper documentation to Amazon. A successful reinstatement can help businesses restore operations, improve account performance, and achieve long-term growth in the competitive eCommerce marketplace.
Kids Furniture refers to specially designed furniture for children that combines safety, comfort, and functionality with playful and attractive designs. In Lahore, Kids Furniture is Kids Furniture widely available in various styles including beds, study tables, storage units, and themed room sets that suit modern homes and growing children’s needs. Across Pakistan, Kids Furniture has become increasingly popular as parents focus on creating safe, colorful, and organized spaces that support learning, creativity, and comfort for kids of all ages.
This Regency turban cap tutorial is really creative and easy to follow for beginners. The styling tips and step-by-step instructions make it much simpler to recreate the look. By the way, many people also ask, What is the cheapest item on the Mixue Malaysia Menu? because Mixue is known for its affordable and tasty drinks and ice cream.
This Regency turban cap tutorial is fantastic! I love how detailed and practical it is — especially the clear steps for creating the base, pleating the fabric, and adding the decorative elements. It makes such an elegant Regency-era accessory that looks much more complicated than it actually is.
The photos are really helpful too. This is exactly the kind of well-explained historical costuming tutorial I look for when working on Jane Austen-era outfits.
I’ve made a couple of turbans before but your method for getting that nice smooth shape on the crown is much better than what I was doing. Definitely trying this version next time.
When I copy sewing patterns, historical costume tutorials, or long DIY instructions like this one, I sometimes battle with stubborn hidden characters that ruin the formatting. In those situations I turn to textoinvisibles – copia texto invisible to quickly restore clean text.
Thank you so much for sharing this excellent tutorial!
Az online kaszinó egy digitális játéktér, ahol a felhasználók különféle kaszinójátékokkal szórakozhatnak online kaszino interneten keresztül. A platformok könnyen elérhetők számítógépen és mobilon is, és olyan népszerű játékokat kínálnak, mint a slotok, póker, blackjack és rulett. Az online kaszinók kényelmes, gyors és biztonságos játékélményt nyújtanak, gyakran extra bónuszokkal és promóciókkal kiegészítve.
White label poker software and poker game development companies offer complete, ready-to-use poker platforms white label poker software that businesses can rebrand and launch as their own. These systems typically include multiplayer poker games, secure server architecture, payment processing integration, and admin dashboards for managing users and games. A professional poker game development company builds and maintains these solutions with customization options, ensuring high performance, fair play mechanisms, and mobile compatibility, enabling operators to enter the online gaming industry quickly and efficiently without heavy development costs.
White label poker software is a pre-developed online poker platform that can be rebranded and launched by white label poker software businesses as their own gaming service. It typically includes features like multiplayer poker tables, secure transactions, user management, and admin control panels. A white label poker software company provides these complete solutions along with customization, deployment, and technical support, enabling entrepreneurs to start an online poker business quickly, efficiently, and with lower development costs.
An ankle brace for nerve damage is designed to provide gentle compression, stability, and support to help reduce pain, improve mobility, and protect weakened nerves during daily movement. A plus size knee brace that doesn’t slide down is specially engineered with adjustable straps, non-slip silicone grips, and wider sizing to ensure a secure fit and consistent knee support during walking or exercise. A hip brace helps stabilize the hip joint, reduce strain, and support recovery from injuries, arthritis, or post-surgery conditions while improving comfort and alignment. Fivali back brace reviews generally highlight its strong lumbar support, breathable material, and plus size knee brace that doesn't slide down effectiveness in reducing lower back pain for long hours of use, though comfort and sizing can vary by user. The Fivali back brace is a posture and lumbar support belt designed to help relieve pressure on the spine, improve posture, and support the lower back during work, lifting, or recovery activities.
Post a Comment