
Hole placement
 |
| lacing across a wide opening |
When deciding how to space your lacing holes, the most important thing is to stagger them so that they are not directly across from one another--if you make each hole in the same place on both sides, the spiral lacing will make your garment edges not meet correctly at the top and bottom. The most simple method is to just put an even number of equally spaced holes on one side and an odd number on the other with the cord zig-zagging between the two, but I have found that the edges will still shift slightly without a bit of an anchor at the top and bottom. If you are lacing across a open area, like the styles seen in German or lower-class Flemish gowns, you can easily solve this by spacing the holes like the diagram to the right. (The dark red shows the cord on top of the fabric and the pink shows it passing beneath. The 1 represents whatever distance you decide on for your standard spacing measurement.) The top and bottom holes are directly across from one another, which helps to keep the edges aligned, but the zig-zag pattern is created by shifting the second and next-to-last holes on one side so that they are only half as far away from the ends as the rest of the spacing. This style is the most easy to do because you just have to figure out an equal measurement for spacing of the holes on one side, and then the opposite side is placed in relation to that.
 |
| lacing closed edges |
The first method works best for lacing across wide openings, because the uneven number of holes on each side makes either the top or bottom end with the cord passing beneath the fabric. However the open styles tend to use rings instead of eyelets, and since you see the cord passing back and forth without ever being hid by any fabric, it does not cause any problems with the pattern. You can still use the first method to close two edges, but you just have to loop the bottom rung back though the same hole a second time on one side (see method 3 for illustration).
The second method corrects this problem by keeping an equal number of holes on each side. It is slightly more difficult to figure out your spacing because you have to allow for a half measurement on both sides, but once you have done the math, you just place the top two holes on one side and bottom two holes on the opposite side half as close together as the rest of the spacing.
 |
| lacing a diagonal or curved edge |
When lacing along a diagonal or curved edge, the spacing becomes much more irregular. This might seem a bit odd, but in Janet Arnold's Patterns of Fashion, she writes of the Eleanora of Toledo bodice that "the holes appear to be worked unevenly but this is the usual practice and when laced up, the waistline lies level." For my wedding gown, I worked out my own solution for lacing the side openings by using a version of the first method described. I spaced the holes on the side-back pieces first in regular intervals. Then I placed the first and last holes on the opposite side directly across from the other first and last holes so that they would line up with the edges of the bodice at the arm opening and bottom. The rest of the eyelets on that side were just placed by eye so that they would stagger between the holes on the other side as they curve around the seam. The bottom lace was passed though the last hole twice to even out the pattern and give it a more secure anchor to support the strain of the fabric at the waist and to prevent it from shifting.
 |
| ladder lacing |
Another option is to use ladder lacing, which is a bit different from spiral lacing, but it still uses only one cord and is commonly found in Italian Renaissance clothing. For this method, you keep the holes even like in modern laced garments, but the single cord or ribbon goes across horizontally, then straight down to the next row of holes before crossing over again, as illustrated in the diagram to the left. This style works best with boned edges or looser garments because it will tend to cause the fabric to buckle in an odd way if put under too much stress.
A final method, sometimes called straight lacing, is sometimes used to take up as much slack as possible in a too-loose garment, or to attach articles of clothing such as sleeves or trunkhose to hidden lacing strips at the shoulder or waist. For this style, you again make even holes like ladder or modern lacing and lap one edge of the opening on top of the opposite side so that the eyelets are all directly on top of each other. The cord is then laced through the holes from top to bottom like a basting or running stitch.
Lacing the garment
Lacing the garment
All of these methods use the same basic pattern to lace the cord through the holes. Some people try to make it more complicated than it should be, but it is a simple "over, under, over, under" pattern that makes a spiral down though the eyelets or rings--hence the name, spiral lacing! You start by going over and across for the first rung, down through the first hole, under the fabric to the second row, up though that hole, over the top again to the opposite side, and so on until you are through them all. The only exception is when you are lacing through rings across an open area instead of using bound holes, and then it doesn't matter so much if you make a true spiral just as long as the zig-zag looks correct.
Tying off the cord
Tying off the cord
There are several solutions for tying off the cord at the top and bottom of garment. The most low-tech way is to simply tie a knot or slip-knot around the hole at both ends, but this can make it a bit more difficult to undo the lacing when getting undressed (although slip-knots work really well most of the time). On several pieces, I have sewn one end of the cord to the inside of the garment near the top hole to keep the lace from getting lost or showing an unattractive knot. You can also sew a small loop in the end of the ribbon, then pass the ribbon through the eyelet and though the loop you have sewn to anchor the cord at the first hole. For my Elizabethan corset, I took a lesson from Victorian corsetry techniques and used two cords, one starting at the top and one starting at the bottom and tied them off in a bow a bit above the waistline. The end of each cord was sewn to the inside of the garment to add strength, and the two separate spiraled cords allow me to better adjust the fit of the garment at the waist and bust independently. The two long cords also make it easier to put it on by myself since it can be loosely laced through all of the holes before I put it on, and the regular bow is also easier to tie and untie on my own.
These are some of the methods I have used, but I'm sure there are many other ways to create spiraled lacing for period garments. Once you get the basic idea down, you can easily adapt the style to work with almost any type of closure, and although it is only a small detail on a finished garment, historically correct lacing really adds that special little kick to any class or style of costume.
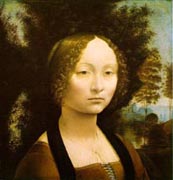 Leonardo da Vinci: Portrait of Ginevra Benci, 1474-1476
National Gallery of Art, Washington
This picture shows a basic spiral lacing with no correction made for the hole placement. Even in the painting, it is obvious that one edge of the bodice opening is higher than the other because of this. Also notice the end of the cord where it is tied off on the top left ring.
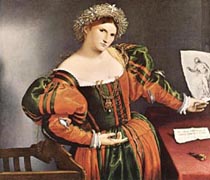 Lorenzo Lotto: Lucretia, 1528-1530
National Gallery, London
You can see the spiral pattern in the small gap between the edges of the bodice opening. The dress opening is probably secured with a hidden hook and eye at the waistline, otherwise, the hole placement that is shown would cause the edges to be lopsided.
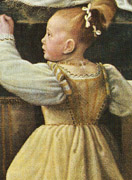
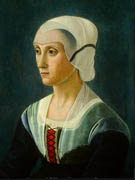
Moroni: Portrait of a Man with Two Children (detail), 1570
National Gallery of Ireland, Dublin
Although it is not incredibly clear in this picture, you can just make out the spiral lacing on the side-back seam of this child's gown.
 Scipione Pulzone: The Colonna Family (detail), 1581
Palazzo Colonna, Rome
Another example of side-back spiral lacing.
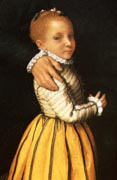
 Girolamo di Benvenuto: Portrait of a Young Woman, 1508
National Gallery of Art, Washington
A common variation on the basic zig-zag pattern is illustrated in this painting. The cord is looped back over the previous rung before continuing to the next row. Once again, the end of the cord is visible where it is tied off on the top left ring.
Examples from paintings and surviving garments
Leonardo da Vinci: Portrait of Ginevra Benci, 1474-1476National Gallery of Art, Washington
This picture shows a basic spiral lacing with no correction made for the hole placement. Even in the painting, it is obvious that one edge of the bodice opening is higher than the other because of this. Also notice the end of the cord where it is tied off on the top left ring.
Lorenzo Lotto: Lucretia, 1528-1530National Gallery, London
You can see the spiral pattern in the small gap between the edges of the bodice opening. The dress opening is probably secured with a hidden hook and eye at the waistline, otherwise, the hole placement that is shown would cause the edges to be lopsided.
Moroni: Portrait of a Man with Two Children (detail), 1570
National Gallery of Ireland, Dublin
Although it is not incredibly clear in this picture, you can just make out the spiral lacing on the side-back seam of this child's gown.
Scipione Pulzone: The Colonna Family (detail), 1581Palazzo Colonna, Rome
Another example of side-back spiral lacing.
Girolamo di Benvenuto: Portrait of a Young Woman, 1508National Gallery of Art, Washington
A common variation on the basic zig-zag pattern is illustrated in this painting. The cord is looped back over the previous rung before continuing to the next row. Once again, the end of the cord is visible where it is tied off on the top left ring.
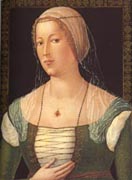
 Domenico Ghirlandaio: Lucrezia Tornabuoni, before 1475
National Gallery of Art, Washington
Although it is quite unusual, you can find the X-style lacing in a few Italian and German paintings. However, this style seems to be used purely as a decorative element to create a pattern across a wide opening. I have never seen it used on a garment where the edges of the opening were intended to meet. Also, another costumer, Kristin Page, recently pointed out that this example seems to be interlaced spirals (two separate cords starting at the top) rather than a modern-style crossed lacing (one cord, with a horizontal rung across the top row).
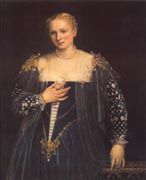 Paolo Veronese: Portrait of a Lady, 1560-1565
 Musée du Louvre, Paris
An example of ladder lacing in a Venetian gown. Although this style is most often found in 15th century Italian and 16th century Venetian styles, garments from other countries including Germany, Spain, and Flanders also occasionally feature this pattern.
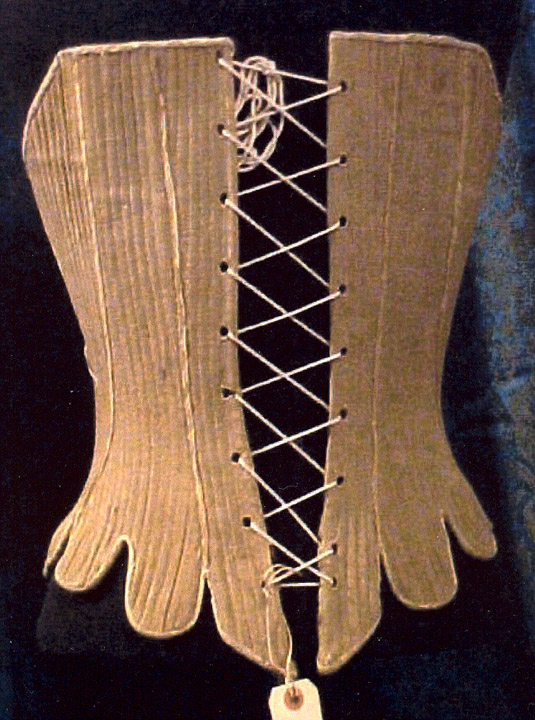
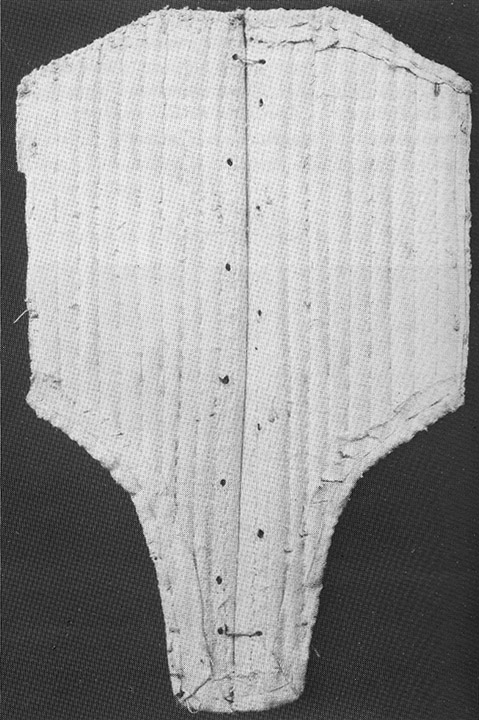 early 1600's or provential 1700's: Rocamora Collection, Barcelona
Just for kicks, I have included a few later period corsets because they so clearly show the hole placement for spiral lacings. This corset, which has been cut off to use as a stomacher, shows very clearly the offset pattern illustrated in the second diagram listed in the article.
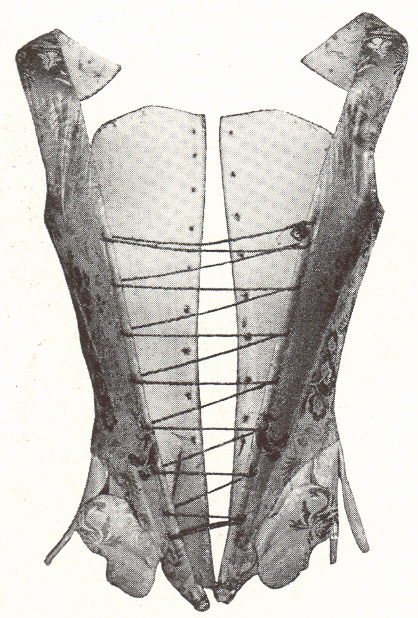
18th century stays
This 18th century corset was auctioned on ebay, and it is shown laced incorrectly in a modern style. I am always amazed that someone could own such an amazing object, but not know enough about it to lace it properly! The holes are just staggered on the top, but one hole is spaced closer on the bottom to correct it from becoming uneven.
 1732-1745: London Museum, London
This is an 18th corset that would have been worn with a separate stomacher. You can see the adjusted holes on both the front and back openings.
Special thanks goes to Melissa Heischberg for suggesting that I write this article and for giving me it's groovy title! :-)

