Sunday, April 17, 2011

bustle overskirt, v.1.0


For my train dress, I am using several images from my 1883 Peterson's magazine for inspiration.  This fashion plate is probably the closest to what I want for the shape, but with a plaid skirt and solid bodice like you see here.  I could probably just drape something that looks similar, but I thought it would be fun to use one of the 19th c. patterns in Francis Grimble's "Fashions of the Gilded Age".  


I thought the Sateen Dress from 1880 might do the trick, so I made it up exactly as the pattern shows.  But as usual with these period diagrams, the illustration and the actual results don't always match up very well. 

My main complaint is that the front of the skirt is so much longer than what you see in the picture.  Having petticoats and an underskirt to fill out the bottom would help this a little, but it still seems too long to me, and I really wish the folds across the front would be more distinct.  The slightly asymmetrical  bustling in the back also bugs me.  I know it is "right", but I can't help thinking that it just looks like I have a lopsided butt.  

But it's still a good start, and I think these problems are easily fixed.  I'm going to redo the front with much deeper pleats, which should take up the length and make the folds more obvious.  And for the back, I think I'll make both sides match, and I'll add a pleat in the center back at the bottom to make the tail into two points (like my inspiration pic) instead of the squared off look.  

And let me tell you - I'm so glad I basted this thing for the fitting instead of just sewing it up on the machine while hoping for the best (like I usually do)!  I guess I am capable of learning from past mistakes after all.  :)

Thursday, April 14, 2011

a happy little bustle

The next DFW Costumer's Guild event is something that I've been wanting to do for YEARS now.  We are riding a vintage steam train in Victorian costumes!!!  *squee* And even better, we are riding the train on the weekend of a historical reenactment event called Frontier Fort Days.  This is seriously one of the coolest costume activities that I have ever been a part of, so of course I need a new bustle dress that is appropriate for the occasion. 

I decided to make a dress from 1883 since the fashions from this year have small bustles and no train, which hopefully will equate to a less cumbersome outfit for a day of walking and train-riding.  I already have most of the undergarments that I will need, but I decided to whip up a quick 1880's style bustle for my outfit since my other bustles are more appropriate for the 1870's.  I already owned the Laughing Moon hoops and bustles pattern, so I decided to make up the 1880's short bustle included in that set.


This little bustle is so cute and perky - it makes me smile every time I look at it!  The pattern went together like a dream, and it was a wonderfully quick and pain-free project.  I made it out of a remnant of red and white ticking that my Grandmother gave from her stash, and it is boned with proper hoop steel for a change (vs. my crazy experiments with wire rope and piano wire). 

Next on the agenda - a pleated plaid skirt. The event is only a month away, so cross your fingers for me that everything else is as easy as my happy little bustle! 

Tuesday, April 5, 2011

Tokyo Pop Cultural Salon

DSC02787


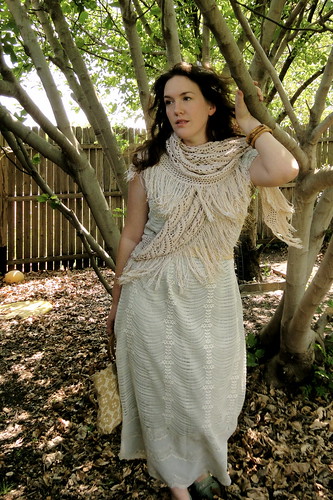
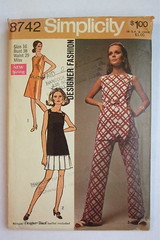
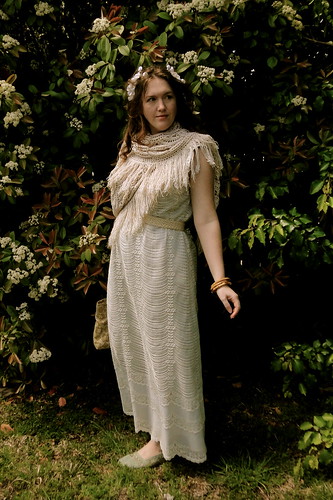
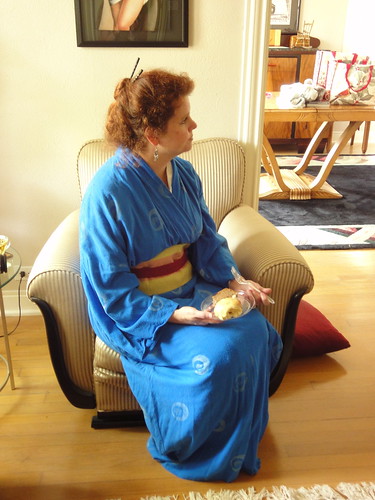
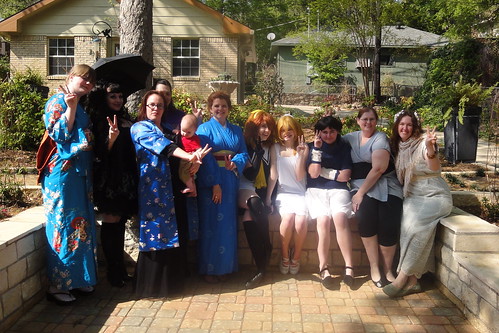
1970 - Simplicity 8742This past weekend, the DFWCG hosted a little tea party with the theme of Tokyo Pop.  This could mean anything from traditional kimonos, to anime, to Harajuku street fashions.  Anime/cosplay is not really my thing, and I don't own a kimono, so I poked around some Harajuku websites and discovered mori girl fashions.  I think I've been a closet mori girl my entire life and didn't even know it!  Mori girls are supposed to look like they came from an enchanted forest.  This aesthetic has lots of loose layers, pale neutral colors, and details taken from nature.  As much as I love dressing up in well tailored dressy dresses, I'm more of a laid back hippie in real life, so this suited me quite perfectly.

I wish I had more time to work on a proper mori girl outfit because my head is bursting with ideas now, but I only had one day to whip something up, so I ended up making a quick sheath dress from one of my 70's patterns.  I lengthened the skirt to make it a maxidress, and I had to enlarge it a bit to fit my hips, so unfortunately now the top is falling off of me.  Not my finest attempt at sewing, but I didn't have time for alterations, so eh... whatever.  The dress is made out of a $2 curtain that I bought at Goodwill and lined with .25 cents worth of estate sale fabric that I dyed green.

DSC02766

My favorite part of this outfit is the shawl, which I bought on etsy.  I've already worn it a few times in my everyday wardrobe, and I love it to pieces.  The purse and belt came from estate sales, the bamboo bracelets were from a local antique shop.  I finished it by making a floral headband out of some cherry blossom silk flowers from World Market.

DSC02891

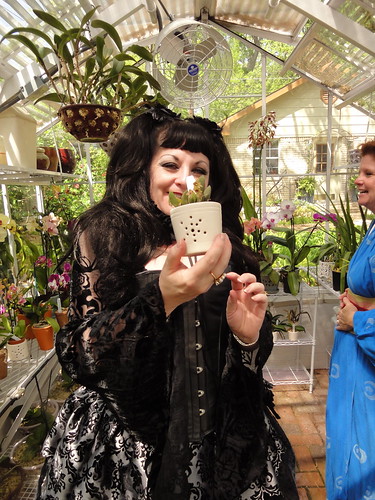
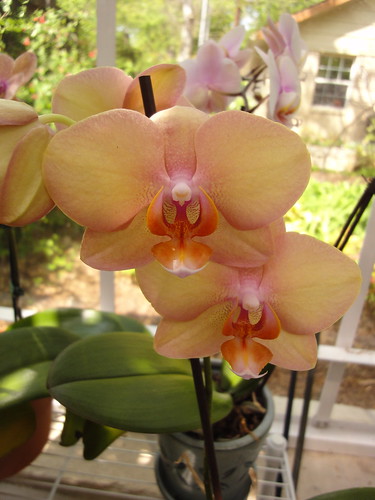
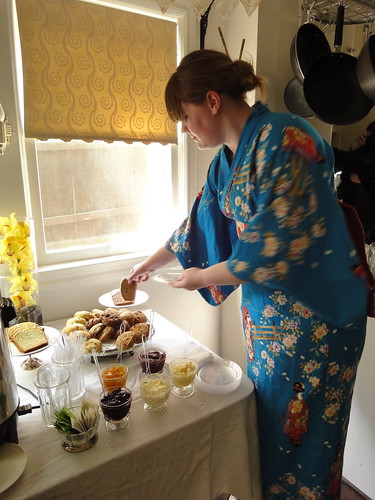
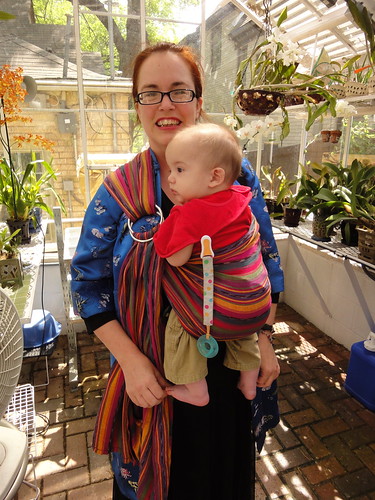
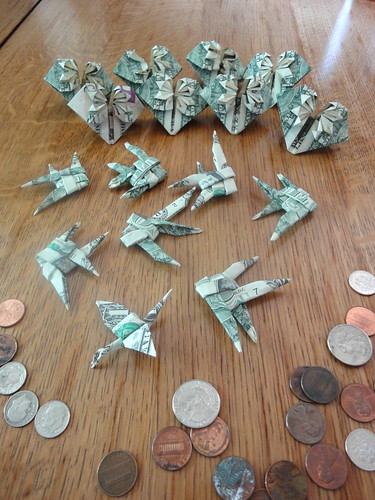
The event was a lot of fun, and I really enjoy these more laid-back gatherings where I can just sit and talk and enjoy hanging out with my friends while wearing silly clothes.  We also got to admire the hostess's amazing hothouse of orchids, we had a lady bring her ball-jointed dolls to play with (a little creepy, but beautiful at the same time), and I taught the group a bit of money origami as a fundraser for a Japanese earthquake relief fund.  It was a lovely afternoon, and I thank Dawni for organizing this event for us!  As usual, my photos are all on flickr, but here are a few of my favorites to give you a taste of the day. 

DSC02805


DSC02815


DSC02840


DSC02837


DSC02829


DSC02882


DSC02884

Sunday, March 20, 2011

1918 dress

So before I got eaten alive by my cutwork skirt project (BTW, I just found out that I won 1st place!  Woohoo!), I promised that I'd post more about my new 1918 dress that I made for the Chestnut Square fashion show.  Well, I added a page on my website where you can see some more pictures of this outfit, and I thought I would talk a little more about how I made it here on my blog.


The dress is made out of two wool fabrics that I picked up at estate sales.  The colors are so funky that I never thought I'd use them for anything other than mockups or linings, but I was surprised as how much more I liked them when they were put together.  

I never could find an exact pattern for this outfit, so I combined several late-1910's patterns and did a bit of improvising to create my dress.  The bodice is based on this similar 1918 New Idea pattern that I found on ebay.  I changed the sleeves to be tight fitting at the forearms, and I used an antique collar that I found at an estate sale instead of the collar style shown in the illustration.  The text that accompanied my original fashion plate told me that this was actually a skirt and bodice and not a full dress, so I decided to keep mine separate as well.  The only problem with that is that my blouse has a tendency to pull out when I move around a lot, so I added a drawstring at the waist (which is a very period practice) to try and keep it tucked in.  This helped some, so I probably will add some hooks or snaps as well to keep everything neat and tidy.  

The skirt was a little bit more difficult to make up since I never could find a good pattern match for the style I was trying to recreate.  But I looked at enough period patterns to figure out the basic shapes (mostly rectangular or very slightly flared), and then I draped the yoke at the top of the skirt on my own.  The first time I made the skirt, it had too much fullness, so I took it all apart, cut off some width on both the tunic and underskirt, and then tried again.  The underskirt closes on one side with hooks and eyes, and there are vintage buttons and loops on both side seams of tunic to add a decorative element.  Both layers of skirt are joined together at the waistline.  


I think the dresses from this particular era are totally made by the accessories, so I considered myself very lucky to already own some key pieces to put the finishing touches on it.  I bought a pair of fabulous spool heel oxfords several years ago on ebay.  They are from the 80's or 90's, but they are in wonderful shape, and they are a near perfect match for the style of shoe shown in the illustration.  I didn't even know what I would do with them when I bought them, but they were just so cool that I knew they had to be mine!  I bought the Edwardian purse last year at the Antique Elegance show.  It is made of silk moire with a crocheted top and silk ribbons, and the condition is amazingly good.  The little "Votes for Women" button was another fun little accessory that was given to me by a friend.  And of course, I've already talked a bit about my hat.  I love being able to mix in some real antique pieces in a historical costume, and the good thing about this period is that a lot of vintage accessories like buttons, lace, and purses are still around if you just do a bit of digging.  


Thursday, March 17, 2011

papel picado skirt

ppfront

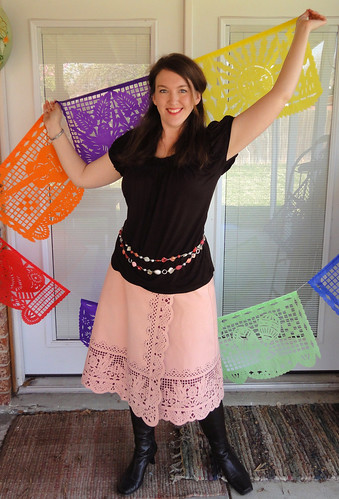
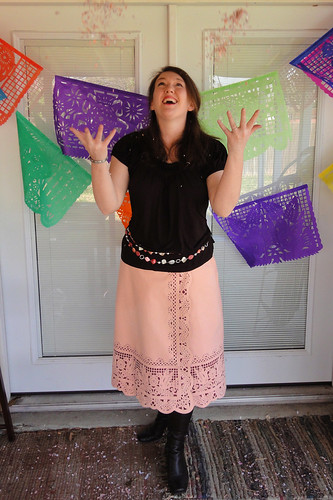
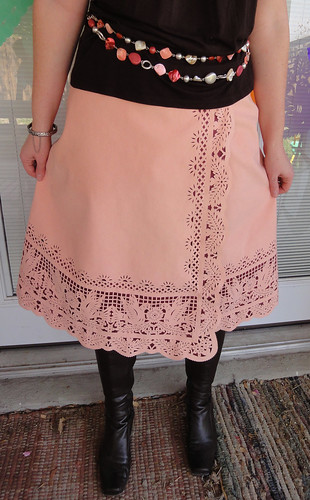
Once again, my favorite local fabric store, Fabrique, was hosting their remnant challenge where you can win up to $200 in store credit by making something from the fabrics in their remnant bin.  The selection of remnants was much more picked over this year, but I finally had a eureka moment when I found a piece of pink ultrasuede.  It's a funky color and the stiffness of the fabric limited my garment options quite a bit, but it is perfect for cutwork, and that seemed like a fun way to turn boring fabric into something really unusual.

1977 - Simplicity 8112
Since I already have some experience with cutwork, I knew what I was getting into (sore fingers and many many hours on mindless cutting!), but I also knew that it usually goes faster than you'd think and the payoff is well worth the effort.  Although it is perfect for cutting, ultrasuede is not the most forgiving fabric for tailoring, so I picked a basic mock wrap skirt pattern from my stash that dates from 1977.  This pattern has minimal shaping and and no zipper, so I was hoping that it would be simple enough to work with the suede.

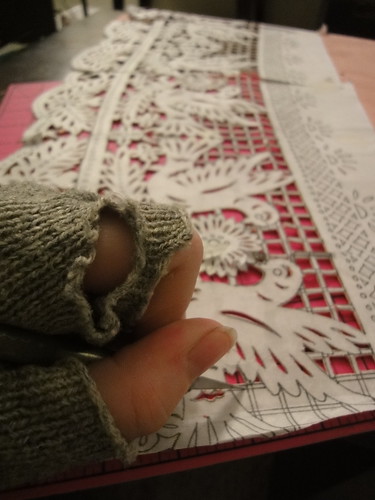
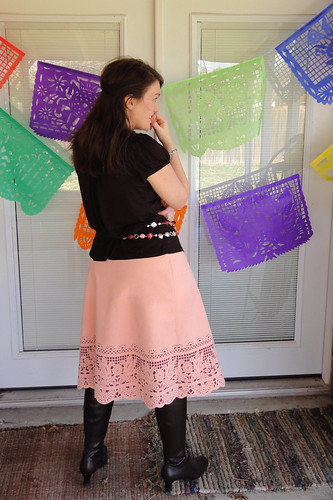
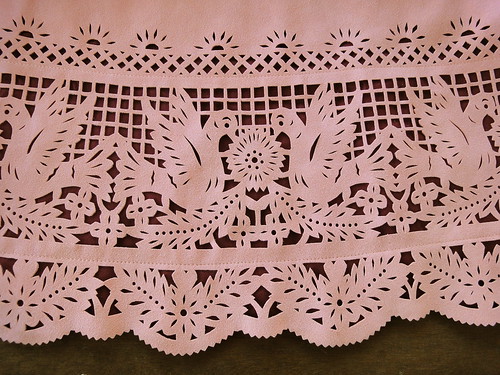
Next I drew out a border design based on Mexican papel picado (perforated paper) banners.  As an art teacher, I thought it would be fun to take a traditional art form that we study in class and translate it into fashion.  The hardest part was getting the design to curve to fit the shape of the hem, but luckily, Photoshop came to the rescue and helped me bend the borders without too much frustration.

Next, I printed out my patterns for the entire border design and stuck it to the back of the ultrasuede with spray basting adhesive.  I used an exacto knife and a leather punch to cut the pattern, and it took me 6 days to get the cutwork done... which is actually much faster than I expected.

DSC02197

The only part of this project that gave me problems was assembling the skirt, which I thought would be the easy part.  HA!  I underestimated the amount of time it would take to make the lining due to the scalloped hem, the ultrasuede liked to stretch when I sewed it, my experiment with spray fusing was a failure, the skirt was too big, and the waistband just refused to go on.  But I pushed on through and the skirt was finally beaten into submission.  I turned the skirt in to the fabulous ladies at Fabrique with 3 whole hours to spare before the deadline.  

DSC02399
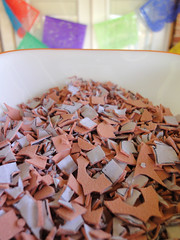
When I was finished with the cutwork, I was left with a big bowl filled with little tiny scraps of the ultrasuede.  These little pieces reminded me of confetti, so to celebrate the end of a VERY long week, I decided to indulge in a little silliness.  I'll probably be sweeping ultrasuede bits off of my patio for the next year, but it was so worth it!  :)

This was a fun project, and I enjoy having a chance to step away from the authentic historical projects for a little while and flex my creative muscles.  Thanks to Fabrique for hosting this inspiring contest!

pptoss


ppback


ppclose


DSC02406

Sunday, March 6, 2011

more adventures with cheap straw hats

My son and I dressed up in our new outfits from 1918 for a fashion show benefiting Chestnut Square this weekend. I'll try to post more about my full outfit later in the week, but I wanted to start with a little post about my hat.


I had originally planned on making something using proper millinery techniques, but as usual, I ran out of time and had to settle for my more typical methods of "hot glue a bit of luck". So off I went to Party City to pick up another $5 straw hat to reshape. You can see the hat in its original (and horribly ugly!) shape here.

Like many other cheap straw party hats, this one is made of a woven blank that can be shaped however you want vs. a hat made with straw coils that is stitched into it's shape.  It is like a pair of Chinese handcuffs - if you push down on it, it gets wider, and if you pull on it, it gets narrower.  This is very convenient when you are trying to reshape the crown into one of the large 1910's styles.


To reshape a hat of this type, all you have to do it wet it, and then hold it in the shape you want while it dries overnight.  I wanted to make my crown shaped like a flared top hat, which is a style that shows up quite often in 1918.  I squeezed the middle with my hands (which also made the hat taller), then wrapped some hair bands around the middle to hold it like that.  I flattened the top just by stretching and pinching the edges.  The brim had a tendency to flip up, so I weighted it down with random bottles that I had in my bathroom.  As you can see, no high-tech tools are needed for this technique!  :)


I was inspired by a variety of images from my 1918 New Idea Quarterly for the overall shape and decorations on my hat.  The first picture shows the hat that was actually worn with the dress that I based my own outfit on.  Although I changed the shape and decorations some, I decided to at least remain faithful to the color scheme of the original, so I used black velvet for the top of the hat and a lighter mauve wool that coordinated with my dress for the lining of the brim.  The second illustration shows a hat with a narrower brim and the flared crown that is more similar to the overall shape of my hat.  The third hat has a crown covered with pleated fabric, which gave me the idea of covering mine with a similar technique.  The picture on the far right has a narrow hatband halfway up the crown at the smallest  part of the flare, which I decided to use as well.  So although my own hat isn't a direct copy of one particular style, I tried to capture the feel of 1918 millinery by combining a variety of elements from these different illustrations.  

To cover the hat with fabric, I traced around the various parts of the hat directly on the material, cut it out (plus a little extra for wiggle room), used spray basting adhesive to stick it to the straw base, then finished the edges with hot glue on the parts you can't see and a strip of bias edging around the brim.  Forgive me for glossing over the fabric steps, but it was 2:00 in the morning when I was working on it, and taking step-by-step pictures was very low on my priority list at that time.  I also took some shortcuts which resulted in the annoying wrinkles on the top of the brim.  I skipped the spray adhesive on that section, which I regret now.  I could definitely do better with some more time, but sometimes "good enough" is good enough, if you know what I mean.  Luckily, I'm tall, so maybe most people won't see that part of the hat very often.  ;)


Covering the flared part of the crown with a flat piece of fabric would have been more tricky, but still doable with a bias cut strip, more spray adhesive, and a bit of luck.  But I decided to avoid all that fiddly work by covering the rise of the crown with a 5" wide pleated silk moire ribbon that has been burning a hole in my stash for the past few years.  I wanted to be able to remove the ribbon if I ever decided to use it for something else, so I skipped the hot glue this time and hand-tacked it to some grosgrain ribbon, then I simply tied the narrow ribbon into a bow to hold it all on the hat.  A few more hand tacks at the bottom of the pleats hold the ribbon to the crown so it won't shift around.  If you don't happen to have a bunch of 5" wide vintage ribbon burning a hole in your stash, you could also do the same thing with a long strip of fabric.  

And that's it!  Total time for making this hat = 2 hours.  Cost of materials = around $20.  The thrill of having a big crazy hat to finish off your 1910's outfit = priceless. 
Sunday, February 13, 2011

Fabulous 50's fun!

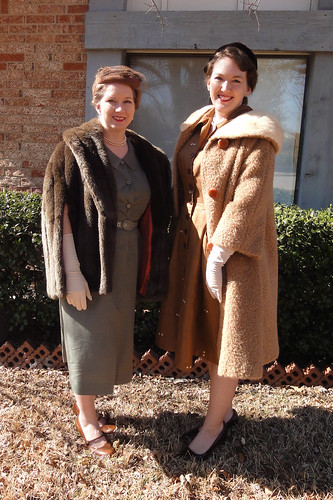
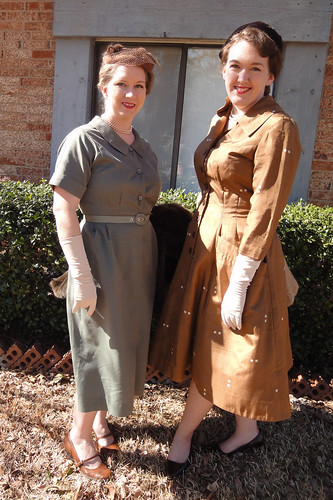
Yesterday, I got together with two of my costuming friends and we went to a "Fabulous 50's" fashion show at a local antique mall/tea room.  It was even better because Christy and I used it as an excuse to dress up in our new vintage 50's outfits. Girly outings are always more fun when you are wearing gloves, pearls, and fur!

DSC01580

DSC01584

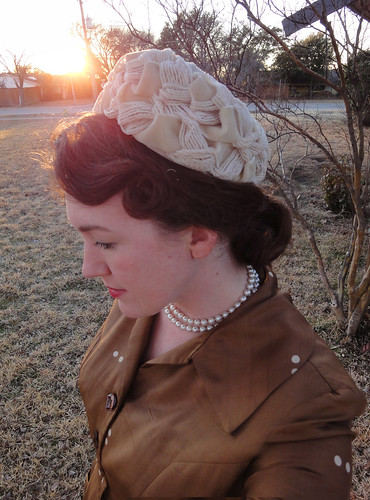
I tried to pincurl my hair, but the back refused to cooperate, so into a chignon it went. *bah* I also didn't have a hat that I really liked for this outfit, but that problem was solved beautifully when I picked up this little $7 beauty at the antique mall after the fashion show.

DSC01704

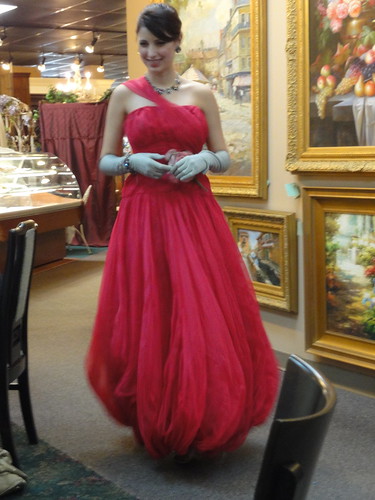
The fashion show itself was fun too, but I was surprised by how "normal" a lot of the dresses looked without 50's hair, makeup, and undergarments. It's amazing how much those finishing touches matter when capturing the look of a period. My favorite part of the fashion show was the evening wear. Most of the gowns were so timeless that they looked more like something from this year's Academy Awards red carpet vs. something your grandma once wore!

DSC01655

I got pictures of nearly every gown in the show, and you can see them all in my Flickr album. There will also be a repeat of this show, plus even more 50's fashions, at the Antique Elegance Show next Saturday at 9:00.

Wednesday, February 9, 2011

State of the Union

So even though I've been pretty quiet this winter, I have been staying busy behind the scenes - so busy that I haven't had much time for blogging.  But we have another snow day today, so it seemed like a good time to play catch-up and give you a little "state of the union... er... of jen" address!

1.  I've been working on getting all the DFWCG event graphics made and posted to our website.  We have some really cool things planned for this year, and if you are in the area, I hope you'll join us for some costumed shenanigans in 2011!
2.  I added some more vintage patterns to my flickr archive.
3.  My 16-year old cheap-o beginner sewing machine finally bit the dust, so I bought a shiny new Janome Magnolia this week!   I am totally in love with this thing!

4. I am working on two new costume projects right now that my son and I will wear in the Chestnut Square fashion show next month.

My dress is inspired by this 1918 dress from the New Idea Quarterly magazine that was given to me by my grandmother, and it is being cobbled together using a variety of patterns from my own collection and from CoPA.

My son is getting a suit made with one of my new old patterns from 1919.  I'm really excited about both of these, and I'll definitely be posting more about them soon!

Wednesday, February 2, 2011

winter recap

It seems like it has been forever since my last blog post... although you really haven't been missing much. Mostly I'e been working on 2011 planning with the DFW Costumers' Guild, and taking a much-needed break from tight-deadline, stress-inducing costume projects.


The one thing that I did mean to write about back in December was the Victorian Christmas ball that I went to with my husband. I've always dreamed of attendig a real live ball (*squee!*), but we ended up not knowing anybody there, and I'm afraid that we were quite the timid wallflowers. But it was still fun to get all dressed up and go somewhere, and I was pretty happy with the way the dress turned out.

I had just enough scraps remaining to make a new bodice to go with my 1868 silk daydress. I had to piece the bejeezus out of it to make it work, but it was fun to give this older dress a new life. For the pattern, I used the 1870-71 ballgown bodice from Patterns of Fashion. It went together well, but I wish I could have done some more tweaking on the bertha before I wore it. As usual though, I was sewing up until it was time to get in the car and go to the event, so I was pretty happy to just have it wearable.
I also re-boned my elliptical hoop skirt that I made with the Laughing Moon pattern. The first time I just used wire rope (bought from Home Depot), which wasn't strong enough to hold out the bottom hoops in back under the weight of a heavy skirt. But I went back and reinforced it with piano wire (from a Hobby shop), which did the trick nicely. I love the shape of this hoop - it is small, but gives the skirt such a pretty flare.

Unfortunately, I didn't get many pictures that night, and the ones that I did get were dark and blurry, but maybe this is better than nothing. You can see more on my website.

Sunday, November 14, 2010

2nd annual Georgian Picnic


DSCF3920

We had our 2nd annual Georgian Picnic for the DFWCG yesterday, and just like the first one, it was a delightful event, and one of the highlights of my year.  Thank-you to everybody who came out for it!  I had a blast catching up with old friends and making new ones as well.  I am one happy little costumer now.  :)

DSCF4046

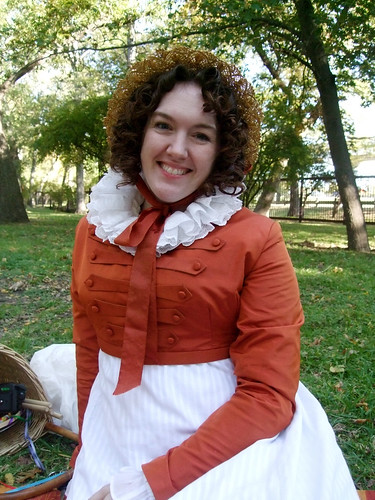
Even though I had a year to plan for this event, I procrastinated until the week before the party to make my costume, so I decided to dig out my Regency 2.0 dress (a.k.a. the Cremesicle gown) that I started last summer and finish that one.  I don't think this is the most flattering dress on me (the phrase "trussed up like a Christmas turkey" kept coming to mind), but it sure is fun to wear.  I've always liked the look of Regency military-style spencer jackets combined with uber-girly ruffs and bonnets (two good examples in this blog), so I decided to go all out with it and tell my modern "less is more" sensibilities to take a hike.   I recently watched Bright Star too, which is probably why I was more willing to go with the Regency foofy madness - my dress reminded me a lot of the one Fanny wears at the beginning of that move.  But with that being said, I might take it down a notch or two when I wear this outfit again in the future.  I think it would be a lot more attractive with a different hat and hair, and maybe leaving off the the ruff (although I do love a good ruff!)

Anyhoo, I'm especially happy with the way the spencer jacket turned out.  I made with with some gorgeous bright orange and burgundy shot silk taffeta, which was a nightmare to work with due to wrinkles, water spots, and grain issues... but it sure is purdy to look at.  ;)  I  used the pelisse pattern from Patterns of Fashion for the bodice, and I just improvised on the little peplum and decorative tabs.  I think I'm most proud of the collar though, which I carefully tailored using hair canvas and pad stitching, thanks to the fabulous tutorial on Gertie's New Blog for Better Sewing (thanks Gertie!).  It made a world of difference in the way it looked, and was surprisingly fun to do.  I'm looking forward to doing more tailored pieces in the future, and I think I'm going to shoot for an 18th c. redingote with a huge collar for next year's picnic.
I ran out of time and didn't get a chance to finish the bodice of the white underdress, but a friend of mine on LiveJournal pointed out this cool example of a spencer worn with a skirt instead of a full dress, so that made me feel a little bit better about it.  The fabric is vintage sheer striped cotton that I bought at an estate sale last year, and I am looking forward to finishing it so I can wear the dress alone some too.

I won't spam you too much with pictures here, but you can see my whole set on Flickr.