Sunday, September 26, 2010

another site update


I wanted to tell you all that I just posted a new page for my Regency jumper that I made earlier this summer.  I think a lot of people have already seen these pictures elsewhere, but maybe not everybody.  It feels good to finally get these costumes webbed.  Now if I could just find the time to take pictures of all my new undies sometime.

Thursday, September 23, 2010

site update for Edwardian


For the past two weekends, I've attended events where I was able to wear my 1911 day dress that I made for the Suffragette Picnic earlier this summer.  I never was completely happy with the pics from the first event (mostly because I was wearing a modern bra that time, which ruins the silhouette of the bust), so I was thrilled to get anther shot a getting photos of this outfit.  You can now find a few of my favorite pictures on the gallery section of my website.

Thursday, July 15, 2010

finds

My "look what I found at the estate sale!!!!" posts are probably boring as all get out for you guys to read, but I love playing show and tell, and it helps me remember what I bought and when and how much it cost.  So anyhoo... after a bit of a dry spell, I've had some really good luck estate shopping these past two weeks.  Wanna see what I got?

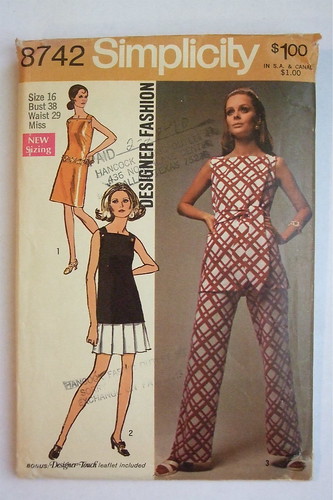
First of all, I picked up 17 new old patterns from the late 60's through the 70's.  This isn't my favorite era of retro fashions, but I have to admit, they are starting to grow on me - mostly because I can see great possibilities for garments that could work in my everyday wardrobe. For example, I love the clean lines in these 2 patterns from 1970.  With the right fabrics, they would look so chic and modern!

1970 - Simplicity 8742

1970 - McCall's 2468

All the patterns were $.50, which made them cheap enough that I could buy a few just to marvel at how hideous 70's fashions could be!

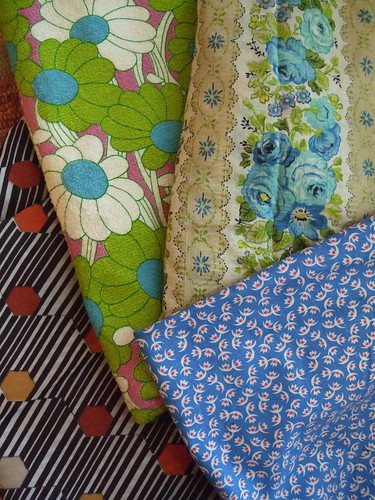
I also picked up some fabric yardage for $.50 a cut.  In addition to a few basics, I found these fabulous prints that I can't wait to use with my vintage patterns.  My favorite is the green and white daisies on terrycloth.  I have no idea what I'll ever do with it, but it is so over the top crazy that I'm determined to make something fabulous someday!  I also love the small scale print on blue, and although there isn't a lot of it, I think it would make a sweet little 40's blouse, or maybe trim on a dress.

DSCF0810

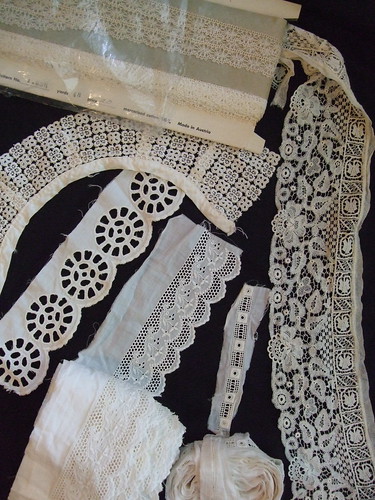
At another sale, I picked up some great lace and collars for $1 apiece.  There is 10 yards of the wide eyelet trim, so I am already daydreaming about pretty Victorian or Edwardian undies.

DSCF0811

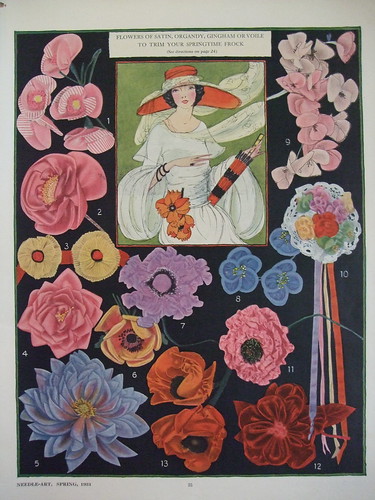
Next, I got a few women's magazines dating from 1900 - 1924.  They have some nice fashion plates, but the articles and embroidery diagrams are the best part.  My favorite article teaches you how to make fabric flowers.  I plan on scanning and posting the instructions for anybody who wants to give them a try (as soon as I can unearth my scanner). 

DSCF0808

And saving the best for last, here is my super-fab $2 coat.  I lovelovelove this coat, and it has a real fur collar and is in perfect condition!  I love it so much, I've been wearing it around the house on this 100 degree summer day!


I've been having a blast searching for estate sale treasures lately, and I am going to be SO sad when I have to go back to work again and miss out on all the early sales!  If any of you in the DFW area are interested in estate sale shopping, you might want to join the 24/7 Estate Sale mailing list.  Just be sure that you leave some of the good stuff for me!  ;)
  

Monday, July 12, 2010

building a straw braid bonnet


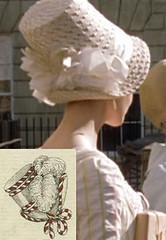
Last year, I bought 10 yards of beautiful 1 1/2 wide straw braid at an estate sale, and I've been dying to do something with it.  Since I've been working on Regency costumes lately, I decided to try my hand at making a stovepipe bonnet with a small brim, like these examples that I found in period illustrations and in the movie, Northanger Abbey.  It seemed like a good starter project since the shapes are quite simple, and it wouldn't take as much braid as one of the wider brimmed hats.

To begin, I made a mockup out of paper.  I traced around a slightly flared plastic pot for the crown, and I made a cone with a flare that I liked for the brim, then measured out from the middle point to draw the inside and outside edges of the brim.  I also cut out a circle for the top of the crown, but I didn't even need it in the end.


Next, I took the paper brim template, wet the braid, and then started pinning it directly to the paper.  I made each row of the braid overlap the top half of the previous row, and I used the zig-zag designs in the braid to keep it somewhat even.  I think most people start with the top of braid hats and work their way down instead of working up, but I wasn't sure how far my braid would go, so I figured it would be better to make the hat shorter if I needed to vs. not having enough for the brim.  


After the entire brim section was pinned plus a little extra starting up the crown, I started hand-sewing the rows together using strong, golden-yellow thread that is used for jeans.  I used basic basting stitches in the middle of the braid, and I would remove one pin at a time from the paper and move the template out of the way for the part I was working on so I could sew the braid without catching the paper.  


After the brim was all basted together, I put the crown template into the opening, and started pinning the braid to that section.  


Once the sides of the crown were all basted together, I removed the paper template, and then started folding the top row to the inside to make the flat section at the top of the hat.


To make the braid lay flat while working in toward the center, I had to pinch little tucks in the inside part of the braid and then sew these tucks down.  On the right of the picture above, you can see what it looks like with the tucks, and on the left side you can see how the braid tends to poke up without them.


When the hat was basted together, I re-wet it, then turned the entire thing inside out.  I sewed the flat edge of the rows to the layer beneath with tighter whipstitches to hold it all together better.  In the picture above, I have the top of the crown and the top few rows sewn down.  I think you can see how it looks tighter and more solid than the bottom parts.


When I was done, I flipped the hat right-side-out, and it looked like this.  It was still wet at this point, so I pinned the back of the brim up and let it dry upside down so the brim could flare out more naturally in the front (you can see that it gets very flat when sitting on the table).


When it was dry, I removed the pins from the back, and it held its shape with no problem.  Then I sewed on a simple ribbon band with a few loops on each side of the head.  I also went back and tacked down the scalloped edge of the braid around the top of the crown to soften the edge and keep the pointy bits from sticking out so much.


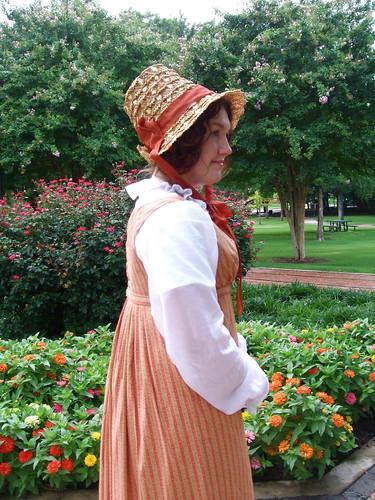
And here you can see the finished product with my new Regency dress!  

I considered sewing the braid to a buckram and wired base, but I liked how light and open and airy the braid looked on its own.  The hat is pretty flexible still, but it holds its shape wonderfully and is very cool and comfortable to wear.   And just FYI, I ended up using about 9 yards of braid when I was done.  

Of course, finding vintage straw braid like this was a HUGE stroke of luck, and I doubt that I'll ever find anything quite like it again.  I looked around online a little to see if anybody sold wide, decorative straw braid, but I didn't come up with much.  It is possible that you could take apart another hat though and reuse the braid if you like the "rustic" look of this type of open braid.  About halfway down this page, you can see a natural open weave hat that might give you a somewhat similar look, or you could always use the more common solid braids too.

All in all, it was a very fun and surprisingly easy project.  I hope this little tutorial will inspire others to give straw braid millinery a try!
Sunday, July 4, 2010

40's blouse for 4th of July


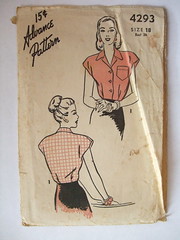
I recently found this wonderful vintage fabric in a local antique shop, so I decided that I needed a red, white, and blue blouse for Mike's family's 4th of July party.  Don't you think the leaves look a bit like fireworks?  I made it with an Advance pattern from 1947.  It went together great with no alterations necessary - I just left the pocket off since it seemed fairly pointless.  I also used a cool new trick that I learned from Gertie's New Blog for Better Sewing (which I adore, BTW!).  Since the fabric was semi-sheer, I used a flesh-colored silk organza for the interfacing, which kept the faced areas from having pattern bleed-through or being brighter white than the rest of the shirt.  I'll definitely be using that technique for now on!  


Saturday, June 19, 2010

summery seventies top


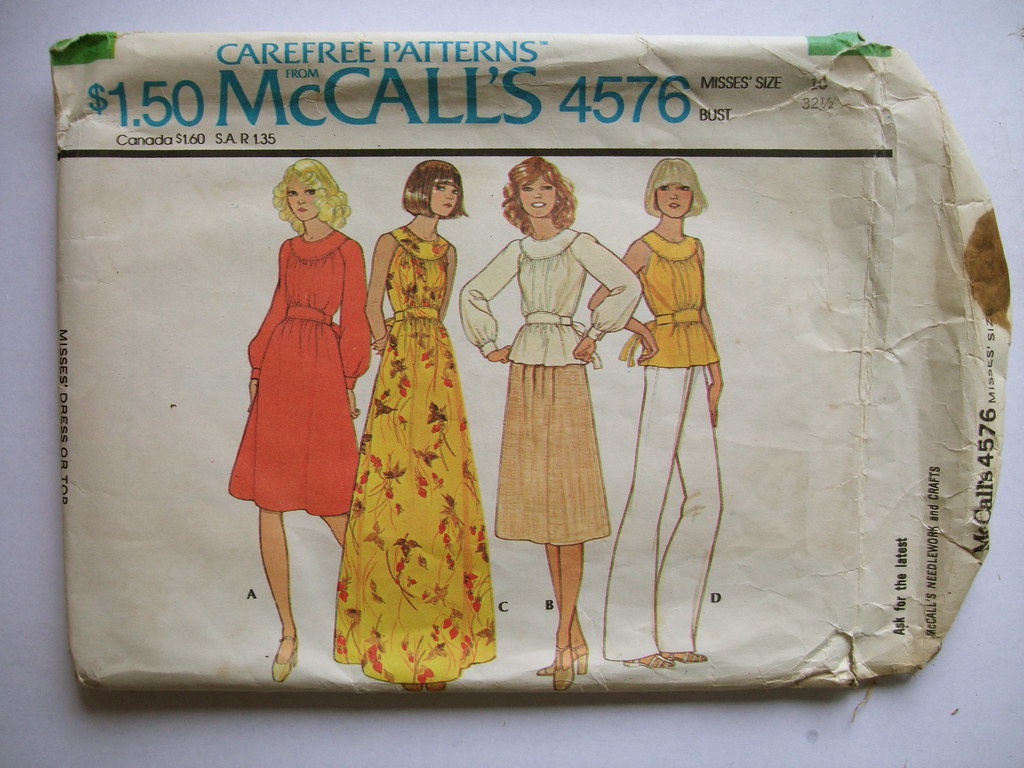
I've made a vow to start using the vintage patterns in my collection to make things that I can wear in everyday life... and if I'm honest with myself, that means I should focus on simple separates vs. dressy dresses.  I usually wouldn't look twice at a pattern from the 70's, but this McCall's top from 1975 seemed so incredibly modern that I thought it would be fun to give it a try.  It also worked out great because I had less than a yard of this cheery vintage floral print, and this is about the only garment that I could find that would make use of such a small piece. 


This shirt was super easy to make and only took a few hours to complete.  I think it would especially be cute in the longer length as a dress, so I might have to try another one at some point in the future.  The only change that I made was raising the placement of the belt by an inch or two, which I kind of regret now because it looks like a maternity blouse!  But it is incredibly cool and comfortable, so I'm sure it will get lots of wear around the house this summer.  


Thursday, June 17, 2010

more patterns in the archive

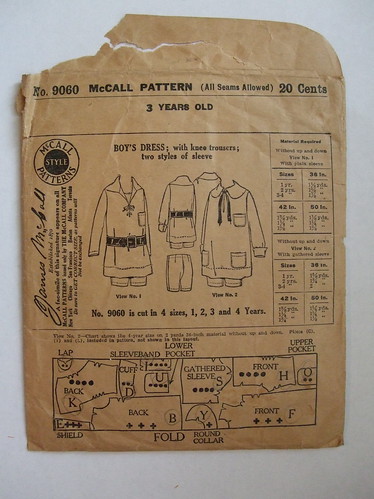
1919 - McCall 9060

I have updated my pattern archive with my children's patterns, and a few other recent purchases.  The pattern you see here is one of my favorites.  I'm dying to make this outfit for my son... and of course, a matching late-1910's costume for myself!

I've also started using some of these patterns for fast and frivolous summer sewing projects, so hopefully I'll have some fun new garments to show you all soon.


Saturday, June 5, 2010

hat decorations

After reshaping my beachcomber hat into a more suitable shape, the last step was just to decorate it.  I looked through some of my books of Edwardian fashion plates and decided to do a cluster of roses on one side with a fabric band that was loosely inspired by the hats from this 1909 Mode Illustree picture.


I am a big believer in hot-glue millinery, so all of the decorations were quickly added just hours before the event started.  I glued strips of silk to the crown first to create the band, then added heirloom-style silk roses that I bought on sale at Michael's.  I filled in the gaps around the flowers with smaller strips and loops of silk.   


front


back

I also made two super-long hat pins by sharpening the ends of some spring steel rods, which you can buy at hobby shops that cater to the model airplane crowd.  Then I just superglued a few glass beads to the other end.

Unfortunately, I didn't look in a mirror when putting my hat on at the suffragette event, so the flowers were too far to the side and back for my taste.  But it still looked great for side-view pictures, and overall, I was very pleased with the way it turned out.  I hope this tutorial gives you a few ideas to help you with your next millinery project!

suffragette recap


I had a wonderful time at the suffragette event last weekend!  We had 12 ladies in attendance (including the wee ones) who were wearing a wonderful range of fashions dating from the early 1900's up to the early 20's.  We did a little shopping at the farmer's market (yay cookies!) and then came back and shared a yummy light picnic lunch.  I really enjoyed chatting with everybody and taking lots of pictures in our beautiful setting.  And I had a blast making the banners and poster and researching some of the writings of the suffragettes.  This was definitely a theme that was right up my alley!  I'll be posting more about my dress and hat this week, but for now, here are my pictures from the event.

Sunday, May 23, 2010

reshaping a beachcomber

My original plan was to make a 1910's hat for my suffragette costume out of straw braid, but I ended up running short on time, so I decided to go with a tried and true method instead.  These cheap beachcomber hats can be found at Party City for $4.99, and there's usually a good variety to the size and color as well.  The one that I picked out was a medium size.

The first step is weaving the extra straw back into the hat (or you could cut it off if you aren't feeling that ambitious).  It took me about an hour and a half to do it, but it was strangely satisfying work!  My best advice is to trim the ends of the straw so they are blunt instead of pointy, and to weave the parts on the flat of the brim before you do the edges.


Next, I wet the hat and weighed down the brim with a bunch of bowls so that it would lay flat.  Then I placed a large bowl on the crown plus a bit more weight to push it down.  These hats are like Chinese handcuffs in the way they are woven - if you push down on them, they get wider, which works wonderfully for making the wide crowns that are so characteristic for the hats from this period.   


I left it like this to dry overnight, and now it holds its new shape.  Easy peasey!  

The crown is a good bit wider than my head now, so I sewed a strip of fabric to the inside with a drawstring that ties in the middle.  This helps to stabilize the hat so it doesn't bobble around so much, and by adjusting how tightly I tie the cord, I can adjust how high it sits on my head.  

Once the straw is shaped, you can cover it with fabric, like I did for my black 1910's hat.  I made that one with a beachcomber too, but I shaped the brim up by tying rubber bands around it instead of laying it out flat.  You can also paint or dye these hats, but I think I'm going to leave my straw plain since a rustic look seems appropriate for a summer picnic.  

Here's a crappy picture of it on my head so you can get a feeling for the scale, but you'll have to wait until this weekend to see the decorated finished product!