Sunday, September 11, 2011

Edwardian Collar Stays

Now that I have finally caught up with blogging about my finished costumes from this summer, I can once again turn my attention to current and future projects.  At the moment, I am finishing up an early-1910's dress that I am making to wear to the Antique Elegance show next weekend.  I've really learned a lot with this project, and I've had fun trying out some period techniques that are new to me.


The bodice that I am making has a tall collar, and I knew that it would need some support to keep it from wrinkling or sliding down.  The only problem is that my fabric is a very sheer windowpane linen, so I didn't want to use thick boning channels that would detract from the delicate fabric.  So what did women in the 1910's use to solve this problem?  A quick search on Etsy turned up this lovely card of antique collar stays, so I snatched them up for "research" purposes.  Don't you love shopping for a good cause.  :)

The card of stays was so beautiful and pristine that I wouldn't dream of using the originals for my dress, but at least I could measure them and figure out how they were made.  The wire is stiff, but still bendable, and it is covered with white silk.  It seemed very similar to millinery wire, so I drug out some of my own millinery wire and decided to give it a try.  It was very easy to bend the wire into a serpentine shape, but the thread covering would become frizzy or broken if I bent it with any type of pliers.  The thread didn't break if I bent it with my fingers instead of the pliers, but I couldn't get the curves in the wire as perfect that way.   I wonder if my threads were breaking because my millinery wire is so old (it came from an estate sale) or if it would do the same thing with modern wire.

When I started looking more closely at the antique collar stays, I couldn't see thread wrapped around the wires as I originally assumed.  They feel more solid and smooth - almost like they are wrapped in silk paper instead of thread.  I'm not sure if wire like that even exists anymore, but it made me wonder if you could paint millinery wire with a layer of flexible glue, like Sobo or Elmer's, to seal the threads together before bending them.  I haven't tried this yet, but it might be worth a try if any of you are considering making wire collar stays of your own.

The original collar stays were 3" long, but the card lists other sizes that they came in.  I made mine be 2 1/2" and 2" long to fit my collar better.  Even though my reproduction collar stays are not as pretty as the original ones, they still work wonderfully.  I can't feel them at all when wearing the dress, and they blend in with the sheer fabric very well.

Saturday, September 10, 2011

Telegraph fancy dress

Wow, I am getting so behind on my costume posts!  I started this entry a month ago, but I'm just now finding the time to finish it.  Now that school is back in session, I'm hoping that things start settling down a little bit and I can keep up with all of my online projects a little better.  Fingers crossed...


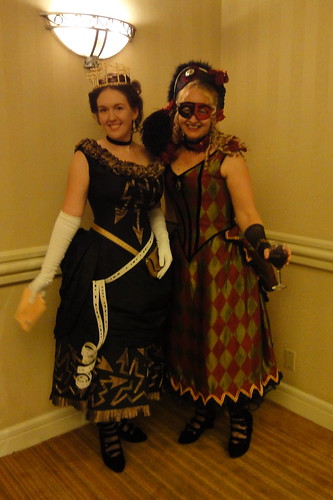
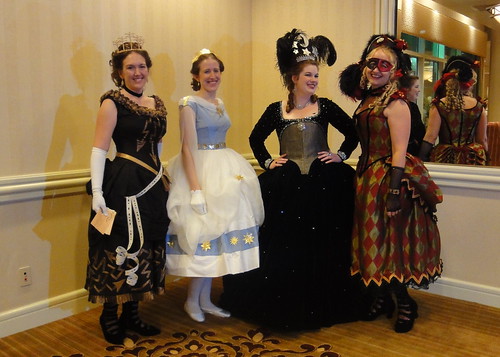
The other new costume that I made for Costume College this summer was my gala dress, which was an 1885 fancy dress costume (like a for masquerade ball) representing the telegraph.  This is one of the most bizarre costumes that I've ever made, but also one of the most fun.  I wish I could take credit for the zany design of this dress, but other than a few minor modifications, I just tried to copy the fashion plate as closely as possible.

The dress is made out of silk taffeta, and the gold arrows and ruffles are made out of silk/metal organza.  For the bodice, I used one of the ball gown bodice patterns in Fashion of the Gilded Age where you use the little apportioning rulers to create a custom fit.  It worked fabulously, and I made sure to keep a good copy of this pattern for future use.  The foundation skirt is from Patterns of Fashion, and both the bodice and foundation skirt are flat lined with cotton calico to give them more structure.  I also boned all of the seams in the bodice, which is something that I don't usually do, and it really helped to create a smooth fit.  All of the arrows are machine appliqued using gold thread, and although that part was pretty time-consuming, I actually had a lot of fun doing it.  The decorative treatment around the neckline was made by running gathering stitches across a super-long strip of the gold fabric, and then tacking the gathered parts to the bodice to create puffs.

This is only the 3rd bustle dress that I've ever made, and I while I think I did pretty good with the foundation skirt and the bodice, the overskirt was less to my liking.  I tried to just drape something on my own at the very last minute, but looking at pictures now, I'm disappointed with how flat it looks in back.  If I ever have an excuse to wear it again, I'm definitely going to take the overskirt apart and try a different bustling technique.  Luckily, all that black fabric hides a lot of flaws, so I don't think it was too obvious to anybody other than me that the overskirt didn't live up to my expectations.

For the accessories, I made a faux-leather pouch that I sprayed with a little gold spray paint to give it a bit of a shimmer.  The pouch closes with an antique telegraph messenger button that also has zig-zag arrows on it, which I'm sure nobody would ever notice in real life, but details like that always make me happy.  I also made some morse code tape to wear around my waist out of brown paper tape that was folded in half and glued.  Then I painted it white and punched a message into the paper tape with a hole puncher.  Of course I had to entertain myself while doing all of that punching, so one of the things that it says is "tonight we're gonna party like it's 1885".  ;)  And finally, I found some online examples of real telegraph envelopes from the Victorian period, and I made my own reproductions to carry around in my messenger pouch to use as a prop.

I only thing that I didn't like in the original illustration was the kooky headdress made out of one of those glass telegraph pole insulators.  I love silly hats, but that was even too weird for me to get into!  So I decided to make a telegraph tiara using model train telephone poles and a very simple bridal tiara.  I sawed the poles to the right lengths, super-glued them to the tiara, strung the poles with gold wire, and then spray painted the whole thing with gold paint.  

So that's about it!  I am totally hooked on Victorian masquerade costumes now, and I hope I get a chance to make another one in the future.  The most fun part of this whole project was getting to wear my costume with other fancy dress people at the Costume College Time Traveler's Gala.  I love dressing in themed groups, and we had quite a ball at the ball!
DSC05429


DSC05482

Saturday, August 6, 2011

20's convert

DSC05606

I'm home from my big trip to Costume College in California, and I finally have a little bit of time for blogging again.  Hooray!  I had meant to do some diaries about the outfits that I was making over the summer, but I ended up running so short on time that I had to keep myself off the computer as much as possible.

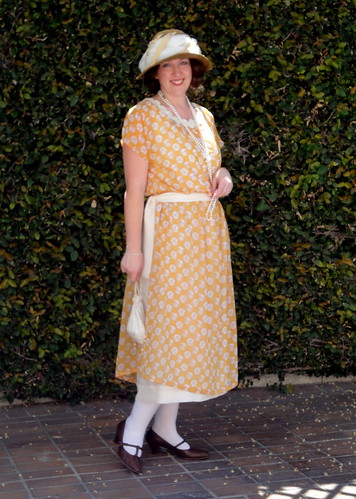
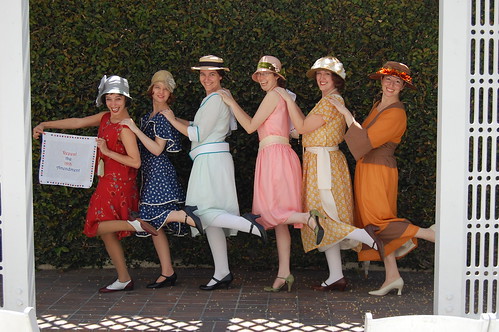
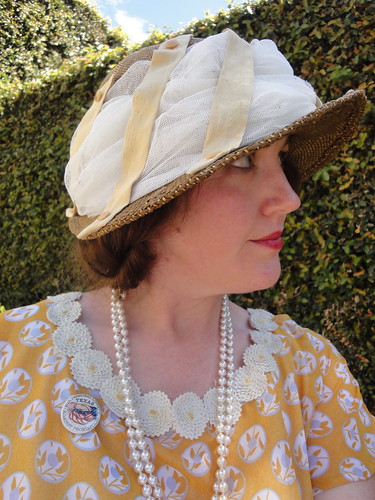
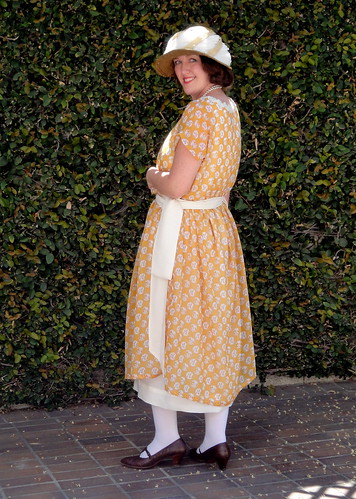
So the first new outfit that I'm going to tell you about is my early 1920's dress that I made to go along with a group of ladies who were all dressing up in prohibition-era attire.  Let me preface this by stating that the 1920's are some my my least favorite fashions ever, and I NEVER thought I'd find a 20's style that looked good on me.  The dress that I ended up with was actually my third try at making a prohibition-era costume this summer, but I am so happy that I stuck with it and kept looking for something that I could live with because I had a blast with the group, and I love the way my dress turned out!

1920s at Costume College


I decided to focus on early 20's styles since I like that the waists were still defined earlier in the decade, and I prefer the fuller skirts to the more severe styles that you see later in the 20's.  So I was thrilled when I came across this wonderful vintage pattern on etsy that was in my price range.  It wasn't dated, but I am guessing from the style that it is from around 1921.

I looked around for a while trying to find some lace or net that I could use for a version like you see in View A, but when that failed, I decided to use a patterned silk crepe that had a vaguely art deco feel to it.  The underdress and sash are made out of georgette, and I used vintage ric-rack rosettes around the neckline to add a little decoration.  I didn't use the over-tunic on the blouse, but other than that, I made the pattern up exactly as it came, and it fit wonderfully with no alterations.

I think the best part about 20's fashions are the accessories, so I knew that I needed a hat to finish off the look.  Wide brim hats were more popular in the early 20's than the cloche styles that we usually associate with that decade, so I took a wide brim straw hat and stretched the crown over a hat block so it would sit further down on my head, then I cut the brim down to a more medium size.  I was wasn't really sure what direction I wanted to go with decorating this thing, but since I was running short on time, I ended up just wrapping the crown with net and adding some silk strips with vintage buttons to add some color and visual interest.  It's really random and a bit sloppy, but a lot of early 20's hats look very random and homemade, so I figured, "hey, why not?  It's period!"  I also made a reproduction of an antique anti-prohibition button that I found online.  It says "Texas - For Personal Liberty, Against Prohibition".  I thought it was cute, and I am a sucker for anything that says Texas on it.  I also wore a super-long strand of pearls that I found at an estate sale, a pair of T-strap shoes from etsy, and my Edwardian purse that goes with everything.  

DSC05638

This was a delightful costume to wear - especially after being in non-stop corsets for the two previous days.  I can TOTALLY see why women wore these fashions now.  They must have felt amazing after decades of more restrictive clothing.   I hate to admit it, but I think I'm a 20's convert now!  ;)

DSC05608


Monday, July 4, 2011

it's a mod, mod summer!

60s3

Next month, I'll be attending Costume College in Southern California, and there are plans to have a costumed pool party while we are there. I'm pretty prudish about showing off a lot of skin, so I floundered around for awhile trying to figure out what I could make. I finally took inspiration from an amazing piece of vintage terrycloth that I had picked up at an estate sale last year and decided to make a playdress from a 1967 Simplicity pattern.

60s1

The tunic was a snap to put together and so fun easy to wear.  But I haven't worn a pair of shorts in at least 5 years, and I was getting some major cold feet about walking around the hotel in an outfit that looks like I forgot my pants!  So I decided to make up a pair of super-wide pallazzo pants to wear over the shorts when I'm not at the pool.  The pants pattern is from 1969, and I am totally in love with these things as well.  I think I need a dozen pairs to wear around the house (and do yoga in!)

60s4

I think I had the most fun finding accessories to finish this outfit off.  The head scarf is such an easy way to fix my hair, and I think it'll look even better once I get a haircut so can do a decent flip with the ends.  I made the sash from a similar tunic pattern, and I'm not sure if I will keep that part as is, buy something else, or just wear the tunic with no belt.  That's the one part of the outfit that I'm not totally sold on.  I found the 60's blue-tinted sunglasses on ebay, and although I think they look a little silly on me, they are definitely fun, so what the heck.  The vintage rubber sandals are from etsy, and I also have a pair of big white hoops and a straw tote with flamingoes on it coming in the mail soon.  I can't wait to get it all together!

60s2


60s5

I also had a lot of fun "antiquing" these photos.  I scanned some of my parents' old pictures to use for the border and for general color matching.  But I also wanted to show you some regular shots so you could see my psychedelic fabric in all its dayglow glory.  :)

DSC04821


DSC04793

Sunday, June 12, 2011

Retro Ice Cream Fun!

ice cream

Yesterday was the DFW Costumers' Guild 20th c. Vintage Ice Cream Social.  I'm starting to sound like a broken record after every event, but once again, I had a blast!!!  We had a really great group of people come out for some sweets, shopping, and socializing, and everybody looked fabulous in their retro outfits.  You can find all of my photos from the afternoon on flickr.

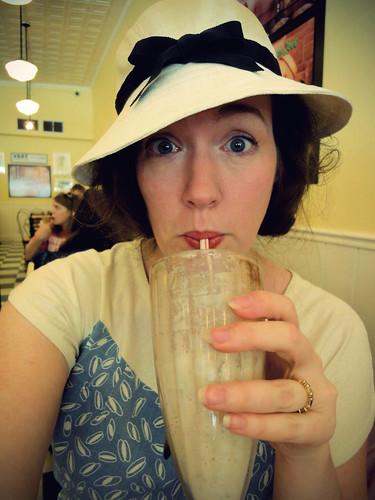
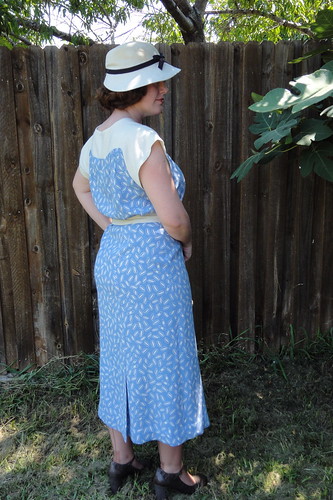
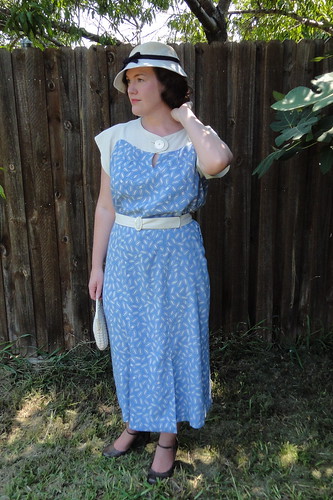
For my costume, I decided to make my first foray into 1930's fashions.  I used one of my recent lucky pattern finds - a mid-30's Anne Adams day dress.  I used some vintage rayon that I had in my stash for the dress, and I bought some silk noil for the contrasting sections.  The button and buckle are vintage mother-of-pearl.  This dress was a dream to put together, and I didn't even have to do any alterations other than lengthening the bodice by an inch.

And I am happy to report that my second version of the hat tuned out much better than my first.  It is made out of heavy linen and I used the brim pattern from the first hat and the crown pattern from the second hat in these directions.  I interlined the brim with heavy interfacing, and I wet the whole hat and let it dry while stretched over a hat block to make it nice and smooth.  I'm so glad I stuck with it - I think the hat is my favorite part of this outfit!

So after my first time wearing 1930's fashions, I must say that I'm hooked! It was such a fun dress to wear, and I felt both glamorous and relaxed at the same time. I'll definitely be making more outfits from this era in the future!


DSC04231


DSC04152

DSC04160

Sunday, June 5, 2011

reality bites

The costume guild has a 20th c. retro ice cream social coming up next weekend, and I decided to make a mid-30's outfit to wear to it.  The dress is coming along nicely, but finding a suitable hat has been a challenge.  I have a number late 30's hats already, but hat styles change drastically at this time, so nothing I have is really "right" for a dress from earlier in the decade.  Plus, I'm picky, and I really want something white, which makes the hunt even harder.

So brilliant me - I decide to make a hat!  I found this fun pattern on one of my favorite sewing blogs, Sewing Vintage.  It only took 2 hours to make, but sadly... reality is not nearly as charming as the picture.  *sigh*


Of course, this happens a lot when working from vintage patterns.  The reality of what the pattern looks like when made up is never as perfect as the idealized illustration.  I could try to shorten the crown so it isn't so puffy, but I doubt the little slit parts will ever stay neatly closed like you see in the original picture.  Maybe I just made the cuts come up too high or made the selvage too big thanks to the vague instructions.  If anything, I'll probably switch out the slit crown for the solid one in the second view from this pattern... or maybe I'll ditch it and try something else entirely.

It was still fun to try though, and I LOVE experimenting with hats, so it was a fun little project even if it wasn't a complete success.

Monday, May 23, 2011

next on the agenda

I don't think I've mentioned this publicly yet, but I'm going to Costume College this summer! Woohoo! Mostly, I'll be wearing costumes that are already in my closet, but I do want to make a few new retro outfits to wear to the classes, and I want something new and fun and over-the-top for the gala. I'll probably be working on all of these things simultaneously over the summer so I don't get burned out on one thing, so forgive me if I jump around a lot over the next 2 months.

The project that I am the most excited about at the moment is my gala dress. After changing my mind a million times, I finally decided to go for something totally random and different. I'm going to make a Victorian fancy dress costume inspired by the telegraph! Is it genius? Madness? Only time will tell! LOL!
Anyway, my plan is to make a pretty close copy of this 1884 illustration from the de Gracieuse archive (it was also found in Harper's Bazar). The only thing that I'm going to change is to omit the silly glass insulator headdress and make a tiara out of tiny telegraph poles instead. I think it'll be a ton of fun to make, and I'm hoping that I can wear it again at future steampunk events as well. It will probably be a few weeks before I get started on this dress in ernest, but I'm having a ball doing all the research and getting the materials right now.

And just for the heck of it, I saved all the fancy dress pictures that I found from de Gracieuse and put them in a flickr set. I hope to continue adding more examples to this set as I find them.

Saturday, May 21, 2011

the anticlimactic ta-da!

DSC03724

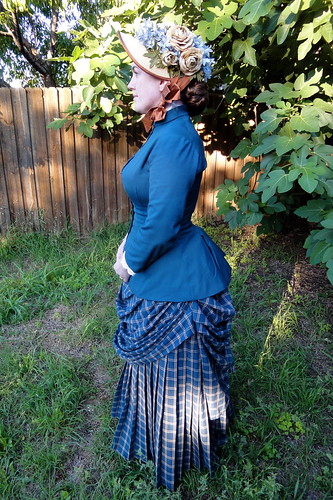
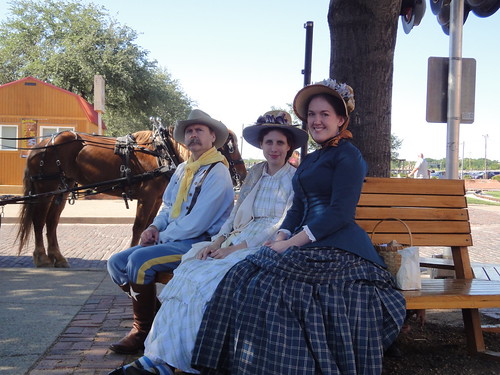
So I finished my 1883 dress last weekend and had a great time at the train event.  Unfortunately, I was so insanely exhausted from it all that I didn't have the energy to do a blog post about finishing my dress right away, and then a week slipped by before I knew it, and now I'm already knee deep into my next costume plans. Whoops. So this seems pretty anticlimactic at this point, but I just wanted to post a quick note to say that I finished the dress and I'm quite happy with the way it all turned out. I've been wanting an "everyday" Victorian bustle dress for years now, and I am thrilled that this one fits the bill so well. It will be great for wearing to living history events.

I'm out of space on my website, so I'll have to go in and do some housecleaning before I can post an official page about it. But until then, you can see more pictures of my dress and the event on flickr.

DSC03711

Tuesday, May 10, 2011

sleevils-1/jen-0

I think I have discovered the tragic flaw of this system of pattern enlarging - the shoulders of the bodice are WAY too wide when scaled up as much as I have it.   But once I started thinking about it, that makes sense.  I have a 40" bust, so the pattern has to be scaled up quite a bit to fit my torso, but the measurement from my neck to the edge of my shoulder wouldn't change significantly even if I was 50 lbs. lighter.  That measurement deals with bone structure vs. "fluff", so it doesn't increase proportionally at the same rate as the bust/waist/hip measurements.  Probably if I had read the entire book it would have told me how to deal with this problem while drafting the pattern, but I guess that's what I get for just skipping around to the good parts.  My first try with the sleeves had them hanging way off my shoulders, more like an 1860's dress than an 80's one... which looks wildly ridiculous with a slightly puffed sleeve head.  I took at least an inch off the width of the shoulders, and I'll try again tomorrow.  It's nearly 2:00 in the morning now, so I concede defeat to the sleevils in round one of Battle of the Bodice.  Maybe I'll have better luck tomorrow.

Sunday, May 8, 2011

bodice in progress

I played around with the tabbed waist treatment on my bodice mockup for about 30 minutes earlier this weekend, then realized it was going to be too fiddly and time consuming, so I gave up.  I decided to go with one of the longer coat shaped bodices instead, like the one on the left side of this 1883 illustration.  I also added pleats in the back like the bodice shown here.  I liked how both of these bodices have 3/4 sleeves as well, which I think looks more summery than the full length sleeves.

So once that was finally decided, I forced myself to be brave and started cutting and assembling my real jacket.  I'm using wool twill for my bodice, and it is flatlined with cotton in a reproduction print that I didn't particularly like, but it was cheap and I figured it would make a fun lining.

The first time I tried it on, it was a wrinkly disaster, so I've been making adjustments and steaming and pressing for hours now.  I went back and used the fitting instructions in Fashions of the Gilded Age where you add darts to the lining layer at the bust, side waist, and back of the shoulders and then press and shrink the outer fabric.  This is supposed to make it fit the curves of the body better without having lots of darts on your outer fabric.  It seems to be working, but I could definitely do more steaming still.  The wool has a fair amount of stretch to it, so I think some areas like the side-back piece are just too stretched out, so I'm going to open up the seams and re-stretch and iron and try again.  It's a pain to have to unpick and redo the seams, but I'm determined to get this thing as smooth as possible before I add the sleeves.  I'm also going to add boning to the front bust darts, so I think the front is going to be okay, but the sides and back are annoying me.


Anyway.  I know it's not a very exciting post, but I just wanted to show you an in-progress shot of the jacket so hopefully we can compare it to a much smoother finished version once it is done.